
1. Introduction
This user manual provides comprehensive instructions for the installation, operation, and maintenance of your maXpeedingrods 2300 lbs Rear Air Helper Spring Kit. Please read this manual thoroughly before beginning installation or use to ensure proper function and safety. This kit is designed to enhance the load-carrying capacity and ride quality of your vehicle by providing additional support to the existing coil spring suspension.
2. Product Overview
The maXpeedingrods Air Helper Spring Kit is engineered to fit inside your vehicle's existing coil springs, offering an adjustable air suspension solution. Constructed from durable and elastic polyurethane, these air springs are designed for high load-bearing capacity and long lifespan, capable of operating in various weather conditions.

Figure 2.1: Overview of the maXpeedingrods 2300 lbs Rear Air Helper Spring Kit, showing the two blue air springs, air lines, hardware, and rubber blocks.
2.1 Key Features
- Load Capacity: Up to 2,300 lbs of load-leveling capacity.
- Adjustable Pressure: Air pressure can be adjusted from 5 PSI to 50 PSI to accommodate varying loads and conditions.
- Material: Made from solid molded polyurethane for durability and resilience in harsh environments.
- Easy Installation: Designed for straightforward installation inside existing coil springs, requiring no frame drilling.
- Improved Ride: Helps stabilize the ride, reduce trailer sway, eliminate vehicle squat, and prevent bottoming out.
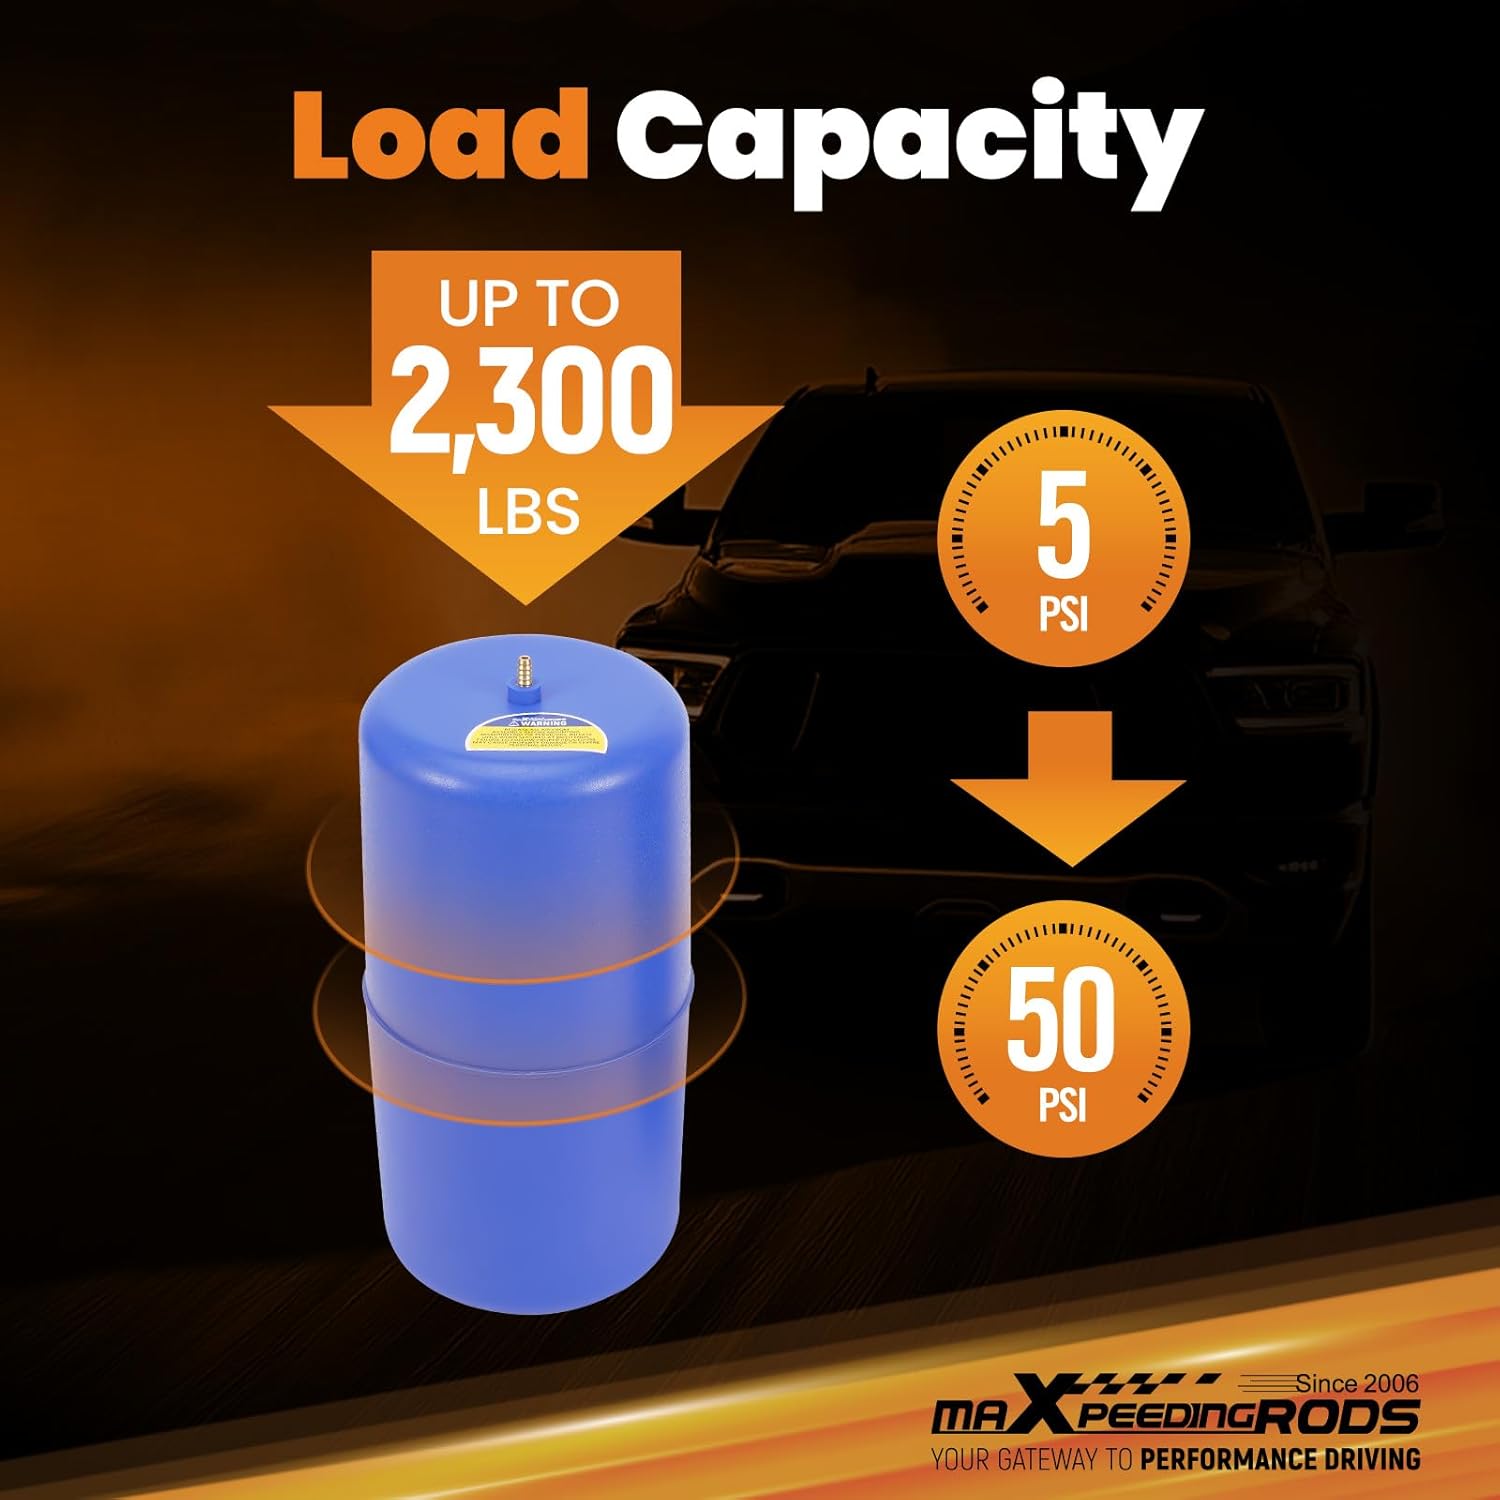
Figure 2.2: Illustration of the adjustable load capacity, ranging from 5 PSI to 50 PSI, supporting up to 2,300 lbs.

Figure 2.3: Depiction of the solid molded polyurethane construction, highlighting its ability to withstand extreme weather and harsh environments.
3. Compatibility
This air helper spring kit is compatible with a range of vehicles. Please verify your vehicle's make, model, and year against the list below to ensure proper fitment. Note: This kit is not compatible with models equipped with factory auto-leveling systems.
3.1 Compatible Models
| Make | Model | Year Range |
|---|---|---|
| Chevrolet | Avalanche 1500 | 2002-2014 |
| Chevrolet | Suburban 1500 | 2000-2020 |
| Chevrolet | Tahoe | 2000-2020 |
| GMC | Yukon | 2001-2020 |
| GMC | Yukon XL 1500 | 2000-2020 |
| Cadillac | Escalade | 2002-2007 |
| Ford | Country Squire | 1987-1991 |
| Hummer | H2 | 2003-2009 |
Table 3.1: List of compatible vehicle makes, models, and their respective year ranges.
4. Package Contents
Before beginning installation, please ensure all components listed below are present in your package. If any parts are missing or damaged, contact maXpeedingrods customer service immediately.

Figure 4.1: Visual representation of the kit's contents, including air springs, rubber blocks, air line, and hardware kit.
- 2 x Coil Spring Air Bags
- 2 x Rubber Blocks
- 1 x Air Line (Φ6*1)
- 1 x Hardware Kit (includes nuts, washers, fittings, zip ties)
5. Installation Instructions
The maXpeedingrods Air Helper Spring Kit is designed for practical installation inside your vehicle's existing coil springs. No frame drilling is required. For detailed visual instructions, refer to the official PDF manual linked in Section 9.
5.1 General Installation Steps
- Safely lift and support the rear of the vehicle, allowing the suspension to hang freely.
- Locate the existing coil springs. The air helper springs will be inserted into the center of these coil springs.
- Deflate the air helper springs completely to make them pliable for insertion.
- Carefully insert the deflated air helper spring into the coil spring, ensuring it is properly seated at both the top and bottom.
- Route the air line from the air helper spring to a convenient location for inflation, such as the rear bumper or wheel well. Secure the air line using the provided zip ties, ensuring it is clear of moving parts and heat sources.
- Install the inflation valve in the chosen location.
- Connect the air line to the inflation valve and the air helper spring, ensuring a secure and airtight connection.
- Lower the vehicle.
- Inflate the air helper springs to the recommended initial pressure (e.g., 5-10 PSI) and check for leaks.
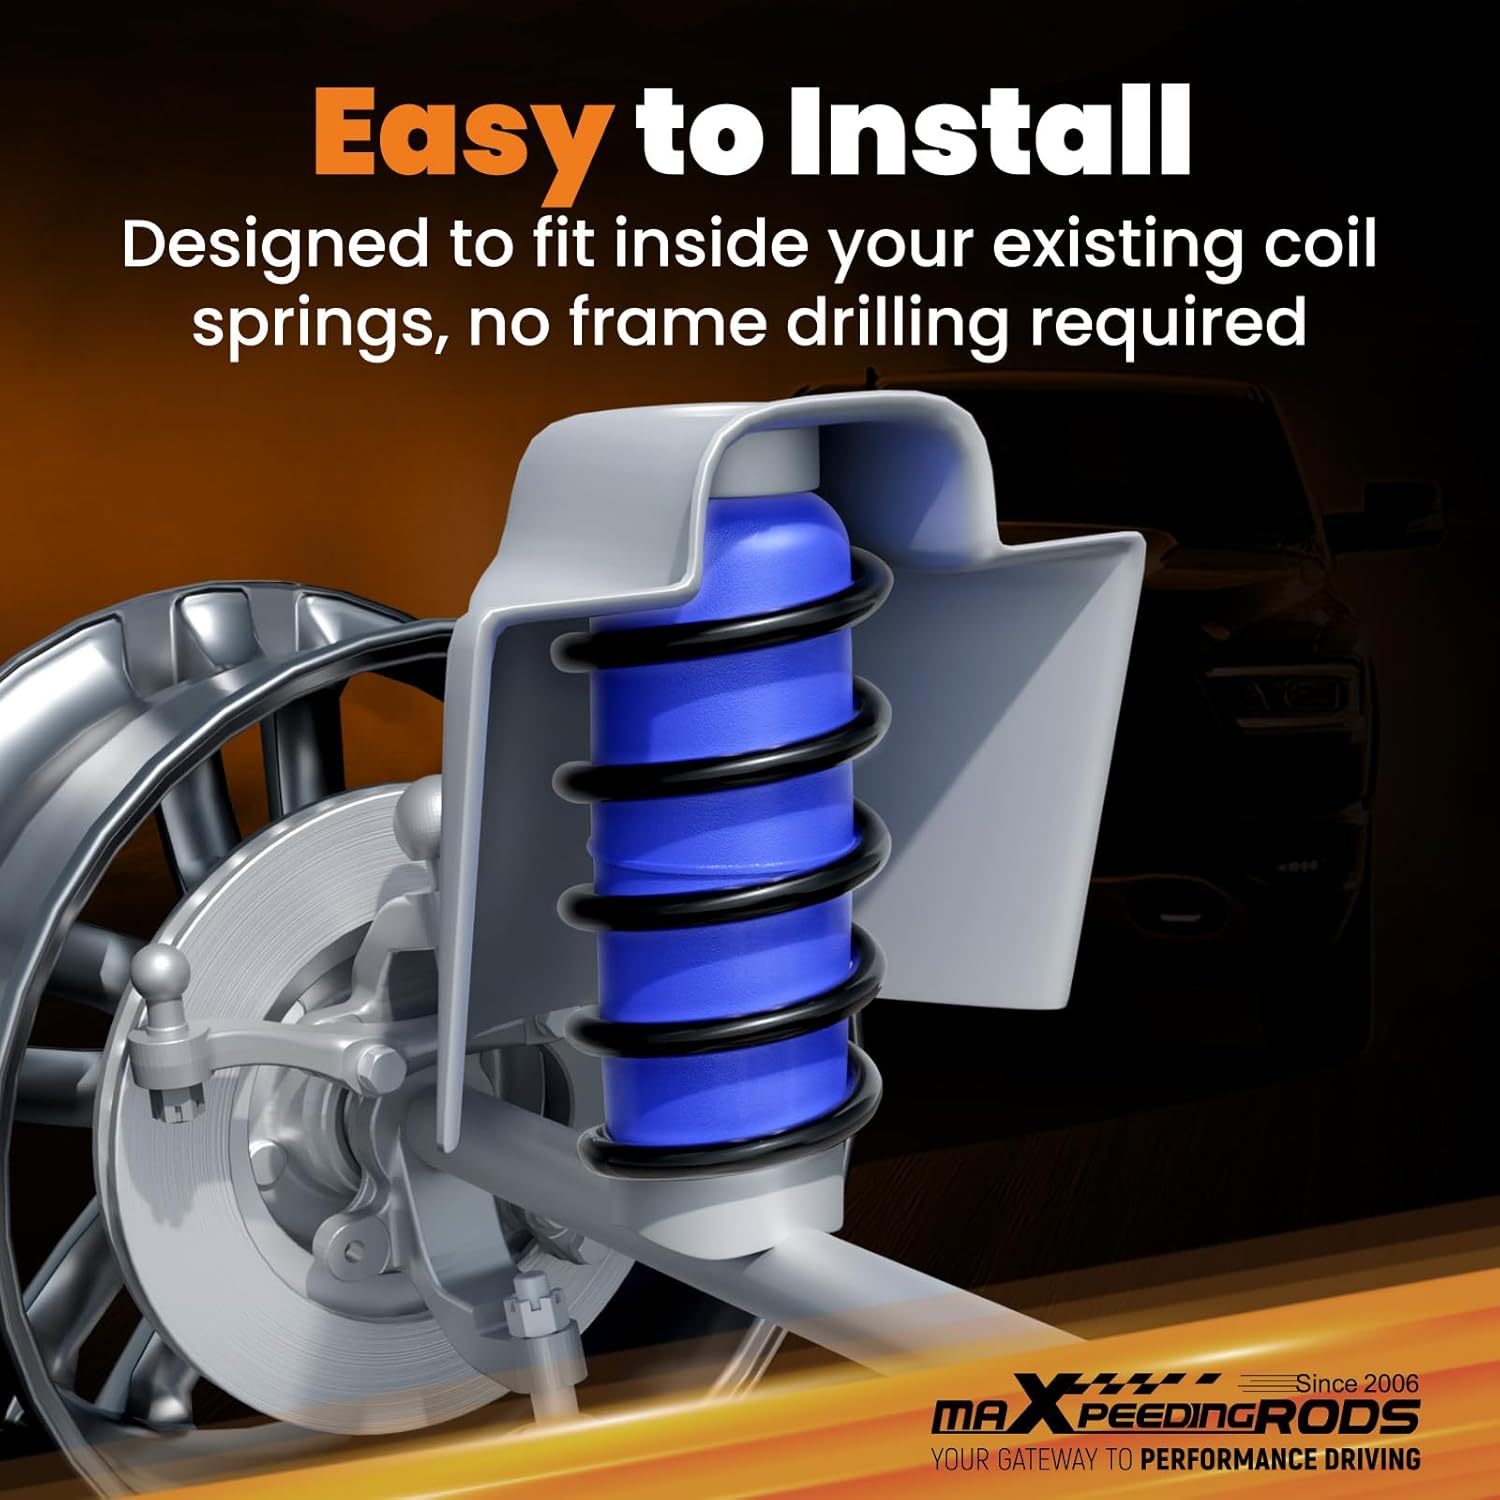
Figure 5.1: Simplified diagram illustrating the insertion of the air helper spring into the existing coil spring.

Figure 5.2: Step-by-step visual guide for installing the air helper springs within the coil spring suspension.
6. Operation
The air helper springs are designed to be adjustable to suit various load conditions. Proper inflation ensures optimal performance and ride comfort.
6.1 Adjusting Air Pressure
- Minimum Pressure: Always maintain a minimum of 5 PSI in the air springs, even when unloaded, to prevent damage.
- Maximum Pressure: Do not exceed 50 PSI. Over-inflation can damage the air springs and compromise ride quality.
- Loading: Increase air pressure when carrying heavy loads or towing to level the vehicle and improve stability.
- Unloading: Decrease air pressure when the load is removed to restore original ride comfort.
- Monitoring: Periodically check air pressure, especially before long trips or when significant load changes occur.
6.2 Performance Benefits
Properly inflated air helper springs provide several benefits:
- Enhanced ride comfort
- Protected cargo by maintaining vehicle level
- Decreased trailer sway
- Reduced tire wear
- Improved braking and steering
- Keeps headlights level, preventing blinding oncoming traffic

Figure 6.1: Visual representation of the performance improvements after installing the air helper springs, including enhanced comfort, protected cargo, and reduced trailer sway.
7. Maintenance
Regular maintenance ensures the longevity and optimal performance of your air helper spring kit.
7.1 Routine Checks
- Air Pressure: Check air pressure weekly or before each significant load.
- Visual Inspection: Periodically inspect the air springs, air lines, and fittings for any signs of wear, cracks, or damage.
- Cleanliness: Keep the air springs and surrounding area free from excessive dirt and debris.
8. Troubleshooting
This section addresses common issues and their solutions.
8.1 Air Leaks
Air leaks are the most common issue. Follow these steps to identify and fix leaks:
- Prepare a spray bottle with a mixture of soap and water.
- Inflate the air springs to their maximum recommended pressure (50 PSI).
- Spray all fittings, connections, and the entire surface of the air bag itself with the soap and water solution.
- Look for bubbles forming, which indicate an air leak.
- Tighten connections where bubbles appear. If the leak is from the air bag itself, it may need replacement.
- Ensure air lines are cut cleanly and squarely to create a perfect seal with fittings.
- Verify that the air line is properly placed and routed, avoiding kinks or sharp bends.

Figure 8.1: Instructions on how to minimize and detect air leaks, emphasizing smooth air line cuts and soap-water testing.
8.2 Vehicle Squat / Bottoming Out
If the vehicle is still squatting or bottoming out, check the following:
- Air Pressure: Ensure air springs are inflated to the appropriate pressure for the current load.
- Load Capacity: Verify that the total load does not exceed the kit's 2,300 lbs capacity or the vehicle's Gross Vehicle Weight Rating (GVWR).
- Installation: Re-check that the air springs are correctly seated within the coil springs.

Figure 8.2: Common signs that indicate your vehicle's suspension may benefit from air helper springs, such as bottoming out and trailer sway.
9. Specifications
| Specification | Detail |
|---|---|
| Model Number | PI61YI |
| Load Capacity | Up to 2,300 lbs |
| Adjustable Pressure Range | 5-50 PSI |
| Material | Durable Polyurethane |
| Item Weight | 4.74 pounds |
| Product Dimensions (each air spring) | Approximately 10 inches (255mm) height, 4.8-5 inches (123-128mm) diameter |
| Manufacturer | maXpeedingrods |
Table 9.1: Technical specifications for the maXpeedingrods Air Helper Spring Kit.
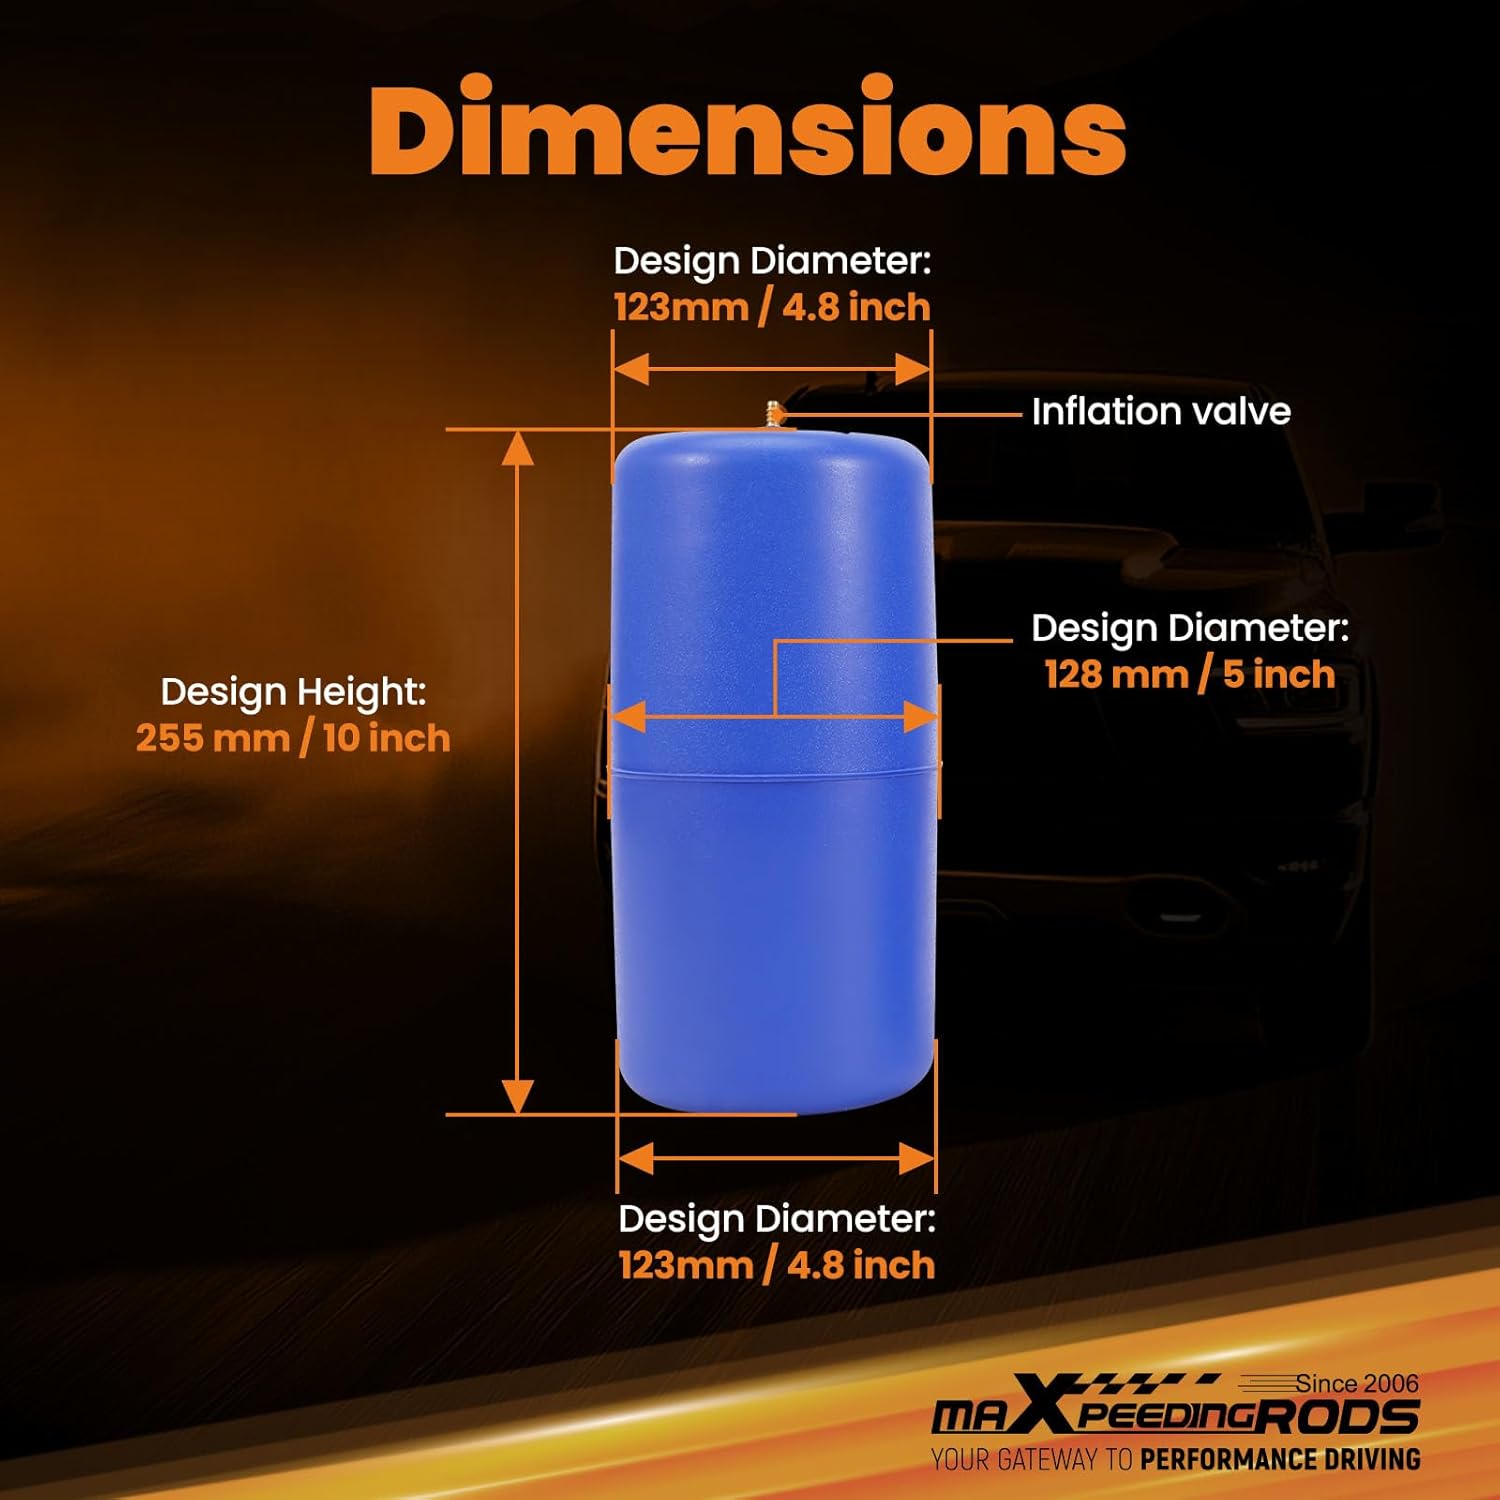
Figure 9.1: Detailed dimensions of a single air helper spring, showing height and diameter measurements.
10. Warranty and Support
maXpeedingrods is committed to providing high-quality products and excellent customer service.
10.1 Warranty Information
maXpeedingrods warrants its products against manufacturing defects under normal use for 1 year from the date of purchase. This warranty covers defects in materials and workmanship. It does not cover damage resulting from improper installation, misuse, abuse, accidents, or unauthorized modifications.
10.2 Technical Support and Customer Service
Lifetime technical support and customer service are provided for this product. If you encounter any issues, have questions regarding installation, or require assistance, please contact maXpeedingrods customer support. Refer to the official maXpeedingrods website or your purchase documentation for contact details.
10.3 Further Resources
For a more detailed installation guide and additional information, you can download the official PDF manual:


