
HUANANZHI X99-QD3
HUANANZHI X99-QD3 Motherboard User Manual
Model: X99-QD3
1. Introduction
Thank you for choosing the HUANANZHI X99-QD3 Motherboard. This manual provides detailed instructions for the installation, operation, and maintenance of your new motherboard. Please read this manual thoroughly before proceeding with installation to ensure proper setup and optimal performance. The HUANANZHI X99-QD3 is a Mini ATX gaming motherboard designed for LGA2011-3 processors, offering robust performance and extensive connectivity for various computing needs, from gaming to professional tasks.
2. Product Overview
2.1 Key Features
- Powerful Processor Support: Designed for LGA2011-3 processors, including Xeon E5-2629 v3 to E5-2696 v4, ensuring high performance for gaming and professional tasks.
- Expanded Memory Capacity: Features 4 DDR3 memory slots, supporting up to 128GB of RAM at speeds of 1866/1600/1333MHz, perfect for multitasking and resource-intensive applications.
- High-Speed Storage & Connectivity: Equipped with 6 SATA3.0 6Gb/s interfaces and 2 M.2 2280 NVME PCIE X4 3.0 slots, providing fast data transfer speeds and ample storage options.
- Advanced Audio & Networking: Integrated Realtek High-Definition Audio and Gigabit Ethernet, delivering crystal-clear sound and reliable internet connectivity.
- Compact & Durable Design: Built on a 6-layer PCB with 6-phase power supply, the mini ATX form factor is perfect for small builds while ensuring stability and longevity.
2.2 Motherboard Layout and Components
Familiarize yourself with the various components and connectors on the HUANANZHI X99-QD3 motherboard.

Figure 2.1: HUANANZHI X99-QD3 Motherboard and its retail packaging.
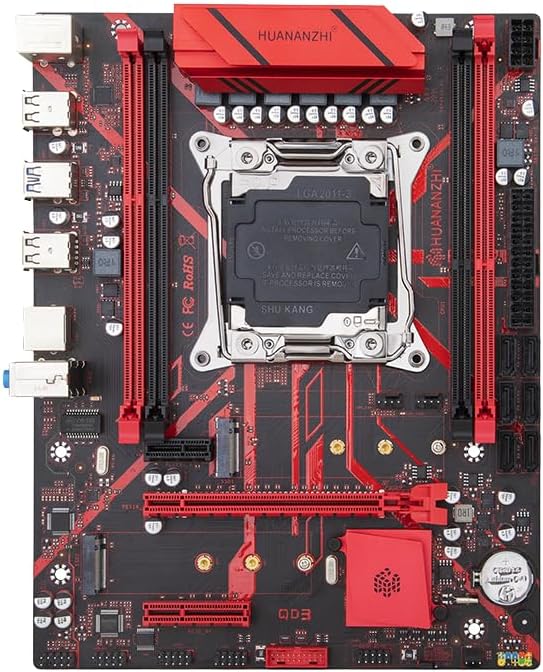
Figure 2.2: Top-down view of the X99-QD3 motherboard, highlighting the LGA2011-3 CPU socket, four DDR3 memory slots, and various expansion slots.

Figure 2.3: Angled view of the X99-QD3 motherboard, showing the heatsinks, PCIe slots, and SATA ports.

Figure 2.4: Detailed view of the rear I/O panel, including PS/2 ports, USB 2.0, USB 3.0, Gigabit Ethernet, and audio ports.
3. Setup Guide
This section guides you through the process of installing the HUANANZHI X99-QD3 motherboard and its components into your PC case.
3.1 Pre-Installation Checklist
- Ensure you have all necessary components: CPU, CPU cooler, DDR3 RAM, power supply, storage devices (SSD/HDD), graphics card (if not using integrated graphics), and PC case.
- Gather tools: Phillips head screwdriver, anti-static wrist strap (recommended).
- Work on a clean, flat, and static-free surface.
3.2 CPU Installation
- Locate the LGA2011-3 CPU socket on the motherboard.
- Gently push down the load lever and pull it away from the socket to open the retention frame.
- Carefully align the CPU with the socket, ensuring the gold triangle on the CPU matches the triangle on the socket. Do not force the CPU into place.
- Lower the retention frame and push the load lever back into its locked position.
- Install the CPU cooler according to its manufacturer's instructions.
3.3 RAM Installation
- Open the clips at both ends of the DDR3 memory slots.
- Align the notch on the DDR3 memory module with the key in the memory slot.
- Press down firmly on both ends of the memory module until the clips snap into place.
- For optimal performance, install memory modules in the recommended dual-channel configuration (refer to motherboard diagram for specific slot pairing).
3.4 Storage Device Installation (SATA & M.2)
- SATA Drives: Connect SATA data cables from your storage devices (HDDs/SSDs) to the SATA3.0 ports on the motherboard. Connect power cables from your power supply to the drives.
- M.2 NVMe SSDs: Insert the M.2 NVMe SSD into one of the M.2 2280 slots, ensuring the notch aligns. Secure the SSD with the provided screw.
3.5 Power Supply Connections
- Connect the 24-pin ATX main power connector from your power supply to the corresponding port on the motherboard.
- Connect the 8-pin (or 4+4 pin) CPU power connector to the ATX 12V power port near the CPU socket.
- Connect any necessary PCIe power cables to your graphics card (if applicable).
3.6 Case Installation and Front Panel Connections
- Install the I/O shield into the rear opening of your PC case.
- Carefully place the motherboard into the case, aligning the screw holes with the standoffs. Secure the motherboard with screws.
- Connect the front panel connectors (Power SW, Reset SW, HDD LED, Power LED, USB, Audio) to their respective headers on the motherboard. Refer to the motherboard's silkscreen labels for correct pin assignments.
4. Operating Instructions
4.1 First Boot and BIOS Setup
- After assembling all components, connect your monitor, keyboard, and mouse.
- Turn on the power supply and press the power button on your PC case.
- During the boot process, repeatedly press the DEL or F2 key (common keys, may vary) to enter the BIOS/UEFI setup utility.
- In the BIOS, you can configure boot order, system time, enable/disable integrated peripherals, and adjust performance settings.
- Save changes and exit the BIOS to continue with operating system installation.
4.2 Operating System Installation
Insert your operating system installation media (USB drive or DVD) and follow the on-screen prompts to install your preferred operating system. After installation, install the necessary drivers for your motherboard's components (chipset, audio, LAN, etc.) from the manufacturer's website or included driver disc.
5. Maintenance
5.1 Cleaning
- Regularly clean dust from your PC case and motherboard components using compressed air.
- Ensure the system is powered off and unplugged before cleaning.
- Avoid using liquid cleaners directly on components.
5.2 BIOS Updates
Periodically check the HUANANZHI official website for BIOS updates. BIOS updates can improve system stability, compatibility, and performance. Follow the specific instructions provided by HUANANZHI for updating the BIOS to avoid system damage.
6. Troubleshooting
This section addresses common issues you might encounter.
| Problem | Possible Cause | Solution |
|---|---|---|
| No display on monitor | Incorrect monitor connection, faulty graphics card, improperly seated RAM/CPU, power issue. |
|
| System does not power on | Power supply issue, incorrect front panel connections, faulty power button. |
|
| System reboots unexpectedly or crashes | Overheating, unstable overclock, faulty RAM, driver issues. |
|
7. Specifications
Detailed technical specifications for the HUANANZHI X99-QD3 Motherboard.
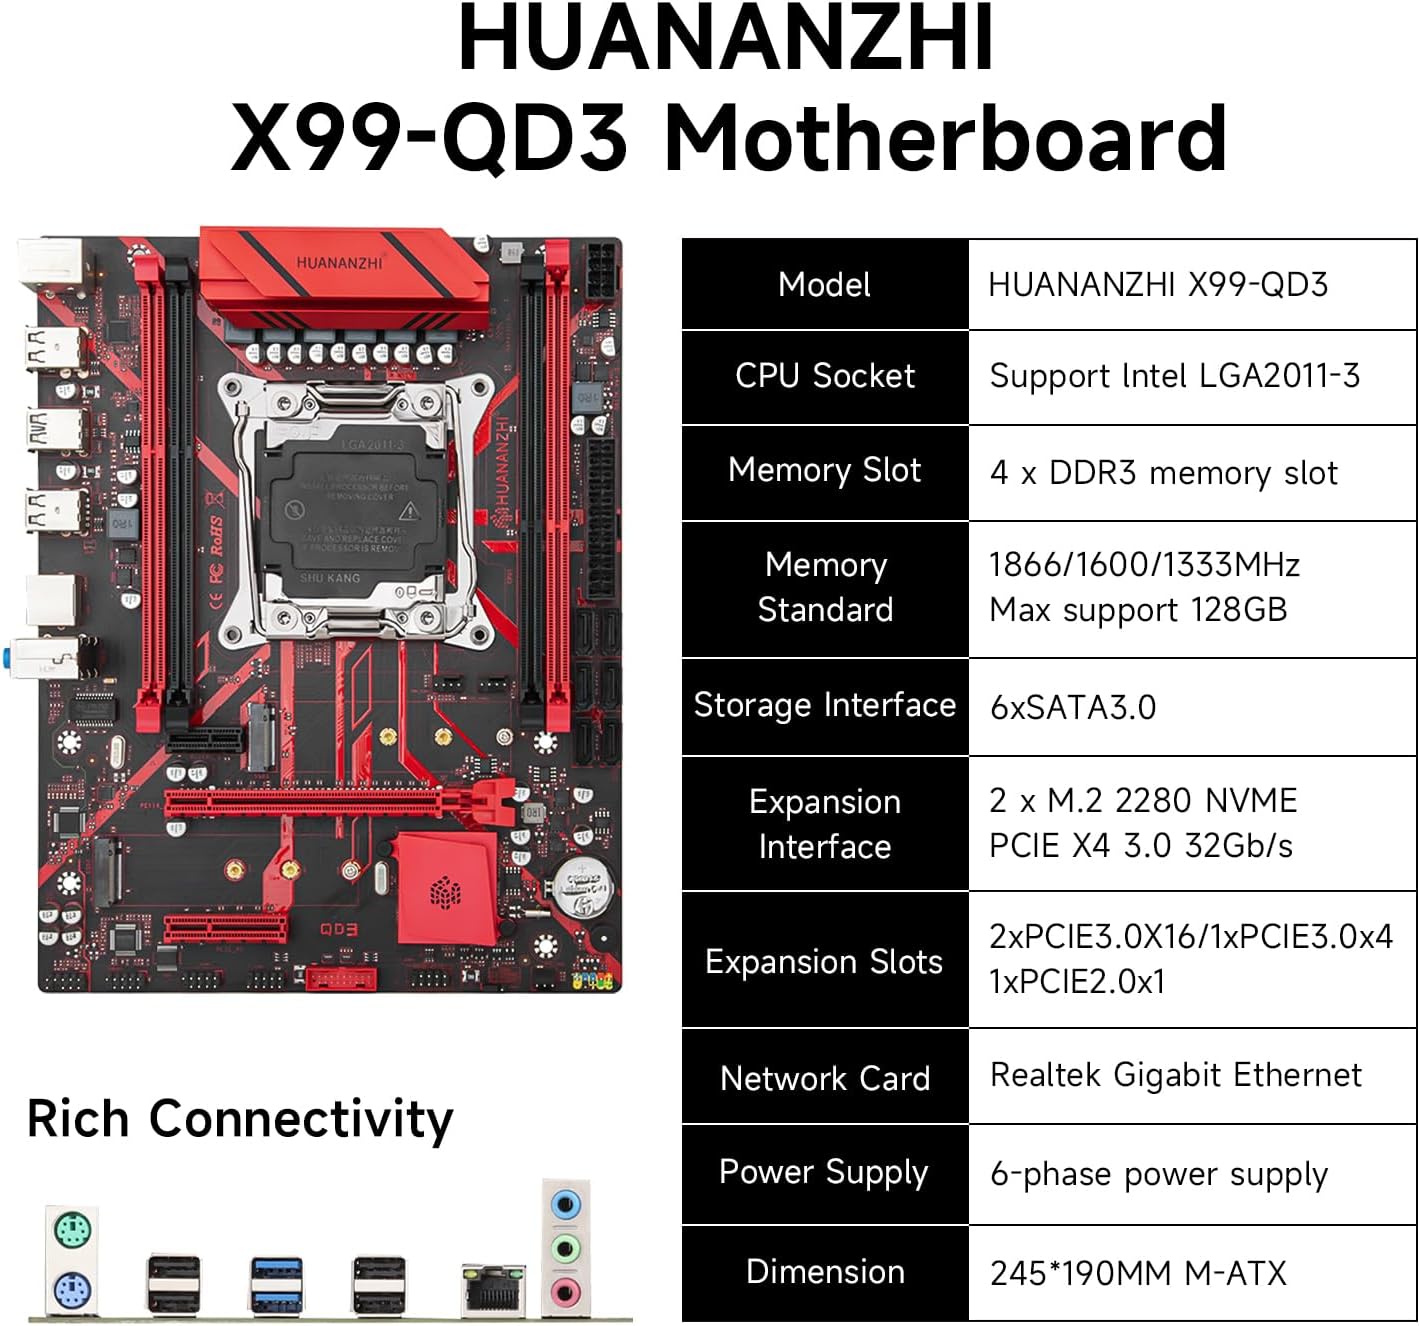
Figure 7.1: Visual representation of the X99-QD3 motherboard alongside its key specifications.
| Feature | Detail |
|---|---|
| Model | X99-QD3 |
| CPU Socket | LGA 2011-3 |
| Compatible Processors | LGA2011-3 (e.g., Xeon E5-2629 v3 to E5-2696 v4) |
| Chipset Type | Q87/Z87 |
| RAM Memory Technology | DDR3 |
| Memory Slots | 4 x DDR3 DIMM slots |
| Max Memory Capacity | 128 GB |
| Memory Clock Speed | 1866/1600/1333 MHz |
| Storage Interfaces | 6 x SATA3.0 6Gb/s |
| M.2 Slots | 2 x M.2 2280 NVME PCIE X4 3.0 |
| Expansion Slots | PCIe X16, PCIe X4, PCIe X1 (specific count not detailed in input, but general types are) |
| Networking | Realtek Gigabit Ethernet |
| Audio | Realtek High-Definition Audio |
| Form Factor | Mini ATX |
| Product Dimensions | 10.24 x 2.76 x 14.17 inches |
| Item Weight | 2.65 pounds |
8. Warranty and Support
For warranty information and technical support, please refer to the official HUANANZHI website or contact their customer service. Keep your proof of purchase for warranty claims.
Manufacturer: HUANANZHI
Website: Visit the HUANANZHI Store on Amazon (for general product information and support links)
Related documentsX99-QD3


Ask a question about this manual
Ask about setup, troubleshooting, compatibility, parts, safety, or missing instructions. Manuals+ will review the question and use this page’s manual context to help answer it.