
1. Introduction
This manual provides essential information for the installation, operation, maintenance, and troubleshooting of your HUANANZHI B85 M-ATX Motherboard. Please read this guide thoroughly before proceeding with installation to ensure proper setup and optimal performance.
2. Product Overview
The HUANANZHI B85 M-ATX Motherboard is designed for desktop PCs, supporting 4th generation Intel LGA 1150 processors and DDR3 memory. It features robust power delivery and versatile connectivity options for a reliable computing experience.

Image 2.1: HUANANZHI B85 M-ATX Motherboard and its retail packaging.
Key Features:
- PCIE Expansion Slots: Equipped with one high-performance PCI Express 3.0 x16 slot for advanced graphics cards and one PCI Express 2.0 x1 slot for additional expansion cards like sound or network cards. These slots ensure optimal bandwidth and speed.
- Dual-channel DDR3 Memory: Features two DDR3 memory slots supporting dual-channel architecture. These slots accommodate unbuffered DDR3 memory with frequencies of 1600/1333MHz and a maximum capacity of 16GB, providing ample memory for various computing tasks.
- Strong PCB and Power Delivery: Built with a durable 4-layer M-ATX design and an 8PIN+24PIN DC power supply interface. The use of all-solid capacitors and optimized power circuit layouts ensures precise and stable current delivery to the CPU, contributing to reliable performance and longevity.
- High Adaptability (LGA 1150 Socket): The LGA 1150 socket offers versatile connectivity, including 2 USB 3.0 ports, 4 USB 2.0 ports, 2 high-speed SATA 3.0 interfaces, and 2 SATA 2.0 interfaces. These features ensure compatibility with various devices and support high-speed SSD performance.
- SATA 3.0 High-Speed Interface: The motherboard includes SATA 3.0 high-speed interfaces, providing quick boot times, broad compatibility, and faster read speeds for improved system responsiveness.
- M.2 Interface: Features an M.2 interface for high-speed storage solutions, contributing to faster boot times and overall system performance.
- Rear I/O Panel: The rear panel includes essential ports for peripherals and display output.

Image 2.2: Detailed view of the PCIe 3.0 x16 slot (blue) and PCIe 2.0 x1 slot on the motherboard.

Image 2.3: The two DDR3 memory slots highlighted on the motherboard.

Image 2.4: Illustration of the motherboard's 4-layer PCB and the 8-pin and 24-pin power connectors.
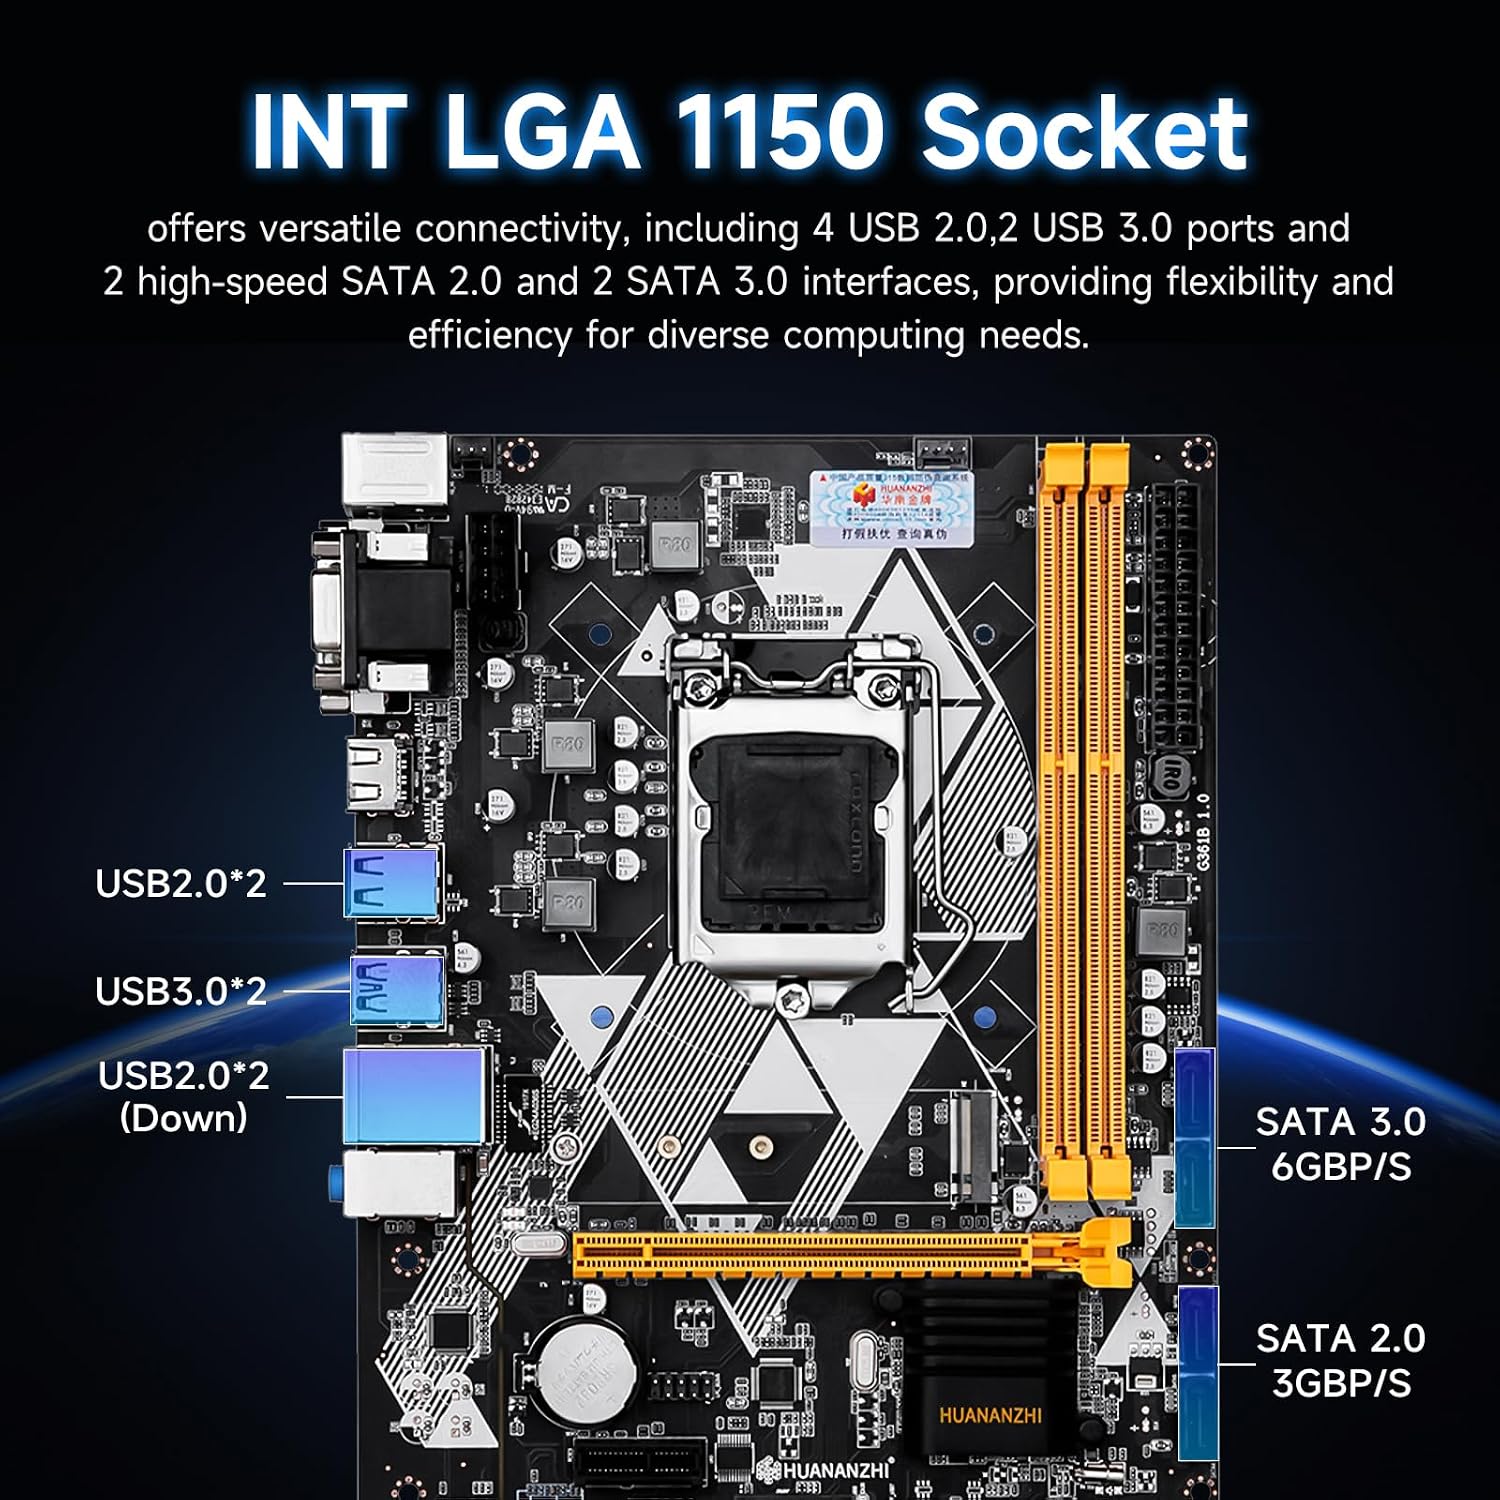
Image 2.5: Detailed view of the LGA 1150 CPU socket and various connectivity ports including USB and SATA.

Image 2.6: The M.2 2280 PCIe x4 2.0 interface for high-speed storage.

Image 2.7: The rear input/output panel of the motherboard, featuring various connectivity options.
3. Setup and Installation
Proper installation is crucial for the stability and performance of your system. Always handle the motherboard with care and ensure you are grounded to prevent electrostatic discharge (ESD).
3.1 Pre-Installation Checklist:
- Ensure your power supply is compatible and provides sufficient wattage.
- Gather all necessary components: CPU, CPU cooler, RAM, storage devices, graphics card (if dedicated), and PC case.
- Prepare a clean, static-free workspace.
3.2 Component Installation:
- CPU Installation: Carefully open the LGA 1150 socket lever. Align the CPU with the socket, ensuring the gold triangle on the CPU matches the indicator on the socket. Gently place the CPU into the socket without forcing it. Close the lever to secure the CPU.
- CPU Cooler Installation: Apply thermal paste (if not pre-applied) and install the CPU cooler according to its manufacturer's instructions. Connect the CPU fan cable to the 'CPU_FAN' header on the motherboard.
- RAM Installation: Open the clips on both ends of the DDR3 memory slots. Align the memory module with the slot, ensuring the notch on the module matches the key in the slot. Press down firmly on both ends until the clips snap into place. For dual-channel operation, install modules in matching slots (refer to motherboard diagram for specific slots).
- Motherboard Installation into Case: Install the I/O shield into your PC case. Align the motherboard with the standoffs in the case and secure it with screws.
- Storage Device Installation: Connect SATA data cables from your storage devices (HDDs/SSDs) to the SATA 3.0 or SATA 2.0 ports on the motherboard. For M.2 SSDs, insert the module into the M.2 slot and secure it with the provided screw.
- Expansion Card Installation: Insert your graphics card into the PCI Express 3.0 x16 slot. Secure it with the case screw. Install any other expansion cards into the PCI Express 2.0 x1 slots as needed.
- Power Connections: Connect the 24-pin ATX power connector and the 8-pin CPU power connector from your power supply to the corresponding ports on the motherboard. Connect SATA power cables to your storage devices.
- Front Panel Connections: Connect the front panel headers (power button, reset button, USB ports, audio jacks, LED indicators) to the corresponding pins on the motherboard. Refer to the motherboard diagram for correct pin assignments.
4. Operating Instructions
4.1 Initial Boot-Up:
- After assembling all components, connect your monitor, keyboard, and mouse.
- Connect the power cable to your power supply and turn on the power switch.
- Press the power button on your PC case.
- During the boot process, press the designated key (usually DEL or F2) to enter the BIOS/UEFI setup.
4.2 BIOS/UEFI Setup:
The BIOS (Basic Input/Output System) or UEFI (Unified Extensible Firmware Interface) allows you to configure system settings. Common settings include:
- Boot Order: Set the priority for your storage devices to boot the operating system.
- Date and Time: Adjust the system clock.
- CPU Settings: Monitor CPU temperature and adjust fan speeds.
- Memory Settings: Verify RAM frequency and timings.
- Peripherals: Enable or disable integrated components like USB controllers or audio.
Save changes before exiting the BIOS/UEFI. Install your operating system from a bootable USB drive or DVD.
5. Maintenance
Regular maintenance helps ensure the longevity and stable operation of your motherboard and PC.
- Dust Removal: Periodically clean dust from inside your PC case, especially from fans and heatsinks, using compressed air. Ensure the system is powered off and unplugged before cleaning.
- BIOS/UEFI Updates: Check the HUANANZHI official website for BIOS/UEFI updates. Updates can improve compatibility, stability, and performance. Follow the update instructions carefully to avoid system damage.
- Cable Management: Ensure all cables are neatly routed to improve airflow and prevent interference.
6. Troubleshooting
This section addresses common issues you might encounter.
Common Issues and Solutions:
- No Power/No Boot:
- Check all power connections (24-pin ATX, 8-pin CPU, GPU power).
- Ensure the power supply switch is on.
- Verify front panel power button connection.
- Test with a different power supply if possible.
- No Display:
- Ensure monitor is connected to the correct display output (integrated graphics or dedicated GPU).
- Reseat the graphics card and RAM modules.
- Check monitor input selection.
- System Instability/Crashes:
- Check CPU and GPU temperatures.
- Run memory diagnostic tools to check RAM integrity.
- Ensure all drivers (chipset, graphics, etc.) are up to date.
- Verify power supply stability.
- Peripheral Not Detected:
- Try a different USB port.
- Check device manager for driver issues.
- Ensure the device is properly connected and powered.
7. Specifications
Detailed technical specifications for the HUANANZHI B85 M-ATX Motherboard.
| Feature | Specification |
|---|---|
| Brand | HUANANZHI |
| Model Name | B85 |
| CPU Socket | LGA 1150 |
| Compatible Processors | B85 (Intel 4th Gen) |
| Chipset Type | Intel B85 |
| RAM Memory Technology | DDR3 |
| Memory Clock Speed | 1333 MHz, 1600 MHz |
| Memory Storage Capacity (Max) | 16 GB |
| Compatible Devices | Desktop Computer |
| Platform | Windows 10, Windows 11, Windows 7 |
| Package Dimensions | 13.78 x 9.85 x 2.76 inches |
| Item Weight | 2.2 pounds |
8. Warranty Information
For specific warranty terms and conditions, please refer to the documentation included with your purchase or contact the seller/manufacturer directly. Protection plans may be available for purchase separately.
9. Support
If you require further assistance or have questions not covered in this manual, please refer to the official HUANANZHI website or contact their customer support. An official Instructions for Use (IFU) document is also available in PDF format for download:


