1. Introduction
Thank you for choosing the Proster PST276 Rechargeable Pinless Moisture Meter. This device is designed for non-destructive measurement of moisture content in various building materials and wood. Its pinless design ensures materials remain intact, while the 2.4-inch color LCD provides clear readings. Please read this manual thoroughly before use to ensure proper operation and to maximize the lifespan of your device.
2. Safety Information
- Keep the device away from water and extreme temperatures.
- Do not attempt to disassemble or modify the device. Repairs should only be performed by qualified personnel.
- Ensure the device is fully charged before use for accurate readings.
- Avoid strong electromagnetic fields, which may affect measurement accuracy.
- Store the device in its protective pouch when not in use to prevent damage.
3. Product Overview
The Proster PST276 features a spherical probe for non-contact measurements, a clear color display, and intuitive controls.

Figure 1: Proster PST276 Moisture Meter with labeled components including spherical probe, display screen, alarm threshold setting button, power on/off button, calibration button, up/down buttons, and Type-C charging socket.

Figure 2: Detailed view of the 2.4-inch color LCD screen showing measured data, bar-graph, risk alert, battery level, data hold, maximum/minimum values, and dry/wet alerts.
Key Components:
- Spherical Probe: For non-destructive moisture detection.
- Display Screen: 2.4-inch color LCD showing measured data, bar-graph, and alerts.
- SET Button: To adjust alarm thresholds.
- MEAS Button: To initiate measurement and calibration.
- Power On/Off Button: To turn the device on or off.
- Up/Down Buttons: For navigation and value adjustment.
- Type-C Charging Socket: For recharging the internal battery.
4. Setup
4.1 Charging the Device
The Proster PST276 is equipped with a rechargeable battery. Before first use, or when the battery indicator shows low power, charge the device using the provided USB-C cable.
- Connect the USB-C end of the charging cable to the Type-C charging socket on the device.
- Connect the USB-A end of the cable to a standard USB power adapter (DC 5V, <1A) or a computer USB port.
- The battery icon on the display will indicate charging status.
- Once fully charged, disconnect the charging cable.

Figure 3: Charging the device via USB-C cable.
4.2 Powering On/Off
- To power on, press and hold the Power On/Off button until the display illuminates.
- To power off, press and hold the Power On/Off button until the display turns off.
5. Operating Instructions
5.1 Performing a Measurement
The Proster PST276 uses a pinless, non-destructive method to detect moisture. It measures moisture content from 5mm to 40mm depth.
- Power on the device.
- Press the "MEAS" button. The device will automatically calibrate in approximately 3 seconds.
- Place the spherical probe flat against the surface of the material you wish to measure. Ensure full contact for accurate readings.
- The moisture reading will be displayed on the screen. The 3-color LED bar graph (Dry, Risk, Wet) provides an immediate visual indication of moisture levels.
- Move the device slowly across the surface to scan for variations in moisture content.

Figure 4: Non-destructive measurement depth and probe length.
5.2 Understanding the Display
The 2.4-inch color LCD provides comprehensive information:
- Measured Data: The primary moisture reading.
- Bar-graph of Measured Value: A visual representation of moisture levels, changing color based on Dry, Risk, or Wet categories.
- MAX/MIN Values: Displays the maximum and minimum readings recorded during a measurement session.
- Dry/Risk/Wet Alerts: Visual indicators for moisture status.
- Battery Level Icon: Shows remaining battery charge.
- Data Hold: Indicates if the current reading is held on screen.

Figure 5: Bar-graph display and reference table for moisture alarm thresholds.
5.3 Setting Alarm Thresholds
The device allows you to set custom alarm levels for different materials. When the measured moisture exceeds the set threshold, an audible alarm will sound, and a visual alert will appear.
- Press the "SET" button to enter the alarm setting mode.
- Use the Up/Down buttons to adjust the desired moisture threshold for the 'Risk' and 'Wet' levels. Refer to the reference table in Figure 5 for typical values for Plaster, Cement-based materials, and Wood.
- Press "SET" again to confirm and exit the setting mode.
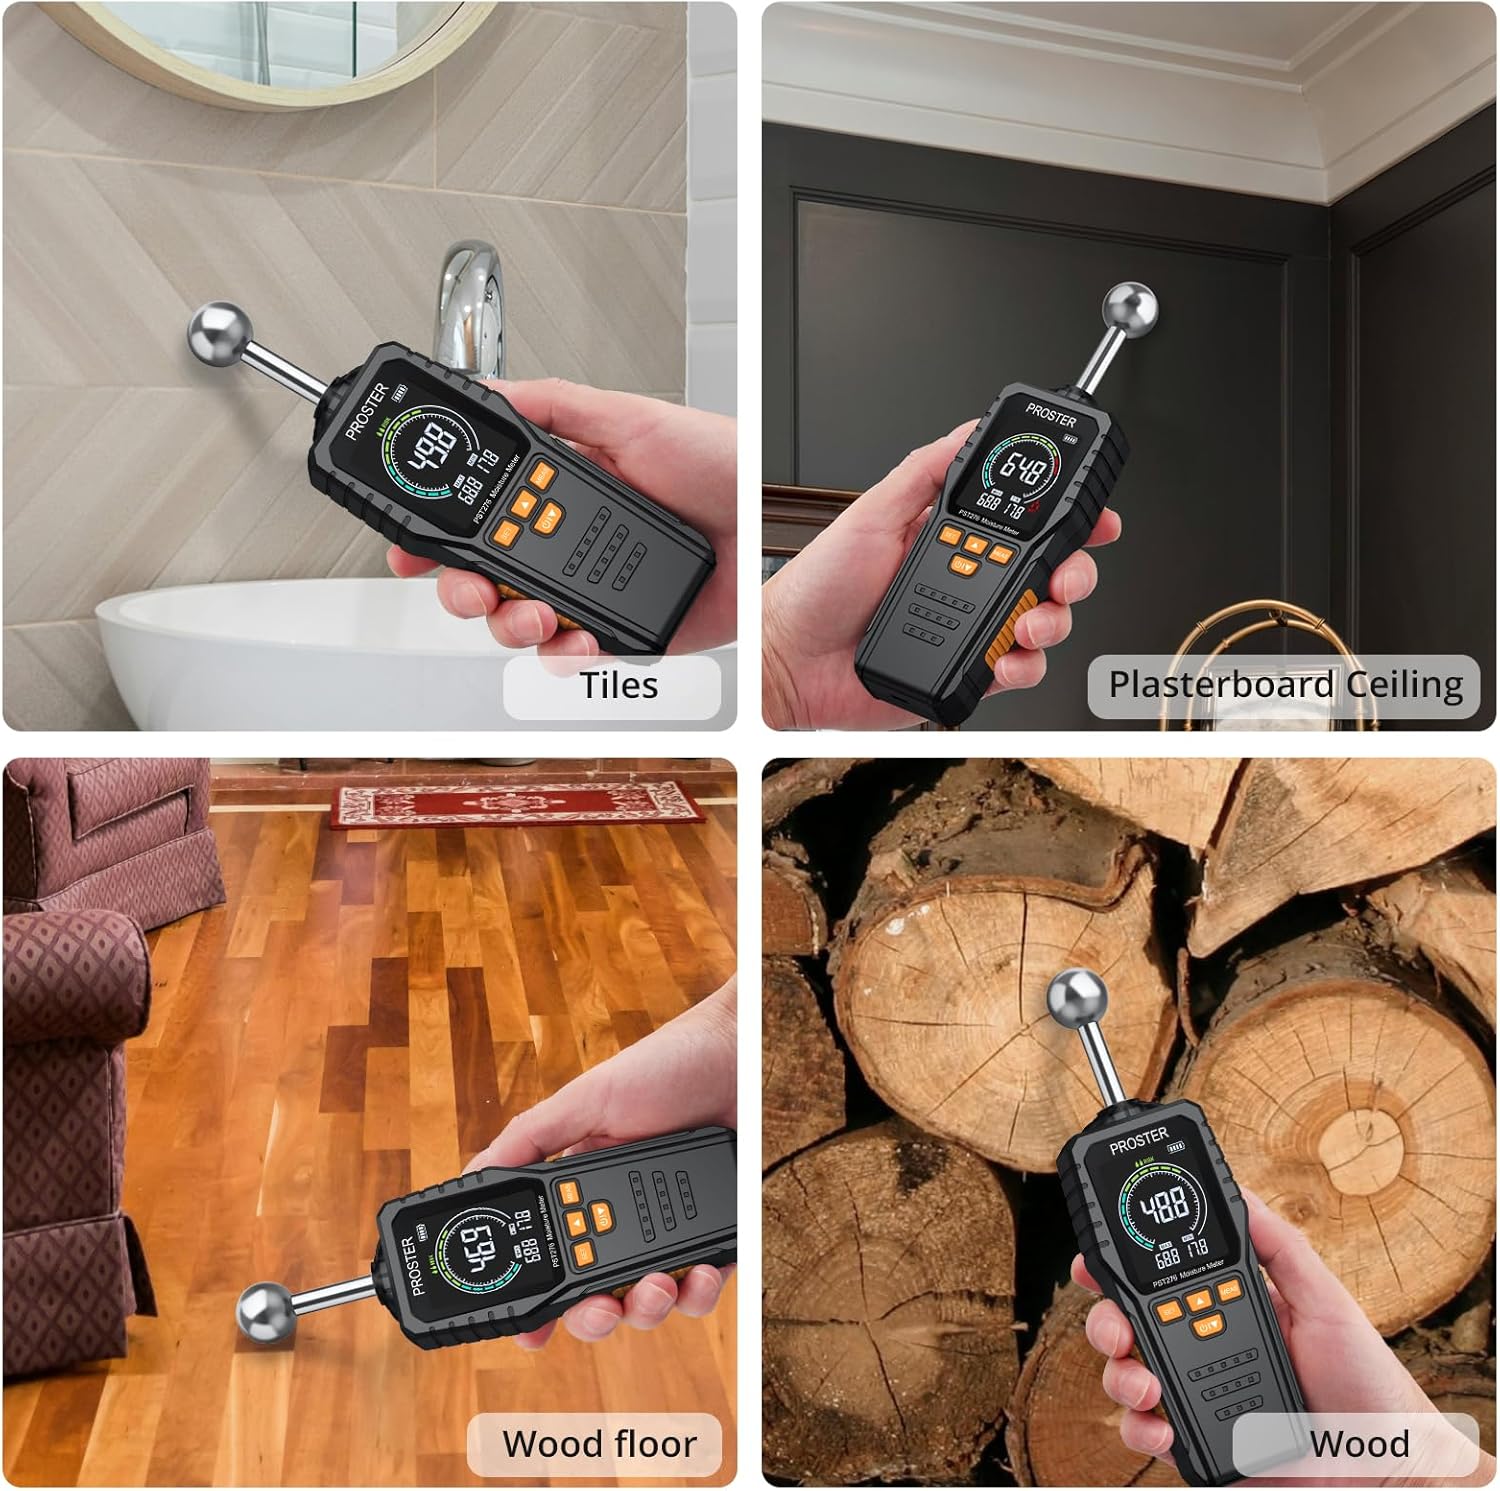
Figure 6: Visual and audible alarm in action.
5.4 Applications
The Proster PST276 is suitable for detecting moisture in a wide range of materials and environments, including:
- Wood and wood products (e.g., wood floors, lumber)
- Building materials (e.g., walls, plasterboard, concrete, brick, tiles, cardboard)
- Home inspection for potential water leaks or dampness
- DIY woodworking projects

Figure 7: Examples of moisture meter applications on various materials.
6. Maintenance
- Cleaning: Wipe the device with a soft, dry cloth. Do not use abrasive cleaners or solvents.
- Storage: Store the moisture meter in its protective carrying pouch in a cool, dry place when not in use. Avoid areas with high humidity or extreme temperatures.
- Battery: For long-term storage, ensure the battery is partially charged (around 50%) to prolong its lifespan. Recharge periodically if stored for extended periods.
7. Troubleshooting
| Problem | Possible Cause | Solution |
|---|---|---|
| Device does not power on. | Low or depleted battery. | Charge the device using the USB-C cable. |
| Inaccurate or inconsistent readings. |
|
|
| Alarm not sounding or sounding incorrectly. | Alarm thresholds not set correctly. | Adjust alarm thresholds using the "SET" button as described in Section 5.3. |
| Display is dim or flickering. | Low battery. | Recharge the device. |
8. Specifications
| Feature | Specification |
|---|---|
| Model Number | PST276 |
| Measurement Principle | Pinless, Non-destructive Induction |
| Measuring Depth | 5 - 40 mm |
| Probe Length | 58 mm |
| Measurement Range | 00.0 - 100.0 |
| Accuracy | ±2.5% |
| Display | 2.4-inch Color LCD |
| Power Source | Rechargeable Lithium Battery |
| Charging Interface | USB Type-C |
| Charging Voltage | DC 5V |
| Charging Current | <1A |
| Item Weight | 5.3 ounces (150 grams) |
| Product Dimensions | 8.46 x 2.59 x 1.05 inches |
| Included Components | Moisture Meter, Storage Bag, User Manual, Charging Cable |
9. Warranty and Support
Proster products are designed for reliability and performance. For warranty information, technical support, or service inquiries, please refer to the contact information provided with your purchase or visit the official Proster website. Please retain your proof of purchase for warranty claims.