
TESmart HDK202-M24-USBK
TESmart 4K@144Hz Displayport + HDMI KVM Switch User Manual
Model: HDK202-M24-USBK
Brand: TESmart
Introduction
The TESmart 4K@144Hz Displayport + HDMI KVM Switch is an advanced solution for managing two computers with dual monitor setups. This device allows you to share a single set of keyboard, mouse, and two monitors between two different computer systems, enhancing productivity and reducing desktop clutter. It supports high-resolution video up to 8K@60Hz and 4K@144Hz, making it suitable for demanding applications such as gaming and professional content creation. Integrated features like EDID emulation, Gigabit Ethernet, and USB 3.0 ports provide a comprehensive and reliable user experience.

Figure 1: The TESmart KVM Switch and its accompanying cables, including HDMI+USB and DisplayPort cables.
What's in the Box
Please verify that all items are present in the package:
- 1x KVM Switch (HDK202-M24-USBK)
- 2x HDMI+USB Cables
- 2x DP Cables
- 1x IR Remote Control (AAA batteries not included)
- 1x DC 12V Power Adapter
- 1x User Manual

Figure 2: Visual representation of all components included in the product packaging.
Setup
Follow these steps to set up your KVM switch:
- Power Off Devices: Ensure both computers and monitors are powered off before making any connections.
- Connect Monitors to KVM: Connect your two monitors to the HDMI Output ports (OUTPUT 1, OUTPUT 2) on the KVM switch using HDMI cables.
- Connect Computers to KVM (Video):
- For PC1: Connect the HDMI output from PC1 to INPUT 1 HDMI on the KVM, and the DisplayPort output from PC1 to INPUT 1 DP on the KVM.
- For PC2: Connect the HDMI output from PC2 to INPUT 2 HDMI on the KVM, and the DisplayPort output from PC2 to INPUT 2 DP on the KVM.
- Connect Computers to KVM (USB): Connect the USB-B cables from each computer to the corresponding USB-B input ports (PC1 USB, PC2 USB) on the KVM switch. These connections enable keyboard, mouse, and other USB peripheral sharing.
- Connect Peripherals: Connect your keyboard and mouse to the dedicated USB ports on the KVM switch. You can also connect other USB 3.0 devices (e.g., USB drives, webcams) to the USB 3.0 ports.
- Connect Network (Optional): Connect an Ethernet cable from your router to the LAN port on the KVM switch to share network access between connected PCs.
- Power On: Connect the DC 12V power adapter to the KVM switch and then plug it into a power outlet. Power on your monitors and computers.

Figure 3: Illustration of connecting dual displays from two desktops to the KVM switch.

Figure 4: Comprehensive diagram detailing all necessary connections for the KVM switch, including monitors, computers, and peripherals.
Operating
The KVM switch offers multiple methods for switching between connected computers:
Switching Methods
- Keyboard Hotkeys: Use customizable keyboard hotkeys for quick switching. Refer to the included user manual for specific hotkey combinations.
- Front Panel Button: Press the dedicated button on the front panel of the KVM switch to cycle between connected computers.
- IR Remote: Use the provided IR remote control to switch inputs from a distance. Ensure AAA batteries are installed (not included).
- Mouse Wheel: Some models may support switching via mouse wheel gestures. Consult the full manual for details.

Figure 5: Demonstrates the various one-touch switching options available, including custom keyboard hotkeys, front panel buttons, and the IR remote.
Display Modes
The KVM switch supports various display configurations:
- Mode AA: Both monitors display output from PC1.
- Mode AB: Monitor 1 displays output from PC1, Monitor 2 displays output from PC2.
- Mode BA: Monitor 1 displays output from PC2, Monitor 2 displays output from PC1.

Figure 6: Visual examples of different display modes, including configurations where both PCs share monitors or each PC uses a dedicated monitor.
EDID Emulation v2.0
Equipped with an advanced ADI chip, the KVM switch features EDID Emulation v2.0. This technology ensures that your computers always receive correct display information, preventing issues such as desktop icon rearrangement, screen flickering, and window clutter when switching between sources. The EDID emulator maintains a stable connection, making transitions smooth and reliable.
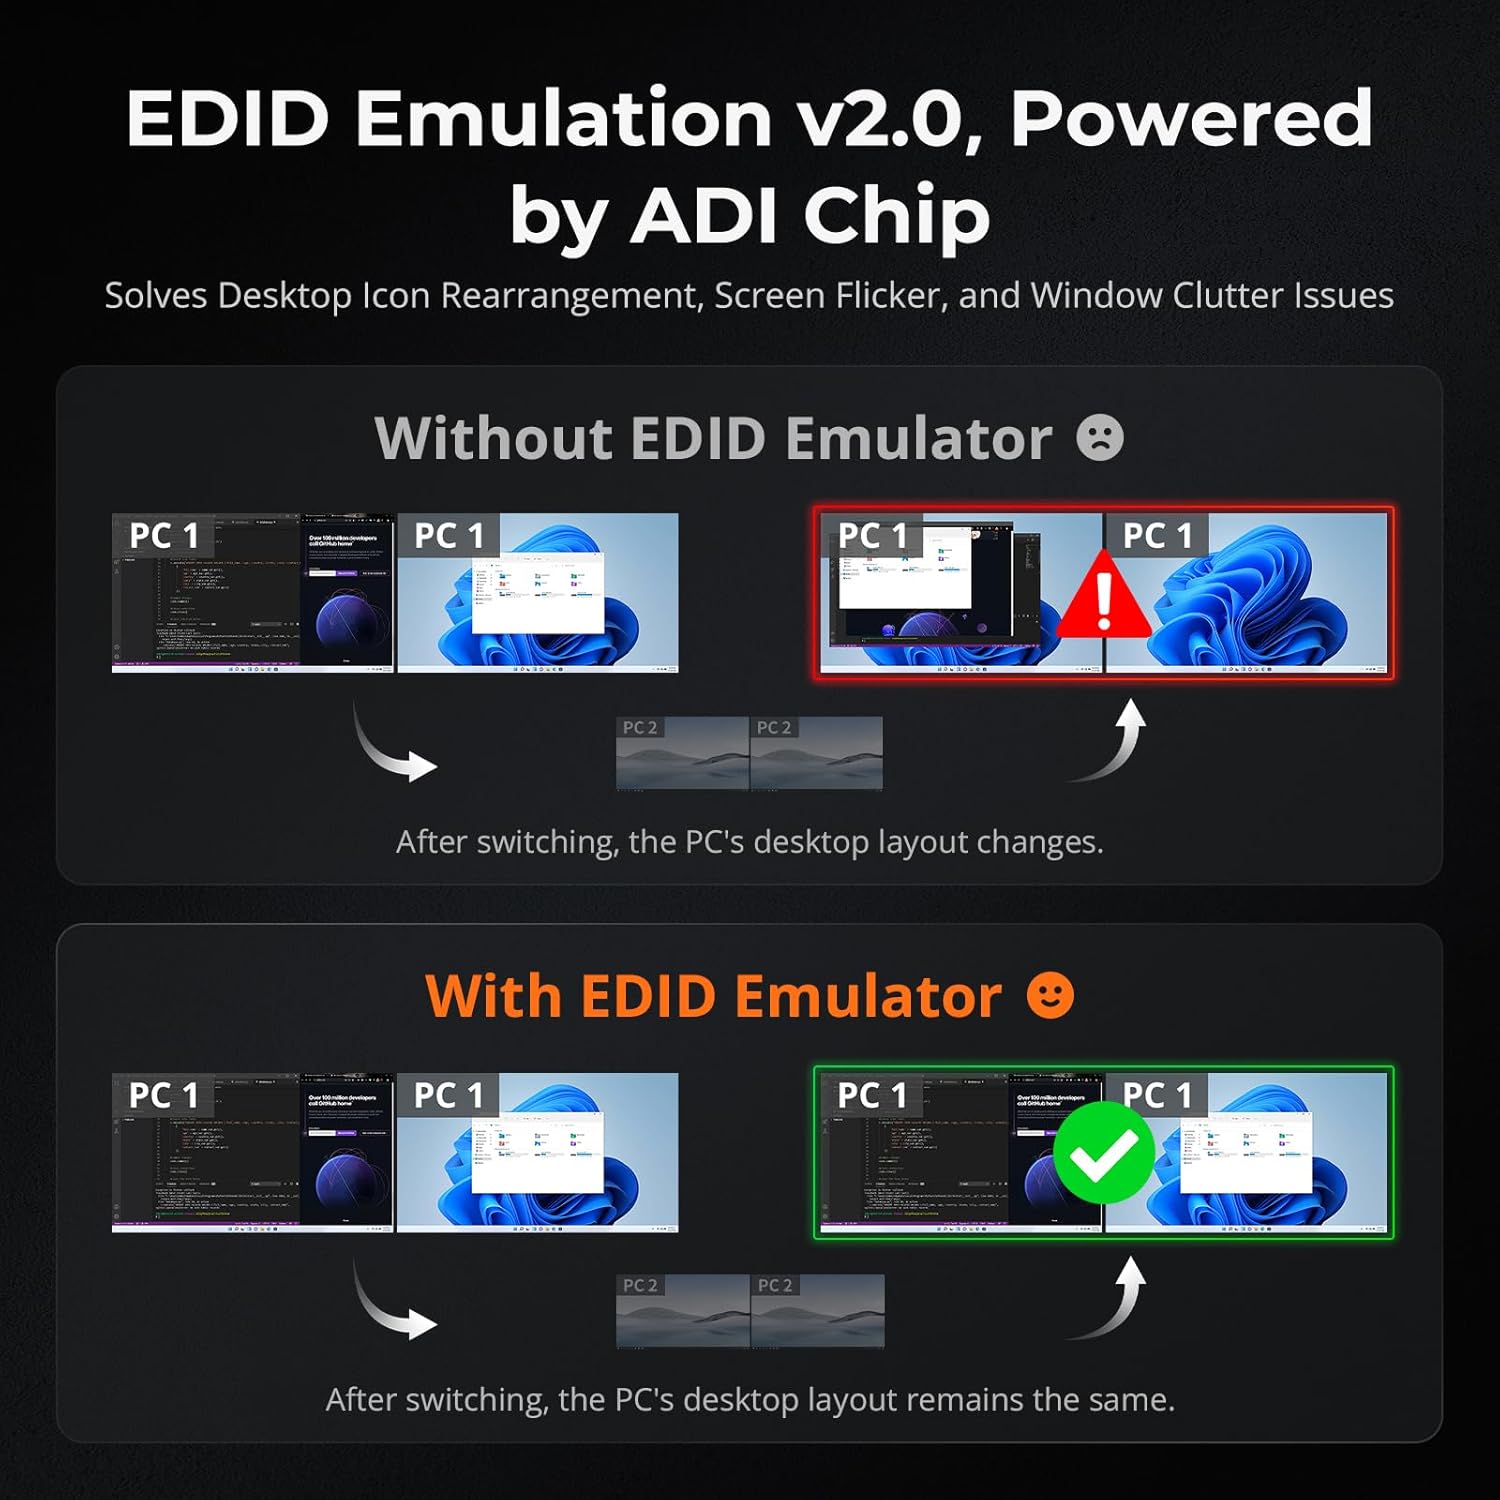
Figure 7: Illustrates the benefits of EDID Emulation, showing how it prevents desktop layout changes and screen issues after switching, unlike setups without it.
Shared Docking Station Features
The KVM switch functions as an all-in-one docking station, providing:
- USB 3.0 Ports: Expand connectivity with extra USB 3.0 ports for peripherals, charging phones, tablets, and more.
- Audio I/O: Share audio devices like headphones and microphones between computers.
- Built-in Network Switch: Enables both connected PCs to share a single Gigabit Ethernet connection (1000Mbps).

Figure 8: Highlights the KVM's features as an all-in-one docking station, including LAN port, expansion port, USB 3.2 Gen 1 ports, and K/M input with pass-through mode.
Specifications
| Feature | Description |
|---|---|
| Model Number | HDK202-M24-USBK |
| Product Dimensions | 7.48 x 4.92 x 2.09 inches |
| Item Weight | 4.98 Pounds |
| Supported Resolutions | Up to 8K@60Hz, 4K@144Hz/120Hz/60Hz |
| Video Inputs | DisplayPort 1.4, HDMI 2.1 |
| Video Outputs | HDMI 2.1 |
| USB Ports | USB 3.0, USB-B (for PC connection) |
| Network | Gigabit Ethernet (1000Mbps) |
| HDR Support | Dynamic HDR (HDR10+, Dolby Vision) |
| Gaming Features | VRR, FVA, ALLM |
| EDID Emulation | Yes, v2.0 with ADI Chip |
| Power Supply | DC 12V |
Maintenance
To ensure the longevity and optimal performance of your TESmart KVM switch, follow these maintenance guidelines:
- Cleaning: Use a soft, dry cloth to clean the exterior of the device. Avoid using liquid cleaners or abrasive materials, which can damage the surface or internal components.
- Ventilation: Ensure the KVM switch is placed in a well-ventilated area. Do not block the ventilation openings, as this can lead to overheating.
- Cable Management: Organize cables neatly to prevent strain on ports and accidental disconnections.
- Power Cycle: If you experience minor issues, a simple power cycle (unplugging the power adapter for a few seconds and then plugging it back in) can often resolve them.
- Firmware Updates: Check the TESmart official website periodically for any available firmware updates, which can improve performance and add new features.
Troubleshooting
If you encounter issues with your KVM switch, refer to the following common troubleshooting steps:
- No Display/Flickering Screen:
- Ensure all HDMI and DisplayPort cables are securely connected to both the KVM and your computers/monitors.
- Verify that the correct input source is selected on your monitors.
- Check cable quality and length. For high resolutions (8K/4K@144Hz), use high-quality, certified cables of appropriate length.
- Power cycle the KVM switch and then the computers.
- Confirm that EDID emulation is functioning correctly.
- Keyboard/Mouse Not Responding:
- Ensure the USB-B cables from your computers are connected to the KVM.
- Try connecting the keyboard and mouse to different USB ports on the KVM.
- Some specialized gaming or wireless keyboards/mice may require pass-through mode. Refer to the full manual for instructions on enabling this.
- Fan Noise:
- The KVM switch has an active cooling fan. Some fan noise is normal, especially under heavy load or in warmer environments.
- Ensure adequate ventilation around the unit.
- If the fan noise is excessive or unusual, contact customer support.
- Network Connectivity Issues:
- Verify the Ethernet cable is properly connected to the KVM and your router.
- Check network settings on both connected computers.
- Remote Control Not Working:
- Ensure fresh AAA batteries are installed in the remote.
- Point the remote directly at the IR receiver on the KVM switch.
For more detailed troubleshooting or persistent issues, please refer to the comprehensive user manual or contact TESmart customer support.
Warranty and Support
TESmart products are designed for reliability and performance. This KVM switch typically comes with a standard warranty. For specific warranty terms and conditions, please refer to the warranty card included in your product packaging or visit the official TESmart website.
Technical Support
TESmart offers dedicated technical support to assist you with any questions or issues you may encounter. You can typically find support contact information (email, phone, or online chat) on the TESmart official website or within the included user manual.
Additional protection plans may be available for purchase, offering extended coverage beyond the standard warranty period. Please check with your retailer or TESmart directly for details on available protection plans.
Related documentsHDK202-M24-USBK


Ask a question about this manual
Ask about setup, troubleshooting, compatibility, parts, safety, or missing instructions. Manuals+ will review the question and use this page’s manual context to help answer it.