
1. Introduction
This manual provides detailed instructions for the safe and proper installation, operation, and maintenance of your Mount-It! MI-4112 Full Motion TV Wall Mount. Please read all instructions carefully before beginning installation. If you have any questions, contact customer support.

Figure 1: Mount-It! MI-4112 Full Motion TV Wall Mount overview.
2. Safety Information
WARNING: Failure to read and follow all instructions may result in personal injury, property damage, or voiding of warranty. Do not install this product if you do not understand these instructions or have doubts about the safety of the installation.
- Ensure the mounting surface can safely support the combined weight of the mount and the television.
- This mount is designed for installation on double wood studs or solid concrete/brick walls. Do not install on drywall alone.
- Use appropriate safety gear, including eye protection, during installation.
- Do not exceed the maximum weight capacity of 88 lbs (40 kg).
- Do not exceed the maximum TV size range of 37" to 80".
- Verify VESA compatibility (100x100mm to 600x400mm) with your television before installation.
- Keep children and pets away during installation.
- Tighten all screws firmly but do not overtighten. Overtightening can damage screws and components.
3. Package Contents
Verify that all components are present and undamaged before installation. If any parts are missing or damaged, contact Mount-It! customer service.
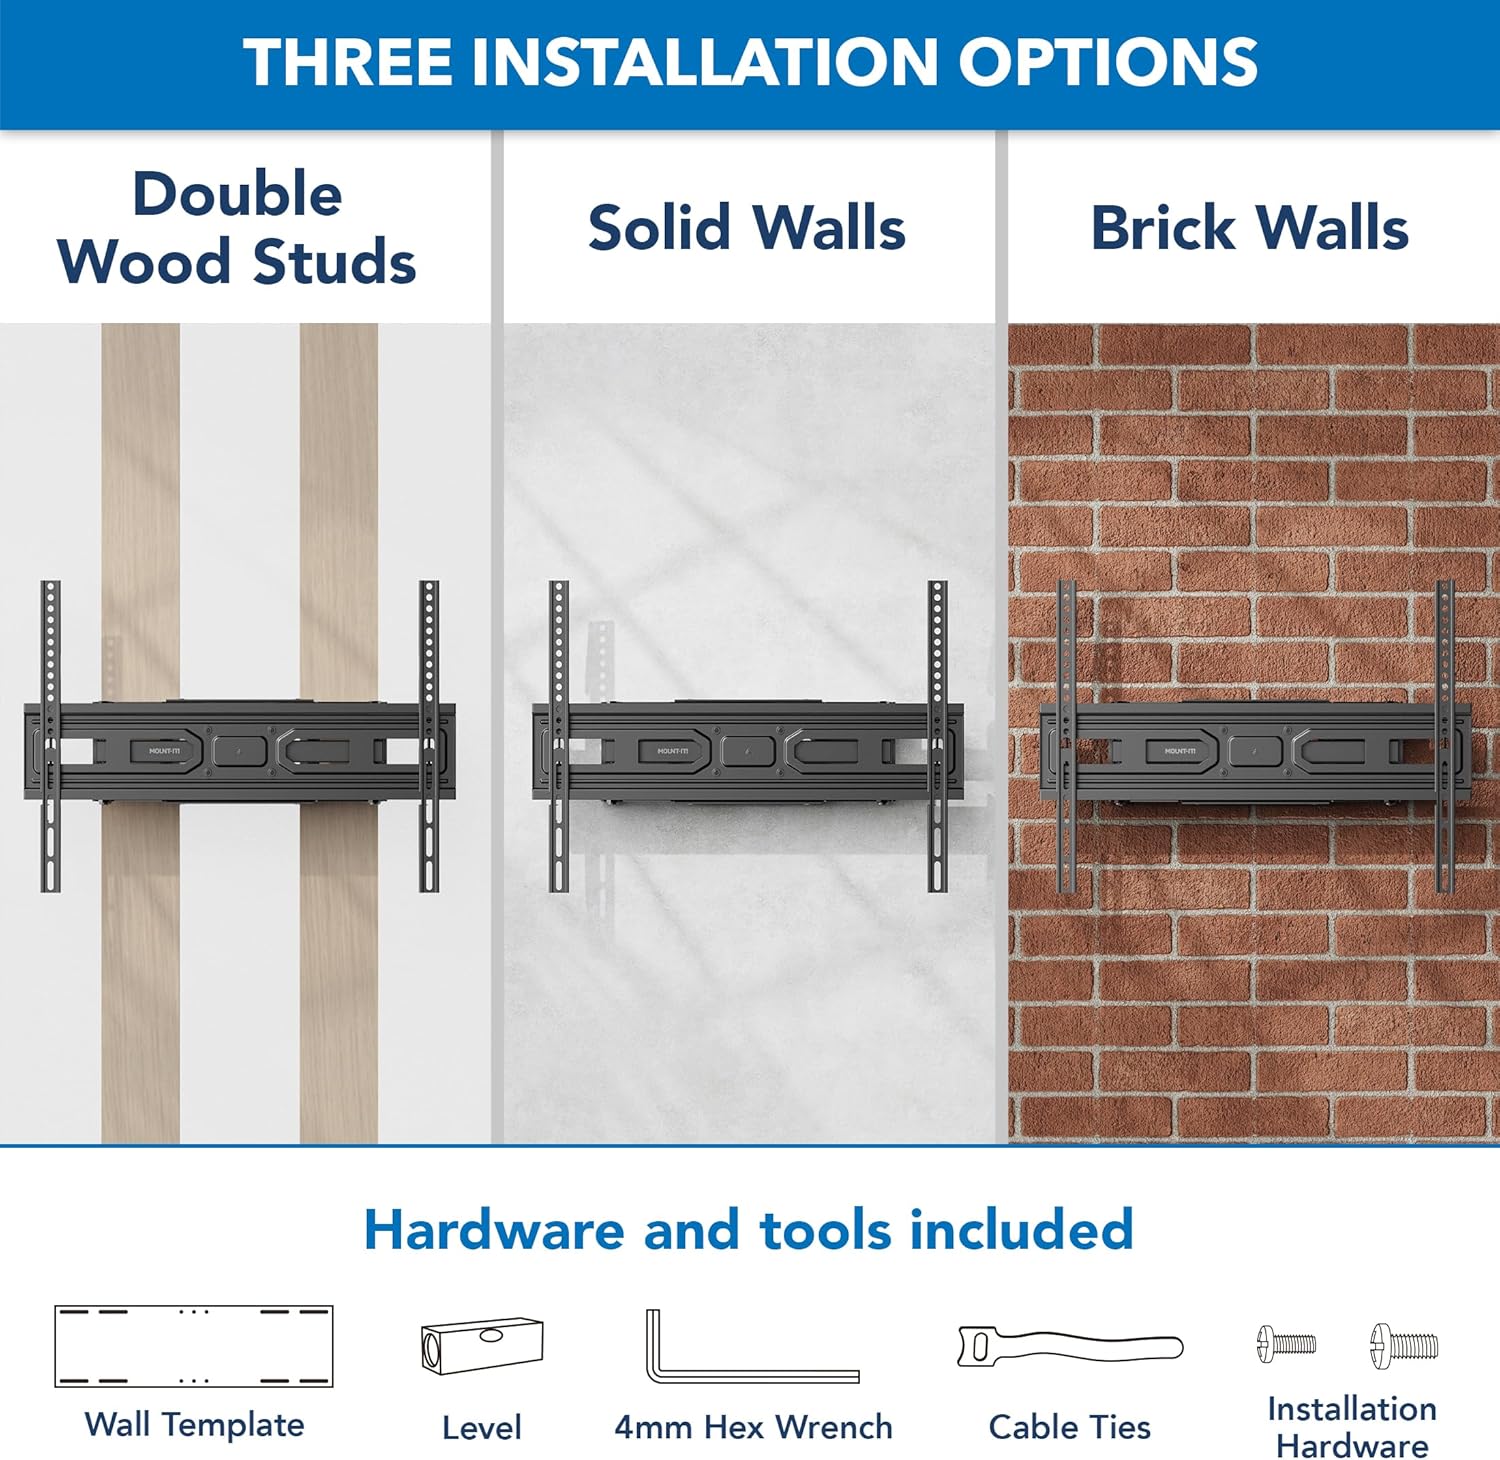
Figure 2: Illustration of installation options and included hardware.
Included Hardware and Tools:
- Wall Mount Assembly
- TV Brackets (2)
- Wall Template
- Bubble Level
- 4mm Hex Wrench
- Cable Ties (4)
- Assorted Installation Hardware (screws, anchors, washers, spacers for various TV and wall types)
4. Setup and Installation
IMPORTANT: Two people are recommended for safe installation.
4.1. Determine Wall Type and Location
This mount is suitable for:
- Double Wood Studs: Locate the center of two adjacent wood studs using a stud finder.
- Solid Concrete/Brick Walls: Ensure the wall is thick enough and structurally sound to support the weight.
Choose a location that allows for optimal viewing angles and sufficient clearance for the mount's full motion capabilities.
4.2. Attach TV Brackets to Television
- Carefully place your TV face down on a soft, clean surface to prevent screen damage.
- Identify the VESA mounting holes on the back of your TV.
- Select the correct diameter and length screws (M4, M6, M8) that fit your TV's mounting holes. Use washers and spacers if necessary to ensure the screws do not bottom out or protrude too far.
- Attach the two vertical TV brackets to the back of your TV, ensuring they are level and securely fastened. The hooks on the brackets should face upwards.
4.3. Install Wall Plate
- Position the wall template at your desired mounting height on the wall. Use the included bubble level to ensure it is perfectly horizontal.
- Mark the drilling locations through the template.
- For Wood Studs: Drill pilot holes (refer to manual for specific drill bit size). Secure the wall plate using the provided lag bolts and washers.
- For Concrete/Brick Walls: Drill pilot holes (refer to manual for specific drill bit size). Insert concrete anchors into the holes. Secure the wall plate using the provided lag bolts and washers.
- Ensure the wall plate is firmly attached to the wall before proceeding.
4.4. Hang Television on Wall Plate
- With assistance, carefully lift the TV with the attached brackets.
- Hook the TV brackets onto the wall plate. Ensure both brackets are securely seated on the wall plate.
- Engage the safety screws or locking mechanisms on the bottom of the TV brackets to prevent accidental dislodging.
4.5. Cable Management
Use the included cable ties to organize and secure TV cables along the mount arms. This helps maintain a tidy appearance and prevents cables from being pinched during adjustments.

Figure 3: Example of cable management using reusable ties.
5. Operating Instructions
The Mount-It! MI-4112 offers full motion capabilities for optimal viewing.
5.1. Adjusting Tilt, Swivel, and Screen Level

Figure 4: Full motion capabilities including tilt, swivel, and screen level.
- Tilt: Gently push or pull the top or bottom of the TV to achieve the desired vertical angle (up to +3°/-15°). Some mounts may have knobs or bolts to loosen/tighten for tilt adjustment.
- Swivel: Extend the TV from the wall and carefully pivot it left or right (up to +/-60°).
- Screen Level: After installation, you can make minor horizontal adjustments (up to +/-3°) to ensure the TV is perfectly level. This is typically done by adjusting screws on the TV brackets.
5.2. Extending and Retracting

Figure 5: The mount extends up to 14 inches and retracts to 2.6 inches.
The dual arms allow the TV to extend up to 14 inches (35.5 cm) from the wall and retract to a slim 2.6 inches (6.6 cm) profile. Gently pull or push the TV to adjust its distance from the wall.
5.3. Height Adjustments

Figure 6: Two height adjustment options for optimal TV positioning.
The TV brackets offer two height adjustment settings, allowing you to raise or lower the TV by approximately 3 inches (7.6 cm) relative to the wall plate. This adjustment is typically made during the initial installation by selecting different mounting holes on the TV brackets.
6. Maintenance
- Regular Inspection: Periodically check all screws and connections to ensure they remain tight and secure.
- Cleaning: Wipe the mount with a soft, dry cloth. Avoid abrasive cleaners or solvents.
- Lubrication: The moving parts are designed for smooth operation. If any movement becomes stiff, a small amount of silicone-based lubricant can be applied to the pivot points.
7. Troubleshooting
7.1. TV is not level after installation
- Check the screen leveling adjustment on the TV brackets. Loosen the appropriate screws, adjust the TV to be level using a bubble level, and then retighten the screws.
- Ensure the wall plate was installed level. If not, minor adjustments can sometimes be made with the screen leveling feature.
7.2. Mount feels loose or unstable
- Verify all wall plate lag bolts are securely tightened into the wall studs or anchors.
- Ensure the TV brackets are properly hooked onto the wall plate and the safety screws are engaged.
- Confirm that the TV's weight and size are within the mount's specified limits.
7.3. Difficulty moving the TV mount
- The mount is designed to be sturdy. Initial movement may require some force.
- Check for any obstructions or cables that might be impeding movement.
- Apply a small amount of silicone-based lubricant to the pivot points if movement remains stiff.
8. Specifications

Figure 7: Detailed dimensions of the Mount-It! MI-4112 TV mount.
| Feature | Specification |
|---|---|
| Model Number | MI-4112 |
| Brand | Mount-It! |
| TV Size Compatibility | 37" to 80" |
| Weight Capacity | 88 lbs (40 kg) |
| VESA Compatibility | 100x100, 100x150, 150x100, 100x200, 200x100, 150x150, 200x200, 300x200, 400x200, 300x300, 400x300, 600x200, 400x400, 600x300, 600x400 |
| Extension from Wall | 2.6" (retracted) to 14" (extended) |
| Tilt Angle | +3° / -15° |
| Swivel Angle | +/-60° |
| Screen Level Adjustment | +/-3° |
| Material | High-Strength Steel |
| Color | Black |
| Item Weight | 8.23 pounds |
| UPC | 810041739810 |

Figure 8: VESA compatibility and TV size range.
9. Warranty and Support
Mount-It! provides a Lifetime Warranty for this VESA wall mount. This warranty covers defects in materials and workmanship under normal use.
For any questions, assistance, or warranty claims, please contact Mount-It! customer service. Our team is available to help ensure your purchase is worry-free.
Contact Information: Please refer to the Mount-It! official website or product packaging for the most current customer service contact details.


