1. Introduction
This manual provides comprehensive instructions for the safe and efficient operation, setup, and maintenance of your La Pavoni LPSCCB01US CELLINI CLASSIC Semi-Professional Espresso Machine. Please read this manual thoroughly before using the appliance and retain it for future reference.
The La Pavoni CELLINI CLASSIC is designed for semi-professional use, featuring a traditional design with rotary valves, cool-touch wands, and a robust AISI 304 bodywork. It incorporates an electronic automatic water level system, an anti-vacuum valve, a removable water tank, and a boiler manometer for precise control and ease of use.
2. Important Safety Instructions
When using electrical appliances, basic safety precautions should always be followed to reduce the risk of fire, electric shock, and/or injury to persons, including the following:
- Read all instructions before using the espresso machine.
- Do not touch hot surfaces. Use handles or knobs.
- To protect against fire, electric shock, and injury to persons, do not immerse cord, plugs, or the appliance in water or other liquid.
- Close supervision is necessary when any appliance is used by or near children.
- Unplug from outlet when not in use and before cleaning. Allow to cool before putting on or taking off parts, and before cleaning the appliance.
- Do not operate any appliance with a damaged cord or plug or after the appliance malfunctions, or has been damaged in any manner.
- The use of accessory attachments not recommended by the appliance manufacturer may result in fire, electric shock, or injury to persons.
- Do not use outdoors.
- Do not let cord hang over edge of table or counter, or touch hot surfaces.
- Do not place on or near a hot gas or electric burner, or in a heated oven.
- Always attach plug to appliance first, then plug cord into the wall outlet. To disconnect, turn any control to “off”, then remove plug from wall outlet.
- Do not use appliance for other than intended use.
- Scalding may occur if the water tank lid is removed during the brewing cycle.
3. Product Overview
The La Pavoni CELLINI CLASSIC espresso machine is engineered for optimal performance and durability. Below are its key components and features:
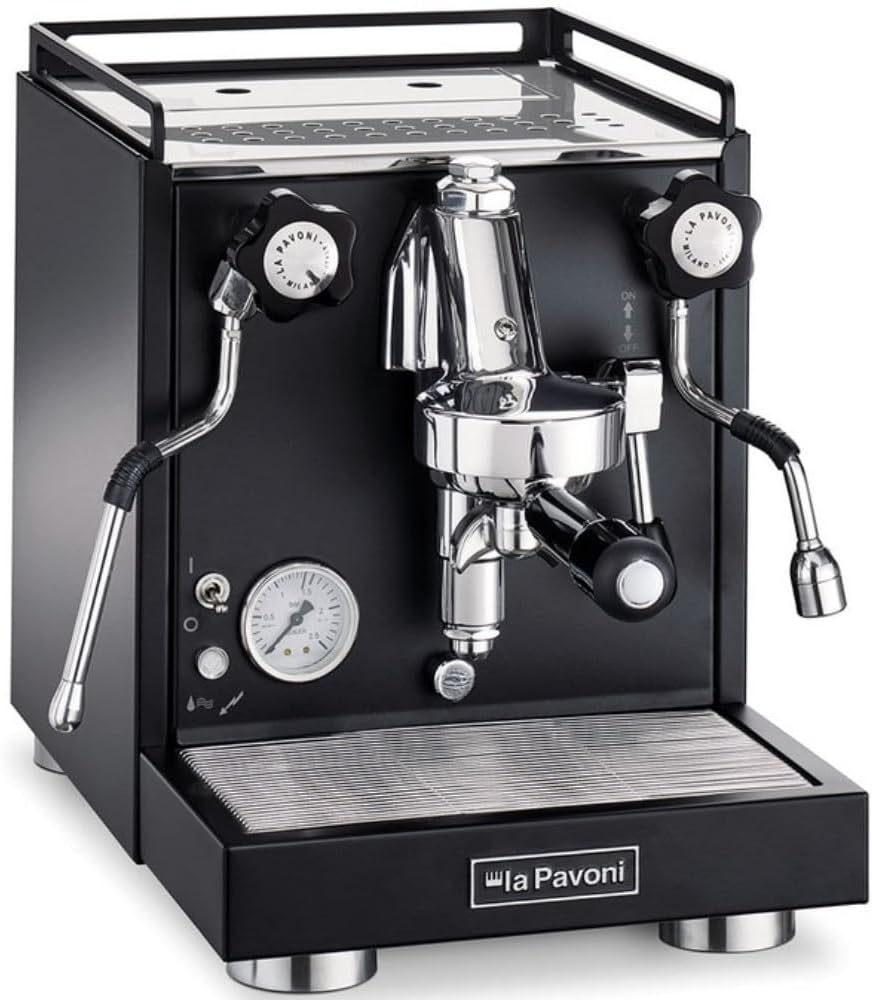
Figure 1: Front view of the La Pavoni CELLINI CLASSIC Espresso Machine, showcasing the group head, steam and hot water wands, pressure gauge, and control knobs.
Key Features:
- Electronic Automatic Water Level: Ensures the boiler maintains the correct water volume automatically.
- Anti-Vacuum Valve: Prevents vacuum formation inside the boiler during cooling.
- Removable Water Tank: Facilitates easy refilling and cleaning, with a capacity of 2.9 liters.
- Boiler Manometer: Displays the boiler pressure for monitoring system status.
- Temperature Light Indicator: Illuminates to indicate when the machine has reached optimal brewing temperature.
- Cool Touch Wands: Both the steam and hot water wands are made of stainless steel and designed to remain cool to the touch during operation, enhancing safety.
- E61 Brewing Group: A classic, robust brass brewing group known for its temperature stability and pre-infusion capabilities.
- Copper & Brass Boiler: A durable 1.8-liter boiler constructed from copper and brass for excellent heat retention.
- Vibration Pump: Provides 15 bar of pressure for optimal espresso extraction.
- Passive Cup Warmer: Located on top of the machine, it utilizes residual heat to warm espresso cups.
4. Setup
4.1 Unpacking
Carefully remove the espresso machine and all accessories from the packaging. Retain packaging materials for future transport or storage.
4.2 Placement
Place the machine on a stable, level, and heat-resistant surface. Ensure adequate clearance around the machine for ventilation and access to the water tank and power cord. Avoid placing it near heat sources or in direct sunlight.
4.3 Water Tank Filling
- Remove the water tank from the back of the machine.
- Fill the tank with fresh, cold, filtered water up to the maximum fill line. The tank has a capacity of 2.9 liters.
- Carefully reinsert the water tank into its position, ensuring it is seated correctly.
4.4 Power Connection
Ensure the machine's power switch is in the OFF position. Plug the power cord (1.8 m length) into a grounded 120V, 60Hz electrical outlet. The machine operates at 1400W.
4.5 Initial Start-up and Priming
- Turn the main power switch to the ON position. The temperature light indicator will illuminate.
- The pump will activate briefly to fill the boiler. This is normal.
- Open the steam valve for a few seconds until water flows out, then close it. This purges air from the steam wand.
- Open the hot water valve for a few seconds until water flows out, then close it. This purges air from the hot water wand.
- Allow the machine to heat up. The boiler manometer will show increasing pressure. The temperature light indicator will turn off once the optimal temperature is reached, typically within 15-20 minutes.
5. Operating Instructions

Figure 2: Front view highlighting the control knobs for steam and hot water, and the brew lever.
5.1 Brewing Espresso
- Ensure the machine is fully heated and the temperature light is off.
- Grind fresh coffee beans to an espresso-fine consistency.
- Dose the portafilter with the desired amount of ground coffee and tamp evenly.
- Insert the portafilter into the E61 brewing group and lock it into place.
- Place your espresso cup(s) under the portafilter spouts.
- Lift the brew lever fully to initiate the brewing process. The pump will activate.
- Monitor the espresso extraction. Once the desired volume is reached (typically 25-30 seconds for a double shot), lower the brew lever to stop the flow.
- Remove the portafilter, discard the spent coffee grounds, and rinse the portafilter.
5.2 Using the Steam Wand
The stainless steel cool-touch steam wand is used for frothing milk for lattes and cappuccinos.
- Ensure the machine is at steaming temperature (boiler manometer will indicate higher pressure than brewing).
- Purge any condensed water from the steam wand by briefly opening the steam rotary knob and closing it.
- Immerse the tip of the steam wand just below the surface of cold milk in a frothing pitcher.
- Slowly open the steam rotary knob to release steam.
- Once the milk reaches the desired temperature and texture, close the steam rotary knob.
- Immediately wipe the steam wand with a damp cloth to prevent milk residue from drying.
5.3 Using the Hot Water Wand
The stainless steel cool-touch hot water wand provides hot water for americanos, tea, or pre-warming cups.
- Place a cup under the hot water wand.
- Open the hot water rotary knob to dispense hot water.
- Close the knob once the desired amount of hot water is dispensed.
6. Maintenance

Figure 3: Side view of the espresso machine, showing the removable water tank access.
6.1 Daily Cleaning
- Drip Tray: Empty and clean the drip tray daily. Wash with warm, soapy water and rinse thoroughly.
- Steam and Hot Water Wands: After each use, wipe the wands with a damp cloth. Periodically, remove the tip and clean any dried milk or mineral deposits.
- Portafilter and Baskets: Rinse the portafilter and filter baskets after each use.
- Group Head: Perform a quick backflush with a blind filter (without coffee) to rinse the group head.
6.2 Weekly Cleaning
- Group Head Backflush: Perform a thorough backflush with espresso machine cleaning detergent. Follow the detergent manufacturer's instructions.
- Water Tank: Remove and clean the water tank with warm, soapy water. Rinse thoroughly to prevent mold or mineral buildup.
6.3 Descaling
The frequency of descaling depends on your water hardness. It is recommended to descale every 2-3 months or as needed. Use a descaling solution specifically designed for espresso machines and follow the product's instructions carefully. Regular descaling prevents mineral buildup and ensures optimal machine performance.
7. Troubleshooting
This section addresses common issues you might encounter with your espresso machine. For problems not listed here, please contact customer support.
| Problem | Possible Cause | Solution |
|---|---|---|
| Machine does not turn on | No power, faulty outlet, power cord not connected | Check power cord connection, try a different outlet, ensure power switch is ON. |
| No water flow from group head | Water tank empty, pump not primed, blockage | Refill water tank, prime the pump (see Setup), check for blockages in portafilter or group head. |
| Weak steam from wand | Wand tip clogged, machine not at steaming temperature | Clean steam wand tip, allow machine to fully heat up to steaming temperature. |
| Espresso extracts too fast/slow | Coffee grind too coarse/fine, incorrect tamping | Adjust grind size (finer for slow, coarser for fast), ensure consistent tamping pressure. |
| Water tank empty alarm activates | Water level is low | Refill the water tank. |
8. Specifications
Detailed technical specifications for the La Pavoni LPSCCB01US CELLINI CLASSIC Espresso Machine:
| Feature | Specification |
|---|---|
| Model Name | LPSCCB01US CELLINI CLASSIC |
| Brand | La Pavoni |
| Color | Matte Black |
| Power | 1400W |
| Voltage | 120V |
| Frequency | 60Hz |
| Boiler Type | Single Boiler w/ Heat Exchanger |
| Boiler Material | Copper & Brass |
| Boiler Capacity | 1.8 liters |
| Water Tank Capacity | 2.9 liters |
| Pump Type | Vibration |
| Pump Pressure | 15 bar |
| Brewing Group | E61 (Brass, Chromed) |
| Steam Wand Material | Stainless Steel - Cool Touch |
| Water Wand Material | Stainless Steel - Cool Touch |
| Dimensions (DxWxH) | 430 x 295 x 365 mm |
| Net Weight | 23 kg (50.7 lbs) |
| Power Cord Length | 1.8 m |
| Special Features | Electronic Automatic Water Level, Anti-Vacuum Valve, Removable Water Tank, Boiler Manometer, Temperature Light Indicator |
| Operation Mode | Manual |
| Made In | Italy |
9. Warranty and Support
For warranty information and customer support, please refer to the documentation provided with your purchase or contact the retailer. Keep your proof of purchase for any warranty claims.


