1. Introduction
Thank you for choosing the Empava 30 Inch Professional Gas Range. This manual provides essential information for the safe and efficient installation, operation, and maintenance of your appliance. Please read it thoroughly before use and retain it for future reference.
Safety Information
This appliance is CSA-certified for safety and performance, ensuring it meets recognized standards. Always follow all safety instructions to prevent injury or damage.
- Ensure proper ventilation during operation.
- Do not store flammable materials near the appliance.
- Keep children and pets away from the range during operation.
- Refer to local codes and regulations for installation requirements.
2. Product Overview
The Empava 30 Inch Professional Gas Range is designed for versatile cooking, featuring a four-burner cooktop and a 4.2 Cu. Ft. convection oven. Its stainless steel construction offers durability and a modern aesthetic.
Key Features
- High-Powered Burners: Four sealed burners, including two 15,000 BTU semi-rapid burners and two 9,000 BTU rapid burners, for precise cooking control.
- Spacious Convection Oven: 4.2 Cu. Ft. capacity with a convection fan for even heat distribution and faster cooking.
- Durable Construction: Sleek stainless steel finish for longevity and easy cleaning.
- Heavy-Duty Grates: Continuous cast iron grates provide a stable surface for cookware.
- LED Knobs & Oven Lighting: Zinc alloy control knobs with LED lights indicate when burners are active, and two halogen lights illuminate the oven interior.
- Safety Re-Ignition: Automatic re-ignition system ensures consistent flame performance.
- Easy-to-Clean Interior: Vibrant blue porcelain oven interior resists stains and spills.
Components
The product package includes:
- Empava Gas Range
- 2 Oven Racks and 1 Tray
- 120-Volt GFCI Power Cord
- Gas Regulator
- LPG Conversion Nozzles
- User Manual (this document)

Figure 2.1: Front view of the Empava 30 Inch Professional Gas Range, showcasing the stainless steel finish, control knobs, and oven door.

Figure 2.2: Angled view of the gas range, highlighting the cooktop grates and control panel.
3. Setup & Installation
Proper installation is crucial for the safe and optimal performance of your gas range. It is recommended that installation be performed by a qualified professional.
Dimensions and Cutout Requirements
Ensure your kitchen space meets the following dimensions:
- Product Dimensions (W x D x H): 30 in. x 27.3 in. x 37.6 in.
- Cutout Dimensions (W x D x H): 30.12 in. x 27.3 in. x 37.6 in.

Figure 3.1: Diagram illustrating the product and cutout dimensions for installation.
Gas Connection
The range is pre-installed for natural gas use and includes a gas regulator. For liquid propane (LPG) gas use, the included LPG conversion nozzles must be installed. This conversion should only be performed by a qualified technician.
Electrical Connection
The range requires a standard 120V GFCI power cord (pre-installed) and a 15-amp breaker. Ensure the electrical supply meets these requirements.
4. Operating Instructions
Cooktop Burners
The cooktop features four sealed burners with continuous cast iron grates. The zinc alloy control knobs have LED lights that illuminate when a burner is active.

Figure 4.1: Cooktop burners in operation with cookware, demonstrating flame distribution.
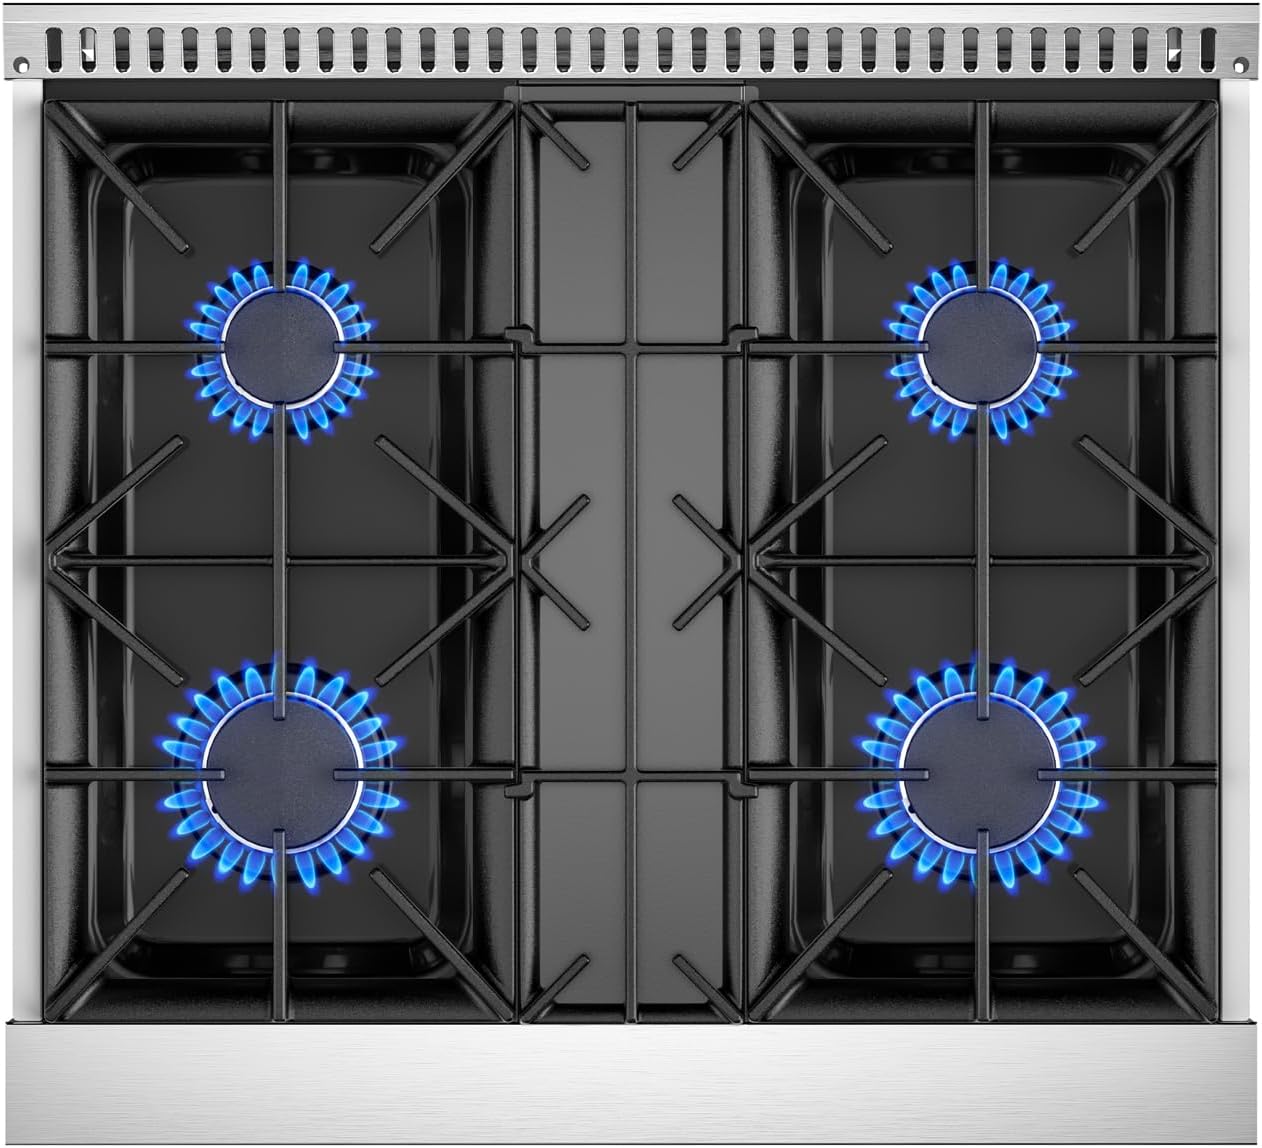
Figure 4.2: Close-up view of the cooktop burners and cast iron grates.
- Place cookware centrally on the grate above the desired burner.
- Push in and turn the corresponding control knob counter-clockwise to the "HIGH" position.
- The automatic re-ignition system will ignite the burner. If the flame does not ignite within a few seconds, turn the knob off and repeat the process.
- Adjust the flame size by turning the knob between "HIGH" and "LOW" settings.
- To turn off, turn the knob clockwise to the "OFF" position.
Oven Operation
The 4.2 Cu. Ft. oven features true convection for even cooking and two adjustable racks.
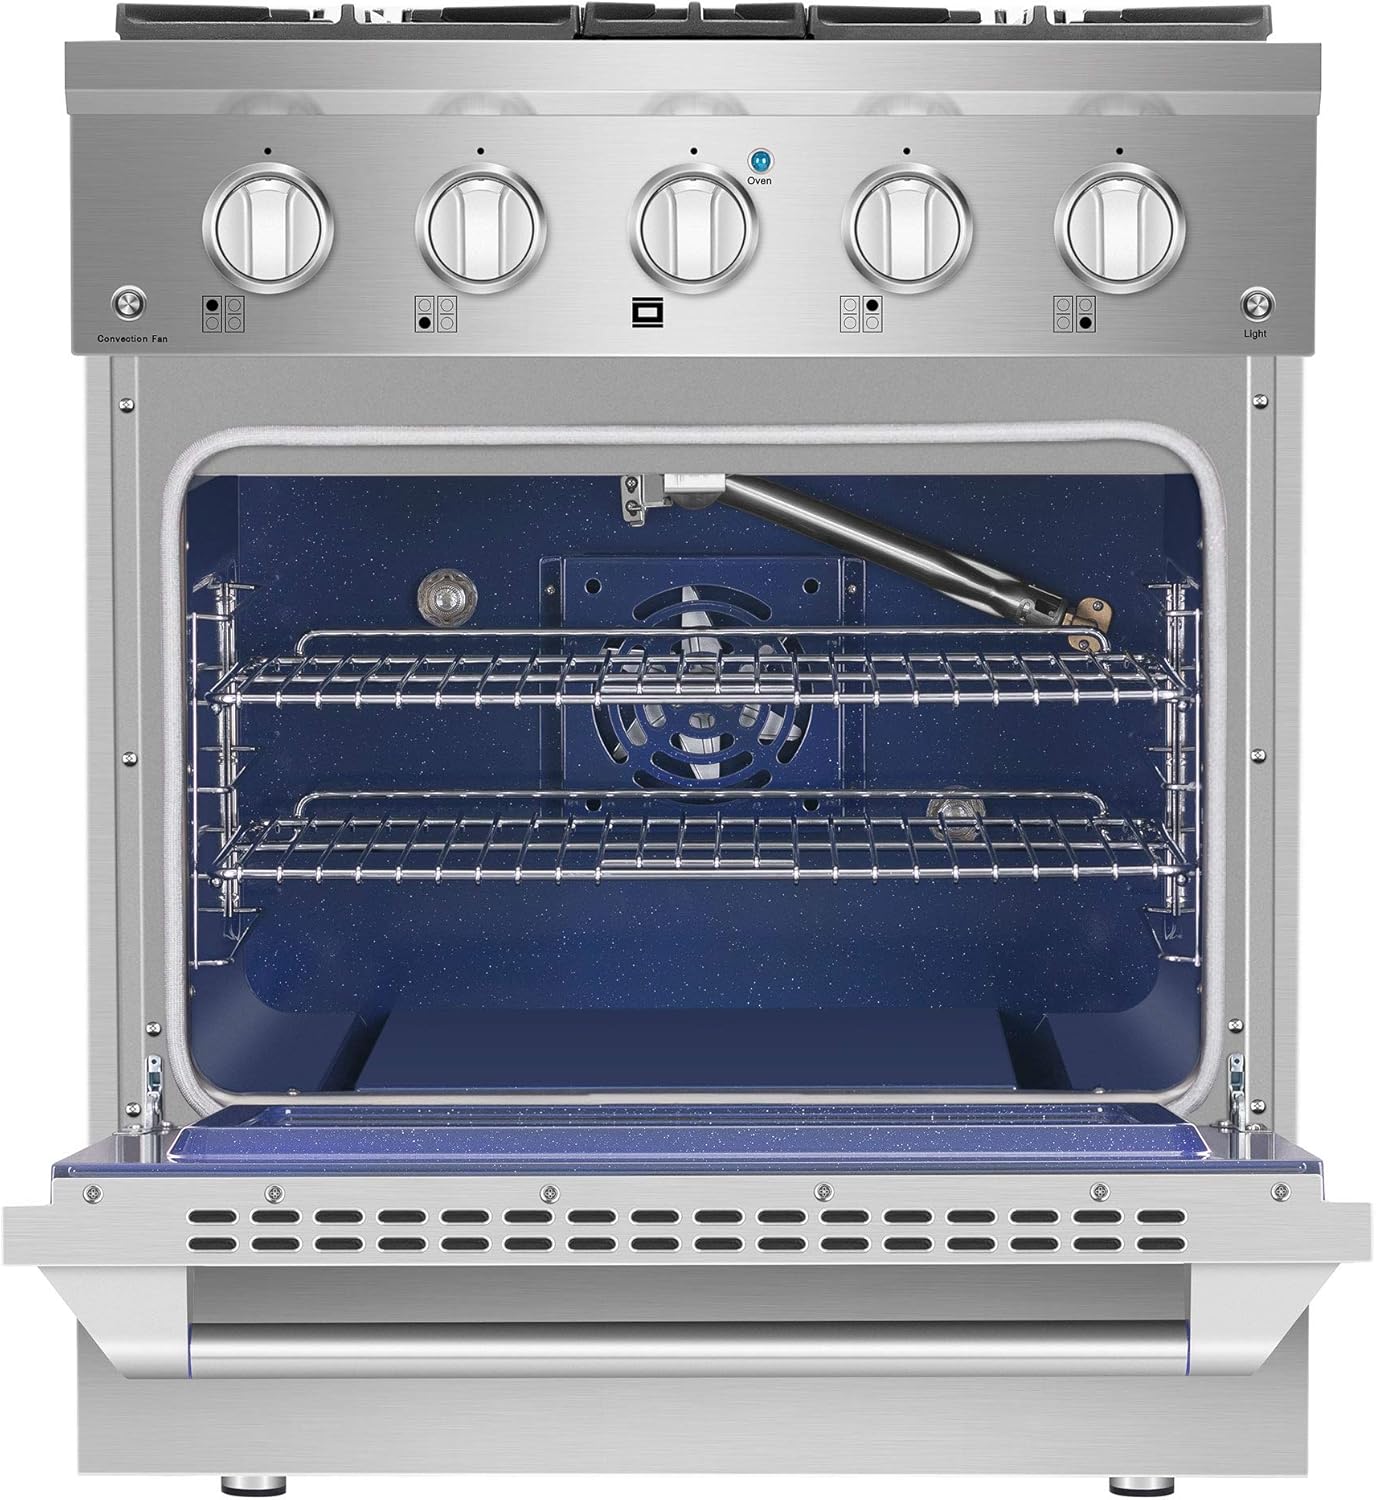
Figure 4.3: View of the oven interior, showing the blue porcelain finish and adjustable racks.
- Setting Oven Temperature: Turn the oven control knob to the desired temperature. The oven will begin to preheat.
- Convection Fan: The convection fan button (labeled "Convection Fan") activates the fan for even heat distribution. Press to turn on/off.
- Oven Light: The oven light button (labeled "Light") illuminates the oven interior. Press to turn on/off.
- Rack Adjustment: The two oven racks can be placed in various positions to accommodate different dish sizes.
- Monitoring Food: Use the oven light and the large viewing window to monitor food without opening the door, which helps maintain consistent oven temperature.

Figure 4.4: Close-up of the control panel, showing the zinc alloy knobs and indicator lights for oven and convection fan.
5. Maintenance & Cleaning
Regular cleaning and maintenance will ensure the longevity and optimal performance of your Empava gas range.
General Cleaning
- Always ensure the appliance is cool and disconnected from the power supply before cleaning.
- Use mild soap and water with a soft cloth for general cleaning of exterior surfaces.
- Avoid abrasive cleaners, scouring pads, or harsh chemicals that can damage the stainless steel finish.
Cooktop and Grates
- The heavy-duty cast iron grates can be removed for cleaning. Wash them with warm, soapy water and dry thoroughly.
- Clean around the sealed burners with a damp cloth. Do not immerse burner components in water.
Oven Interior
The vibrant blue porcelain interior is designed to resist stains and spills, making cleaning easier.
- For light spills, wipe with a damp cloth and mild detergent once the oven has cooled.
- For tougher stains, use an oven cleaner specifically designed for porcelain enamel, following the product instructions carefully.
- The oven racks can be removed and cleaned in a sink with warm, soapy water.
6. Troubleshooting
Before contacting customer support, review the following common issues and solutions.
| Problem | Possible Cause | Solution |
|---|---|---|
| Burner does not ignite. | Gas supply off, power outage, clogged burner port. | Check gas valve. Verify power to the range. Clean burner ports if necessary (ensure range is off and cool). |
| Oven not heating. | Incorrect temperature setting, power issue, gas supply issue. | Confirm temperature setting. Check power connection and circuit breaker. Verify gas supply. |
| Uneven cooking in oven. | Improper rack placement, convection fan off, overloaded oven. | Adjust rack position. Ensure convection fan is on for even cooking. Avoid overcrowding the oven. |
| Gas odor detected. | Gas leak. | Immediately turn off gas supply to the range. Open windows for ventilation. Do not operate electrical switches. Contact a qualified technician or gas company immediately. |
If the problem persists after attempting these solutions, please contact Empava customer support.
7. Specifications
| Feature | Detail |
|---|---|
| Brand | Empava |
| Model Number | 30GR07-V |
| Installation Type | Freestanding & Slide-In |
| Material Type | Stainless Steel |
| Item Weight | 218 pounds |
| Product Dimensions (W x D x H) | 30 in. x 27.3 in. x 37.6 in. |
| Oven Capacity | 4.2 Cubic Feet |
| Heating Elements | 4 Sealed Burners (Two 15,000 BTU, Two 9,000 BTU) |
| Oven Racks | 2 |
| Control Console | Knob |
| Voltage | 120 Volts |
| Certification | CSA |
| Gas Type | Natural Gas (LPG Convertible) |
8. Warranty & Support
Warranty Information
The Empava 30 Inch Professional Gas Range is backed by a 2-year warranty, covering defects in materials and workmanship under normal use. Please retain your proof of purchase for warranty claims.
For detailed warranty terms and conditions, please refer to the warranty card included with your product or visit the official Empava website.
Customer Support
If you have any questions, require technical assistance, or need to schedule service, please contact Empava customer support. Contact information can typically be found on the Empava website or in the product packaging.
When contacting support, please have your model number (30GR07-V) and purchase date readily available.


