1. Important Safety Information
Please read and understand all instructions before assembly and use. Retain this manual for future reference.
- Always assemble the desk according to the instructions provided.
- Ensure the desk is properly anchored to the floor to prevent tipping, especially if heavy items are placed on the hutch.
- Do not overload the desk or place heavy objects on the top hutch beyond its structural capacity.
- Exercise caution when using the integrated power outlets and USB charging ports to prevent electrical hazards. Ensure all devices are compatible with the provided power specifications.
- Keep children and pets away from the assembly area. Small parts can be a choking hazard.
- Use only the hardware provided or specified by the manufacturer.
2. Package Contents
Verify that all components are present before beginning assembly. If any parts are missing or damaged, contact customer support.
- Desk Panels (L-shaped desktop, hutch shelf, drawer panels)
- Metal Frame Components
- 4 Fabric Storage Drawers
- Grid Pegboard
- Power Outlet Strip with 3 AC Outlets and 2 USB Ports
- LED Light Strips (2 units)
- Headphone Hook
- Adjustable Foot Pads
- Assembly Hardware (screws, bolts, tools)
- Instruction Manual
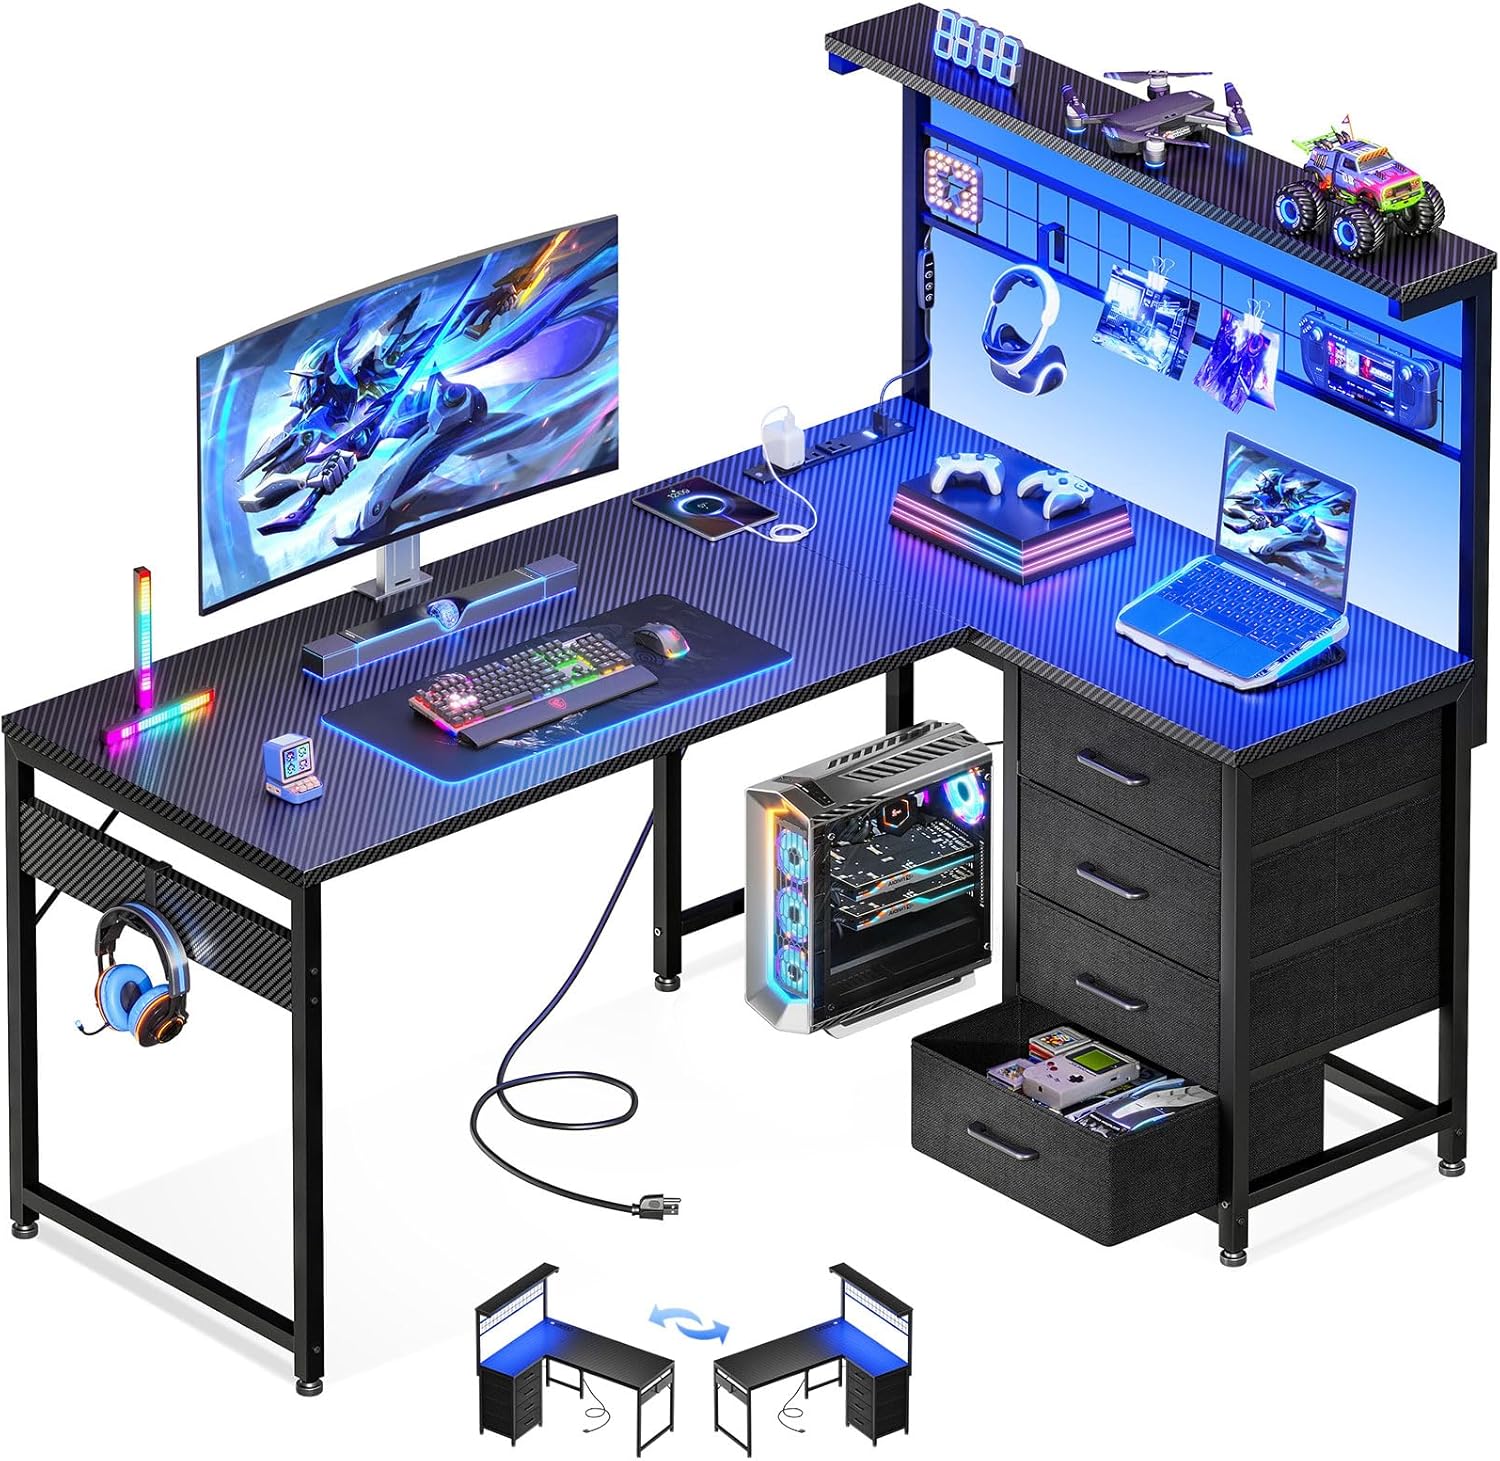
Image: Overview of the MOTPK L-Shaped Gaming Desk, showcasing its various features including the L-shaped desktop, hutch, drawers, and LED lighting.
3. Setup and Assembly Instructions
Assembly requires following the detailed step-by-step instructions provided in the separate assembly guide included with your package. All necessary tools are included.
- Preparation: Clear a spacious area for assembly. Lay out all parts and hardware, comparing them against the package contents list.
- Frame Assembly: Begin by assembling the metal frame components as per the instructions. Ensure all connections are secure.
- Desktop Installation: Attach the L-shaped desktop panels to the assembled frame.
- Reversible Configuration: The desk is reversible. Decide whether you want the hutch and drawer unit on the left or right side before proceeding. The top hutch can be fixed on either side.
- Hutch and Storage Unit Assembly: Assemble and attach the hutch, grid pegboard, and the frame for the fabric drawers.
- Drawer Insertion: Insert the four fabric storage drawers into their designated slots.
- Power Outlet Installation: Secure the power outlet strip into its recessed position on the desk.
- LED Light Strip Application: Apply the LED light strips to the desired locations, typically under the hutch or along the desk edges, using the adhesive backing.
- Headphone Hook Attachment: Attach the headphone hook to a convenient location on the desk frame.
- Adjustable Foot Pads: Adjust the foot pads at the base of the desk to ensure stability on uneven surfaces.

Image: Illustration demonstrating the reversible nature of the L-shaped desk, allowing the hutch and drawer unit to be configured on either the left or right side.
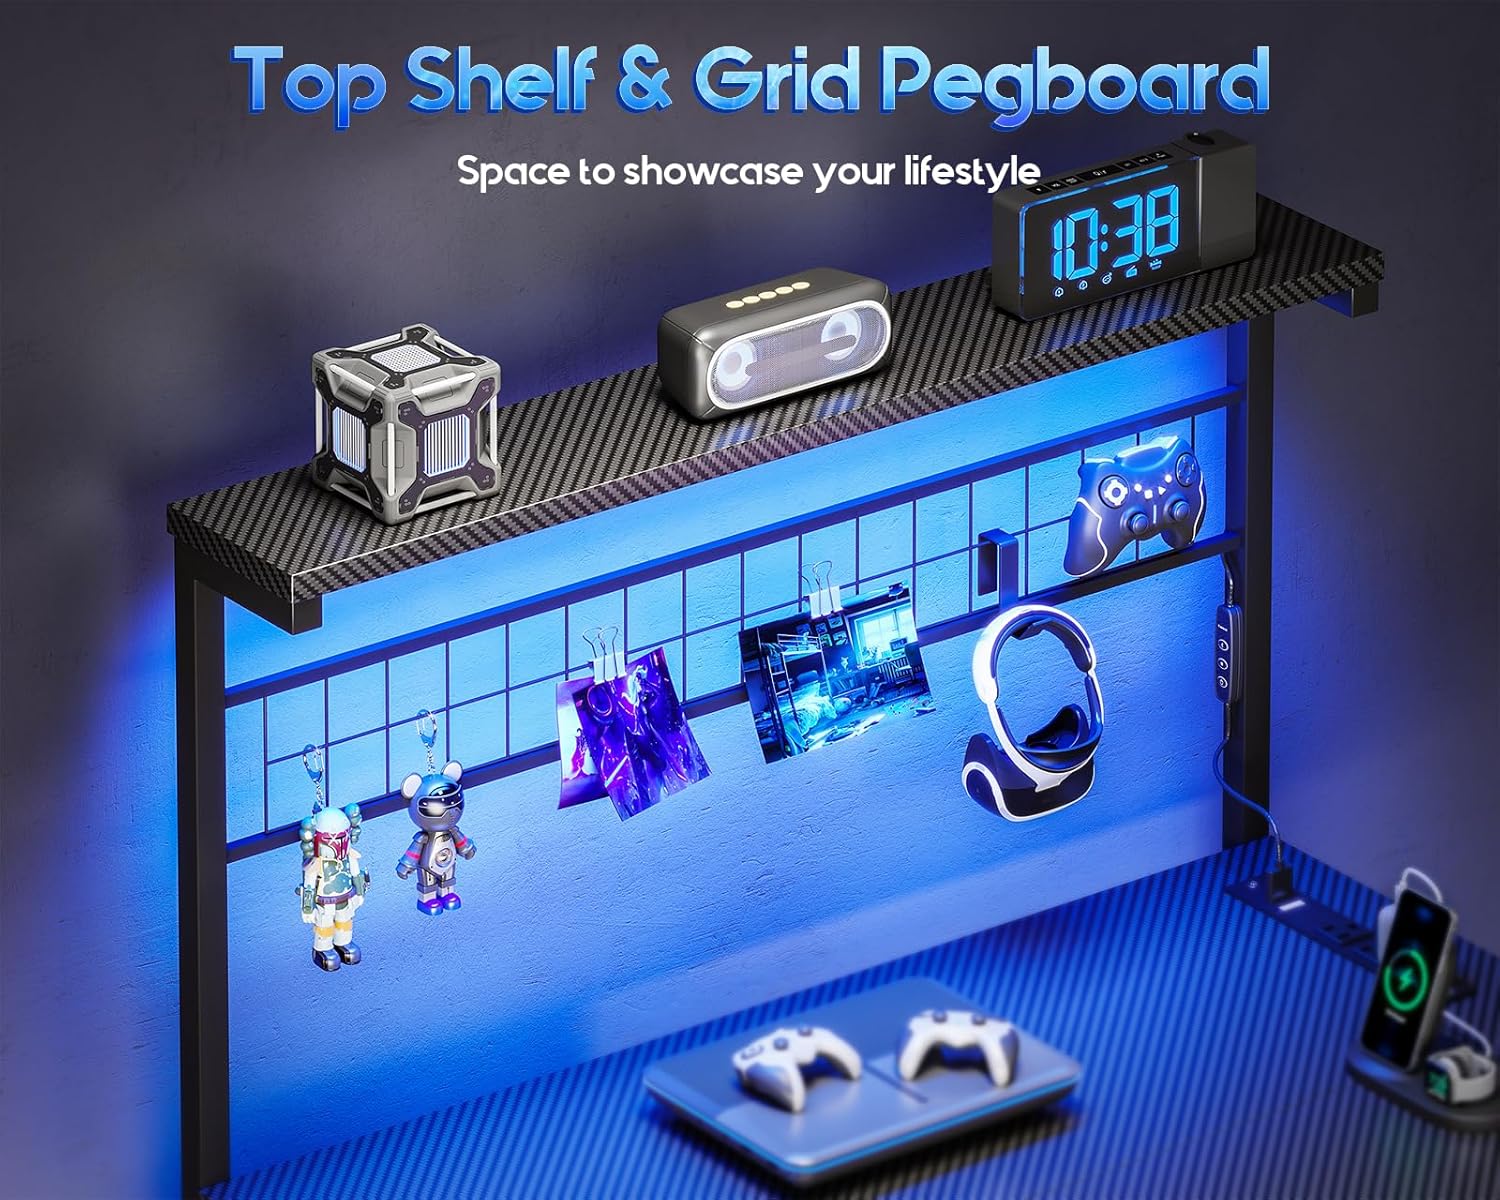
Image: A detailed diagram showing the dimensions of the desk, including the L-shape, hutch, and drawer unit, with measurements in inches.
4. Operating Instructions
4.1. LED Light Strips
The desk features two LED light strips for customizable ambiance.
- Power On/Off: Connect the LED light strips to a power source. Use the integrated controller to turn the lights on or off.
- Color Selection: Choose from 10 static colors using the controller.
- Dynamic Modes: Select from 10 dynamic lighting modes for various effects.
- Brightness Adjustment: Adjust the brightness level (6 grades available) to suit your preference and reduce eye fatigue.
- Memory Function: The lights retain the last selected setting when powered off and on.

Image: Close-up of the LED light strip controller, illustrating the buttons for color, mode, and brightness adjustments.
4.2. Power Outlets & USB Charging Ports
The integrated power strip provides convenient access to power for your devices.
- AC Outlets: The strip includes 3 standard AC outlets (125V/12A) for powering monitors, computers, and other peripherals.
- USB Ports: Two USB charging ports (5V/2A) are available for charging smartphones, tablets, gaming controllers, and other USB-powered devices.
- Power Cord: The power cord is 4.9 feet long, allowing flexible placement of the desk.
- Usage: Plug the desk's main power cord into a wall outlet. Then, connect your electronic devices to the AC outlets or USB ports on the desk.

Image: A view of the desk's integrated power strip, showing the three AC outlets and two USB charging ports in use with various devices.
4.3. Storage Features
- Fabric Drawers: Utilize the four fabric drawers for organizing documents, accessories, or gaming gear.
- Grid Pegboard: The pegboard allows for hanging small items, cables, or decorative elements.
- Top Shelf: The hutch's top shelf provides additional space for displays, speakers, or other items.
- Headphone Hook: Use the hook to keep headphones or bags off the desktop.

Image: Close-up of the four fabric storage drawers, demonstrating their capacity for organizing various items.
5. Maintenance
- Cleaning: Wipe the desk surfaces with a soft, damp cloth. Avoid harsh chemicals or abrasive cleaners that may damage the finish.
- Dusting: Regularly dust the desk, especially around the power outlets and LED strips, to prevent accumulation.
- Hardware Check: Periodically check all screws and bolts to ensure they remain tight. Retighten if necessary.
- LED Strips: If the LED strips become loose, re-secure them with appropriate adhesive.
- Drawer Care: The fabric drawers can be spot cleaned with a mild detergent if needed. Ensure they are completely dry before reinserting.
6. Troubleshooting
- Problem: LED lights do not turn on.
- Solution: Ensure the LED strips are properly connected to their power source and the desk's main power cord is plugged into a functional wall outlet. Check the controller for proper operation.
- Problem: Power outlets or USB ports are not working.
- Solution: Verify that the desk's main power cord is securely plugged into a live wall outlet. Check if the power strip itself is properly installed and connected. Test with a different device to rule out device issues.
- Problem: Desk feels unstable or wobbly.
- Solution: Ensure all assembly hardware (screws, bolts) are securely tightened. Adjust the leveling foot pads at the bottom of the desk to compensate for uneven flooring.
- Problem: Missing parts or damaged components during assembly.
- Solution: Refer to the "Customer Support" section for contact information to request replacement parts or assistance.
7. Product Specifications
| Feature | Specification |
|---|
| Brand | MOTPK |
| Model Number | B02022S70PF1004USDF |
| Product Dimensions (D x W x H) | 43.31"D x 31.5"W x 30"H |
| Color | Black Carbon Fiber |
| Material | Engineered Wood (Top), Alloy Steel (Base) |
| Item Weight | 41.58 Pounds |
| Special Features | Reversible L-Shape, LED Lights, Power Outlets (3 AC, 2 USB), 4 Drawers, Grid Pegboard, Headphone Hook, Adjustable Foot Pads |
| Power Outlet Specifications | 3 AC Outlets (125V/12A), 2 USB Ports (5V/2A) |
| Power Cord Length | 4.9 Feet |
| LED Light Features | 10 Static Colors, 10 Dynamic Modes, 6 Brightness Grades, Memory Function |
| Number of Drawers | 4 |
| Assembly Required | Yes (All tools included) |
8. Warranty Information
This product comes with a Limited Warranty. Please refer to the warranty card included in your package for specific terms, conditions, and duration. The warranty typically covers manufacturing defects and material flaws under normal use.
For warranty claims or inquiries, please contact MOTPK customer support.
9. Customer Support
If you encounter any issues during assembly or operation, or if you have questions regarding your MOTPK L-Shaped Gaming Desk, please contact our customer support team.
Contact Information:
- Email: [Refer to product packaging or official website for email]
- Phone: [Refer to product packaging or official website for phone number]
- Online Support: Visit the official MOTPK website for FAQs and support resources.
Please have your model number (B02022S70PF1004USDF) and purchase date ready when contacting support.


