Phonjoroo 10'x7'x7'
Phonjoroo 10'x7'x7' Walk-in Greenhouse Instruction Manual
Model: 10'x7'x7'
Introduction
Thank you for choosing the Phonjoroo 10'x7'x7' Walk-in Greenhouse. This manual provides essential information for the proper assembly, safe operation, effective maintenance, and basic troubleshooting of your greenhouse. Please read these instructions carefully before beginning assembly and retain this manual for future reference.
1. Setup and Assembly
Careful assembly is crucial for the stability and longevity of your greenhouse. Ensure all components are present before starting.
1.1 Unpacking and Component Check
Unpack all parts and compare them against the included parts list (not provided in this document, refer to your product packaging). Identify all frame components, connectors, the PE mesh cover, and accessories.
1.2 Frame Assembly
- Begin by connecting the galvanized frame tubes using the provided connectors. The upgraded galvanized material and horizontal/diagonal bars are designed for increased load-bearing and stability.
- Assemble the base frame first, ensuring it is square and level.
- Proceed to assemble the arch sections, connecting them to the base.
- Important: Do not fully tighten screws until all frame components are in their final positions. This allows for minor adjustments during assembly. Once all parts are correctly aligned, tighten all screws securely. The screw covers prevent scratching and rusting.

Image: Illustrates various frame components and connection points for the greenhouse structure.
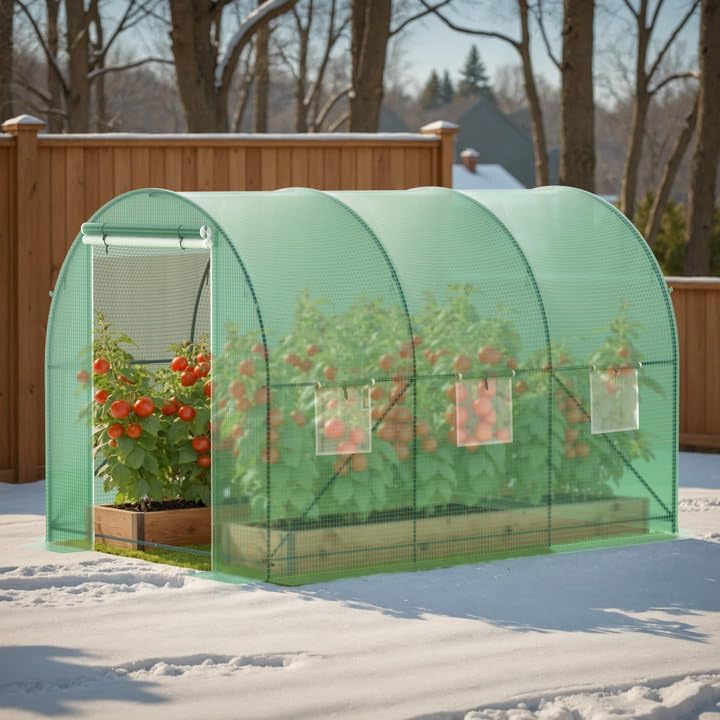
Image: A detailed view of how two frame tubes connect, highlighting the secure fitting.
1.3 Cover Installation
- Carefully drape the 140g PE plastic mesh cover over the assembled frame. Ensure it is centered and evenly distributed.
- Secure the cover to the frame according to the design (e.g., ties, clips, or integrated fasteners).
- The bottom of the greenhouse cloth features an extension design. To enhance stability, place heavy objects such as stones or sandbags on this extension around the perimeter.
1.4 Securing the Greenhouse
For added security, stability, and strength, utilize the included ground spikes and wind ropes:
- 4 L-shaped ground spikes
- 6 U-shaped ground spikes
- 4 wind ropes
Anchor the greenhouse firmly to the ground, especially in areas prone to wind.
2. Operating Instructions
Proper operation ensures an optimal growing environment for your plants.
2.1 Door Management
The front of the greenhouse features a double zipper roll-up door system:
- Screen Door: This inner door helps prevent small insects from entering and harming your plants while allowing some airflow.
- PE Door: The outer PE door is used for heat preservation, maintaining the indoor temperature, especially during cooler periods.
Roll up and secure the doors as needed for access or ventilation.
2.2 Ventilation Control
The greenhouse is equipped with 6 ventilated mesh windows to facilitate air circulation and airflow.

Image: Shows the greenhouse exterior with arrows illustrating how air circulates through the mesh windows for effective ventilation.
- Open windows during warm periods to prevent overheating and ensure adequate air exchange.
- Recommendation: Close the door and windows in windy and snowy weather to maintain indoor temperature and protect plants from harsh conditions.
2.3 Environmental Control
The 140g PE plastic mesh cover effectively blocks UV rays, mosquitoes, and insects, while withstanding wind and snow. This helps maintain a stable indoor temperature and humidity, prolonging the life of your plants.

Image: A view of the greenhouse with plants thriving inside, demonstrating its walk-in design and the open roll-up door for access.

Image: The greenhouse situated in a garden, providing a clear view of its full structure and design.
3. Maintenance
Regular maintenance will extend the lifespan of your greenhouse and ensure optimal performance.
3.1 Cleaning
- Clean the PE mesh cover periodically with mild soap and water. Avoid abrasive cleaners or harsh chemicals that could damage the material.
- Rinse thoroughly with clean water.
- Keep the interior free of debris and fallen leaves to prevent pest infestations and maintain cleanliness.
3.2 Inspection
- Regularly inspect the frame for any signs of rust, bending, or loose connections. Tighten any loose screws.
- Check the PE cover for tears, punctures, or excessive wear. Promptly repair any damage to maintain insulation and protection.
- Ensure the ground spikes and wind ropes are securely anchored, especially after strong winds or storms.
- Verify that the sandbags or stones placed on the bottom extension are still in place and providing adequate stability.
4. Troubleshooting
This section addresses common issues you might encounter.
4.1 Greenhouse Instability
- Issue: Greenhouse feels wobbly or unstable.
- Solution:
- Ensure all frame screws are fully tightened.
- Verify that the L-shaped and U-shaped ground spikes are firmly inserted into the ground.
- Check that the wind ropes are properly secured and taut.
- Confirm that sufficient weight (stones, sandbags) is placed on the bottom extension of the cover.
4.2 Poor Ventilation / Overheating
- Issue: Inside temperature is too high, or air feels stagnant.
- Solution:
- Open all 6 mesh windows.
- Roll up the front door (both screen and PE layers) to maximize airflow.
- Consider adding a small fan for forced air circulation if natural ventilation is insufficient in extreme heat.
4.3 Water Accumulation / Leaks
- Issue: Water pooling inside or dripping from the cover.
- Solution:
- Inspect the PE cover for any tears or holes. Patch small damages with appropriate repair tape.
- Ensure the cover is taut and properly secured to prevent sagging where water could collect.
- Check that the greenhouse is level to prevent water from pooling on one side.
5. Specifications
Key technical details for the Phonjoroo 10'x7'x7' Walk-in Greenhouse:
| Feature | Detail |
|---|---|
| Brand | Phonjoroo |
| Model | 10'x7'x7' |
| Overall Dimensions (L x W x H) | 92.91" x 132.28" x 78.74" (approximately 10' x 7' x 7') |
| Cover Material | 140g Polyethylene (PE) Mesh |
| Frame Material | Heavy Duty Galvanized Alloy Steel |
| Windows | 6 Ventilated Mesh Windows |
| Door Type | Double Zipper Roll-up Door (Screen + PE) |
| Color | Green |

Image: A technical drawing showing the overall dimensions (length, width, height) and specific measurements of the greenhouse, including window sizes.
6. Warranty and Support
Information regarding product warranty and customer support was not provided in the available product details. Please refer to your purchase documentation or contact the retailer/manufacturer directly for warranty claims or technical assistance.
Related Documents - 10'x7'x7'
 |
Ogrow Large Heavy Duty Walk-In Greenhouse Product Manual This manual provides assembly instructions for the Ogrow Large Heavy Duty Walk-In 2 Tier 8 Shelf Portable Lawn and Garden Greenhouse, model numbers OG4979-2T8 and OG03-GBK7449E. It includes a parts list, step-by-step assembly guidance for the frame, and instructions for the anchor kit. |
 |
YITAHOME YZZW-V2 Outdoor Greenhouse Assembly Instructions Comprehensive assembly instructions for the YITAHOME YZZW-V2 Outdoor Greenhouse, detailing parts, assembly steps, and important safety warnings for proper installation and use. |
 |
ShelterLogic Heavy Duty Walk-Thru Greenhouse 12' x 20' x 8' Assembly and Care Guide Comprehensive assembly instructions, care guide, and warranty information for the ShelterLogic Heavy Duty Walk-Thru Greenhouse (Model #70590). Learn how to safely install and maintain your greenhouse. |
 |
YITAHOME Greenhouse Assembly Instructions - Model ytah2658 Detailed assembly instructions for the YITAHOME 10'W X 26'D Heavy-duty Walk-in Hobby Greenhouse (model ytah2658). Includes parts list, safety warnings, and step-by-step guidance. |
 |
Outsunny 12' x 6' x 6.5' Polycarbonate Greenhouse Assembly Manual Detailed assembly instructions for the Outsunny 12' x 6' x 6.5' Polycarbonate Greenhouse. Includes parts list, step-by-step guidance, and tips for building your heavy-duty greenhouse with aluminum frame, adjustable roof vent, rain gutter, and sliding door. |
 |
ShelterLogic Heavy Duty Walk-Thru Greenhouse 12'x24'x8' - Installation & Anchor Guide Detailed installation and anchoring guide for the ShelterLogic Heavy Duty Walk-Thru Greenhouse (Model 70593, 12'x24'x8'). Includes safety warnings, parts list, step-by-step assembly instructions, and an anchor guide for various ground types. |
Ask a question about this manual
Ask about setup, troubleshooting, compatibility, parts, safety, or missing instructions. Manuals+ will review the question and use this page’s manual context to help answer it.