1. Introduction
The Povasee 4000A Jump Starter is a portable device designed to jump-start 12V vehicle batteries, including those in cars, trucks, motorcycles, boats, RVs, tractors, ATVs, UTVs, and lawnmowers. It is capable of starting engines up to 10L gas and 10L diesel. This device also functions as a power bank for charging electronic devices and includes an integrated LED flashlight for emergency situations.
This manual provides essential information for the proper use, maintenance, and troubleshooting of your jump starter. Please read it thoroughly before first use.
2. Package Contents
Verify that all items listed below are included in your package:
- Povasee 4000A Jump Starter (Model A20)
- Smart Jumper Cables
- USB-A to USB-C Charging Cable (adapter not included)
- Carrying Case
- User Manual

Image: The package contents, including the jump starter unit, smart jumper cables, USB-A to C cable, carrying case, and user manual.
3. Product Overview and Features
The Povasee 4000A Jump Starter features a 3-inch LCD display, dual USB output ports (including one QC3.0 port), and a 600-lumen LED light with multiple modes.

Image: Diagram illustrating the components of the jump starter, including USB outputs, indicator lights, EC5 output port, ON/OFF button, LED flashlight, and USB-C input.
3.1. HD LCD Display
The integrated 3-inch LCD display provides clear information on the remaining power percentage and operational status of the unit.
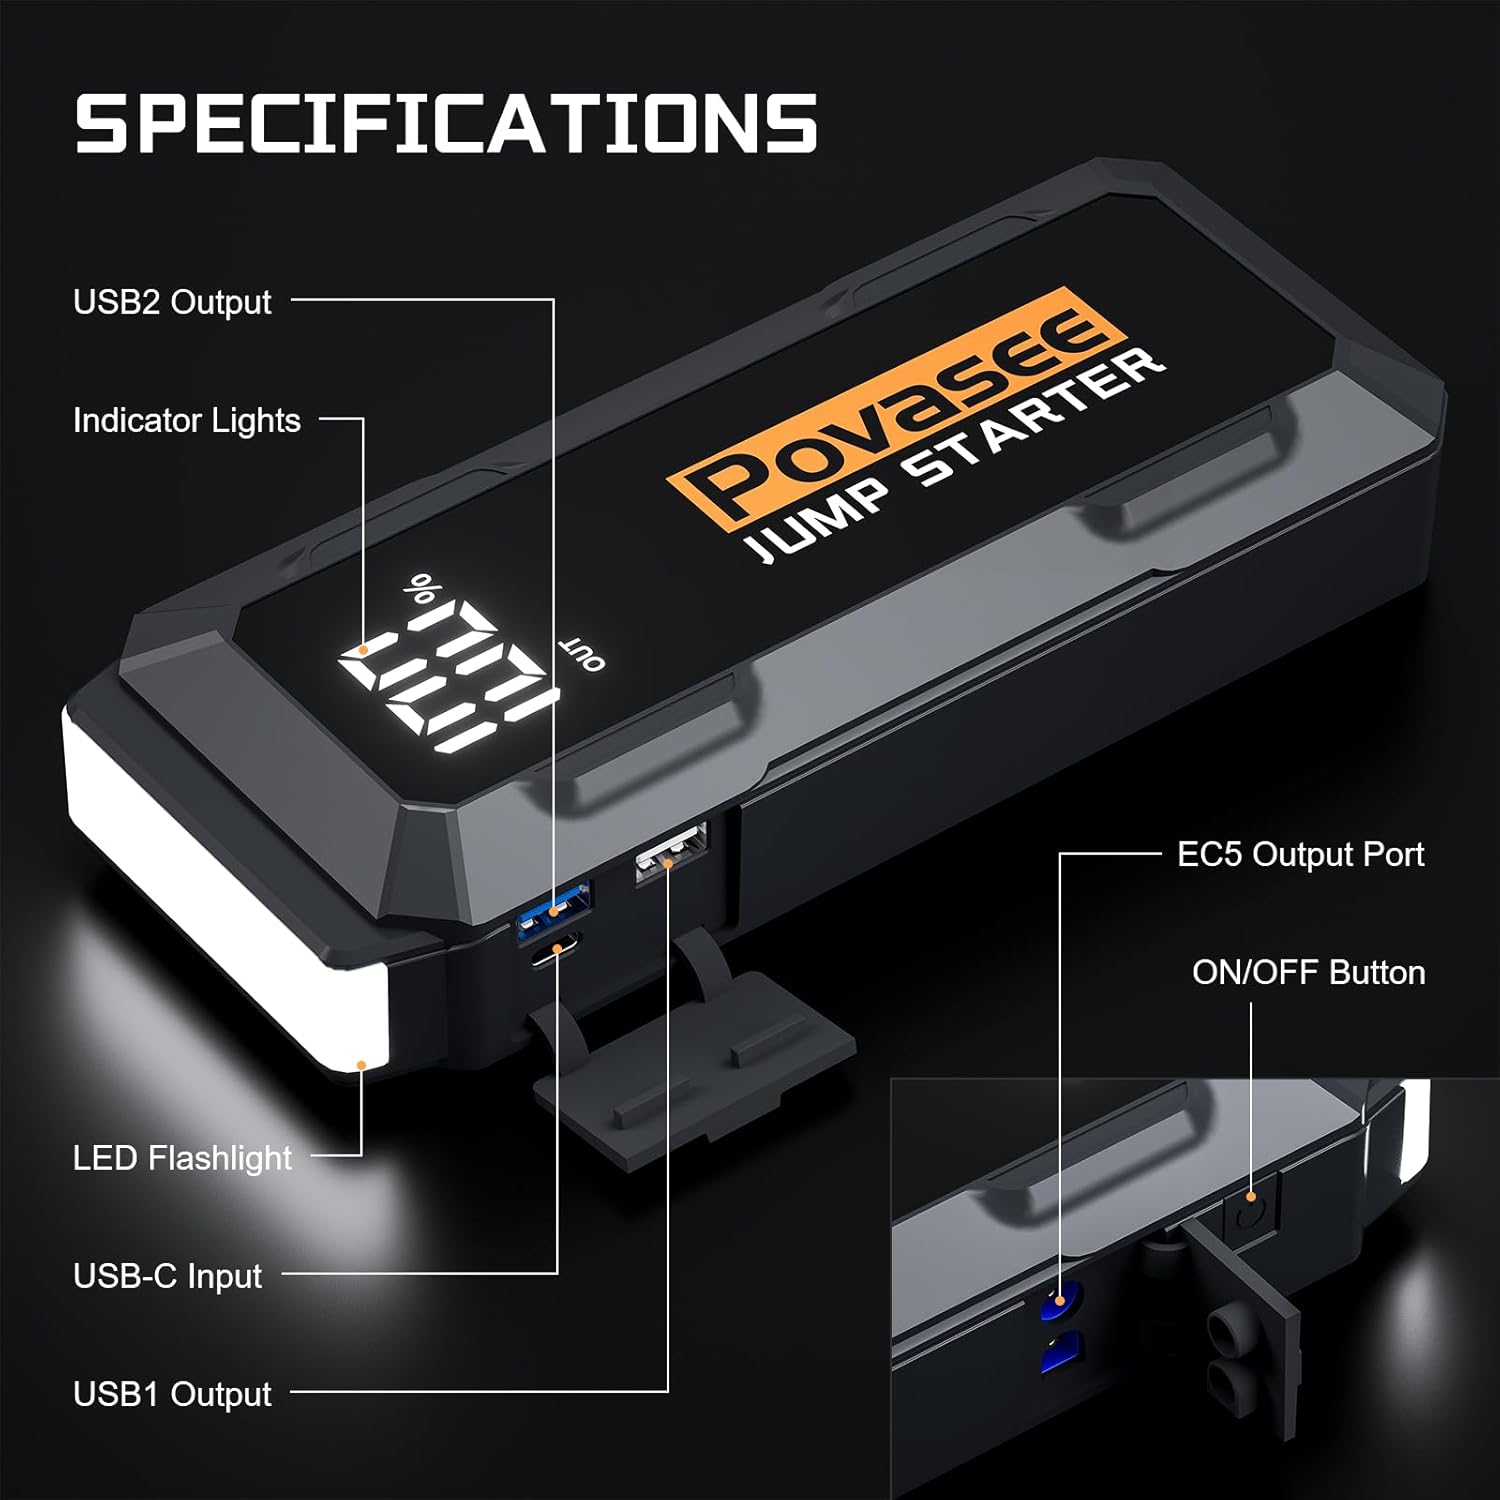
Image: A detailed view of the jump starter's LCD screen, displaying "100% OUT" and "QC 3.0 5.0V 2.4A" for clear status indication.
3.2. Power Bank Functionality
Equipped with two USB ports, including a QC3.0 port, the jump starter can charge smartphones and other USB-powered devices. The QC3.0 port offers faster charging speeds.
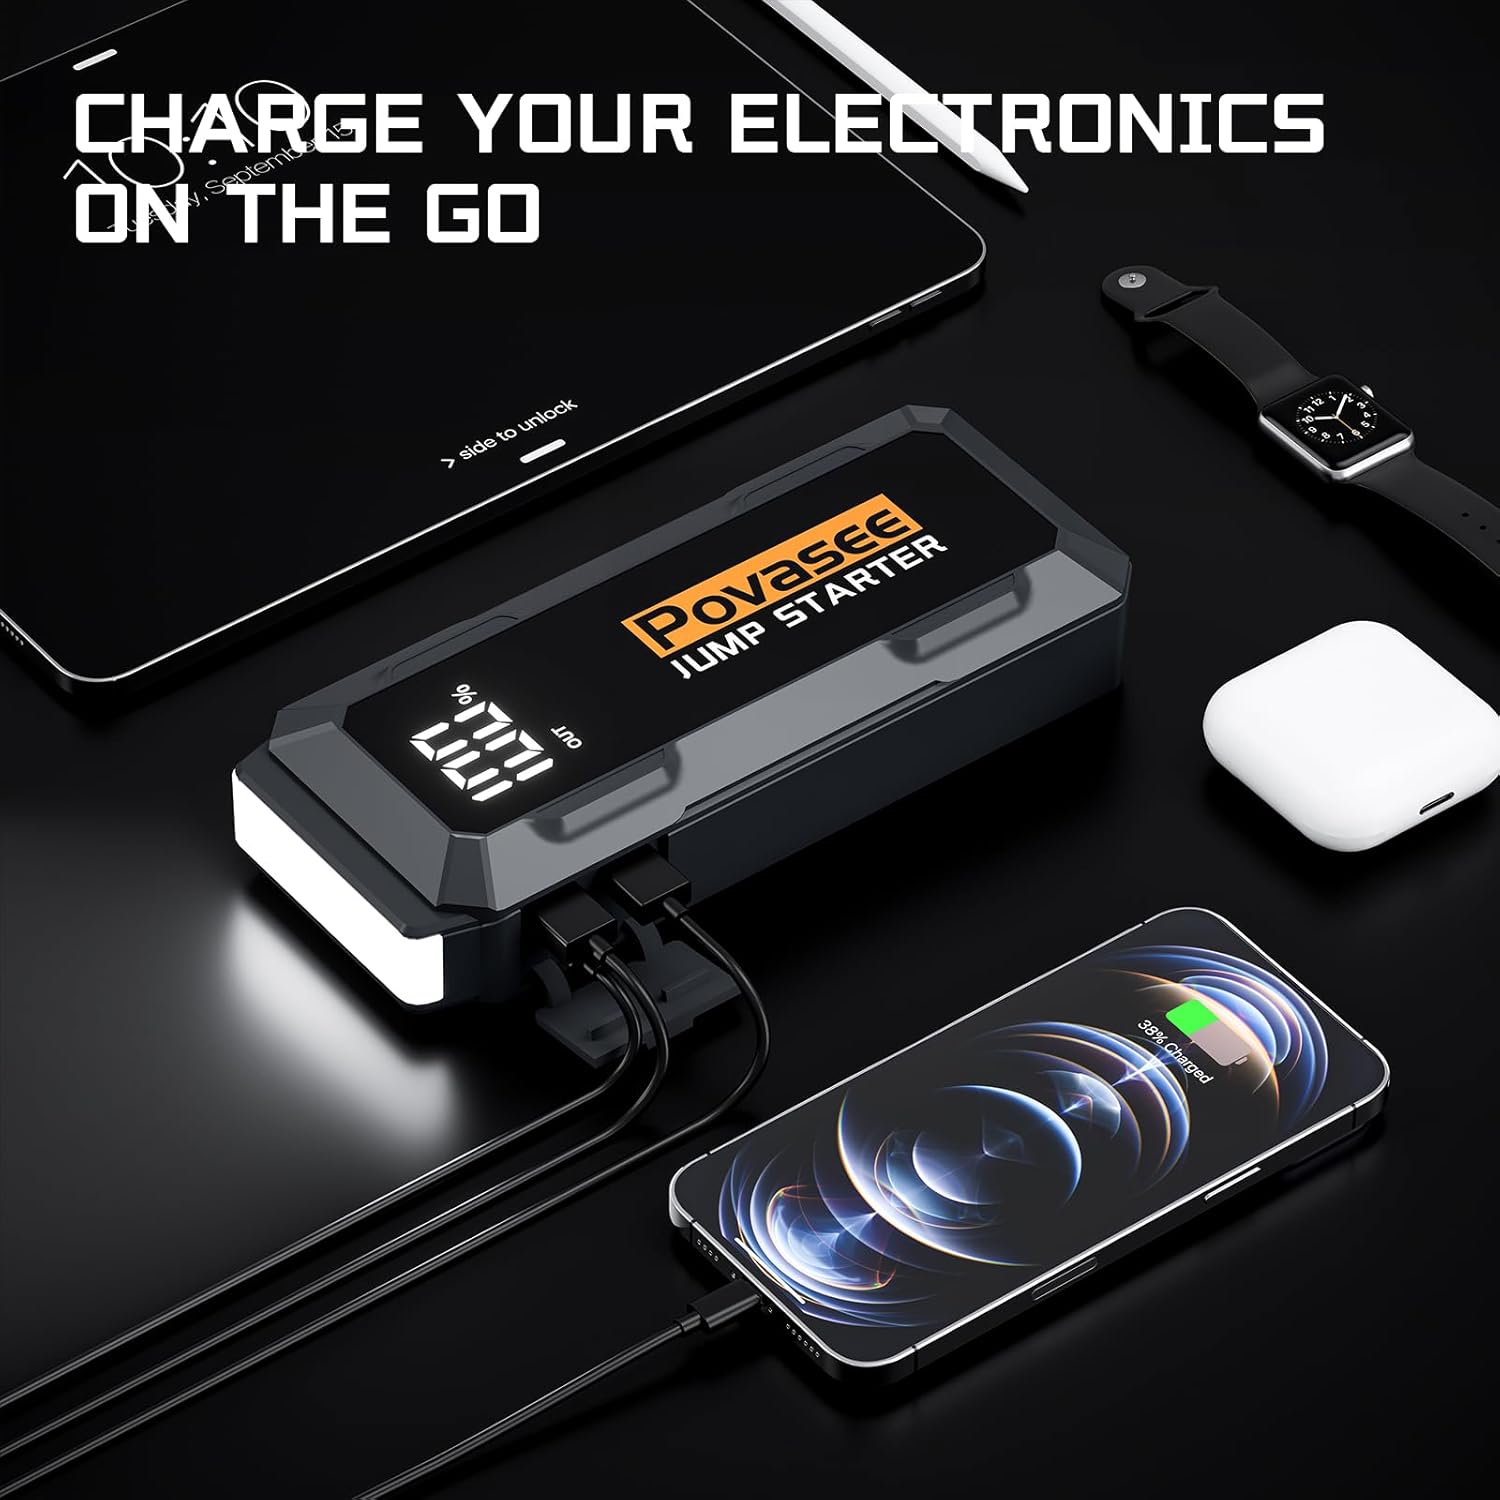
Image: The jump starter connected via USB cables to charge a smartphone, tablet, and smartwatch, demonstrating its power bank capability.
3.3. LED Flashlight
A 600-lumen LED light is integrated, offering three modes: Flashlight, Strobe, and SOS. This feature is useful for illumination during nighttime operations or for signaling in emergencies.
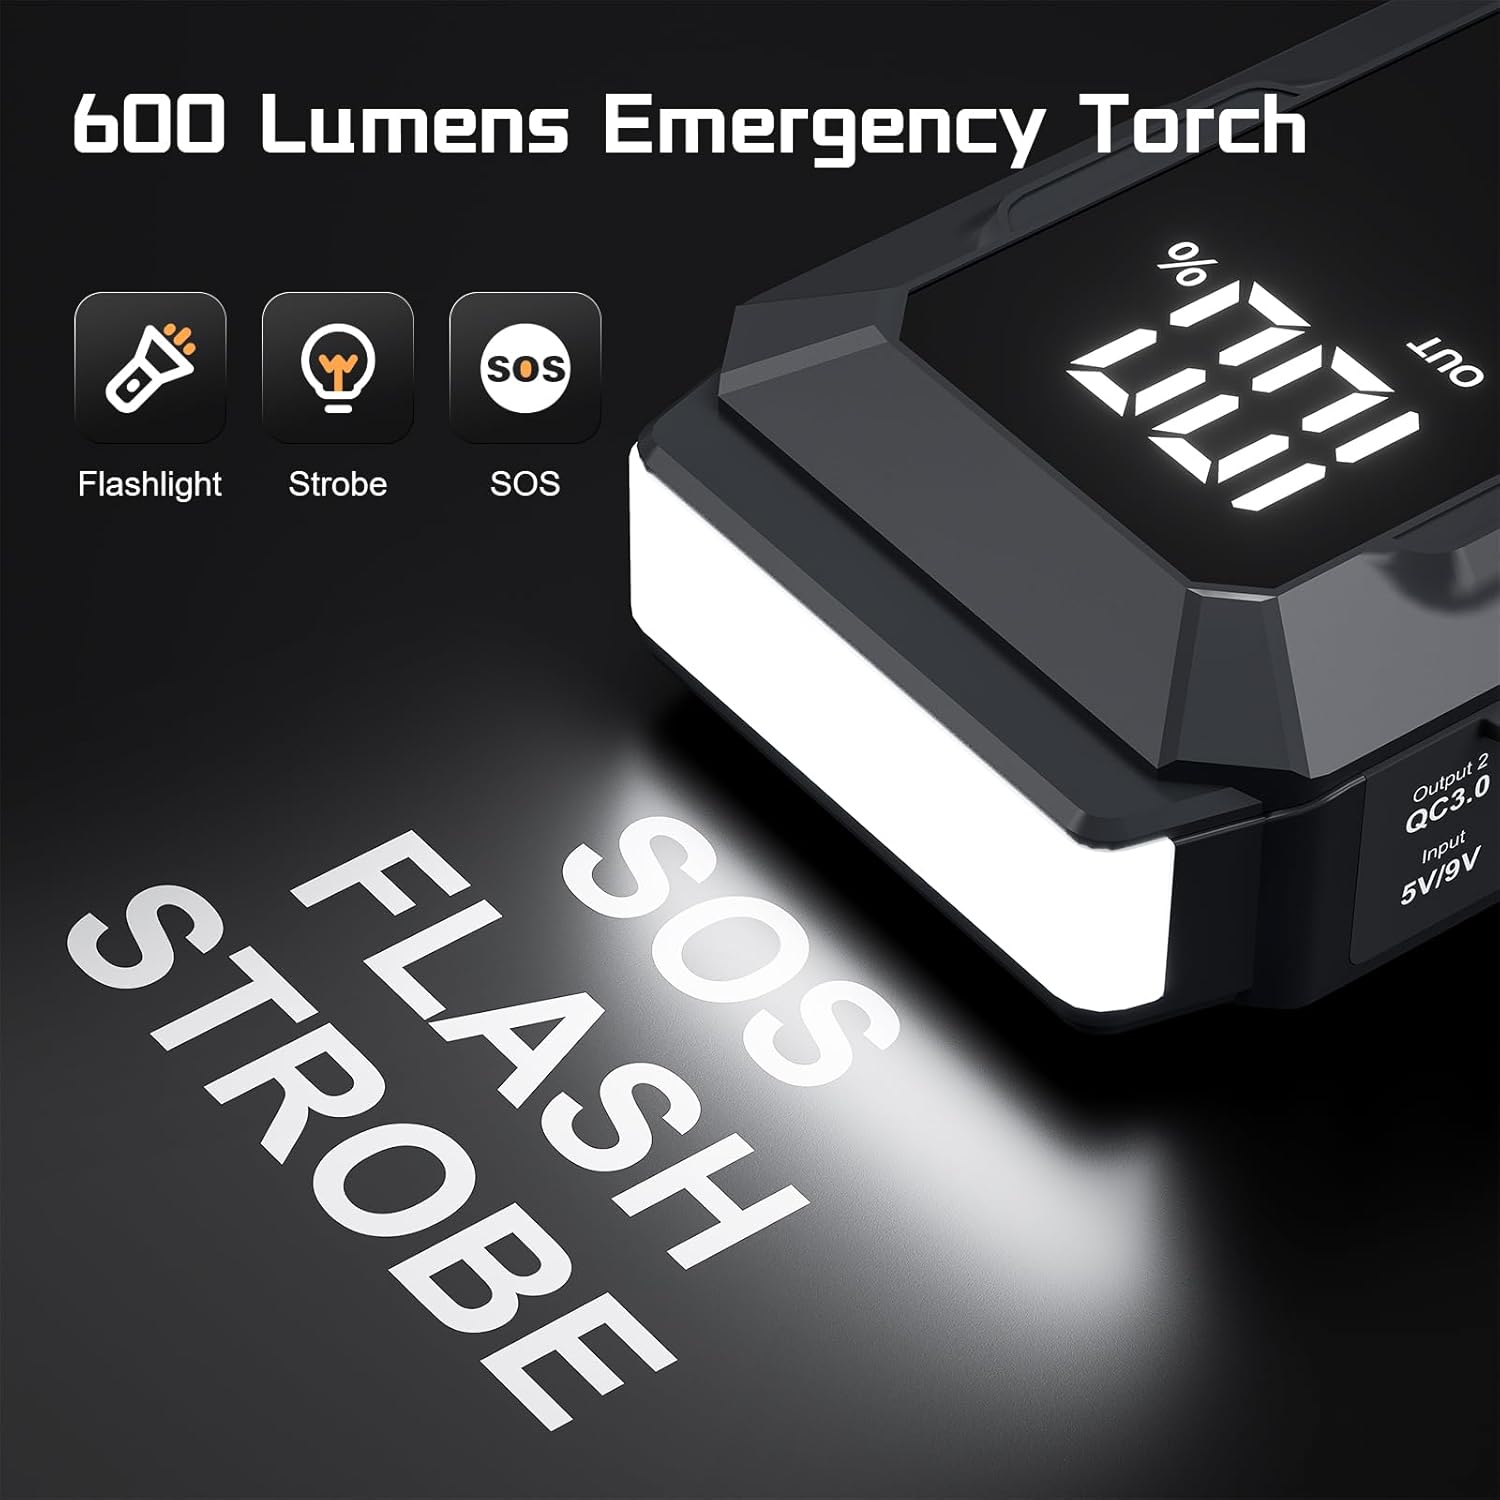
Image: The jump starter with its powerful LED light illuminated, highlighting the Flashlight, Strobe, and SOS functions.
4. Safety Information
The Povasee 4000A Jump Starter incorporates ten safety protections to ensure safe operation. Adhere to all safety guidelines to prevent injury or damage to the device or vehicle.
- Over-current Protection: Prevents damage from excessive current flow.
- Short-Circuit Protection: Automatically shuts off in case of a short circuit.
- Over-Voltage Protection: Safeguards against voltage surges.
- Over-Charge Protection: Prevents battery overcharging.
- Over-Discharge Protection: Protects the internal battery from deep discharge.
- Reverse-Polarity Protection: Alerts and prevents operation if clamps are connected incorrectly.
- Spark-Resistance: Minimizes the risk of sparks during connection.
- Over-Heat Protection: Shuts down if internal temperature exceeds safe limits.
- Reverse-Connection Protection: Prevents damage from incorrect cable connection.
- Extreme-Temperature Protection: Operates safely in temperatures from -22°F to 140°F (-30°C to 60°C).
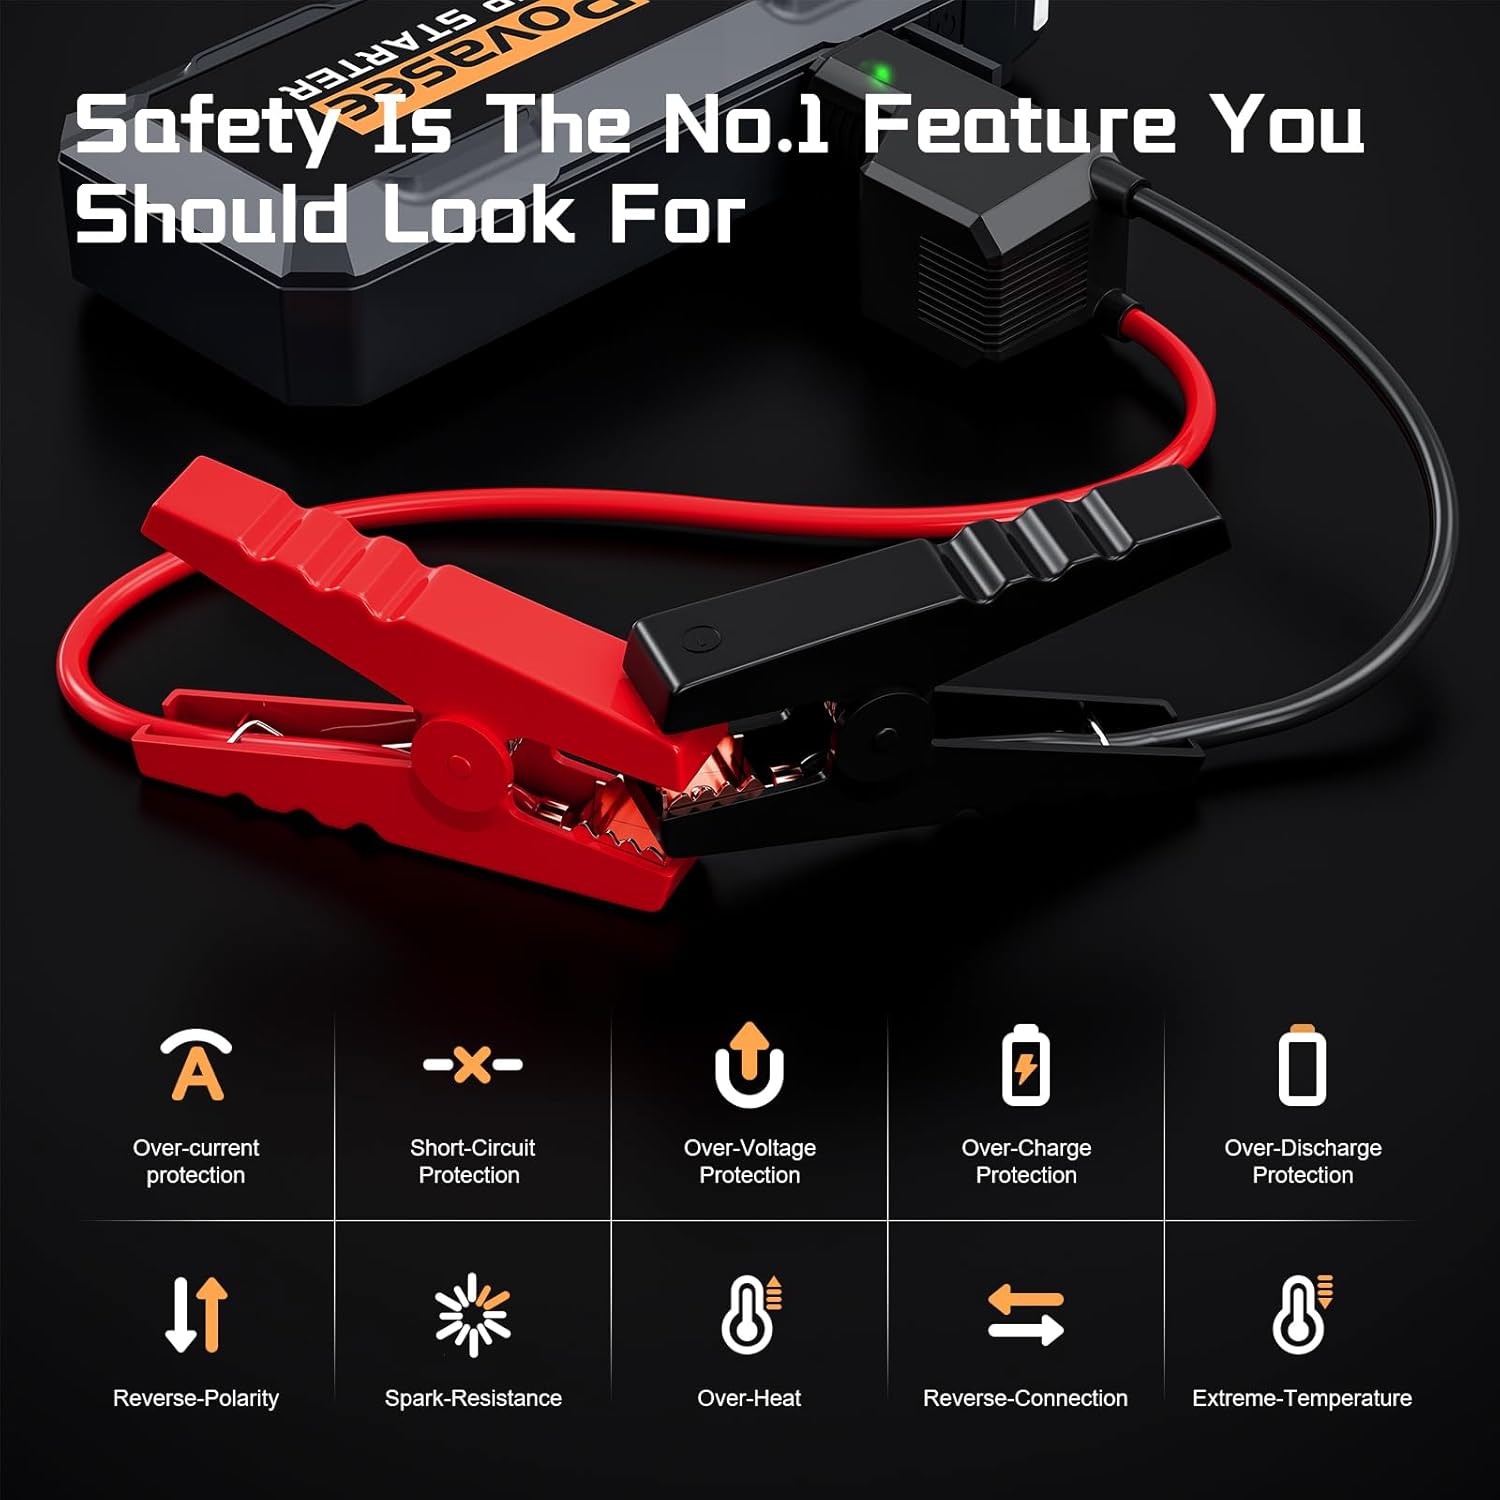
Image: Visual representation of the ten safety protections, including over-current, short-circuit, over-voltage, over-charge, over-discharge, reverse-polarity, spark-resistance, over-heat, reverse-connection, and extreme-temperature protection.
WARNING:
- Do not attempt to jump-start a frozen battery.
- Ensure proper ventilation when operating in enclosed spaces.
- Keep out of reach of children.
- Do not disassemble the unit.
- Avoid exposing the unit to water or extreme moisture.
5. Setup and Charging
5.1. Initial Charge
Before first use, fully charge the jump starter. Connect the provided USB-A to USB-C cable to the jump starter's USB-C input port and to a compatible USB wall adapter (not included). The LCD display will show the charging progress.
5.2. Checking Battery Level
The LCD display indicates the remaining power percentage. It is recommended to keep the jump starter charged above 50% for optimal performance, especially before jump-starting a vehicle.
6. Operating Instructions
6.1. Jump Starting a Vehicle
- Prepare the Vehicle: Ensure the vehicle's ignition is off and all accessories (lights, radio, AC) are turned off. Place the vehicle in park (automatic) or neutral (manual) and engage the parking brake.
- Connect Smart Jumper Cables: Insert the blue plug of the smart jumper cables firmly into the EC5 output port of the Povasee Jump Starter. Ensure a secure connection.
- Connect to Vehicle Battery:
- Connect the red (+) clamp to the vehicle's positive (+) battery terminal.
- Connect the black (-) clamp to the vehicle's negative (-) battery terminal.
If the connections are correct, the indicator light on the smart cable will turn solid green. If it flashes red or an alarm sounds, check the connections for reverse polarity or other issues.
- Start the Engine: Once the smart cable indicator is solid green, start the vehicle's engine. If the engine does not start immediately, wait 30 seconds before attempting again. If the battery voltage is extremely low (below 9V), press the "RST" button on the jump starter to activate force start mode, then attempt to start the engine.
- Remove Cables: Once the vehicle starts, immediately remove the black (-) clamp from the vehicle battery, followed by the red (+) clamp. Then, disconnect the smart jumper cables from the jump starter.

Image: A visual guide showing the three steps for jump-starting a car: 1. Insert smart clip plug, 2. Connect red (+) and black (-) clamps to battery, 3. Start car engine.

Image: The Povasee Jump Starter connected to a vehicle's battery terminals with the smart jumper cables, illustrating the jump-starting process.
6.2. Using the LED Flashlight
To activate the LED flashlight, press and hold the power button for a few seconds. Subsequent short presses will cycle through the modes: Flashlight (steady on), Strobe, and SOS. Press and hold again to turn off.
7. Maintenance
- Charging: Recharge the jump starter every 3-6 months, even if not used, to maintain battery health.
- Cleaning: Wipe the unit with a dry, soft cloth. Do not use harsh chemicals or abrasive materials.
- Storage: Store the jump starter in its carrying case in a cool, dry place, away from direct sunlight and extreme temperatures.
8. Troubleshooting
| Problem | Possible Cause | Solution |
|---|---|---|
| Jump starter does not turn on. | Battery is fully discharged. | Charge the jump starter fully. |
| Vehicle does not start. | Incorrect cable connection; vehicle battery too low; jump starter battery too low. | Check cable connections (red to +, black to -). Ensure jump starter is sufficiently charged. If vehicle battery is below 9V, use the "RST" button for force start. |
| Smart cable indicator flashes red or alarms. | Reverse polarity; short circuit; over-temperature. | Disconnect cables and re-connect correctly. Allow unit to cool down if overheated. |
| Device not charging from USB ports. | Jump starter battery low; incorrect cable/device. | Ensure jump starter is charged. Use appropriate charging cables for your devices. |
9. Specifications
| Feature | Detail |
|---|---|
| Model | A20 |
| Peak Output Current | 4000 Amps |
| Engine Compatibility | Up to 10L Gas / 10L Diesel |
| Battery Type | Lithium Polymer (4 included) |
| Item Weight | 2.38 pounds (approx. 1.08 kg) |
| Product Dimensions | 8 x 1.5 x 3.4 inches (approx. 20.3 x 3.8 x 8.6 cm) |
| Operating Temperature | -22°F to 140°F (-30°C to 60°C) |
| USB Output 1 | 5V/2.4A |
| USB Output 2 (QC3.0) | 5V/3A, 9V/2A, 12V/1.5A |
| USB-C Input | 5V/9V |
| LED Flashlight | 600 Lumens (Flashlight, Strobe, SOS modes) |
10. Warranty and Support
The Povasee 4000A Jump Starter comes with a 24-month warranty from the date of purchase. This warranty covers manufacturing defects and malfunctions under normal use.
For warranty claims, technical support, or any questions regarding your product, please contact Povasee customer service. Refer to the contact information provided in your user manual or on the official Povasee website.
Please retain your proof of purchase for warranty validation.


