
1. Product Overview
The ORICO DPM2P9-V1 is a versatile 10-in-1 USB-C docking station that integrates an M.2 SSD enclosure, designed to expand the connectivity and storage capabilities of your USB-C enabled devices. This device supports both M.2 NVMe and SATA SSDs, offering high-speed data transfer and a wide range of ports for various peripherals.
Key features include:
- Integrated M.2 SSD enclosure compatible with NVMe and SATA SSDs (2230/2242/2260/2280 sizes).
- Built-in cooling fan and M.2 heatsink for optimal SSD temperature management.
- High-speed data transfer with 10Gbps USB 3.2 Gen2 ports (1x USB-A, 1x USB-C).
- Additional 5Gbps USB 3.0 USB-A ports (2x).
- 4K@60Hz HDMI video output for external displays.
- 100W Power Delivery (PD) for host device charging.
- Gigabit Ethernet (RJ45) port for stable wired network connection.
- SD and TF card readers supporting simultaneous use.

Figure 1: ORICO DPM2P9-V1 Docking Station with M.2 SSD Enclosure. This image displays the device's various ports including USB-A, USB-C, HDMI, Ethernet, and the M.2 SSD slot with its cooling fan.
2. Setup Instructions
2.1 M.2 SSD Installation
The ORICO DPM2P9-V1 features a tool-free design for M.2 SSD installation. Follow these steps:
- Gently lift the magnetic top cover of the docking station to expose the M.2 SSD slot.
- Insert your M.2 NVMe or SATA SSD (2230/2242/2260/2280) into the designated slot. Ensure it is fully seated.
- Place the provided M.2 heatsink (aluminum alloy with copper heat pipes) onto the installed SSD for optimal cooling.
- Close the magnetic top cover until it securely snaps into place.
Note: For SSDs 1TB or larger, an external power supply is recommended for stable operation. It is normal for high-speed SSDs to generate heat; handle with care to avoid burns.

Figure 2: M.2 SSD Installation Steps. This diagram illustrates the process of opening the magnetic cover, installing the SSD and heatsink, and closing the cover.
2.2 Initial Connection
Connect the ORICO DPM2P9-V1 docking station to your host device (laptop, MacBook, etc.) using the provided USB-C cable. Ensure your device's USB-C port supports the necessary functions for the desired features.
Important: Before using the HDMI port, confirm that your host device's Type-C interface supports video transmission (DisplayPort Alternate Mode).

Figure 3: USB-C Port Types. This image explains the different functionalities of various USB-C ports, highlighting the need for DisplayPort Alternate Mode support for video output.
3. Operating the Docking Station
3.1 Data Transfer (USB Ports)
The docking station provides multiple USB ports for connecting peripherals and transferring data:
- USB 3.2 Gen2 (10Gbps): One USB-A and one USB-C port support speeds up to 10Gbps, allowing for rapid transfer of large files like 1GB videos, music, or photos in approximately 1 second.
- USB 3.0 (5Gbps): Two USB-A ports support speeds up to 5Gbps for standard peripheral connections.
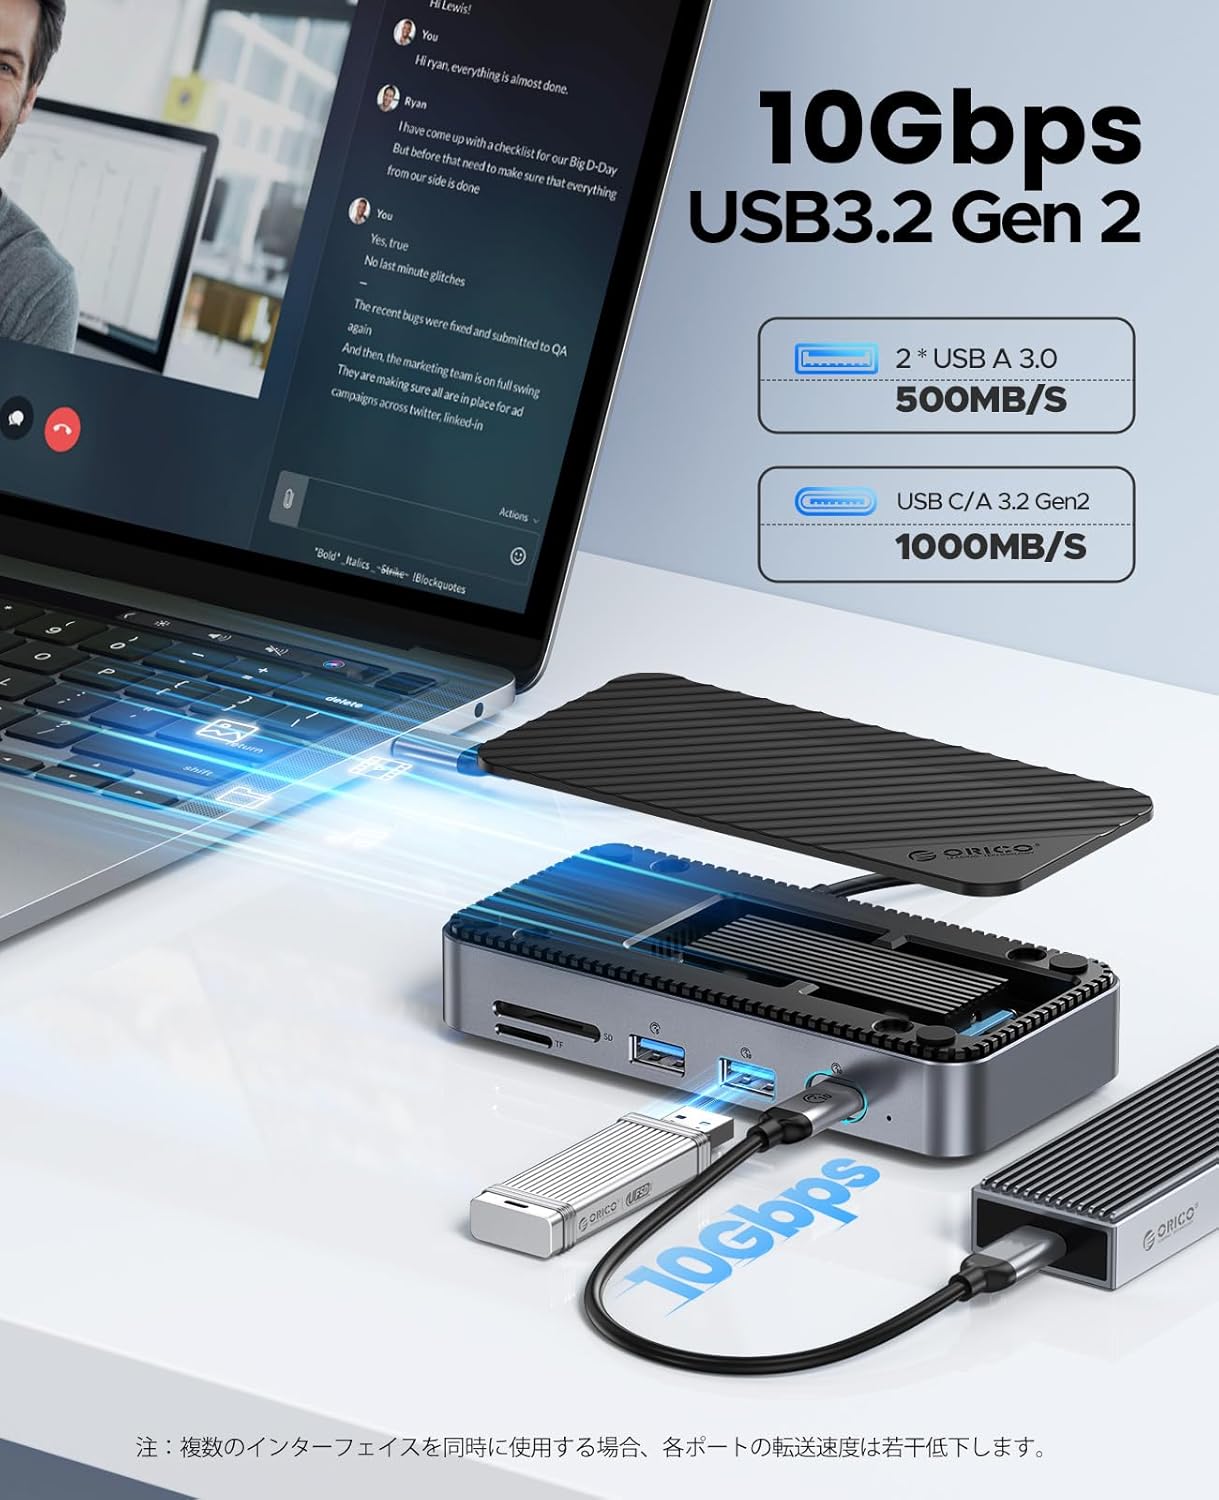
Figure 4: 10Gbps USB 3.2 Gen 2 Data Transfer. This image shows the docking station connected to a laptop, demonstrating high-speed data transfer capabilities.
3.2 Video Output (HDMI)
Connect an external monitor or display to the HDMI port to extend or mirror your screen at up to 4K resolution at 60Hz. This is suitable for presentations, movie watching, or expanding your workspace.

Figure 5: 4K@60Hz HDMI Display Output. A laptop is shown connected to an external monitor via the docking station, displaying high-resolution content.
3.3 Network Connectivity (Ethernet)
The Gigabit Ethernet RJ45 port provides a stable and fast wired network connection, supporting speeds up to 1000Mbps. This ensures reliable internet access for work, gaming, and large downloads, compatible with existing 10/100 Ethernet standards.

Figure 6: Gigabit Ethernet Connection. The docking station is connected to a laptop and an Ethernet cable, illustrating wired network access.
3.4 Card Reader (SD/TF)
The integrated USB 3.0 SD and TF card readers allow for easy file transfers from memory cards, such as those from drones or action cameras. Both SD and TF cards can be used simultaneously.

Figure 7: SD/TF Card Reader. This image shows memory cards being inserted into the dedicated slots on the docking station.
3.5 Power Delivery (PD 100W)
The dedicated PD100W power interface allows you to charge your host laptop or other compatible devices while using the docking station, ensuring continuous power supply.
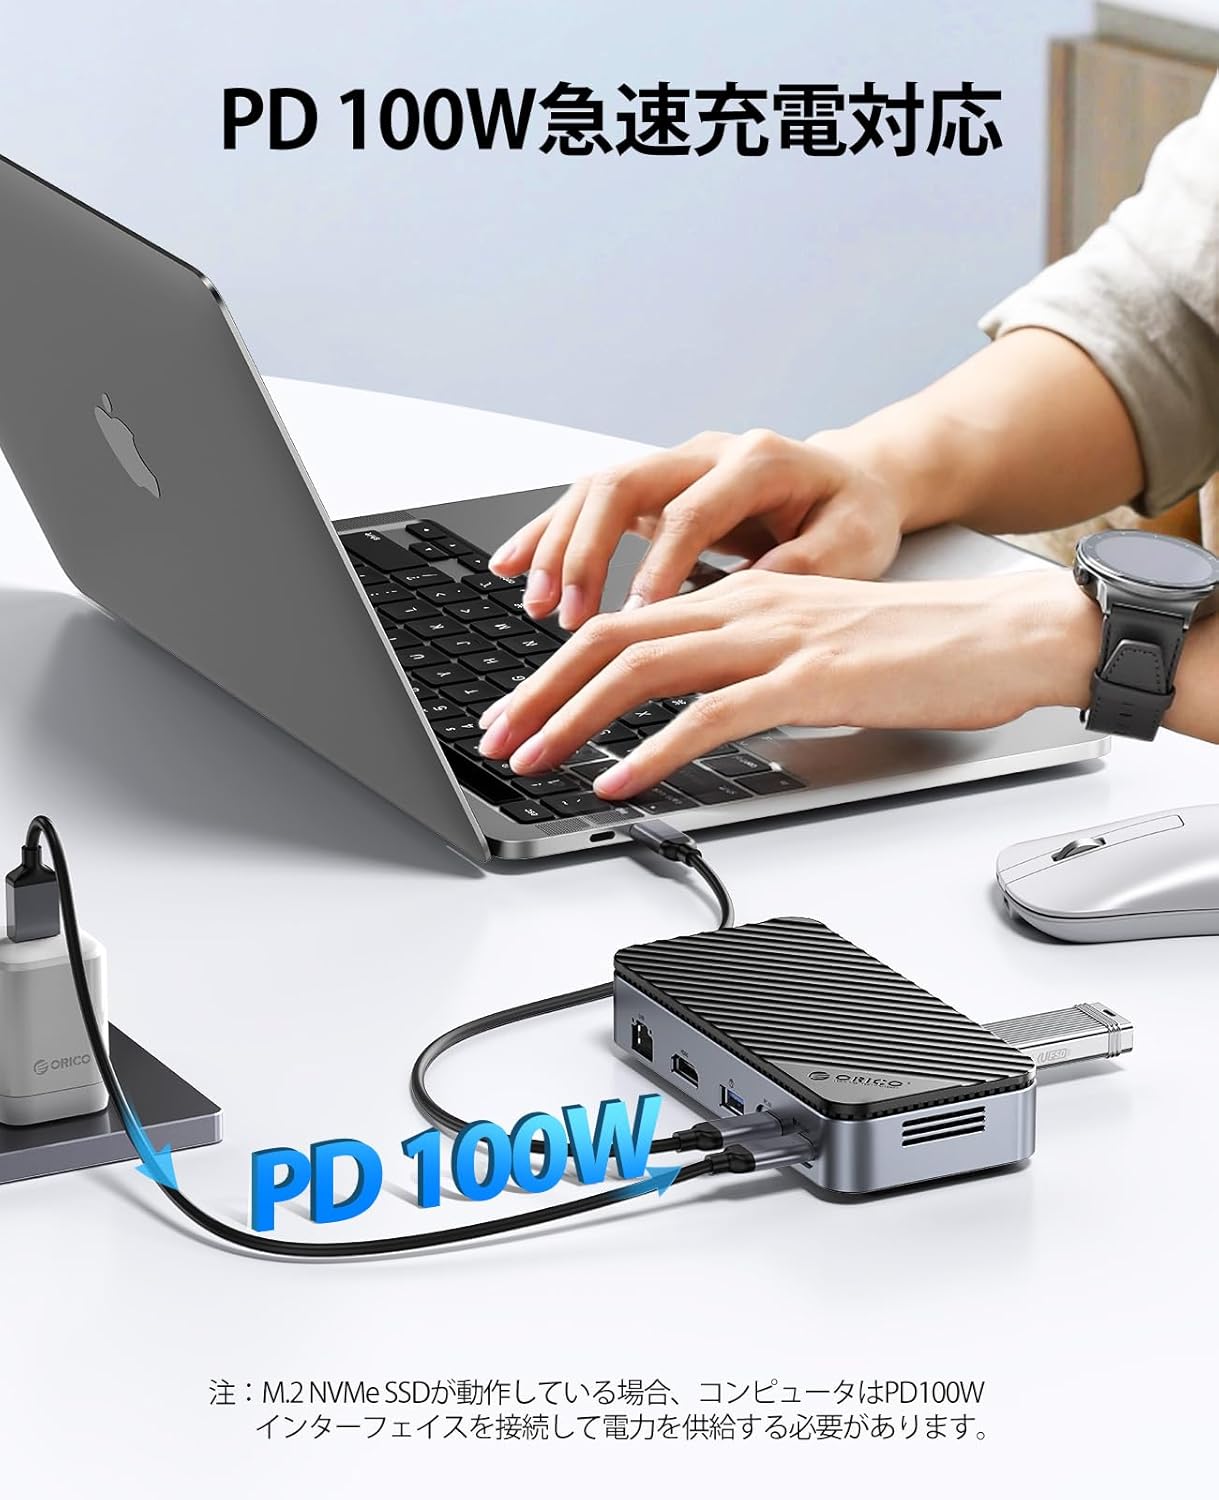
Figure 8: PD 100W Charging. A laptop is shown connected to a power adapter via the docking station for fast charging.
4. Maintenance
To ensure the longevity and optimal performance of your ORICO DPM2P9-V1 docking station, follow these maintenance guidelines:
- Cleaning: Use a soft, dry cloth to clean the exterior of the device. Avoid liquid cleaners or abrasive materials.
- Storage: When not in use, store the docking station in a cool, dry place. The included protective bag can help prevent wear and damage during transport.
- Cooling System: The internal cooling fan activates when the SSD temperature exceeds 50°C to prevent overheating. Ensure the ventilation openings are not obstructed.

Figure 9: Internal Cooling System. This image highlights the built-in fan and heatsink designed to maintain optimal SSD operating temperatures.
5. Troubleshooting
If you encounter issues with your ORICO DPM2P9-V1, refer to the following common problems and solutions:
- USB Ports Not Functioning or Slow:
- Ensure the docking station is securely connected to your host device.
- Verify that your host device's USB-C port supports the required data transfer protocols.
- Try connecting the device to a different USB-C port on your host device.
- If using an SSD 1TB or larger, ensure an external power supply is connected to the PD port for stable operation.
- M.2 SSD Speed is Slower Than Expected:
- Confirm that your SSD is properly installed and seated in the enclosure.
- Ensure your host device's USB-C port supports USB 3.2 Gen2 (10Gbps) for maximum speed. Older USB versions will result in lower speeds.
- Check the health and performance of your M.2 SSD using appropriate software.
- High-speed SSDs can generate heat, which might affect performance if not adequately cooled. The built-in fan and heatsink help mitigate this.
- HDMI Display Output Issues (No Signal, Incorrect Aspect Ratio):
- Verify that your host device's USB-C port supports DisplayPort Alternate Mode for video output.
- Ensure the HDMI cable is securely connected to both the docking station and the external display.
- Check the display settings on your host device to ensure the external monitor is detected and configured correctly.
- Try a different HDMI cable or external display to rule out component issues.
- Frequent Disconnections:
- Ensure all cables are firmly connected.
- If using an SSD, ensure adequate power is supplied, especially for larger capacity drives, by connecting an external power source to the PD port.
- Avoid placing the docking station in areas with poor ventilation, as overheating can lead to instability.
6. Product Specifications
| Feature | Specification |
|---|---|
| Model Number | DPM2P9-V1 |
| Brand | ORICO |
| Color | 10-in-1 with Built-in Fan |
| USB-A Ports | 1x USB 3.2 Gen2 (10Gbps), 2x USB 3.0 (5Gbps) |
| USB-C Ports | 1x USB 3.2 Gen2 (10Gbps), 1x PD 100W Input |
| HDMI Port | 1x HDMI (4K@60Hz) |
| Ethernet Port | 1x RJ45 Gigabit Ethernet (10/100/1000Mbps) |
| Card Reader | SD/TF 3.0 (simultaneous use) |
| M.2 SSD Compatibility | NVMe/SATA (2230/2242/2260/2280), up to 4TB |
| Power Delivery | Up to 100W |
| Cooling | Built-in fan, M.2 heatsink |
| Dimensions | 16.7 x 11.2 x 4.4 cm |
| Weight | 310 g |
| Operating System Support | Windows, Mac OS, Linux, Chromebook OS |
7. Warranty Information
ORICO products are covered by a limited warranty from the date of purchase. Please refer to the official ORICO website or your retailer for specific warranty terms and conditions. Keep your proof of purchase for warranty claims.
8. Customer Support
For technical assistance, troubleshooting, or product inquiries, please contact ORICO customer support through their official website or the contact information provided with your product packaging. Online resources, including FAQs and driver downloads, may also be available.


