
ORICO M2P2-C3
ORICO M.2 NVMe Docking Station Dual-Bay SSD Cloner
Model: M2P2-C3 | Brand: ORICO
1. Introduction
The ORICO M.2 NVMe Docking Station Dual-Bay SSD Cloner is a versatile device designed for efficient data management of M.2 NVMe PCIe SSDs. It supports both offline cloning and high-speed data transmission when connected to a computer. Its tool-free design and wide compatibility make it an ideal solution for expanding storage, backing up data, and upgrading systems.
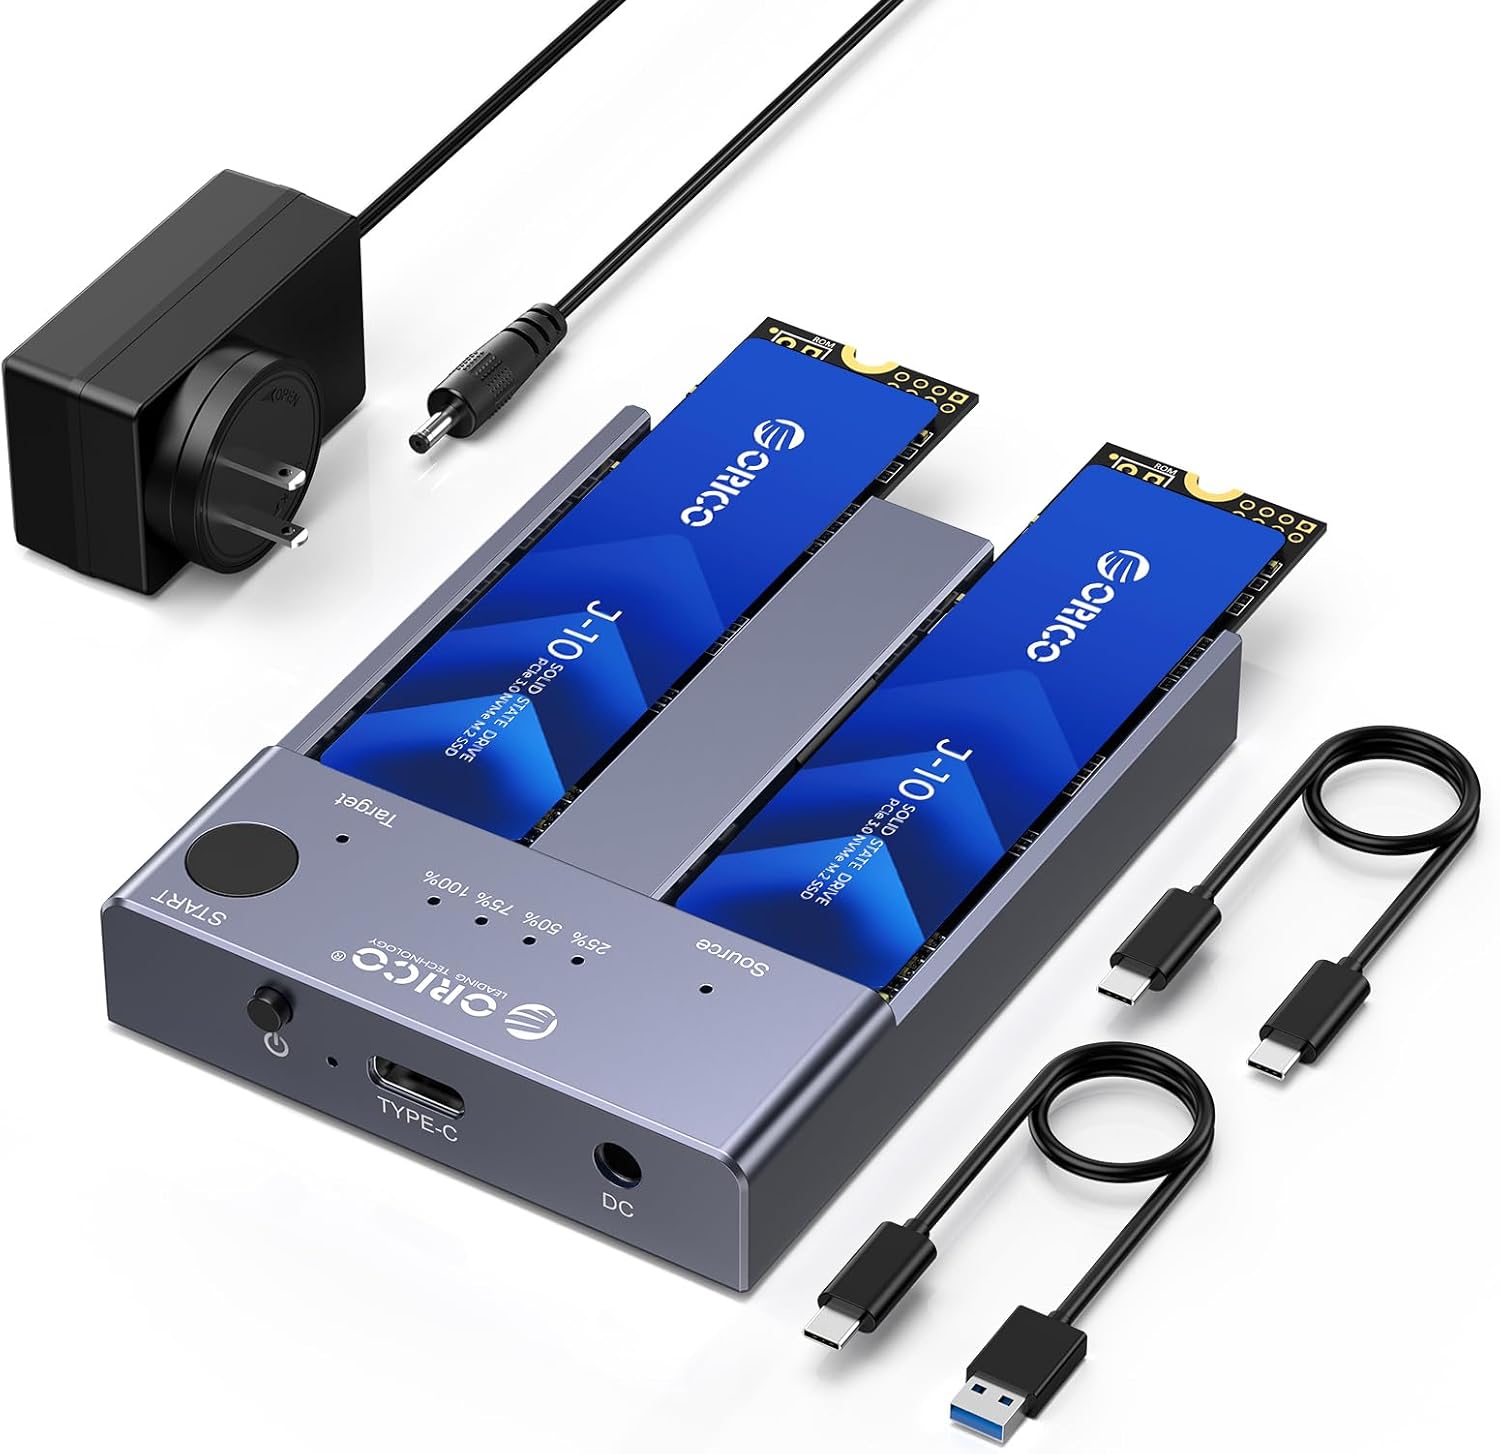
Figure 1: ORICO M.2 NVMe Docking Station with accessories.
2. What's in the Box
- M.2 NVMe Cloner
- C to A Data Cable
- C to C Data Cable
- 5V/4A Power Adapter

Figure 2: Package contents of the ORICO M.2 NVMe Cloner.
3. Specifications
| Feature | Detail |
|---|---|
| Memory Storage Capacity | 8 TB (Max) |
| Compatible Devices | Laptop, Gaming Console, Television, Personal Computer, Tablet |
| Hard Disk Form Factor | 22 Millimeters (M Key NVMe PCIe SSDs: 22110/2280/2260/2242/2230) |
| Max Number of Supported Devices | 2 |
| Data Transfer Rate | 10 Gigabits Per Second (USB 3.2 Gen 2) |
| Hardware Interface | USB 3.2 Gen 2 |
| Material | Metal (Aluminum Alloy) |
| Item Model Number | M2P2-C3 |
Note: Not suitable for SSDs with SATA or mSATA interfaces.
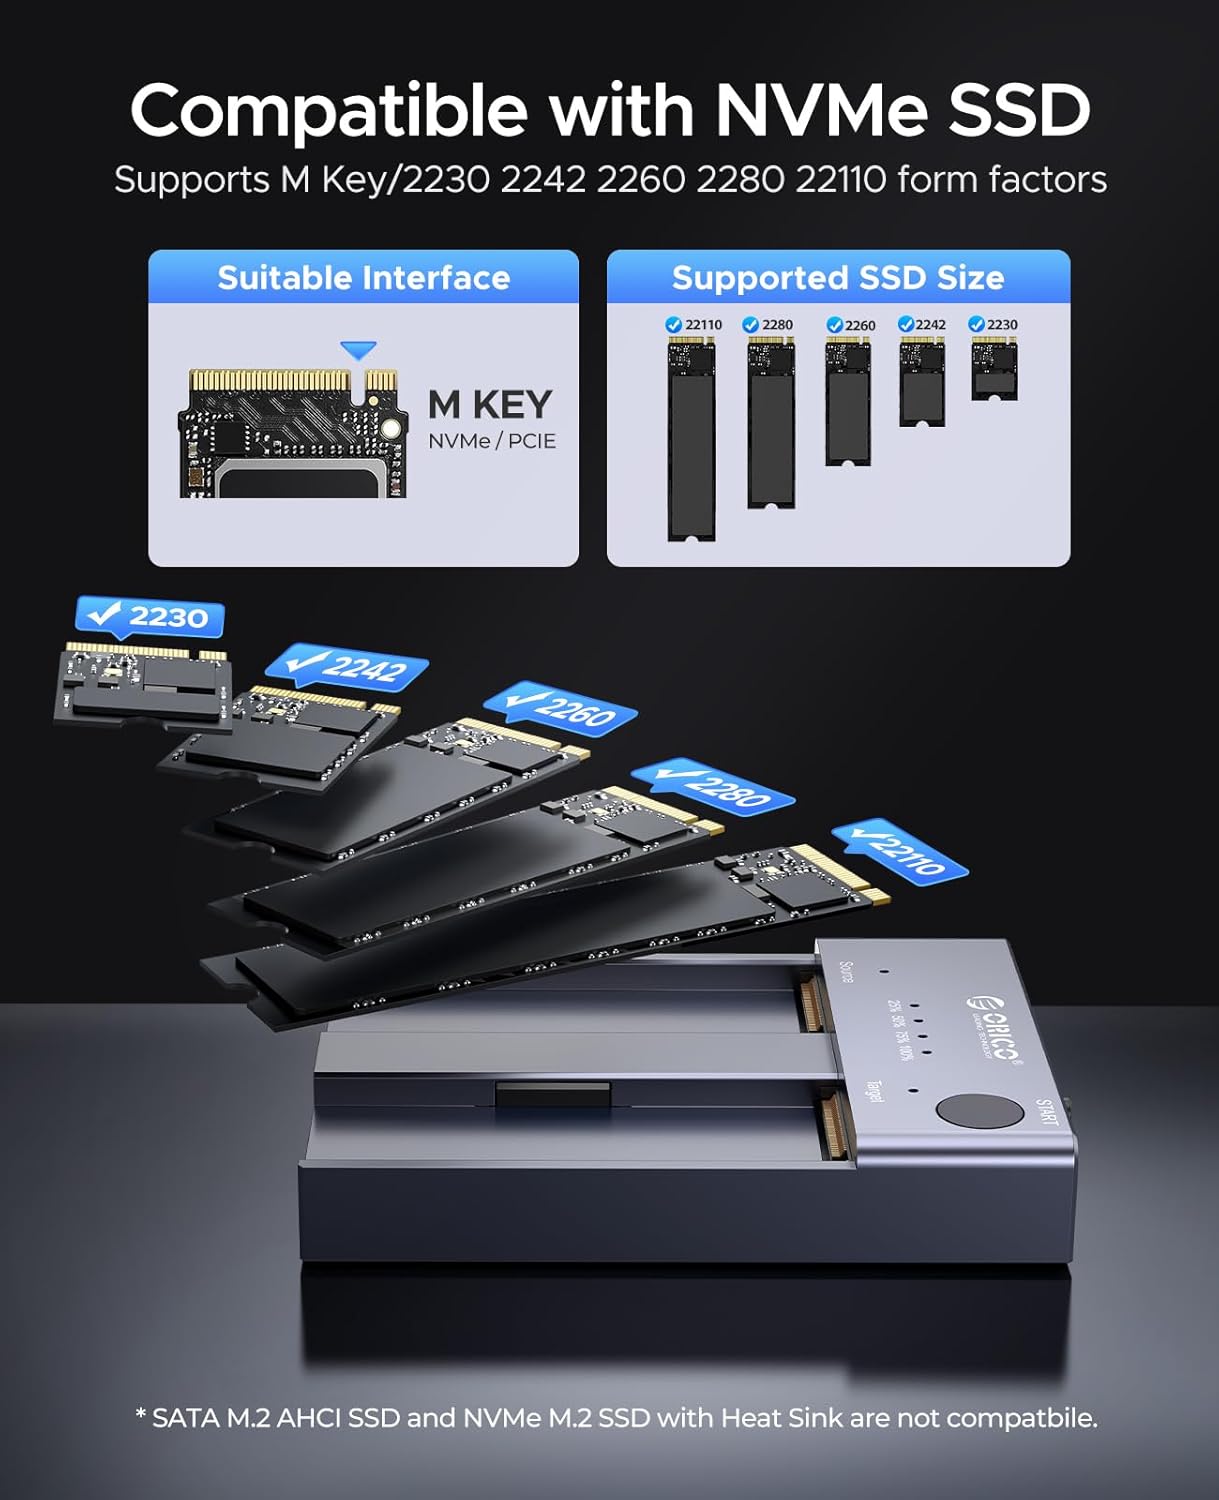
Figure 3: Compatible NVMe SSD types and sizes.
4. Setup
Follow these steps to set up your ORICO M.2 NVMe Docking Station:
- Insert SSDs: Place the source and target NVMe SSDs into their respective slots at a 45-degree angle. Gently press them down until they lie flat and are secured by the silicone buckles. Ensure the target disk has a capacity equal to or larger than the source disk to prevent data loss during cloning.
- Connect Power: Connect the provided 5V/4A power adapter to the DC input port on the docking station and plug it into a power outlet.
- Connect to PC (Optional for Data Transfer): If you intend to use the docking station for data transfer to/from a PC, connect it using either the USB-C to USB-A or USB-C to USB-C cable. For offline cloning, ensure the device is NOT connected to a PC.
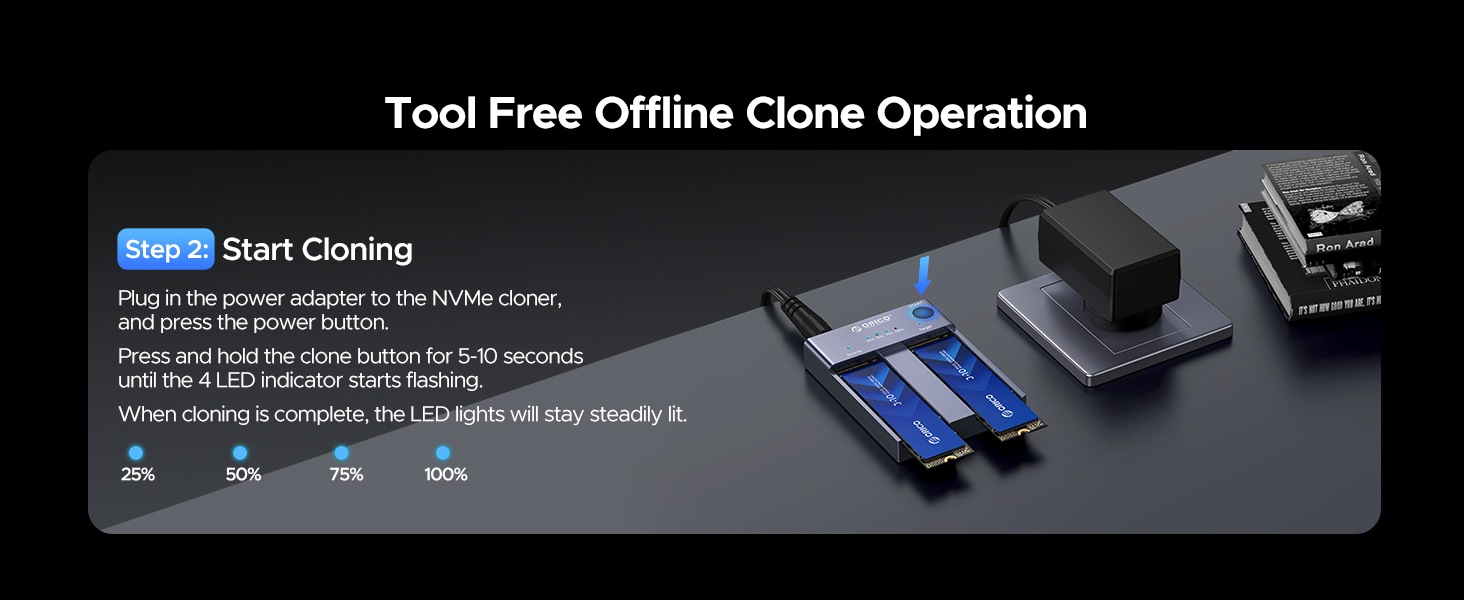
Figure 4: Inserting SSDs into the docking station.
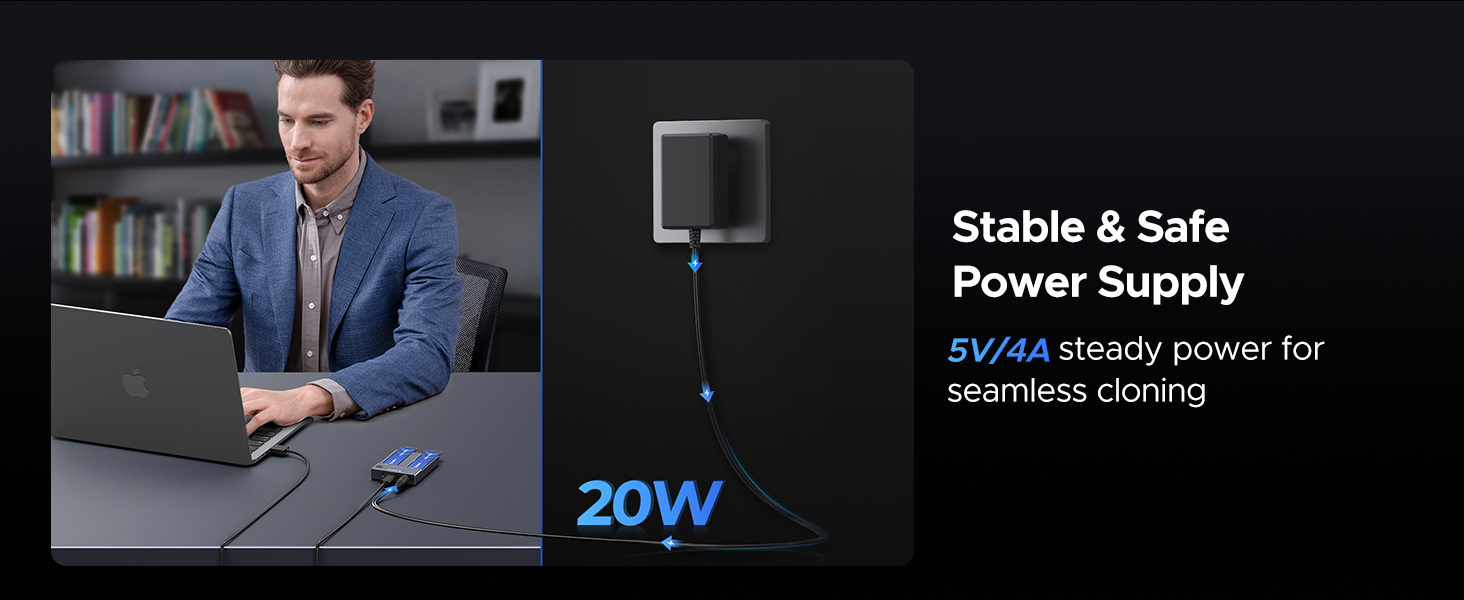
Figure 5: Connecting the power adapter.
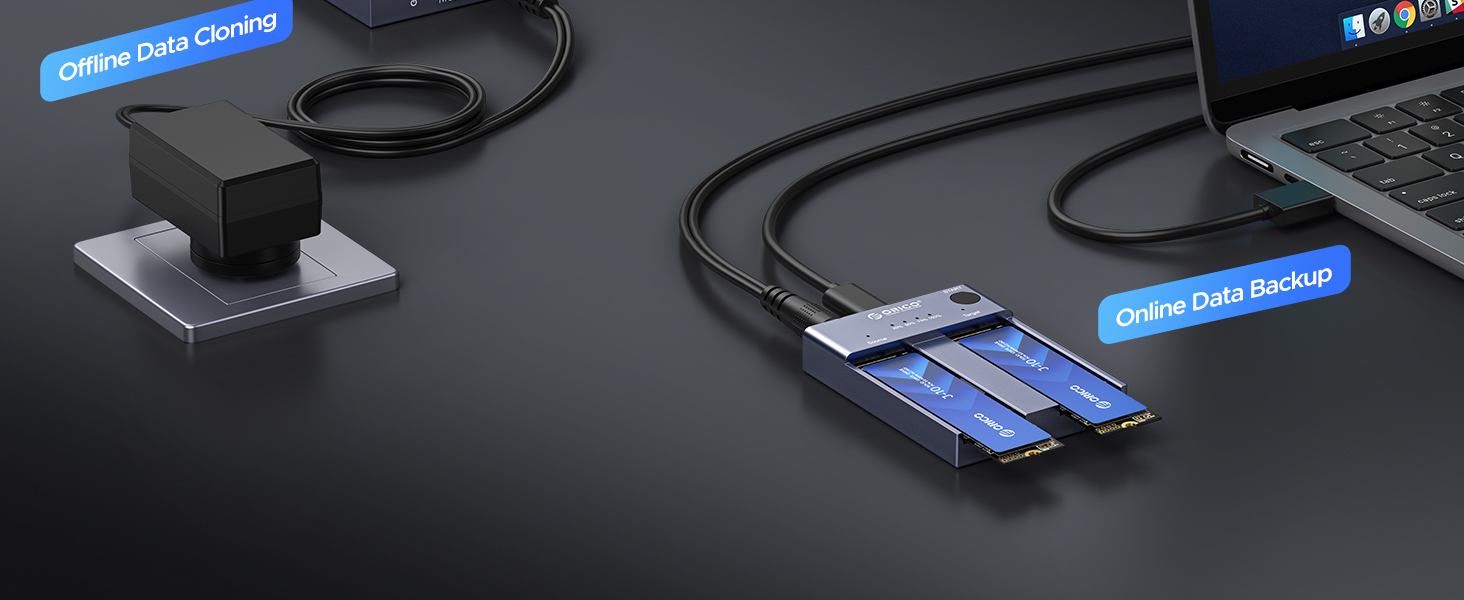
Figure 6: Offline cloning vs. Online data backup connection.
5. Operating Instructions
5.1. One-Key Offline Clone
This feature allows you to clone an SSD without connecting to a computer. Ideal for rapid backups and system migration.
- Ensure the source SSD is in the 'Source' slot and the target SSD is in the 'Target' slot. The target SSD must be equal to or larger than the source SSD.
- Ensure the docking station is powered on and NOT connected to any computer.
- Press and hold the 'Start' button for 5-10 seconds until the LED indicator lights start flashing. This confirms the cloning process has begun.
- Monitor the cloning progress via the LED indicators (25%, 50%, 75%, 100%). When cloning is complete, all LED lights will stay steadily lit.
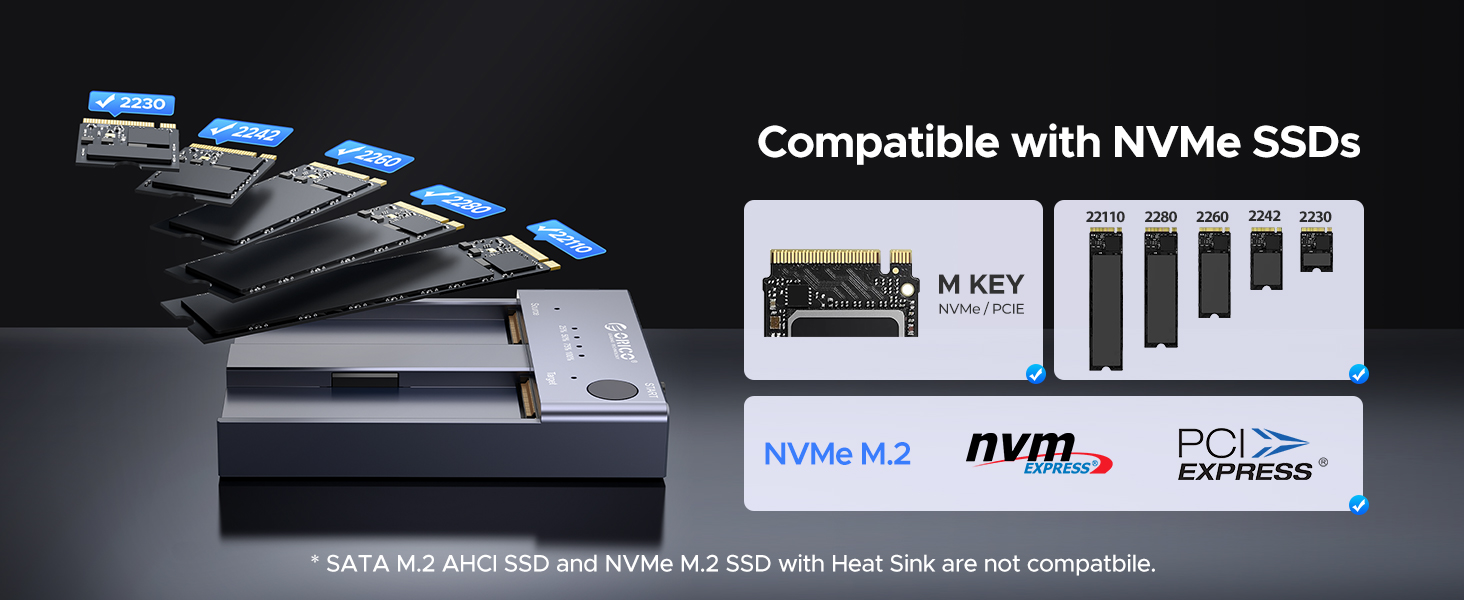
Figure 7: Initiating the offline cloning process.
Video 1: Official ORICO demonstration of the Dual Bay NVME Clone Enclosure, showing its features and ease of use for cloning.
5.2. Online Data Transfer (Docking Station Mode)
When connected to a PC, the docking station functions as an external SSD enclosure, allowing for high-speed data transfer.
- Insert one or two NVMe SSDs into the docking station slots.
- Connect the docking station to your PC using the appropriate USB-C cable (USB-C to USB-A or USB-C to USB-C).
- The SSD(s) will appear as removable drives on your computer. You can now drag and drop files, or use disk management tools to format or partition the drives.
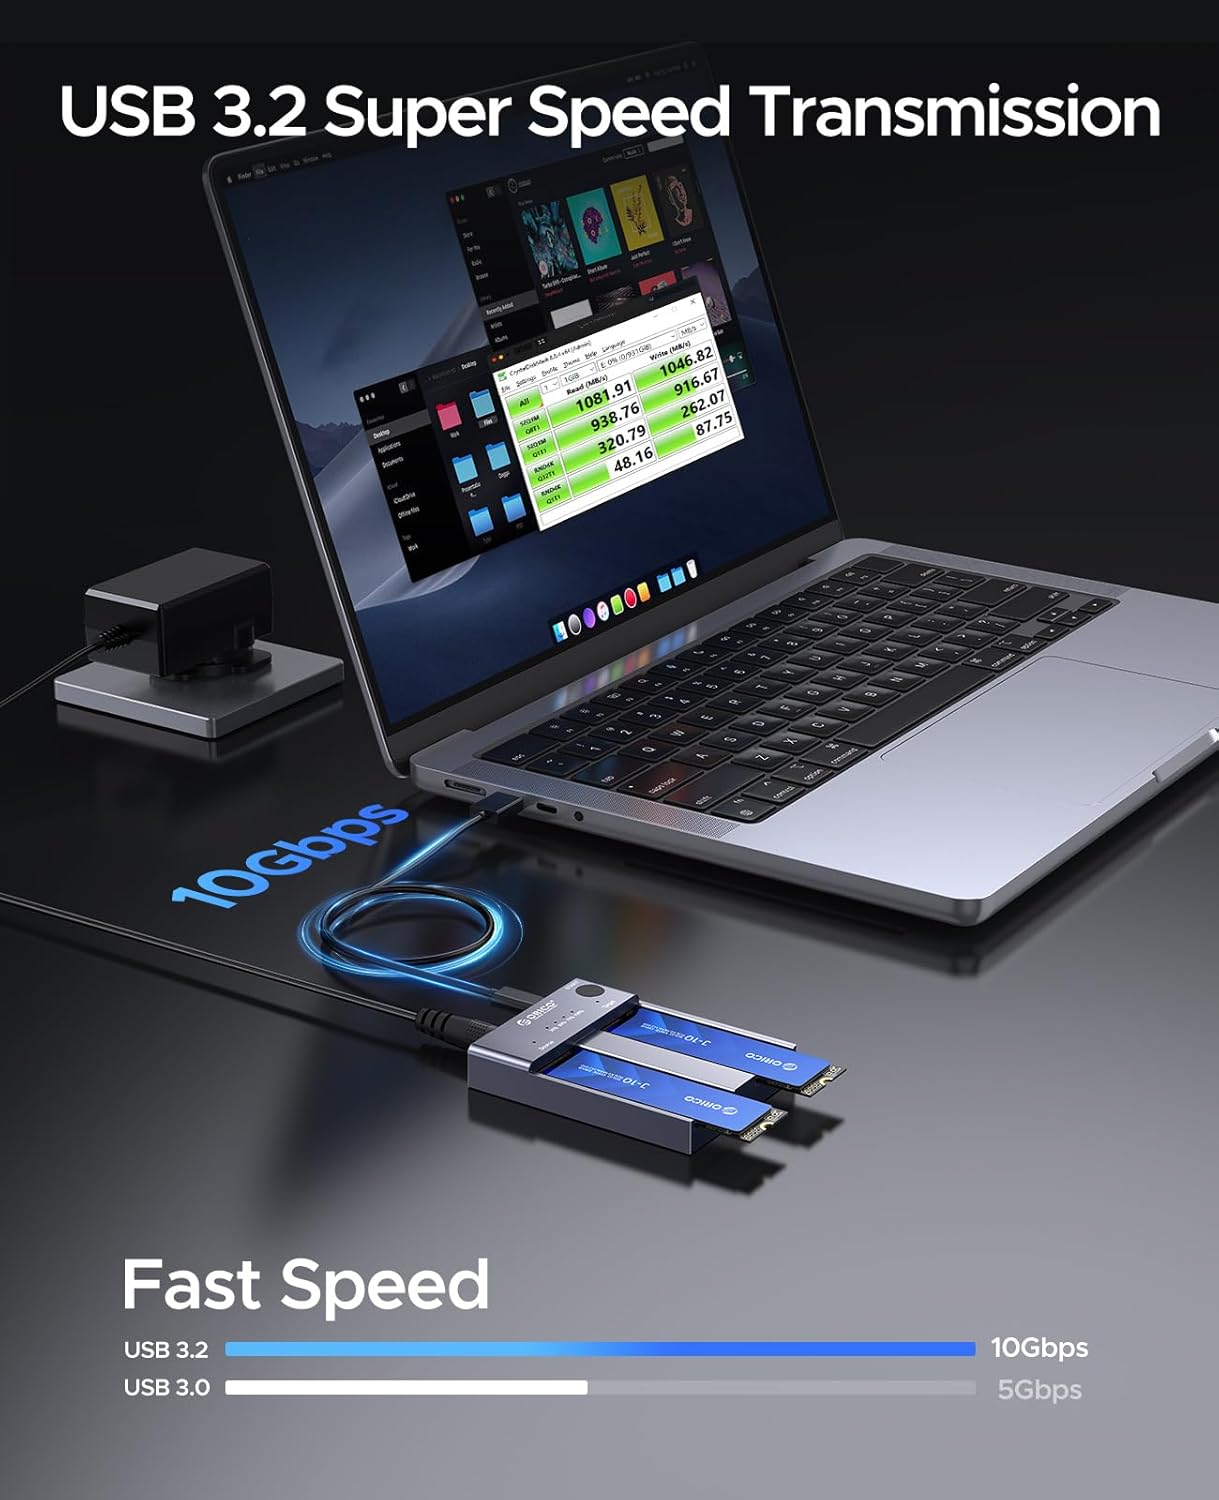
Figure 8: High-speed data transfer via USB 3.2 Gen2.
6. Maintenance
- Cleaning: Use a soft, dry cloth to clean the exterior of the docking station. Avoid using liquid cleaners or solvents.
- Heat Dissipation: The aluminum alloy construction and open-frame design are optimized for heat dissipation. Ensure proper airflow around the device during operation, especially during prolonged cloning or data transfer tasks.
- Automatic Sleep Mode: The device automatically enters sleep mode after 10 minutes of inactivity. This feature helps to extend the lifespan of your SSDs and conserve energy.
- Storage: When not in use, store the docking station in a cool, dry place away from direct sunlight and extreme temperatures.
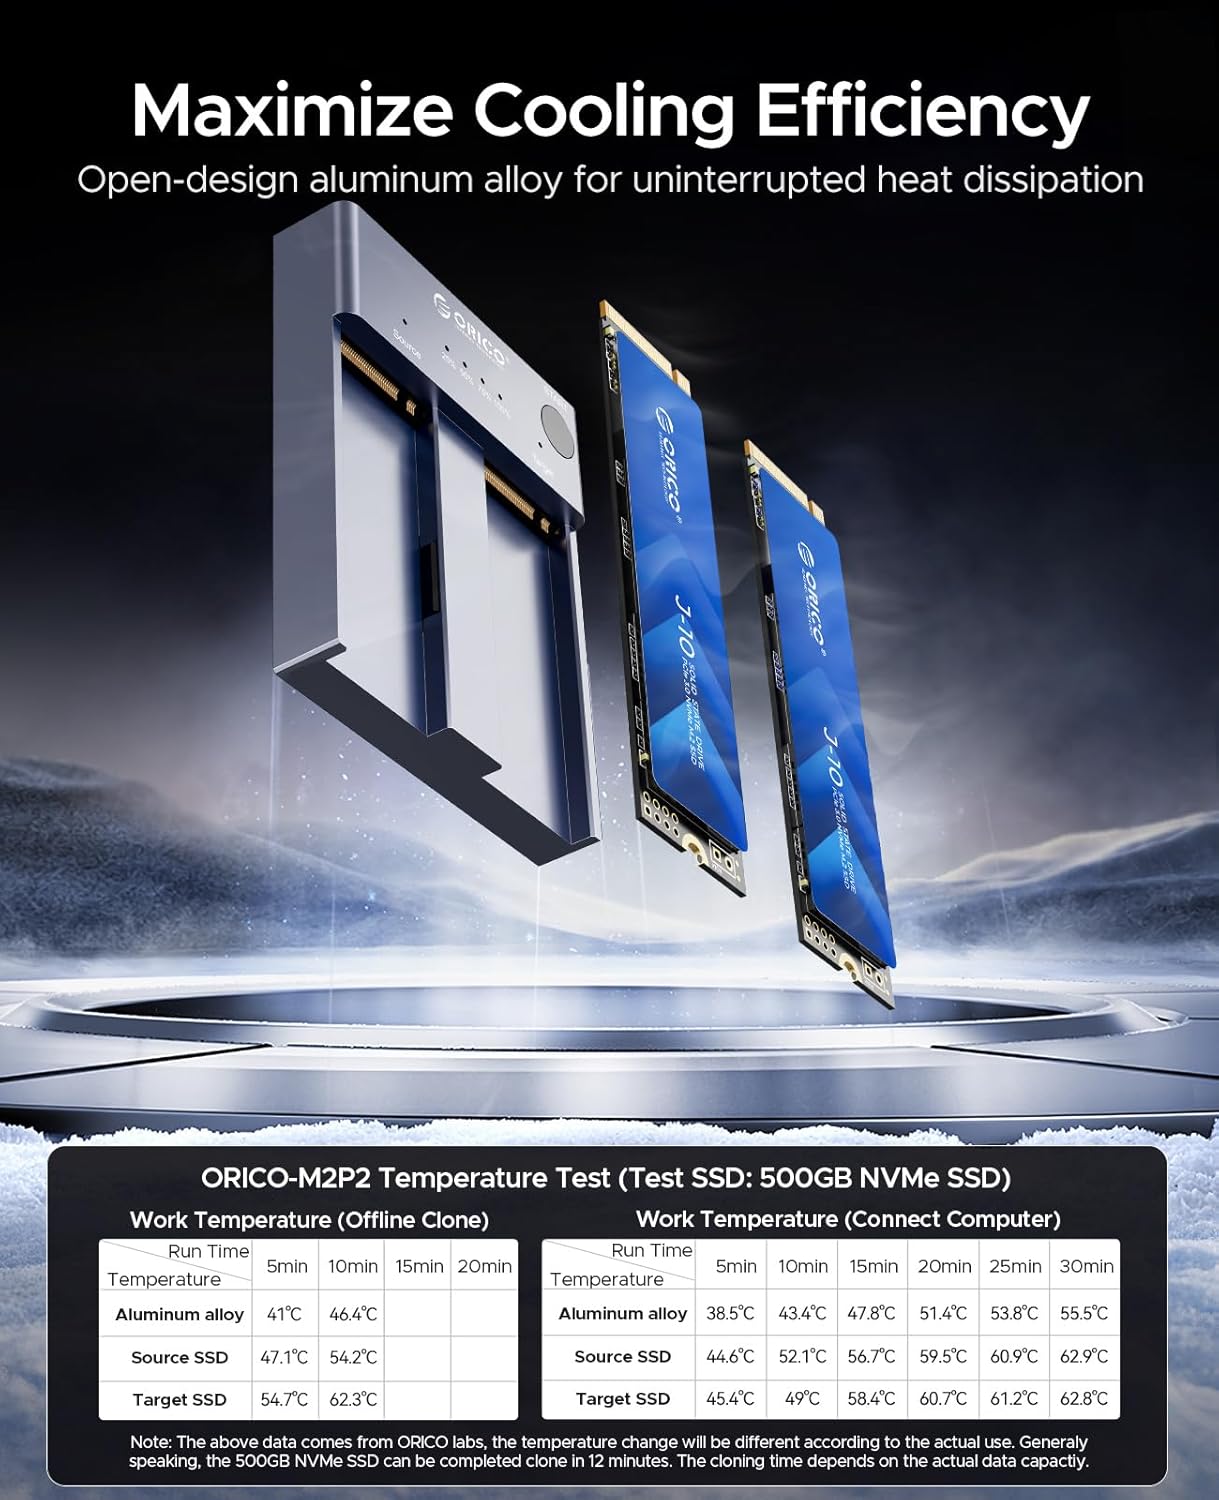
Figure 9: Efficient heat dissipation design.
7. Troubleshooting
- Device gets hot during operation: It is normal for the device and SSDs to generate heat during high-speed data transfer or cloning. The aluminum alloy design is intended to dissipate this heat. Ensure adequate ventilation and avoid placing the device on heat-sensitive surfaces.
- Cloning fails or data corruption:
- Ensure the target SSD's capacity is larger than or equal to the source SSD's capacity.
- Verify that both SSDs are properly seated in their respective slots.
- Ensure the docking station is not connected to a PC during offline cloning.
- For Windows installations, cloning may sometimes lead to bootloader issues. Consider a fresh installation if issues persist after cloning.
- SSDs not recognized by PC:
- Ensure the correct USB cable is used and securely connected.
- Try a different USB port on your computer.
- Check Disk Management (Windows) or Disk Utility (Mac) to see if the drive is detected but unformatted or unpartitioned.
- Confirm the SSD is an M Key NVMe PCIe SSD; SATA or mSATA SSDs are not compatible.
8. Warranty and Support
For detailed warranty information, technical support, and customer service, please refer to the official ORICO website or the warranty card included with your product. You may also contact ORICO customer support directly through their official channels for assistance with product-related inquiries or issues.
Related documentsM2P2-C3


Ask a question about this manual
Ask about setup, troubleshooting, compatibility, parts, safety, or missing instructions. Manuals+ will review the question and use this page’s manual context to help answer it.