Introduction
Thank you for choosing the Sunicon Professional Knife Sharpener. This system is designed to provide a safe, stable, and effective way to sharpen various types of blades, including kitchen knives, scissors, and peelers. Constructed from high-quality stainless steel, it offers durability and precision for maintaining sharp edges.
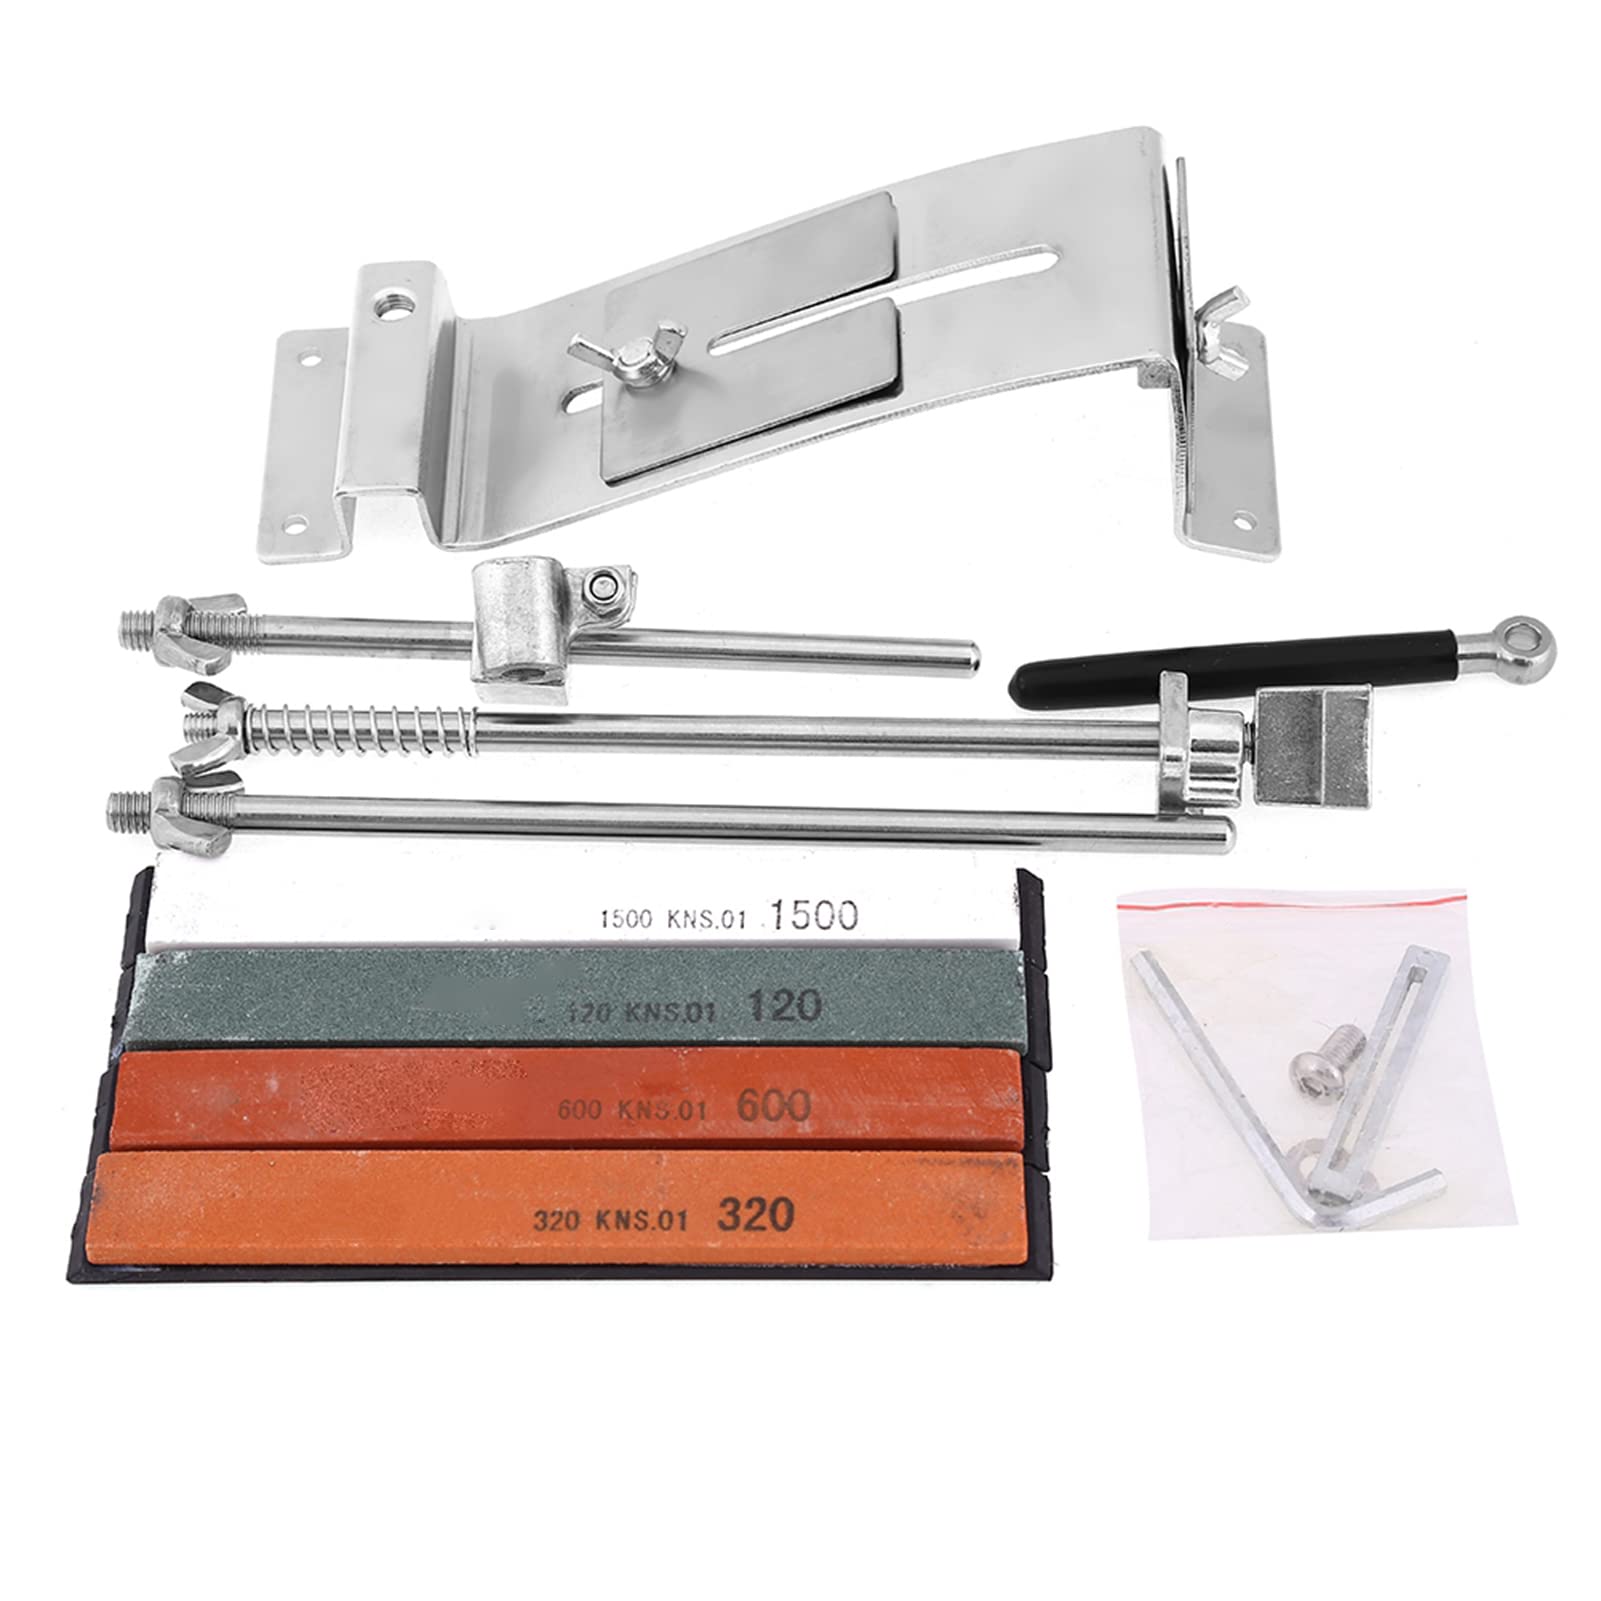
Image: The Sunicon Professional Knife Sharpener, fully assembled, demonstrating a knife being sharpened with a whetstone.
Safety Information
- Always handle sharp objects with extreme care. Knives are dangerous.
- Ensure the sharpener is placed on a stable, non-slip surface before use.
- Keep fingers away from the blade's edge and the sharpening stone during operation.
- Wear appropriate safety gloves if desired.
- Keep out of reach of children.
- Do not attempt to sharpen blades that are severely damaged or broken.
Package Contents
Verify that all components are present in your package:
- 1 x Sharpening Frame (main assembly)
- 4 x Sharpening Stones (120#, 320#, 600#, 1500# grit)

Image: A set of four sharpening stones with different grit levels (120, 320, 600, 1500) for various sharpening needs.
Setup Instructions
Follow these steps to assemble your knife sharpener:
- Unpack Components: Carefully remove all parts from the packaging.
- Assemble the Base: Place the main sharpening frame on a stable surface. Ensure all screws are tightened.
- Attach the Guide Rod: Insert the long guide rod into the designated slot on the sharpening frame.
- Secure the Knife Clamp: The knife clamp mechanism is integrated into the frame. Ensure the butterfly screw is loose enough to insert a knife.

Image: A detailed view of the sharpener's components, including the main frame, guide rod, and adjustment screws for securing the knife and setting the angle.

Image: A close-up of the knife clamping mechanism, highlighting the butterfly screw used to secure the blade firmly in place.
Operating Instructions
This section guides you through the process of sharpening a knife using the Sunicon system.
1. Securing the Knife
- Loosen the butterfly screw on the knife clamp.
- Carefully insert the blade of your knife into the clamp, ensuring it is centered and held firmly.
- Tighten the butterfly screw by hand until the knife is securely fixed and cannot move or shake.

Image: A close-up view of the spring-loaded mechanism, which helps to hold the sharpening stone securely during use.
2. Selecting and Attaching the Whetstone
- Choose the appropriate grit whetstone for your sharpening needs. Start with a coarser grit (e.g., 120# or 320#) for dull knives or repairing edges, and progress to finer grits (e.g., 600# or 1500#) for refining and polishing.
- Attach the selected whetstone to the guide rod. Ensure it is securely fastened.
3. Adjusting the Sharpening Angle
- The sharpener allows for angle adjustment from 5° to 90°. Adjust the angle by manipulating the vertical rod and securing it with the appropriate knob.
- For most kitchen knives, an angle between 15° and 20° per side is common. Refer to your knife manufacturer's recommendations if available.
- Ensure the whetstone makes even contact with the blade's edge at your desired angle.

Image: The knife sharpener in action, illustrating the back-and-forth sharpening motion and the adjustable angle feature, ranging from 5 to 90 degrees.
4. Sharpening the Blade
- Apply a small amount of water to the whetstone (if it's a water stone) or use a honing oil (if recommended for your stone type).
- Using light, consistent pressure, slide the whetstone along the blade's edge, moving from the heel to the tip. Maintain the set angle throughout the stroke.
- Perform an equal number of strokes on both sides of the blade. The 360° rotation flip design allows you to easily flip the knife to sharpen the other side without removing it from the clamp.
- Continue sharpening until a burr forms along the opposite edge of the blade.
- Progress to finer grit stones, repeating the process with lighter pressure, until the desired sharpness is achieved.
- After sharpening, carefully remove the knife and clean any residue.

Image: The sharpening system highlighting its ability to sharpen various kitchen tools, alongside a display of the four different grit whetstones provided.
Maintenance
- Cleaning: After each use, clean the sharpening frame and whetstones. Wipe the stainless steel frame with a damp cloth. Rinse whetstones under running water to remove metal particles. Allow all components to dry completely before storage.
- Storage: Store the sharpener and whetstones in a dry place to prevent rust and damage.
- Whetstone Care: Over time, whetstones may develop grooves or become uneven. Use a flattening stone (not included) to maintain a flat sharpening surface.
Troubleshooting
- Knife not getting sharp:
- Ensure the correct sharpening angle is set for your knife.
- Verify that you are using the appropriate grit sequence (coarse to fine).
- Check if the whetstone is making full contact with the blade's edge.
- Ensure sufficient pressure is applied, especially with coarser grits, but avoid excessive force.
- Knife slipping in clamp:
- Tighten the butterfly screw firmly by hand.
- Ensure the blade is clean and free of oil or grease before clamping.
- Uneven sharpening:
- Ensure consistent pressure and an equal number of strokes on both sides of the blade.
- Check if the whetstone surface is flat.
Specifications
| Feature | Detail |
|---|---|
| Model Number | Sunicon1y0dgt4oxb |
| Material | Stainless Steel |
| Whetstone Grit | 120#, 320#, 600#, 1500# |
| Sharpening Blade Angle | 5° to 90° (adjustable) |
| Frame Length | Approx. 40.4 cm / 15.91 in |
| Base Width | Approx. 6 cm / 2.36 in |
| Height | Approx. 16.3 cm / 6.42 in |
| Item Weight | Approx. 910g / 1.96 pounds |
| Product Dimensions (L x W x H) | 9.84 x 3.93 x 2.36 inches |
| Manufacturer | Sunicon |

Image: A diagram illustrating the key dimensions of the knife sharpener, including length, width, and height measurements.
Warranty and Support
For warranty information, technical support, or any inquiries regarding your Sunicon Professional Knife Sharpener, please refer to the manufacturer's official website or contact their customer service department directly. Contact details are typically provided with your purchase documentation or on the product packaging.