1. Introduction
This manual provides essential instructions for the safe and efficient operation, maintenance, and troubleshooting of your Vexilar T6T7T8 Robot Vacuum. Please read this manual thoroughly before using the product and retain it for future reference.
2. Important Safety Instructions
- Read all instructions before using this appliance.
- Do not operate the robot vacuum in wet environments or near water.
- Ensure the power adapter is compatible with your local voltage.
- Keep hair, loose clothing, fingers, and all parts of the body away from openings and moving parts.
- Do not pick up large or sharp objects, liquids, or burning/smoking materials.
- Supervise children and pets when the robot vacuum is operating.
- Only use manufacturer-specified attachments and accessories.
- Unplug the charging dock when not in use for extended periods.
3. Package Contents
Verify that all items are present and in good condition:
- 1 x Vexilar T6T7T8 Robot Vacuum
- 1 x Charging Dock
- 1 x AC Power Adapter
- 1 x Remote Control
- 2 x HEPA Filters
- 1 x Cleaning Tool
- 4 x Side Brushes
- 1 x User Manual (This document)

Figure 3.1: Vexilar T6T7T8 Robot Vacuum with its charging dock, remote control, and other accessories.
4. Product Overview
4.1 Robot Vacuum Components (Top View)
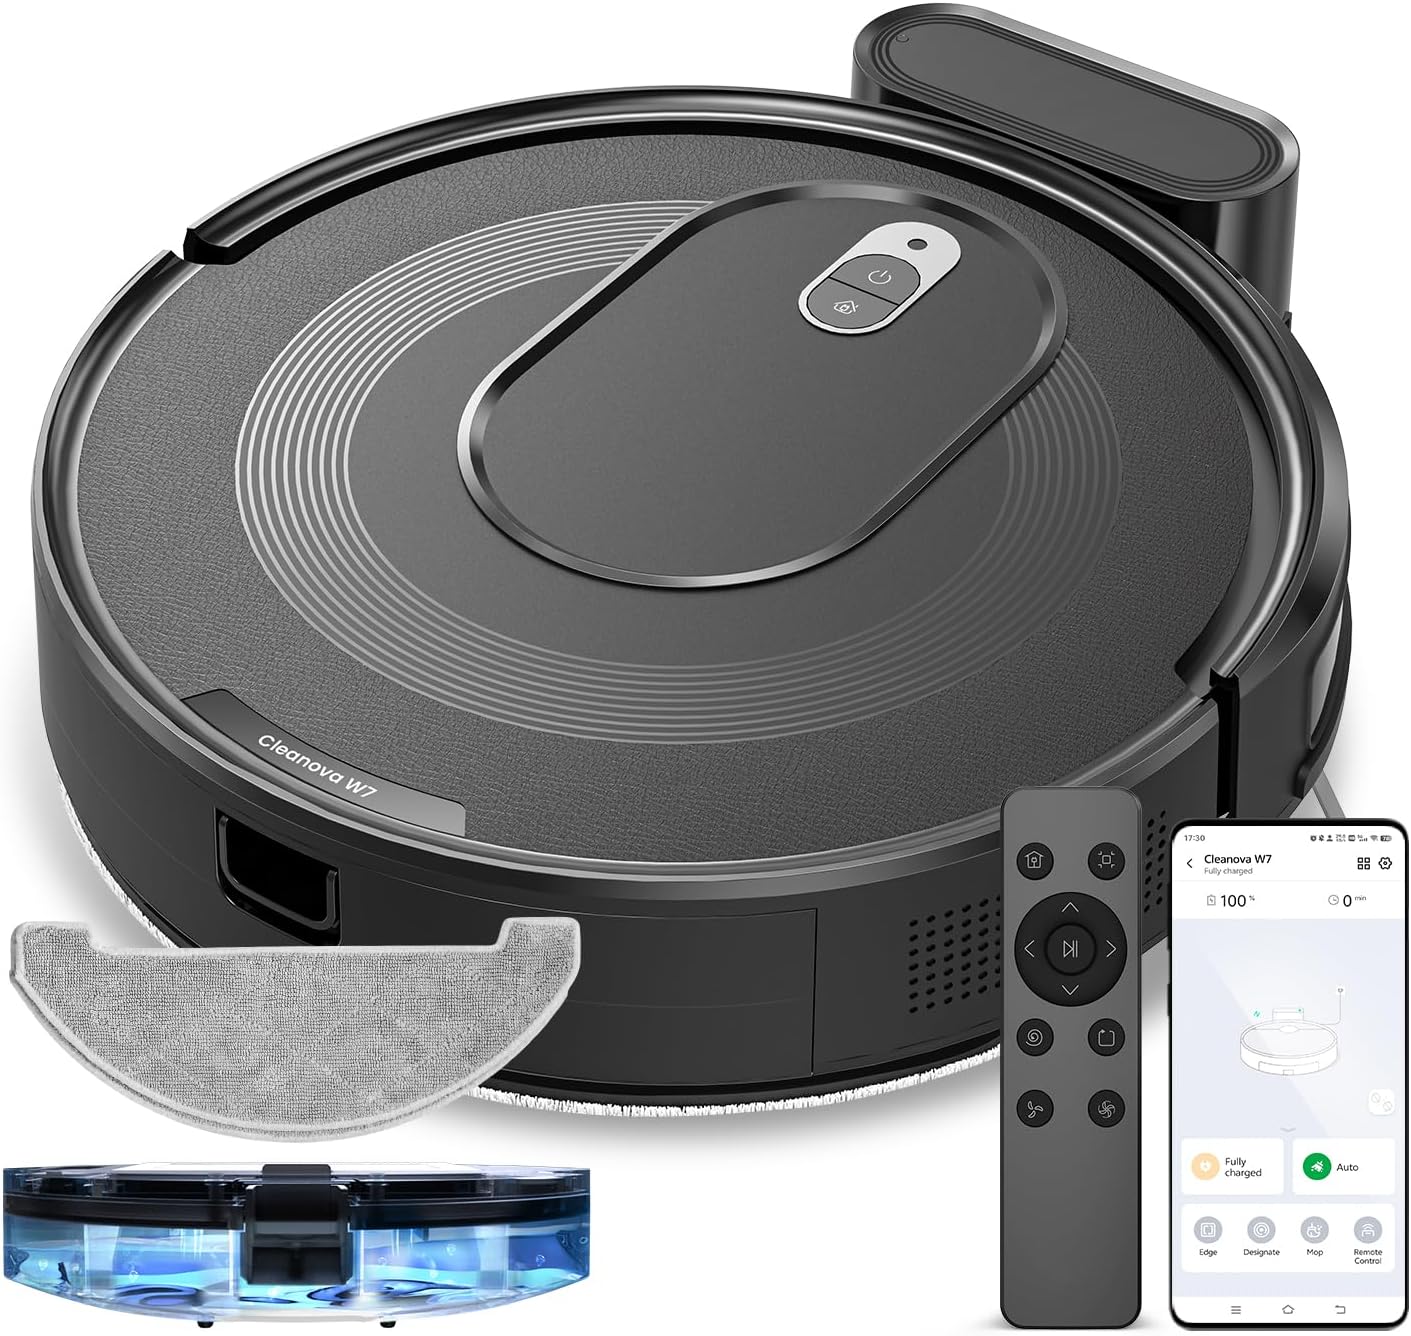
Figure 4.1: Top view of the Vexilar T6T7T8 Robot Vacuum, showing the power button and dustbin cover.
4.2 Robot Vacuum Components (Bottom View)
Figure 4.2: Bottom view of the Vexilar T6T7T8 Robot Vacuum, illustrating the side brushes, main brush, and wheels.
4.3 Slim Design and Navigation
The robot's ultra-thin design (2.89 inches height) allows it to easily navigate under furniture and in tight spaces, ensuring comprehensive cleaning.

Figure 4.3: The Vexilar T6T7T8 Robot Vacuum demonstrating its ability to clean under low-clearance furniture.
5. Setup Guide
5.1 Charging Dock Placement
- Place the charging dock against a wall in an open, uncluttered area.
- Ensure there is at least 0.5 meters (1.6 feet) of clear space on both sides of the dock and 1.5 meters (4.9 feet) in front.
- Connect the power adapter to the charging dock and plug it into a wall outlet.
5.2 Initial Charging
Before first use, fully charge the robot vacuum. Place the robot onto the charging dock, ensuring the charging contacts align. The indicator light will show charging status. A full charge typically takes 4-5 hours.
5.3 App Connection and Smart Control
For enhanced control and scheduling features, download the Vexilar app from your smartphone's app store. The app supports 2.4GHz WiFi networks only (5G WiFi is not supported).
- Download and install the Vexilar app.
- Register an account and log in.
- Follow the in-app instructions to connect your robot vacuum to your home Wi-Fi network.
- Once connected, you can control the robot via the app, or integrate with voice assistants like Siri, Google Home, or Alexa.
- Alternatively, use the included remote control or Bluetooth for basic operations without Wi-Fi.

Figure 5.1: Example of the Vexilar app interface for controlling the robot vacuum.
6. Operation
6.1 Starting and Pausing Cleaning
- Press the power button on the robot or the "Clean" button on the remote/app to start cleaning.
- Press the button again to pause cleaning.
- To send the robot back to the charging dock, press the home button on the remote/app.
6.2 Cleaning Modes
The Vexilar T6T7T8 offers four cleaning modes:
- Auto Clean: The robot intelligently navigates using gyroscope technology to cover the entire floor area in an efficient zig-zag pattern.
- Spot Clean: Focuses on a specific dirty area, cleaning in a spiral pattern.
- Edge Clean: Cleans along walls and furniture edges.
- Mop Mode: Engages the mopping function for hard floors.
6.3 2-in-1 Sweeping and Mopping
The robot can simultaneously vacuum and mop. To use the mopping function:
- Fill the water tank (200ml capacity) with clean water.
- Attach the mop cloth to the water tank.
- Insert the water tank assembly into the robot.
- Select Mop Mode via the app or remote control. The electronically controlled water pump allows for adjustable four-level water output.
- Note: For carpeted areas, remove the mop holder before cleaning to prevent wetting the carpet. The robot automatically recognizes carpets and switches to max suction mode when the mop holder is removed.

Figure 6.1: The Vexilar T6T7T8 Robot Vacuum simultaneously vacuuming and mopping a hard floor.
7. Maintenance
Regular maintenance ensures optimal performance and extends the lifespan of your robot vacuum.
7.1 Dustbin and Filter Cleaning
- Press the dustbin release button and remove the dustbin.
- Empty the dustbin contents into a trash receptacle.
- Remove the HEPA filter and sponge filter. Tap them gently to remove dust. Do not wash HEPA filters with water.
- Rinse the dustbin with water if necessary, ensuring it is completely dry before reinstallation.
- Reinstall the filters and dustbin.
7.2 Side Brush and Main Brush Cleaning
- Periodically check side brushes for tangled hair or debris. Remove and clean them using the provided cleaning tool.
- Remove the main brush cover and lift out the main brush. Use the cleaning tool to remove hair and debris.
7.3 Sensor Cleaning
Wipe the cliff sensors, wall sensors, and charging contacts on the robot and charging dock with a clean, dry cloth to ensure proper function.
7.4 Water Tank and Mop Cloth Maintenance
- After each mopping session, empty any remaining water from the tank.
- Remove and wash the mop cloth. Allow it to air dry completely before reuse.
8. Troubleshooting
| Problem | Possible Cause | Solution |
|---|---|---|
| Robot does not start | Low battery; Power switch off | Charge the robot; Turn on the power switch |
| Robot gets stuck frequently | Obstacles; Dirty sensors | Clear obstacles; Clean sensors |
| Poor cleaning performance | Full dustbin; Clogged filters/brushes | Empty dustbin; Clean/replace filters and brushes |
| Robot cannot find charging dock | Dock obstructed; Dock unplugged | Ensure clear path to dock; Plug in dock |
| App connection issues | Incorrect Wi-Fi band; Network issues | Ensure 2.4GHz Wi-Fi; Restart router/robot |
9. Specifications
| Feature | Detail |
|---|---|
| Model Name | T6T7T8 |
| Brand | Vexilar |
| Product Dimensions | 16"L x 13"W x 4.5"H |
| Item Weight | 7 pounds (3.17 kg) |
| Suction Power | Up to 3000Pa (Max Mode) |
| Battery Life | Up to 120 minutes (Quiet Mode) |
| Dustbin Capacity | 0.5 Liters (500ml) |
| Water Tank Capacity | 200ml |
| Filter Type | Sponge, HEPA (H10 Grade with 95% filtration above 3 microns) |
| Control Methods | App, Siri, Google Home, Alexa, Remote Control, Bluetooth |
| Navigation Type | Gyroscope Smart Navigation |
| Charging Time | Approximately 4-5 hours |
| Noise Level | Under 60dB |
| Power Source | Battery Powered (10.8 Volts) |
10. Warranty and Support
The Vexilar T6T7T8 Robot Vacuum comes with a 12-month warranty from the date of purchase, covering manufacturing defects. Please retain your proof of purchase for warranty claims.
For technical support, troubleshooting assistance, or warranty inquiries, please visit our support page or contact customer service:
- Online Support: http://www.utenic.com/qr/support/vactidy/
- Email Support: support@gracevacuum.com


