
Introduction
This manual provides detailed instructions for the safe operation, setup, and maintenance of your Wooptoothy YUXIANG F07 UH-1D RC Helicopter. This 1:34 scale model features a 6-axis gyro for stable flight, a brushless direct-drive system, and a flybarless design. Please read this manual thoroughly before operating the helicopter to ensure proper use and to prevent damage.

Image: The YUXIANG F07 UH-1D RC Helicopter, its remote control, and two included batteries. The helicopter is green with black rotor blades and a detailed fuselage.
Safety Information
WARNING: This product contains small components. Assembly and use of this product must be under the supervision of adults. Not suitable for children under 15 years of age.
- Always operate the helicopter in an open area, away from people, animals, and obstacles.
- Ensure all batteries are fully charged before flight.
- Do not operate in strong winds or adverse weather conditions.
- Keep fingers and loose clothing away from rotating blades.
- Store the helicopter and batteries in a cool, dry place.
- Refer to local regulations regarding RC aircraft operation.
Product Overview and Features
The YUXIANG F07 UH-1D RC Helicopter is designed for enthusiasts, offering a realistic scale model experience with advanced flight capabilities.
- Realistic Design: A 1:34 scale model based on the Bell UH-1 Huey, featuring detailed aesthetics and lighting effects.
- Advanced Stabilization: Equipped with a 6-axis gyro and an electronic stabilization system for precise control and enhanced flight stability, suitable for beginners.
- Efficient Brushless Motors: Features a 2511 1200KV brushless main motor for high efficiency and low noise, and a 1204 5500KV brushless tail motor for rapid response and stable tail locking.
- Durable Construction: Propellers made from nylon and carbon fiber composite for strength and impact resistance. Optimized structure reduces damage risk.
- Precision Servos: 4.3g metal gear servos provide high torque, fast response, and precise centering for superior flight control.
- Intelligent Battery: Professional 7.4V 1200mAh 25C Li-Po battery with overcharge, discharge, and low-voltage protection, offering up to 12 minutes of flight time. Charges via Type-C port.

Image: The helicopter in flight, emphasizing its 6-axis gyroscope for stable, fast, and accurate flight, especially beneficial for beginners.
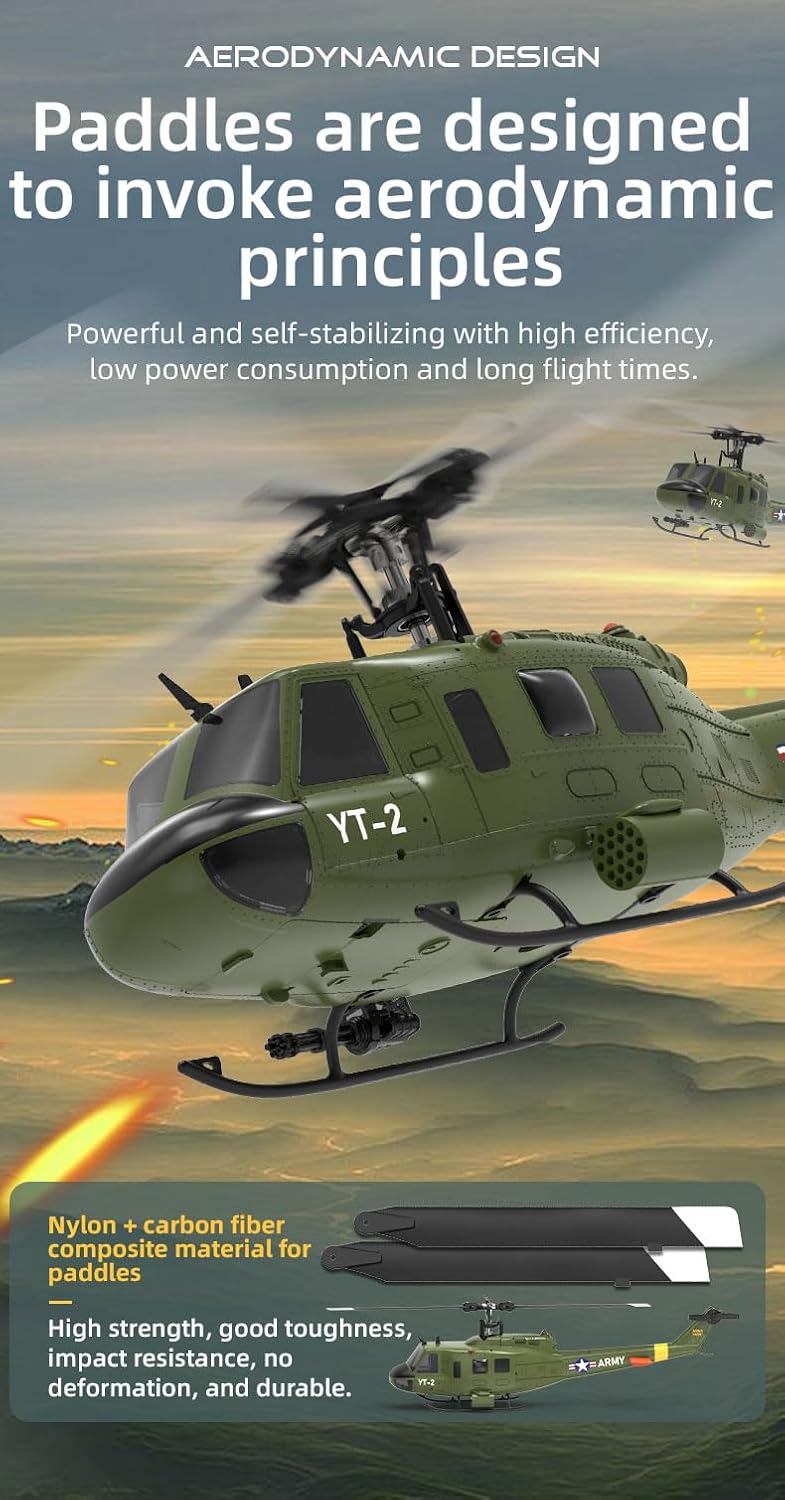
Image: Illustration detailing the aerodynamic design of the helicopter's paddles, highlighting their construction from nylon and carbon fiber composite for strength and efficiency.
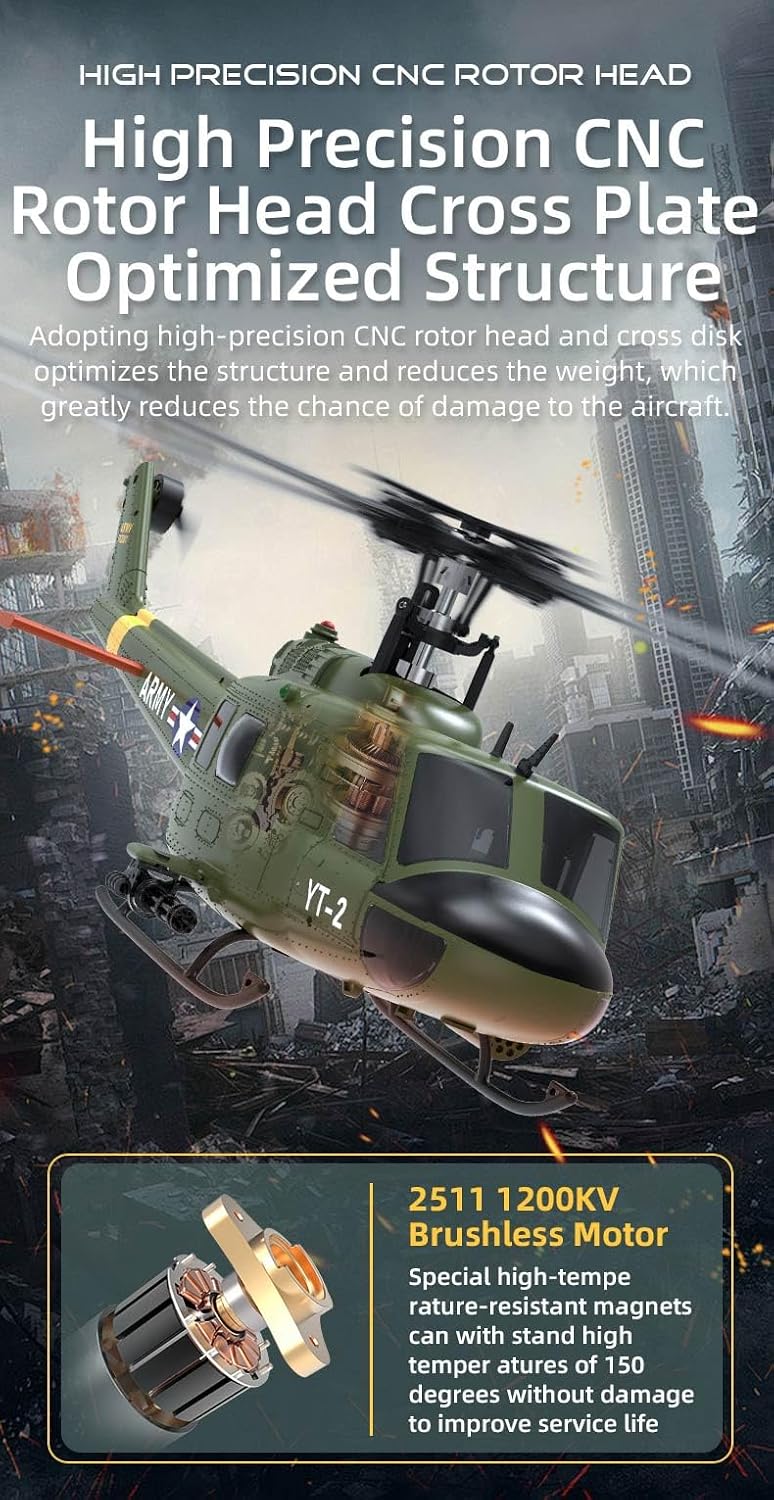
Image: A cutaway view of the helicopter's internal components, focusing on the high-precision CNC rotor head and the 2511 1200KV brushless motor, designed for durability and performance.
Setup
1. Battery Charging
Before first use, fully charge the helicopter's Li-Po battery. Connect the provided Type-C charging cable to the battery and a suitable USB power adapter (not included). The charging indicator will show the charging status. Disconnect once fully charged.
- Charging time: Approximately 60-90 minutes.
- Do not leave batteries unattended while charging.
- Use only the provided charging cable and a compatible USB power source.
2. Remote Control Batteries
Install 4x AA batteries (not included) into the remote control. Ensure correct polarity.
3. Pairing the Helicopter and Remote Control
- Ensure both the helicopter and remote control are powered off.
- Place the helicopter on a flat, level surface.
- Power on the helicopter. The indicator light will flash.
- Power on the remote control. Move the throttle stick (left stick) to the lowest position.
- The remote control will emit a beep, and the helicopter's indicator light will become solid, indicating successful pairing.
- If pairing fails, repeat the steps.
Operating Instructions
Familiarize yourself with the remote control functions before attempting flight.
Remote Control Layout
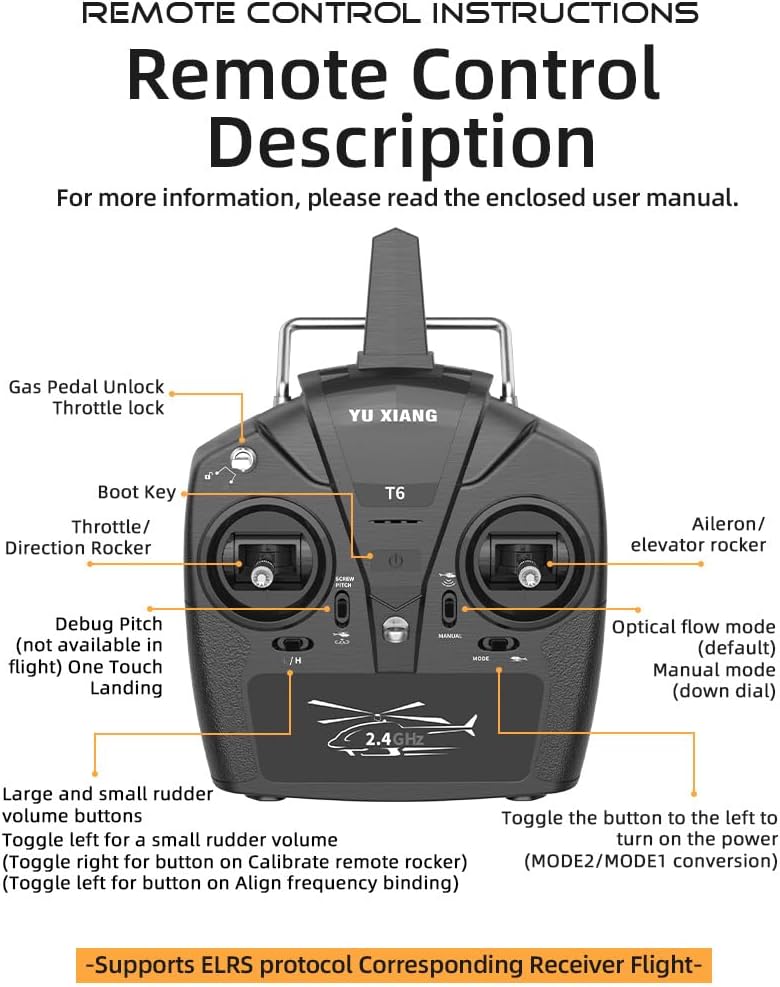
Image: Detailed diagram of the T6 remote control, showing the Gas Pedal Unlock, Throttle lock, Boot Key, Throttle/Direction Rocker, Debug Pitch, One Touch Landing, Aileron/Elevator Rocker, Optical Flow Mode, Manual Mode, Large and Small Rudder Volume buttons, and MODE2/MODE1 conversion switch.
- Throttle/Direction Rocker (Left Stick): Controls altitude (up/down) and yaw (left/right rotation).
- Aileron/Elevator Rocker (Right Stick): Controls forward/backward movement (pitch) and left/right sideways movement (roll).
- Boot Key: Power on/off the remote control.
- Gas Pedal Unlock/Throttle Lock: Safety features to prevent accidental rotor activation.
- One Touch Landing: Initiates an automatic landing sequence.
- Optical Flow Mode / Manual Mode Switch: Toggles between stable flight mode (optical flow) and more agile manual control.
- Rudder Volume Buttons: Adjusts the sensitivity of rudder control.
- MODE2/MODE1 Conversion: Switches between different control stick configurations.
Basic Flight Functions

Image: A visual guide to the helicopter's flight capabilities, including vertical ascent/descent, lateral movement (left/right flight), rotational turns (left/right turn), and horizontal movement (onward/backwards).
- Take-off: After pairing, slowly push the throttle stick upwards to lift off.
- Ascend/Descend: Push the left stick up to ascend, pull down to descend.
- Forward/Backward: Push the right stick up to move forward, pull down to move backward.
- Left/Right Flight (Roll): Push the right stick left to move left, push right to move right.
- Turn Left/Right (Yaw): Push the left stick left to turn left, push right to turn right.
- One-Key Inverted Flight: This feature allows for easy transition to inverted flight. Refer to the remote control diagram for the specific button.
- One-Touch Landing: Press the designated button on the remote control to initiate an automatic landing.

Image: The helicopter descending for a one-touch landing, with an overlay indicating bi-directional feedback and a low battery alarm feature.
Maintenance
- Cleaning: Use a soft, dry cloth to clean the helicopter after each use. Avoid water or solvents.
- Blade Inspection: Regularly check rotor blades for any damage (cracks, bends). Replace damaged blades immediately.
- Battery Care: Do not overcharge or over-discharge the Li-Po battery. Store batteries at approximately 50% charge if not used for extended periods.
- Storage: Store the helicopter and remote control in a cool, dry place, away from direct sunlight and extreme temperatures.
- Motor and Gear Inspection: Periodically check motors and gears for debris or signs of wear.
Troubleshooting
| Problem | Possible Cause | Solution |
|---|---|---|
| Helicopter does not respond to remote control. | Not paired; low battery in helicopter or remote. | Re-pair the helicopter and remote. Charge helicopter battery; replace remote control batteries. |
| Helicopter flies erratically or is unstable. | Damaged blades; gyroscope calibration needed; strong wind. | Inspect and replace damaged blades. Recalibrate gyroscope (refer to remote control instructions for debug pitch). Fly in calm conditions. |
| Short flight time. | Battery not fully charged; aging battery. | Ensure battery is fully charged. Consider replacing the battery if it's old. |
| Rotors spin but helicopter does not lift off. | Low battery; damaged rotors; motor issue. | Charge battery. Check and replace damaged rotors. Contact support if motor issue is suspected. |
Specifications
| Feature | Detail |
|---|---|
| Model Number | YUXIANG F07 UH-1D |
| Scale | 1:34 |
| Gyroscope | 6-Axis Gyro |
| Motor Type | Brushless (Main: 2511 1200KV, Tail: 1204 5500KV) |
| Battery | 7.4V 1200mAh 25C Li-Po |
| Flight Time | Up to 12 minutes |
| Charging Port | Type-C |
| Product Dimensions | 12 x 8 x 5 inches |
| Item Weight | 3 pounds |
| Recommended Age | 15 years and up |
Warranty and Support
For warranty information, technical support, or replacement parts, please contact the seller or manufacturer directly. Keep your purchase receipt as proof of purchase.
Manufacturer: Wooptoothy