
1. Introduction
Thank you for purchasing the Wooptoothy YUXIANG F08 Bell206 RC Helicopter. This 1:27 scale model is designed for both beginners and experienced pilots, featuring advanced flight stability and control systems. This manual provides essential information for safe operation, setup, maintenance, and troubleshooting to ensure optimal performance and longevity of your helicopter.
2. Safety Precautions
Read and understand all safety instructions before operating the helicopter. Failure to follow these instructions may result in injury or damage to the product.
- Adult Supervision: This product contains small components. Assembly and operation should be performed under adult supervision, especially for users under 18 years of age.
- Flight Environment: Operate the helicopter in open, clear areas, away from people, animals, buildings, and power lines. Avoid flying in strong winds or adverse weather conditions.
- Battery Safety: Use only the specified 7.4V 1200mAh 25C Li-Po battery. Do not overcharge, over-discharge, or short-circuit the battery. Discontinue use if the battery shows signs of swelling or damage.
- Rotor Blades: Keep hands, face, and loose clothing away from rotating rotor blades. The blades can cause serious injury.
- Water Exposure: The helicopter is weather-resistant but not waterproof. Avoid exposure to heavy rain or submersion in water.
- Heat: Do not expose the helicopter or battery to direct sunlight or high temperatures.
3. Package Contents
Verify that all items are present in the package:
- YUXIANG F08 Bell206 RC Helicopter
- Remote Controller
- 7.4V 1200mAh 25C Li-Po Battery (Quantity may vary based on purchase option)
- USB Type-C Charging Cable
- Spare Rotor Blades
- Product Manual (this document)
- Small Tools (e.g., screwdriver)
4. Product Overview
The YUXIANG F08 Bell206 features a realistic design and advanced flight technology for a stable and enjoyable flying experience.

Figure 4.1: YUXIANG F08 Bell206 RC Helicopter, showcasing its realistic design.
4.1 Key Features
- Realistic Design: 1:27 scale model replicating the Bell-206 helicopter with high-precision details and lighting effects.
- Advanced Flight Stability: Flybarless design with dual-axis motor control and electronic stabilization system for precise handling.
- Tail Motor: Specialized 1204 5500KV brushless tail motor for rapid response and stable tail-lock performance.
- Precision Servos: Three 4.3g metal gear servos for high torque, quick response, and precise centering.
- High-Efficiency Propellers: Aerodynamically designed nylon and carbon fiber composite propellers for enhanced power and stability.
- Brushless Motor: 2511 1200KV brushless motor for low noise, high torque, and efficient operation, with heat-resistant magnetic steel.
- 6-Axis Gyro: Built-in 6-axis gyro for stable, fast, and accurate flight postures, suitable for beginners.
- Optical Flow Positioning: High-precision optical flow positioning and barometer altitude hold function for accurate hovering indoors and outdoors.
- One-Key Inverted Flight: Allows users to master inverted flying with ease.
- Intelligent Battery: Custom 7.4V 1200mAh 25C Li-Po battery with overcharge, discharge, and low-voltage protection.

Figure 4.2: Barometric altitude flight and optical flow positioning for stable hovering.

Figure 4.3: Aerodynamic design of propellers for high efficiency and long flight time.
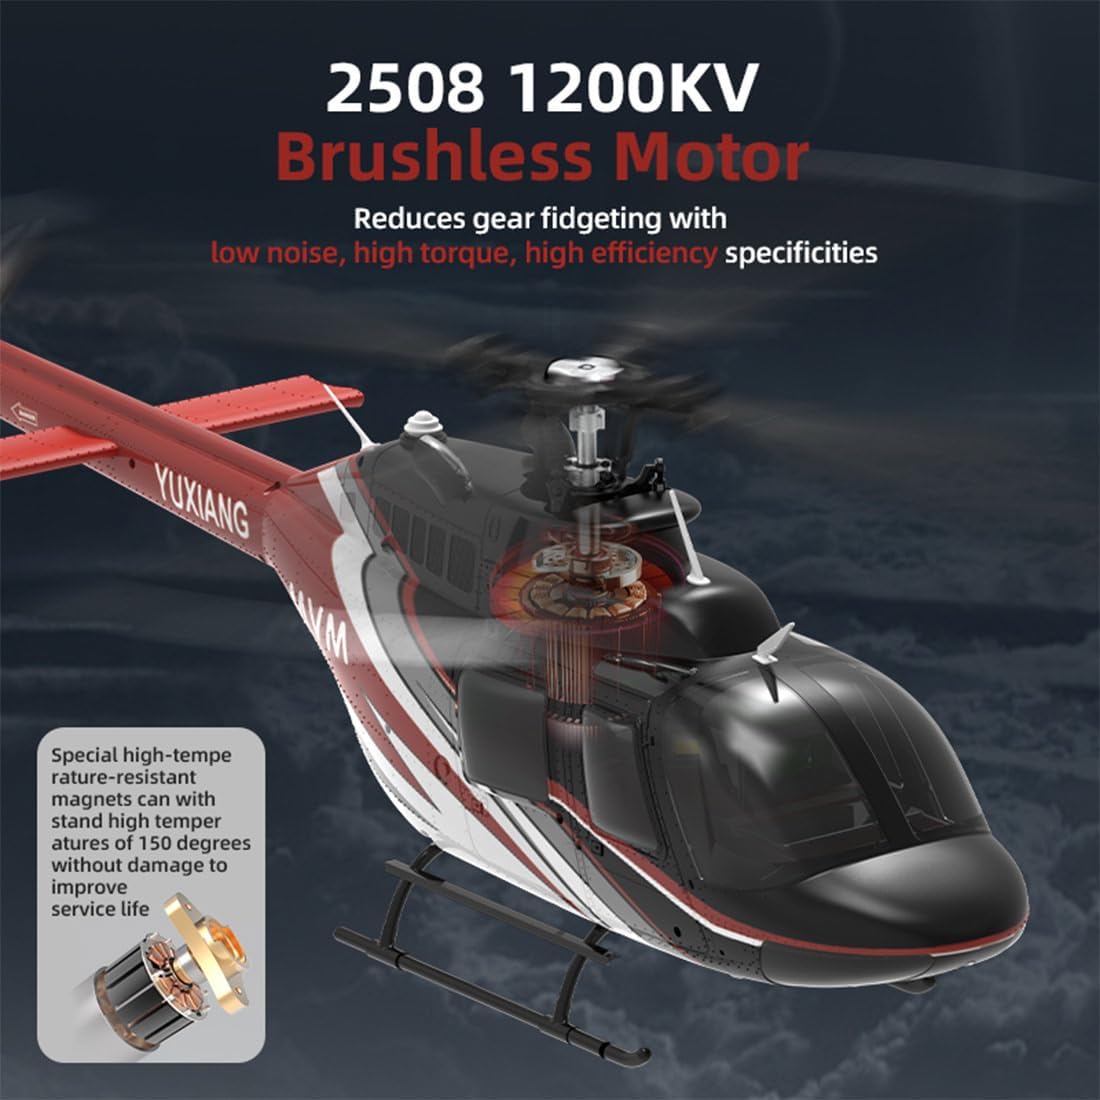
Figure 4.4: The 2511 1200KV brushless motor provides low noise and high torque.

Figure 4.5: The 6-axis gyro ensures stable flight, suitable for beginners.
5. Setup
5.1 Battery Charging
- Connect the provided USB Type-C charging cable to a compatible USB power adapter (not included).
- Connect the battery to the charging cable.
- The charging indicator will show the charging status (refer to the charger's specific instructions for light patterns).
- Once fully charged, disconnect the battery from the charger. Do not leave batteries charging unattended.
5.2 Battery Installation
- Ensure the helicopter's power switch is in the OFF position.
- Open the battery compartment on the helicopter.
- Insert the charged battery into the compartment, ensuring correct polarity.
- Securely close the battery compartment.
5.3 Remote Controller Setup
- Install 4 AA batteries (not included) into the remote controller, observing correct polarity.
- Turn on the remote controller.
- Turn on the helicopter. The helicopter and remote controller will automatically pair. A successful pairing is usually indicated by a solid light on the helicopter.
6. Operating Instructions
Familiarize yourself with the remote controller functions before attempting flight.
6.1 Basic Flight Controls
- Throttle (Left Stick Up/Down): Controls the helicopter's altitude.
- Yaw (Left Stick Left/Right): Rotates the helicopter left or right on its vertical axis.
- Pitch (Right Stick Up/Down): Moves the helicopter forward or backward.
- Roll (Right Stick Left/Right): Moves the helicopter left or right sideways.
6.2 Take-off and Landing
- Take-off: Place the helicopter on a flat, level surface. Slowly increase the throttle until the helicopter lifts off the ground.
- Landing: Slowly decrease the throttle to descend. Gently bring the helicopter down to a soft landing.
6.3 6-Axis Gyro and Optical Flow Positioning
The built-in 6-axis gyro provides stable flight, automatically correcting for minor deviations. The high-precision optical flow positioning and barometer altitude hold function enable accurate hovering, especially useful for beginners and indoor flight (within limited height).
6.4 One-Key Inverted Flight
This feature allows the helicopter to perform inverted flight with a single button press. Refer to your remote controller's specific button layout for this function. Practice this feature at a safe altitude.

Figure 6.1: The 2.4G signal remote control allows multiple helicopters to fly without interference.
7. Maintenance
7.1 Cleaning
Wipe the helicopter with a soft, dry cloth after each use to remove dust and debris. Do not use water or chemical cleaners.
7.2 Propeller Replacement
If propellers are damaged, replace them immediately with genuine spare parts. Use the provided tools to carefully remove and install new blades, ensuring they are securely fastened.
7.3 Battery Care
- Store batteries in a cool, dry place.
- Do not store fully charged or fully discharged batteries for extended periods. Charge them to approximately 50% for storage.
- If the battery is not used for a long time, charge and discharge it once every three months to maintain battery life.
8. Troubleshooting
If you encounter issues, refer to the following common problems and solutions:
| Problem | Possible Cause | Solution |
|---|---|---|
| Helicopter does not respond to remote control. | Low battery in helicopter or remote; Not paired; Interference. | Charge helicopter battery; Replace remote batteries; Re-pair helicopter and remote; Move to an area with less interference. |
| Helicopter flies erratically or is unstable. | Damaged propellers; Gyro not calibrated; Strong wind. | Replace damaged propellers; Recalibrate gyro (refer to remote control instructions); Fly in calm conditions. |
| Short flight time. | Battery not fully charged; Old or damaged battery. | Ensure battery is fully charged; Consider replacing the battery if it's old or damaged. |
| Helicopter does not lift off. | Low battery; Obstruction to rotors; Incorrect throttle input. | Charge battery; Check for obstructions; Slowly increase throttle. |
9. Specifications
| Feature | Detail |
|---|---|
| Brand Name | Wooptoothy |
| Model Name | YUXIANG F08 Bell206 RC Helicopter |
| Model Number | F08Bell206 |
| Scale | 1:27 |
| Channels | 6CH |
| Motor Type | Brushless Direct-Drive |
| Gyro | 6-Axis Gyro |
| Flight Modes | 3D/6G |
| Battery | 7.4V 1200mAh 25C Li-Po |
| Flight Time | Up to 13 minutes |
| Charging Port | Type-C |
| Material Type | Plastic |
| Item Weight | 3 Pounds |
| Item Dimensions | 12 x 8 x 5 inches |
| Age Range Description | Adult (Manufacturer Minimum Age: 180 Months) |
| Additional Features | Weather Resistant, Optical Flow Positioning, Barometer Altitude Hold, One-Key Inverted Flight |
10. Warranty and Support
Specific warranty information and customer support contact details are not provided within this manual. Please refer to your purchase documentation or the retailer's website for warranty terms and support options.