
Gigabyte G6 MF-H2DE854KH
GIGABYTE G6 MF-H2DE854KH Gaming Laptop User Manual
Model: G6 MF-H2DE854KH | Brand: Gigabyte
1. Introduction
This manual provides essential information for the safe and efficient operation of your GIGABYTE G6 MF-H2DE854KH Gaming Laptop. Please read this manual thoroughly before using the device and keep it for future reference.
2. Safety Information
Observe the following safety precautions to prevent damage to the laptop and ensure personal safety:
- Do not expose the laptop to extreme temperatures, humidity, or direct sunlight.
- Avoid placing heavy objects on the laptop.
- Use only the original power adapter and accessories provided by Gigabyte.
- Do not attempt to disassemble or repair the laptop yourself. Refer to qualified service personnel.
- Keep liquids away from the laptop to prevent electrical shock or damage.
3. Package Contents
Verify that all items are present in the package:
- GIGABYTE G6 MF-H2DE854KH Gaming Laptop
- Power Adapter and Power Cord
- User Manual (this document)
- Warranty Card (if applicable)
4. Product Overview
Familiarize yourself with the components of your GIGABYTE G6 Gaming Laptop.
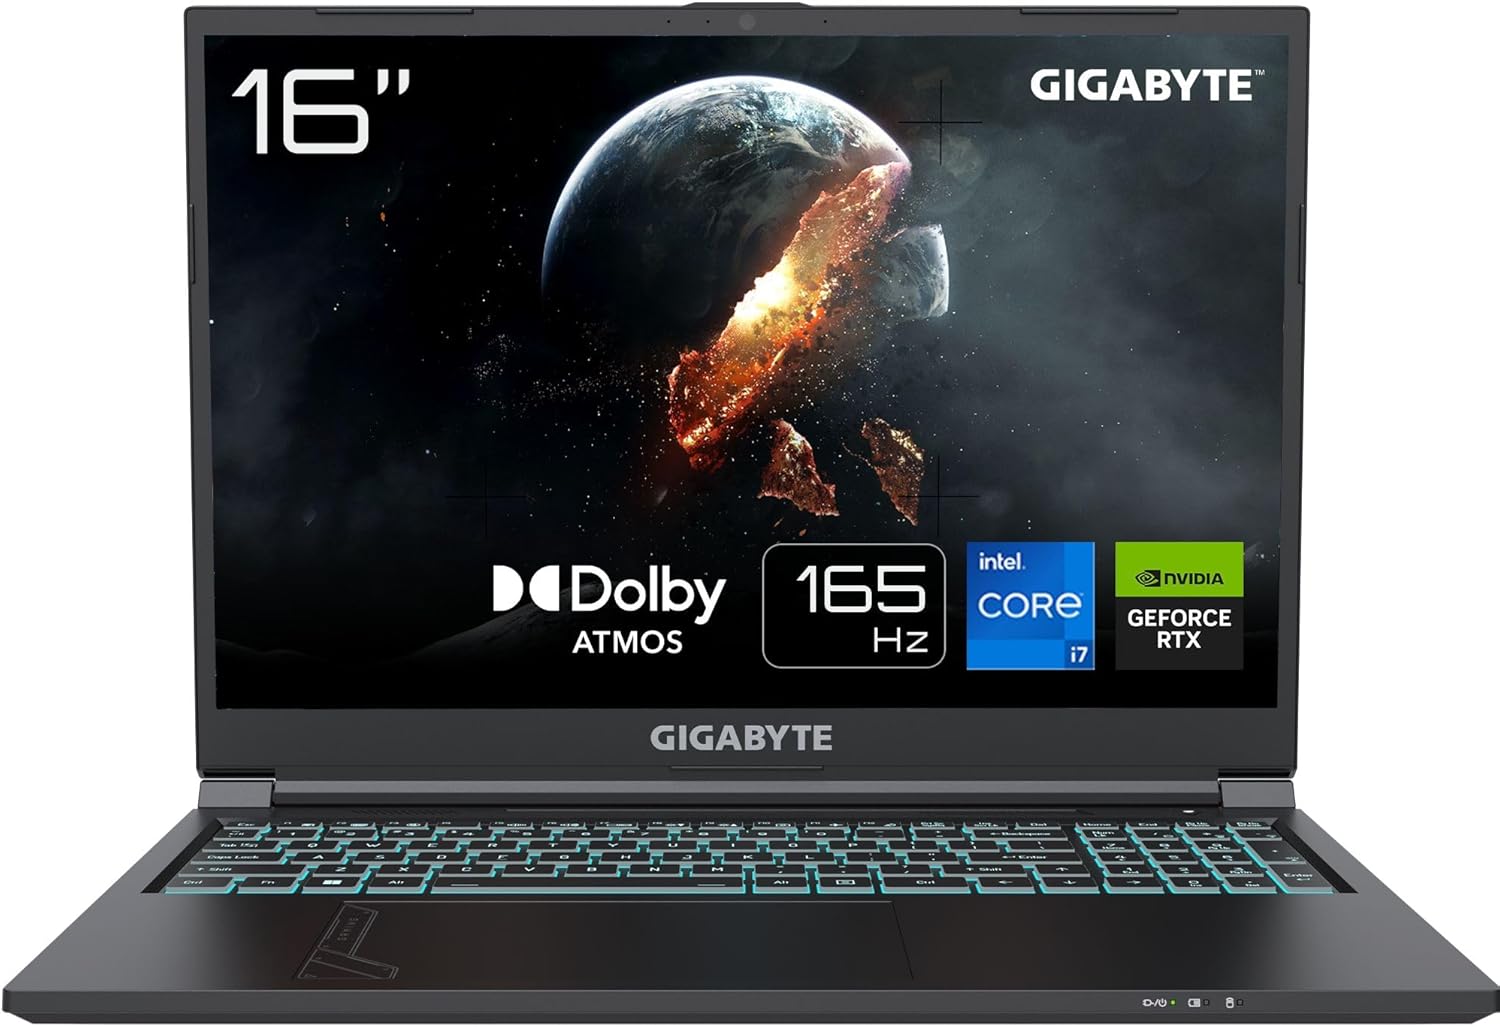
Figure 4.1: Front view of the GIGABYTE G6 Gaming Laptop. This image shows the laptop open, revealing the 16-inch display, the illuminated keyboard, and the touchpad. The screen displays a dynamic graphic, highlighting the laptop's gaming capabilities. Branding for GIGABYTE, Dolby Atmos, 165Hz, Intel Core i7, and NVIDIA GeForce RTX are visible on the screen bezel.

Figure 4.2: Angled view of the GIGABYTE G6 Gaming Laptop. This image presents the laptop from an elevated angle, with the lid open to reveal the keyboard and screen, and the closed lid of another identical laptop positioned behind it. This perspective highlights the sleek design and the texture of the laptop's casing.

Figure 4.3: Top-down view of the GIGABYTE G6 Gaming Laptop. This image provides an overhead shot of the laptop with its lid open, showcasing the full keyboard layout and touchpad. Below it, the closed lid of the laptop is shown, emphasizing the minimalist design and the GIGABYTE logo.

Figure 4.4: Side angled view of the GIGABYTE G6 Gaming Laptop. This image captures the laptop from a lower side angle, highlighting the thin profile when open, the illuminated keyboard, and the display. The perspective emphasizes the ergonomic design and the visual appeal of the screen content.

Figure 4.5: Rear angled view of the GIGABYTE G6 Gaming Laptop. This image shows the laptop from a rear-side angle with the lid closed, revealing the textured surface of the lid and some of the side ports. The "GAMING" text is subtly visible along the edge, indicating its purpose.

Figure 4.6: Top-down view of the GIGABYTE G6 Gaming Laptop keyboard and touchpad. This close-up overhead shot focuses on the keyboard, showcasing the illuminated keys and the layout, along with the large touchpad below it. The design elements on the palm rest are also visible.

Figure 4.7: Side profiles of the GIGABYTE G6 Gaming Laptop. This image displays three separate side views of the laptop, highlighting the various ports and ventilation grilles. The top profile shows USB ports, the middle shows HDMI and audio jacks, and the bottom shows additional ports and the power input.
4.1. Front View
- Display: 16-inch screen for visual output.
- Webcam: Integrated camera for video conferencing.
- Microphone: Built-in microphone for audio input.
- Keyboard: Full-size keyboard with backlit keys.
- Touchpad: Multi-touch gesture supported pointing device.
4.2. Side Views (Ports)
- USB Ports: Connect USB devices (e.g., mouse, external drive). The laptop features 2 USB 3.0 ports.
- HDMI Port: Connect to external displays or projectors.
- Audio Jacks: Headphone and microphone ports.
- Power Input: Connect the power adapter.
- Ethernet Port: For wired network connection.
5. Setup
5.1. Initial Power On
- Connect the power adapter to the laptop's power input port and then plug it into a power outlet.
- Open the laptop lid.
- Press the power button, usually located above the keyboard or on the side.
- Follow the on-screen instructions to complete the initial Windows 11 Home setup, including language, region, and network settings.
5.2. Connecting to a Network
Your laptop supports both Wi-Fi and wired Ethernet connections.
Wi-Fi Connection:
- Click the Wi-Fi icon in the system tray (bottom right of the screen).
- Select your desired Wi-Fi network from the list.
- Enter the network security key (password) if prompted.
- Click "Connect".
Wired (Ethernet) Connection:
- Connect one end of an Ethernet cable to the laptop's Ethernet port.
- Connect the other end of the Ethernet cable to your router or modem.
- The laptop should automatically detect and connect to the wired network.
6. Operating
6.1. Basic Operations
- Power On/Off: Press the power button to turn on. To shut down, click Start > Power > Shut down.
- Sleep Mode: Close the lid or click Start > Power > Sleep to enter sleep mode.
- Restart: Click Start > Power > Restart to reboot the system.
6.2. Using the Keyboard and Touchpad
- Keyboard Backlight: Adjust backlight brightness using the dedicated function keys (Fn + Fx, refer to your keyboard for specific keys).
- Touchpad Gestures:
- Tap: Single tap for left-click, two-finger tap for right-click.
- Scroll: Two-finger drag up or down.
- Zoom: Pinch in or out with two fingers.
6.3. Connecting External Devices
Connect USB devices, external monitors, and audio devices to the appropriate ports as described in Section 4.2.
7. Maintenance
7.1. Cleaning the Laptop
- Screen: Use a soft, lint-free cloth slightly dampened with water or a screen cleaner. Do not spray cleaner directly onto the screen.
- Keyboard and Chassis: Use a soft, dry cloth. For stubborn dirt, a slightly damp cloth can be used, ensuring no liquid enters openings.
- Ventilation: Regularly clean dust from the ventilation grilles using compressed air to ensure proper airflow and prevent overheating.
7.2. Battery Care
- Avoid fully discharging the battery frequently.
- Do not expose the battery to high temperatures.
- If storing the laptop for an extended period, charge the battery to about 50-60% before storage.
7.3. Software Updates
Regularly check for and install operating system updates (Windows Update) and driver updates from the Gigabyte official website to ensure optimal performance and security.
8. Troubleshooting
| Problem | Possible Cause | Solution |
|---|---|---|
| Laptop does not power on. | No power, battery drained, power adapter issue. | Ensure power adapter is securely connected. Charge the battery for at least 30 minutes. Try a different power outlet. |
| Screen is blank or black. | Sleep mode, display driver issue, hardware problem. | Press any key or move the mouse to wake from sleep. Connect to an external monitor to check if the display works. Reinstall or update display drivers. |
| Wi-Fi connection issues. | Incorrect password, router issue, driver issue. | Verify Wi-Fi password. Restart your router. Update Wi-Fi drivers. Ensure Wi-Fi is enabled in Windows settings. |
| Laptop is running slow. | Too many background applications, low disk space, malware. | Close unnecessary applications. Free up disk space. Run a malware scan. Check for system updates. |
9. Specifications
| Feature | Detail |
|---|---|
| Brand | Gigabyte |
| Model Number | G6 MF-H2DE854KH |
| Series | G6 |
| Color | Dark Grey/Aurora Grey |
| Operating System | Windows 11 Home |
| Processor Brand | Intel |
| Processor Type | Intel Core i7 |
| Processor Speed | 2.4 GHz |
| Number of Cores | 1 (Note: This value is as provided in source data, typical i7 processors have more cores.) |
| Max Memory Supported | 64 GB |
| RAM Size Installed | 16 GB |
| Hard Drive Technology | SSD |
| Screen Size | 16 Inches |
| Graphics Chipset Brand | NVIDIA |
| Graphics Card Description | Dedicated |
| GPU | NVIDIA GeForce RTX 4050 |
| Graphics Card RAM | 6 GB |
| Graphics RAM Type | GDDR6 |
| Bluetooth Compatible | Yes |
| Number of USB 3.0 Ports | 2 |
| Item Dimensions (L x W x H) | 49.7 x 11.9 x 25.9 cm |
| Product Weight | 2.3 Kilograms |
| Batteries | 1 D - included |
10. Warranty and Support
For warranty information and technical support, please refer to the warranty card included with your product or visit the official Gigabyte support website. Keep your purchase receipt as proof of purchase for warranty claims.
Gigabyte Official Website: www.gigabyte.com
Related Documents - G6 MF-H2DE854KH
 |
GIGABYTE AORUS PROJECT STEALTH ICE Chassis Support List Compatibility list for GIGABYTE AORUS PROJECT STEALTH ICE motherboards with various PC chassis models from leading vendors like Corsair, Cooler Master, Lian-Li, and more. Find the perfect chassis for your build. |
 |
GIGABYTE AORUS PROJECT STEALTH PC Chassis Compatibility List Detailed compatibility list of PC chassis models from various vendors with GIGABYTE AORUS PROJECT STEALTH motherboards (B650E, B850, X870 STEALTH Series). |
 |
GIGABYTE AORUS PROJECT STEALTH Chassis Support List Discover the GIGABYTE AORUS PROJECT STEALTH chassis compatibility list. Find compatible PC chassis for B650E AORUS, B850 AORUS, and X870 AORUS STEALTH Series motherboards from leading brands like Cooler Master, Corsair, Lian-Li, and more. |
 |
GIGABYTE AORUS PROJECT STEALTH ICE Chassis Support List Compatibility list for GIGABYTE AORUS PROJECT STEALTH ICE motherboards with various PC chassis models from vendors including AORUS, AeroCool, APNX, AZZA, Be Quiet!, Cooler Master, Corsair, Deepcool, Fractal Design, HEC(COUGAR), In Win, Lian-Li, NZXT, Phanteks, SAMA, Silver Stone, Thermaltake, and XPG. |
 |
Aftermarket Massey Ferguson Tractor Parts Catalog Comprehensive catalog of aftermarket tractor parts for various Massey Ferguson models, including engine overhaul kits. Provided by Cross Creek Tractor. Find part numbers and specifications for your agricultural machinery. |
 |
Bourns Multifuse® Polymer PTC Resettable Fuses Soldering Recommendations This document provides detailed soldering recommendations for Bourns Multifuse® Polymer PTC Resettable Fuses, covering reflow, vapor phase, wave, and hand soldering techniques, along with essential pre-heating, gluing, and cleaning guidelines for reliable electronic assembly. |
Ask a question about this manual
Ask about setup, troubleshooting, compatibility, parts, safety, or missing instructions. Manuals+ will review the question and use this page’s manual context to help answer it.