1. Introduction
Welcome to the user manual for your new LITNXT RG35XXSP Handheld Game Console. This guide provides essential information for setting up, operating, and maintaining your device. The RG35XXSP is a portable retro gaming console featuring a 3.5-inch IPS display, designed for an immersive gaming experience.
2. Package Contents
Please verify that all items listed below are included in your package:
- Game Console (1 unit)
- Memory Card (1 unit)
- USB Charging Cable (1 unit)
- English Instructions (1 unit)
- Tempered Film (1 unit)
3. Product Overview
Familiarize yourself with the various components and features of your RG35XXSP console.

Figure 3.1: Front, back, and side views of the LITNXT RG35XXSP Handheld Game Console. This image displays the console in its open and closed states, highlighting the screen, control buttons (D-pad, A/B/X/Y, Start, Select, Power), shoulder buttons (L1, L2, R1, R2), and various ports including USB/OTG, HD (HDMI), and TF card slots.
3.1 Key Features
- Hall Magnetic Switch: The console features a built-in Hall magnetic switch. Strong magnets in the upper and lower covers enable a magnetic closure function. This design allows for automatic wake-up when the lid is opened and activates sleep mode when the lid is closed.
- Alloy Axles: The console's hinge mechanism utilizes alloy axles, allowing for multi-angle screen positioning. The screen can be adjusted to various angles, including 45°, 90°, 135°, and 180°, providing flexibility for comfortable viewing.
- High-Definition IPS Display: Equipped with a 3.5-inch IPS full-view display, featuring OCA full lamination and a resolution of 640x480 pixels for clear and vibrant visuals.
- Powerful Processor: Features an H700 quad-core ARM Cortex-A53 CPU clocked at 1.5GHz and a dual-core G31 MP2 GPU, paired with 1GB LPDDR4 RAM, ensuring smooth performance for retro gaming.
- Long-lasting Battery: Equipped with a 3300mAh battery, providing approximately 8 hours of battery life on a single charge. Supports 5V/1.5A charging and C2C chargers.

Figure 3.2: Illustration of the Hall magnetic switch functionality. The image shows the console partially open, with magnetic fields indicated between the upper and lower covers, demonstrating the automatic wake-up and sleep features.

Figure 3.3: Diagram illustrating the multi-angle hover capability of the console's alloy axles. The image shows the console's screen being adjusted to different angles, from 45 degrees to 180 degrees, highlighting the durability and flexibility of the hinge.
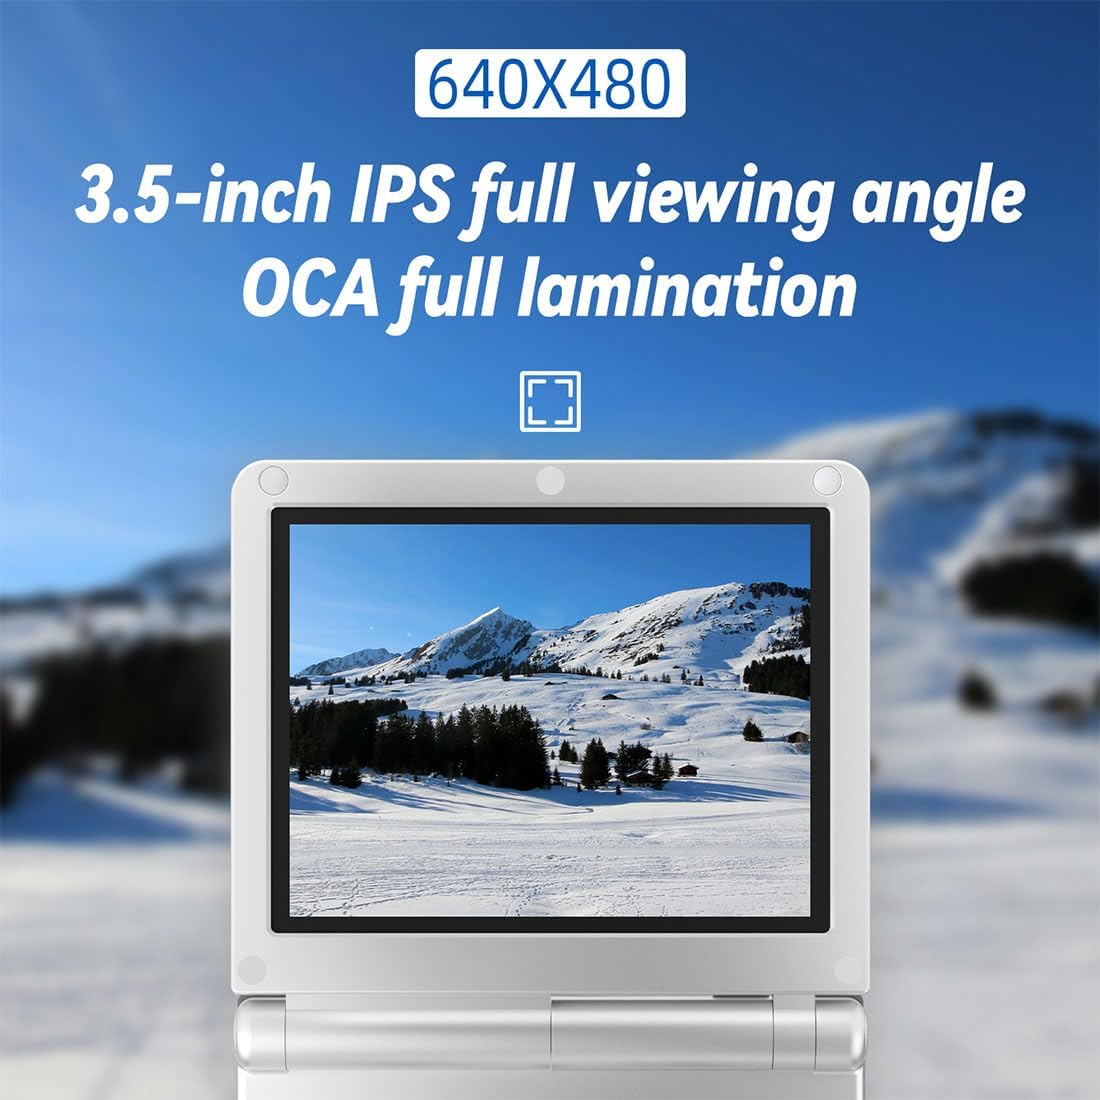
Figure 3.4: Close-up view of the console's 3.5-inch IPS screen, displaying a scenic image. The text overlay emphasizes the 640x480 resolution and OCA full lamination for a high-quality viewing experience.

Figure 3.5: Diagram illustrating the internal components, including the H700 quad-core ARM Cortex-A53 processor, LPDDR4 1GB RAM, and dual-core G31 MP2 GPU, highlighting the console's processing power.

Figure 3.6: Image showcasing the 3300mAh battery inside the console, with text indicating an 8-hour battery life for extended gameplay sessions.
4. Setup
4.1 Charging the Console
- Connect the provided USB charging cable to the console's charging port.
- Connect the other end of the USB cable to a compatible 5V/1.5A USB power adapter (not included) or a C2C charger.
- The charging indicator light will illuminate. Allow approximately 2-3 hours for a full charge.
- Disconnect the charger once the battery is fully charged.
4.2 Inserting the Memory Card
- Locate the TF1/TF2 card slots on the console.
- Gently insert the provided memory card into the designated slot until it clicks into place. Ensure the card is oriented correctly.
- To remove, gently push the card inward until it springs out.
4.3 Powering On/Off
- Power On: Press and hold the Power button located on the side of the console until the screen illuminates.
- Power Off: Press and hold the Power button until a power-off menu appears, then select 'Shut Down'. Alternatively, a quick press of the Power button will put the console into sleep mode.
5. Operating Instructions
5.1 Basic Controls
- D-Pad: Navigation within menus and in-game movement.
- A/B/X/Y Buttons: Action buttons for gameplay and menu selections.
- Start Button: Typically used to start games or confirm selections.
- Select Button: Often used for in-game options or menu functions.
- L1/L2/R1/R2 Shoulder Buttons: Additional action buttons, commonly used in various games.
5.2 Navigating the System
Use the D-Pad to move through menu options and the A button to confirm selections. The B button typically acts as a 'back' or 'cancel' function.
5.3 Playing Games
- From the main menu, navigate to the desired game system or game library.
- Select a game using the D-Pad and A button.
- The game will load. Follow on-screen prompts or game-specific instructions to play.
5.4 Saving and Loading Game Progress
The console supports save/load game functionality. Specific methods may vary depending on the emulator or game. Generally, you can access save/load options through the in-game menu or by pressing a designated hotkey combination (refer to the system's internal documentation for specific hotkeys).
5.5 Connectivity Options
- HDMI Output: Connect the console to an external display (TV, monitor, projector) using an HDMI cable (not included) via the HD port for a larger screen experience.
- Bluetooth Connectivity: The console supports Bluetooth 4.2, allowing connection to compatible external controllers for enhanced gameplay. Refer to your controller's manual for pairing instructions.
- 5G WiFi for Online Multiplayer: Connect to a 5G WiFi network to engage in online multiplayer games, if supported by the game and emulator.
- Moonlight Streaming: The console supports Moonlight streaming, enabling you to play PC games freely by streaming them to your handheld device over a network connection.
- E-book Reader: The console supports reading e-books in TXT format. Navigate to the e-book reader application to access your text files.

Figure 5.1: The console connected to a television via HDMI, demonstrating its capability to output video to an external display. An external Bluetooth controller is also shown, indicating support for wireless gamepads.

Figure 5.2: Two RG35XXSP consoles shown side-by-side, with wireless signals indicating 5G WiFi connectivity for online multiplayer gaming.
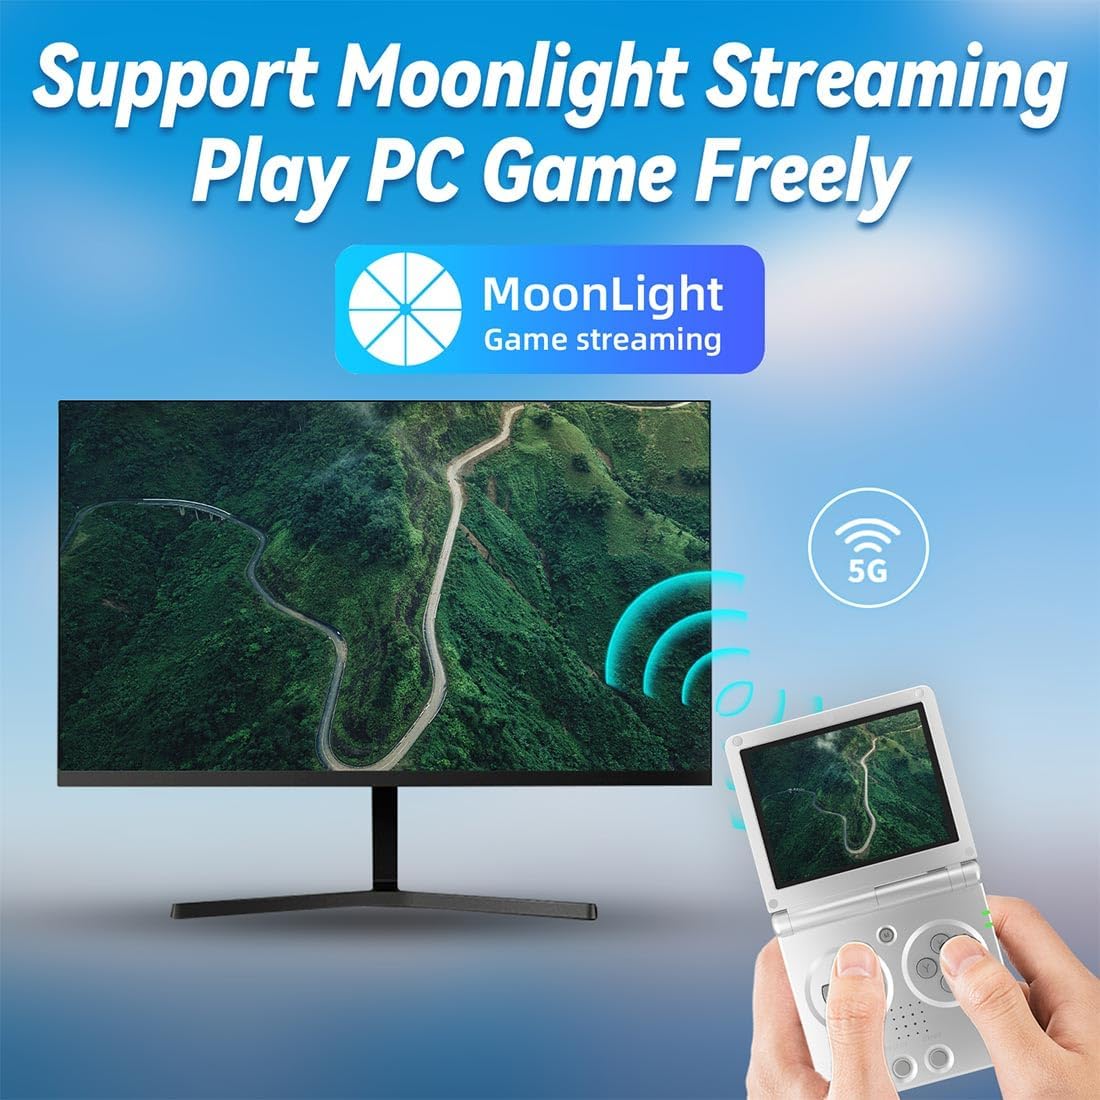
Figure 5.3: The console displaying a PC game streamed via Moonlight, with a desktop monitor in the background, illustrating the PC game streaming capability.
6. Maintenance
6.1 Battery Care
- Avoid fully discharging the battery frequently.
- Charge the console regularly, even if not in use, to maintain battery health.
- Do not expose the console to extreme temperatures, as this can affect battery performance and lifespan.
6.2 Cleaning
- Use a soft, dry cloth to wipe the console's exterior.
- For the screen, use a microfiber cloth specifically designed for electronics.
- Avoid using harsh chemicals or abrasive materials, as they may damage the finish or screen.
7. Troubleshooting
If you encounter issues with your RG35XXSP, please refer to the following common solutions:
- Console does not power on: Ensure the battery is sufficiently charged. Connect the console to a charger and try again.
- Screen is blank or frozen: Try performing a soft reset by holding the Power button for an extended period (e.g., 10-15 seconds) until the device powers off, then restart it.
- Games are not loading: Verify that the memory card is properly inserted and that the game files are in compatible formats.
- Poor performance or lag: Ensure the console's firmware is up to date. Close any unnecessary background applications if applicable.
- No sound: Check the volume settings on the console. Ensure headphones are properly connected if in use.
If problems persist, please contact customer support for further assistance.
8. Specifications
| Feature | Detail |
|---|---|
| Operating System | Linux |
| Display | 3.5-inch IPS full-view, OCA fully bonded 640x480 pixels |
| CPU | H700 quad-core ARM Cortex-A53, 1.5GHz |
| GPU | Dual-core G31 MP2 |
| RAM | LPDDR4 1GB |
| Battery | 3300mAh, approximately 8 hours battery life |
| Charging | 5V/1.5A, supports C2C charger |
| E-book Reader Support | TXT format |
| Product Dimensions | 8.9 x 8.5 x 2.7 cm (3.5 x 3.35 x 1.06 inches) |
| Product Weight | 192g (6.8 ounces) |
| Item Model Number | 30V4J09N1950FKRW |
| Manufacturer | LITNXT |
9. Warranty and Support
For warranty information and customer support, please refer to the documentation provided with your purchase or visit the official LITNXT website. Keep your proof of purchase for any warranty claims.


