
1. Safety Information
- Ensure the monitor and camera are installed in a location that does not obstruct the driver's view or interfere with vehicle operation.
- Securely mount all components to prevent detachment during vehicle movement.
- This device is intended as an aid for monitoring and is not a substitute for direct adult supervision of a child.
- Keep cables away from hot surfaces, sharp edges, and moving parts.
- Do not attempt to disassemble or repair the unit. Contact customer support for assistance.
2. Package Contents
Verify that all items are present in the package:
- 1x 4.3 Inch Baby Car Monitor
- 1x Baby Car Camera
- 1x Video Cable
- 2x Straps (for camera mounting)
- 1x Suction Cup Bracket (for monitor mounting)
- 1x Lighter Adapter (car charger)
- 1x User Manual
3. Product Overview
The Wkzay Baby Car Camera system provides a clear view of your child in the backseat, enhancing safety and peace of mind while driving. It features a high-definition camera with a wide-angle lens and a 4.3-inch LCD monitor.

Image: The Wkzay Baby Car Camera system, showing the 4.3-inch monitor displaying a baby in a car seat and the compact camera unit.
Key Features:
- HD 1080P Resolution: Provides clear and sharp video feed.
- 150° Wide-Angle Lens: Offers a broad view of the backseat, suitable for monitoring multiple children.
- Automatic Night Vision: Ensures clear visibility in low-light conditions using infrared LEDs.
- 4.3” LCD Display: Compact screen size for easy viewing without obstructing the driver's view.
- Adjustable LED Light: Integrated camera light with multiple modes for calming or entertaining the baby.
- Anti-Glare & Anti-Vibration: Designed for stable and clear images regardless of road conditions.
- 360° Rotation: Both camera and monitor offer adjustable angles for optimal positioning.
4. Setup and Installation
Follow these steps for proper installation of your Wkzay Baby Car Camera:
4.1 Camera Installation
- Attach Camera to Headrest: Secure the camera to the headrest of the backseat using the provided straps. Ensure the camera is positioned to capture the desired view of your child. The camera features 360° rotation for angle adjustment.
- Connect Video Cable: Connect one end of the video cable to the camera.

Image: Visual guide showing the steps to install the camera on a headrest, connect cables, and power the system.
4.2 Monitor Installation
- Mount Monitor: Attach the suction cup bracket to the monitor. Choose a suitable location on your dashboard or windshield that provides a clear view without obstructing your driving. Secure the suction cup firmly. The monitor also allows 360° rotation for optimal viewing.
- Connect Video Cable: Connect the other end of the video cable to the monitor.

Image: Diagram showing the camera mounted on the rear headrest, connected via cable to the monitor on the dashboard, and powered by the car charger.
4.3 Power Connection
- Plug in Car Charger: Insert the lighter adapter (car charger) into your vehicle's cigarette lighter socket.
- Power On: The system should power on automatically or by pressing the power button on the monitor.
5. Operating Instructions
Familiarize yourself with the monitor controls and camera features.
5.1 Monitor Controls
The monitor features several buttons for control:
- Power Button: Turns the monitor on/off.
- RGB Button: Activates or cycles through the adjustable LED light modes on the camera.
- Sleep Button: Activates a red light mode on the camera, intended for calming.
- Wake Button: Activates a green light mode on the camera, intended for waking or engaging.
- Light Button (Sun Icon): Adjusts the brightness of the camera's LED light.
Note: The first power button on the car charger controls the lights, not the monitor screen. The RGB, Sleep, Wake, and Light buttons on the monitor only function when the camera's light is on.
5.2 Image Adjustment
The monitor allows for adjustment of image parameters:
- Brightness: Adjust the screen brightness for optimal viewing in various lighting conditions.
- Saturation: Control the intensity of colors displayed.
- Tint: Adjust the color balance of the image.

Image: The monitor screen displaying options to adjust saturation, tint, and brightness levels for customized viewing.
5.3 Night Vision
The camera automatically switches to night vision mode in low-light environments, providing a clear black and white image of your child without disturbing them.
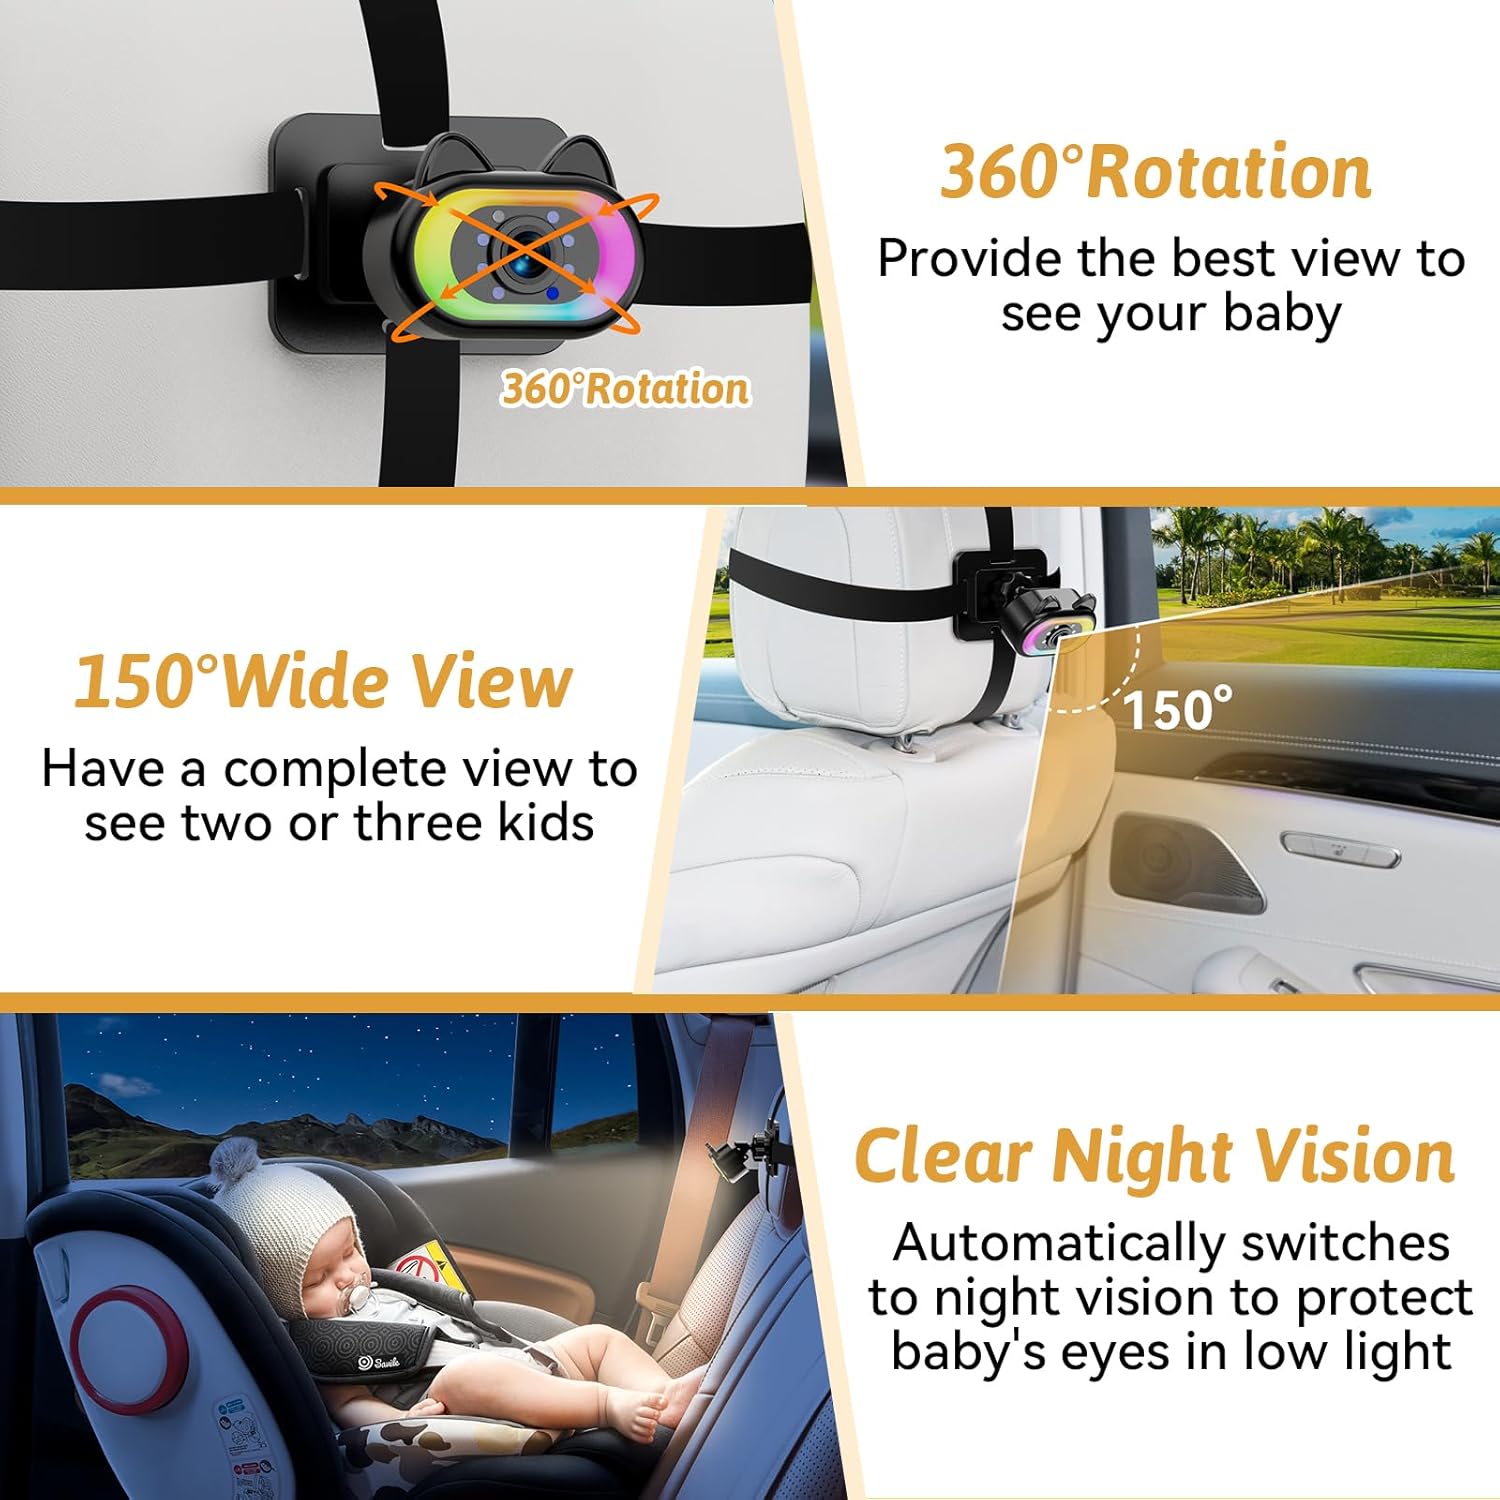
Image: A composite image demonstrating the camera's wide-angle view, 360-degree rotation, and a clear night vision view of a sleeping baby in a car seat.
5.4 Mirror/Normal Image Switching
The monitor allows you to switch between mirror and normal image views, depending on the orientation of your child's car seat (rear-facing or forward-facing).
- Normal Image: For children facing backward.
- Mirror Image: For children facing forward.

Image: The monitor showing a comparison between a normal image (for rear-facing car seats) and a mirror image (for forward-facing car seats).
5.5 Adjustable LED Lighting
The camera includes an adjustable LED light feature to provide ambient lighting for your child.
- Use the RGB button to cycle through various colorful light modes.
- Press the Sleep button for a calming red light.
- Press the Wake button for an engaging green light.
- Adjust the brightness of the LED light using the Light button (sun icon).

Image: A baby in a car seat reaching towards the camera, which is emitting colorful LED lights, illustrating the entertainment feature.

Image: A visual representation of the camera's LED light offering four levels of brightness, from 0% (off) to 100% (Level 4).
6. Maintenance
Proper maintenance ensures the longevity and optimal performance of your device.
- Cleaning: Use a soft, dry cloth to clean the monitor screen and camera lens. For stubborn smudges, a slightly damp cloth with mild, non-abrasive cleaner can be used, ensuring no liquid enters the device openings.
- Storage: When not in use for extended periods, store the device in a cool, dry place away from direct sunlight and extreme temperatures.
- Cable Care: Avoid bending or crimping the cables excessively. Ensure they are not caught in doors or seats.
7. Troubleshooting
If you encounter issues, refer to the following troubleshooting guide:
| Problem | Possible Cause | Solution |
|---|---|---|
| No power to monitor | Car charger not properly inserted or vehicle's cigarette lighter socket is not active. | Ensure the car charger is fully inserted. Check if the vehicle's ignition is on. Test the cigarette lighter with another device. |
| No image on monitor | Video cable loose or disconnected. Camera not powered on. | Check all cable connections between the camera and monitor. Ensure the camera's power is on (if applicable). |
| Unclear or blurry image | Camera lens is dirty. Incorrect focus. Low light conditions. | Clean the camera lens with a soft cloth. Adjust the camera's position. Ensure night vision is active in low light. Adjust monitor brightness/contrast. |
| LED lights not working | Camera light power button off. Monitor buttons not active. | Ensure the first power button on the car charger is on. The RGB, Sleep, Wake, and Light buttons on the monitor only function when the camera's light is on. |
8. Specifications
| Feature | Detail |
|---|---|
| Model Number | V36-001 |
| Screen Size | 4.3 Inches |
| Resolution | HD 1080P |
| Lens Type | Wide Angle |
| Real Angle of View | 150 Degrees |
| Optical Sensor Technology | CMOS |
| Night Vision | Automatic Infrared LEDs |
| Power Source | Corded Electric (Car Charger) |
| Voltage | 12 Volts |
| Material Type | ABS |
| Product Dimensions | 7.8 x 4.7 x 3.9 inches |
| Item Weight | 1.15 pounds |
9. Warranty and Support
For warranty information or technical support, please refer to the contact details provided with your purchase documentation or visit the official Wkzay website. Keep your purchase receipt for warranty claims.