1. Introduction
Thank you for choosing the VAXMAY 1.35 Gallon Battery Powered Sprayer. This electric sprayer is designed for efficient and effortless application of liquids for various gardening and cleaning tasks. Its features include adjustable spray speeds, multiple nozzle options, a rechargeable handle, and a retractable wand for enhanced convenience and precision.

Image 1: VAXMAY 1.35 Gallon Battery Powered Sprayer with included accessories.
2. Safety Information
Please read and understand all safety instructions before operating the sprayer. Failure to follow these instructions may result in electric shock, fire, and/or serious injury.
- Always wear appropriate personal protective equipment (PPE) such as gloves, eye protection, and respiratory protection when handling chemicals.
- Do not spray flammable liquids or use the sprayer near open flames or sparks.
- Keep the sprayer and its contents out of reach of children and pets.
- Ensure the charging port is securely covered when not charging to prevent water ingress.
- Do not immerse the handle or any electrical components in water.
- Use only the provided charging cable or a compatible USB-C cable for charging.
- Always rinse the tank and wand thoroughly with clean water after each use, especially when switching between different chemicals.
3. Package Contents
Verify that all items are present in the package:
- 1 x Electric Pump Sprayer (1.35 Gallon Tank)
- 1 x Rechargeable Handle with Integrated Pump
- 1 x Retractable Wand
- 4 x Mist Nozzles (various types)
- 1 x Hose
- 1 x Adjustable Shoulder Strap
- 1 x USB-C Charging Cable
Video 1: Overview of the VAXMAY 1.35 Gallon Battery Powered Sprayer and its components.
4. Setup
4.1. Charging the Handle
- Locate the USB-C charging port on the handle, usually protected by a rubber tab.
- Open the tab and connect the provided USB-C charging cable.
- Connect the other end of the cable to a suitable USB power adapter (not included).
- The battery indicator on the handle will show charging status. A full charge typically takes 3 hours and provides up to 3 hours of continuous spraying.
- Once fully charged, disconnect the cable and securely close the rubber tab to maintain waterproof integrity.
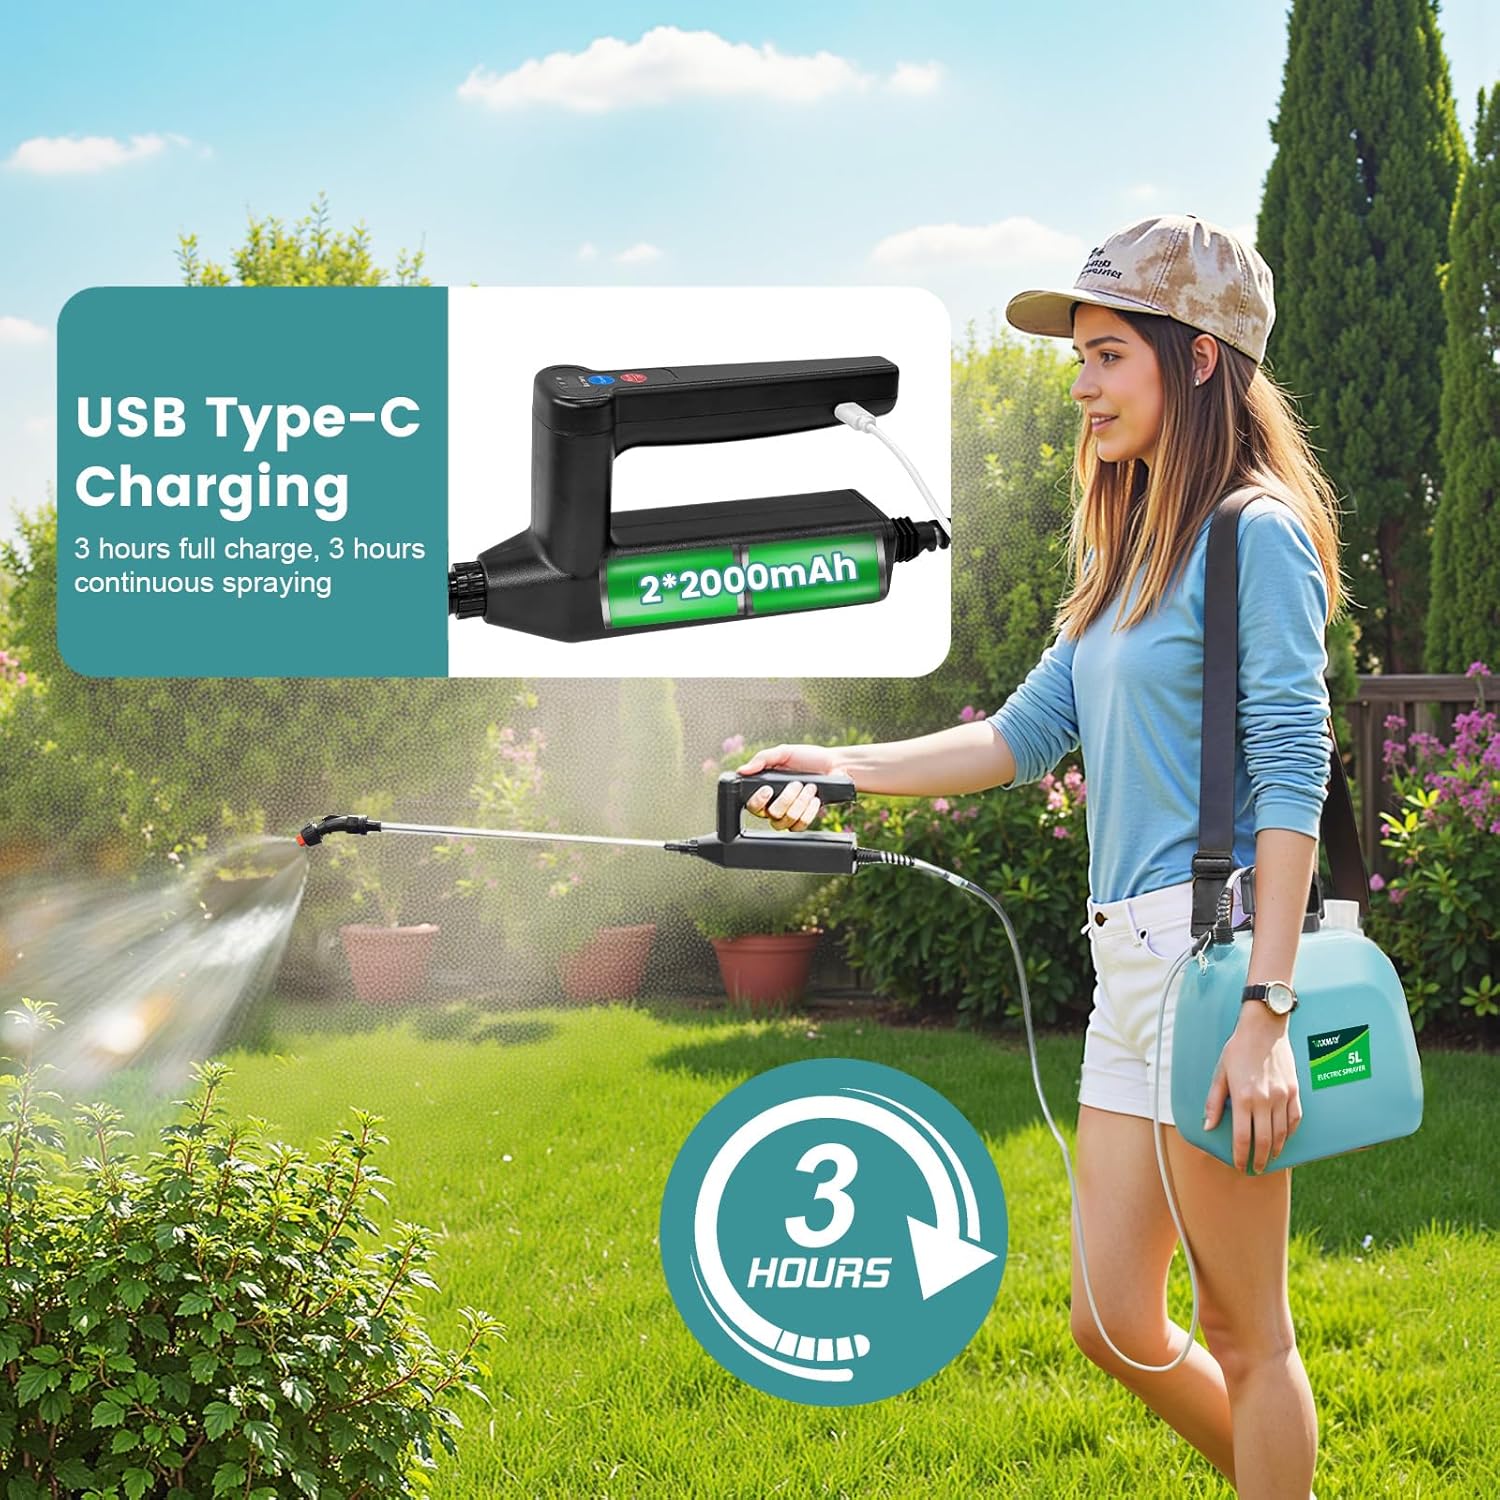
Image 2: The sprayer handle features a USB Type-C charging port for convenient recharging.
4.2. Assembling the Sprayer
- Connect the Hose: Attach one end of the hose to the tank's outlet port and the other end to the handle's inlet. Ensure both connections are tight to prevent leaks. The anti-kinking design helps maintain flow.
- Attach the Wand: Insert the retractable wand into the front of the handle and tighten the securing nut.
- Select and Attach Nozzle: Choose the desired nozzle from the four available types. Twist it onto the end of the retractable wand until secure.
- Attach Shoulder Strap: Clip the adjustable shoulder strap to the designated attachment points on the tank for comfortable carrying during use.
Video 2: General assembly and feature overview of a VAXMAY electric sprayer.
5. Operating Instructions
5.1. Filling the Tank
- Unscrew the main cap on the top of the tank. The tank features two wide openings for easy filling and mixing of solutions, minimizing spills.
- The transparent tank has a clear volume scale (in gallons and liters) to monitor liquid levels accurately.
- Pour your desired liquid (water, fertilizer, weed killer, cleaning solution) into the tank. Ensure the liquid is free of large debris to prevent clogging.
- Securely screw the cap back on after filling.
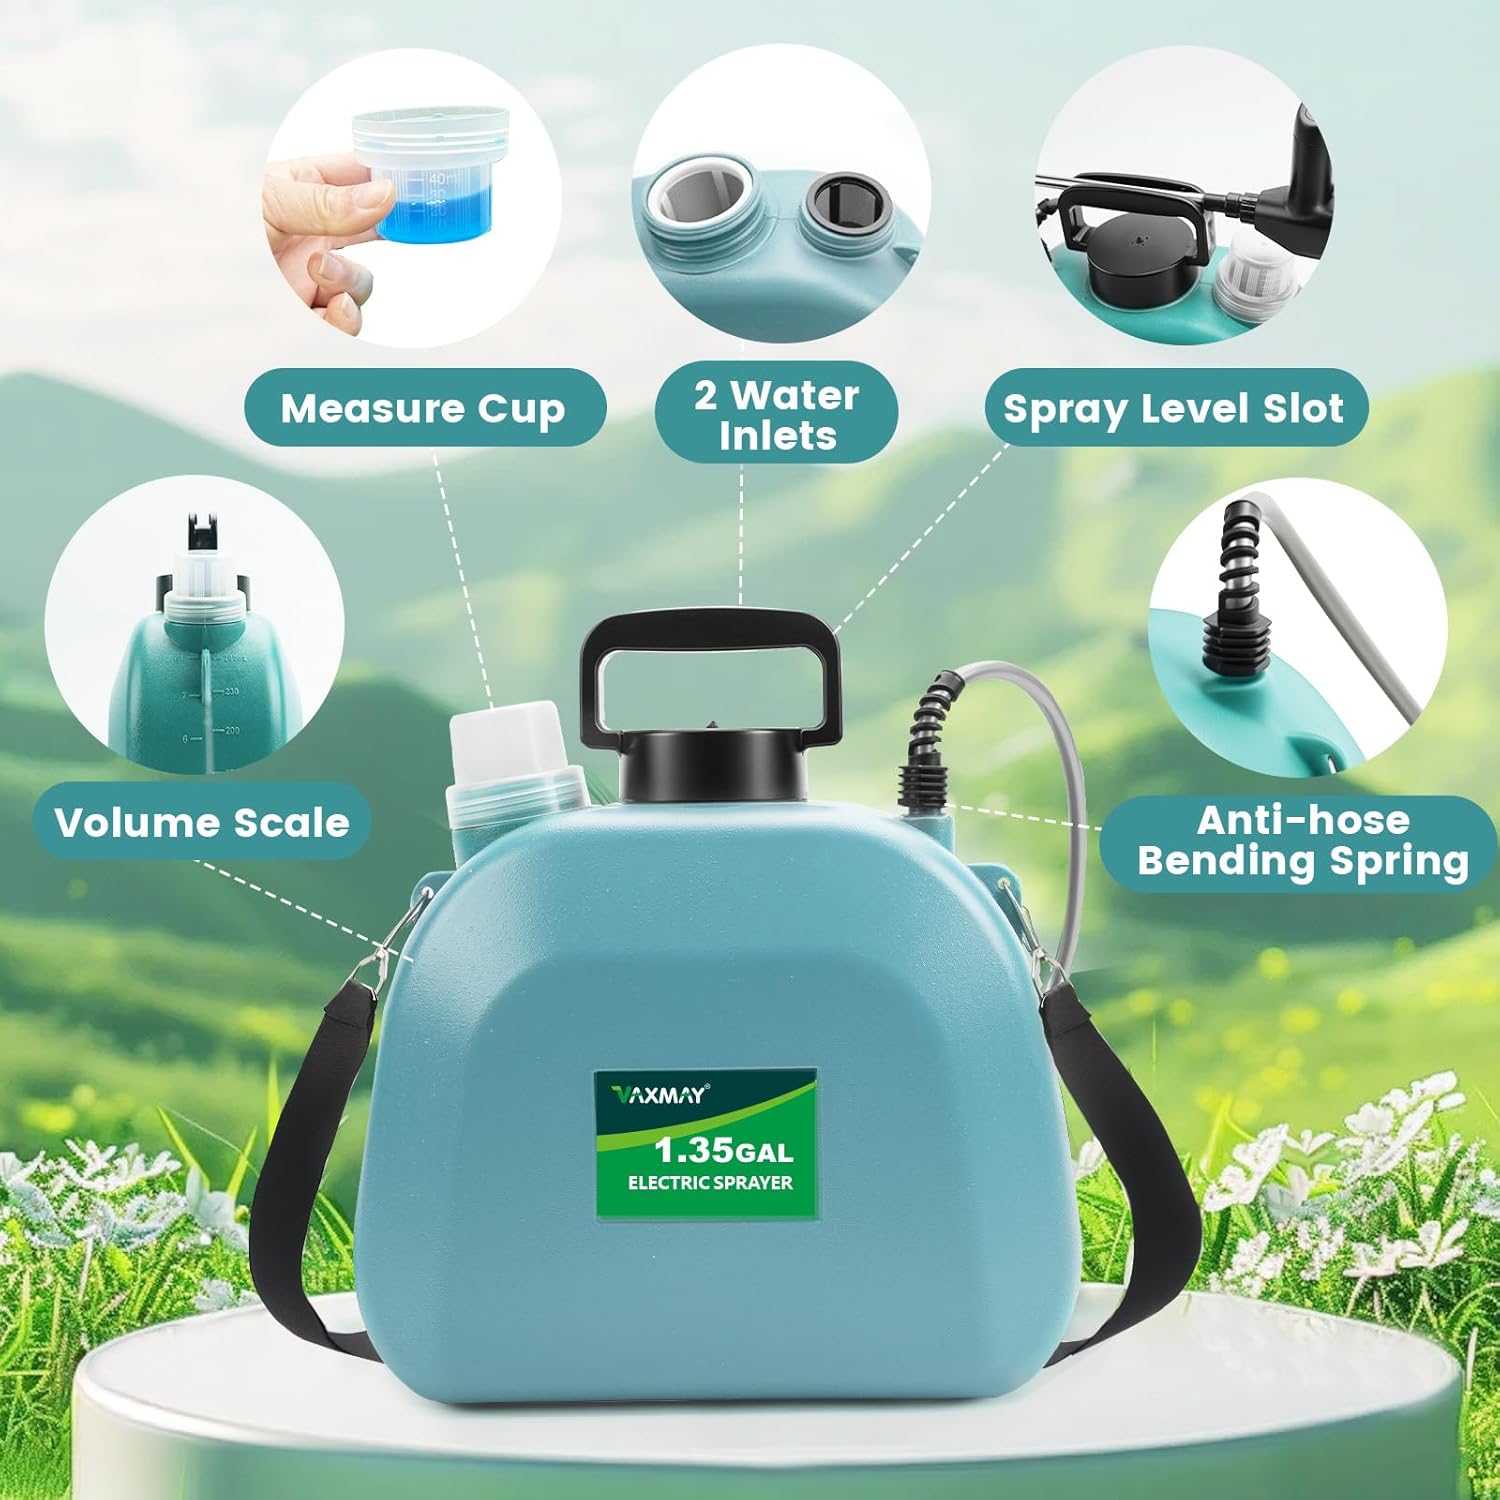
Image 3: The sprayer is designed with wide openings for easy filling and a clear volume scale.
5.2. Powering On and Adjusting Speed
- Press the red 'On/Off' button on the handle to power on the sprayer. The battery indicator will light up, showing the current charge level.
- Press the blue 'Speed' button to cycle through the 3 adjustable speed settings (Soft, Medium, Strong) to control the spray intensity.
- To power off, press the red 'On/Off' button again.

Image 4: The handle features a battery indicator and controls for adjusting spray speed.
Video 3: Demonstration of the 3 adjustable spray intensity settings.
5.3. Nozzle Adjustment and Application
- The sprayer comes with 4 adjustable nozzles: 6-Hole Pattern, Cone, Fan, and F-Type Dual Nozzle.
- Twist the selected nozzle to adjust the spray pattern from a fine mist to a direct stream, depending on your task.
- The retractable wand extends to reach higher or more distant areas, providing precision for various applications.

Image 5: The sprayer includes four different nozzle types for versatile use.

Image 6: The electric sprayer offers 3 adjustable spray force settings for different tasks.
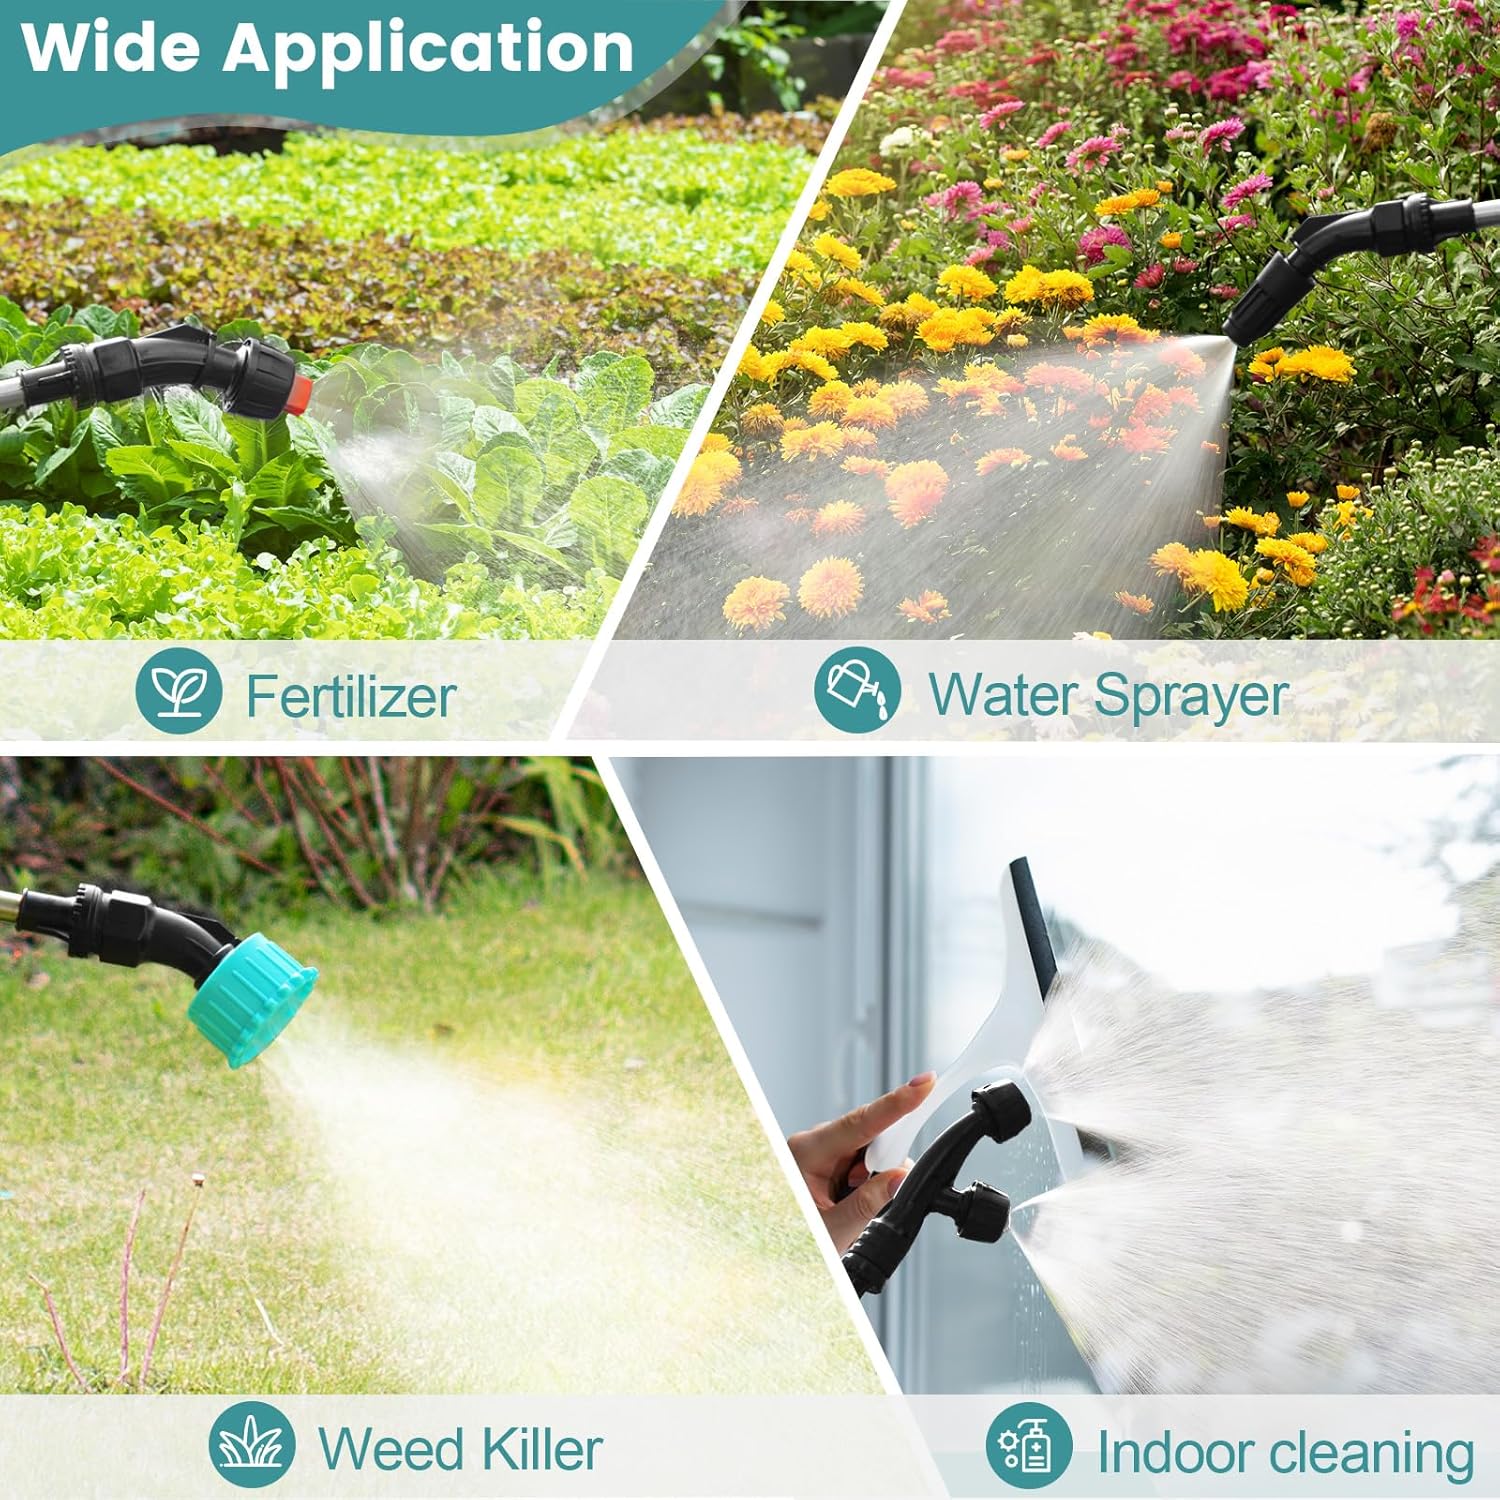
Image 7: The sprayer is suitable for a wide range of applications including garden watering, fertilizing, weed killing, and cleaning.
6. Maintenance
- Cleaning: After each use, especially with chemicals, empty any remaining liquid from the tank. Fill the tank with clean water and spray until the tank is empty to flush out the hose and wand. This prevents residue buildup and clogging.
- Storage: Store the sprayer in a cool, dry place away from direct sunlight and extreme temperatures. Ensure the tank is empty and clean before storage.
- Battery Care: For optimal battery life, avoid completely draining the battery regularly. Charge the unit periodically if not used for extended periods.
7. Troubleshooting
- No Spray/Weak Spray: Check battery level and recharge if necessary. Ensure the hose connections are tight. Verify the nozzle is not clogged; clean if needed. Check if the filter head in the tank is clear of debris.
- Leaking: Ensure all connections (hose to tank, hose to handle, nozzle to wand) are securely tightened. Check for any visible damage to the tank or hose.
- Unit Not Turning On: Confirm the battery is charged. If fully charged and still not turning on, contact customer support.
8. Specifications
| Feature | Specification |
|---|---|
| Brand | VAXMAY |
| Model Name | ST5LPRO-7.4VDXD-BU |
| Tank Volume | 1.35 Gallons |
| Power Source | Battery Powered (1 Lithium Ion battery included) |
| Battery Life | Up to 3 hours of continuous spraying |
| Adjustable Speeds | 3 (Soft, Medium, Strong) |
| Nozzles Included | 4 (6-Hole Pattern, Cone, Fan, F-Type Dual) |
| Material | High-Density Polyethylene (HDPE) and ABS |
| Item Weight | 2.94 pounds (1.34 Kilograms) |
| Product Dimensions | 6.6"W x 9.8"H |

Image 8: Detailed product dimensions and key features.
9. Warranty and Support
The VAXMAY 1.35 Gallon Battery Powered Sprayer is backed by a 12-month warranty. For any questions, concerns, or technical assistance, please contact our 24/7 customer support team.


