
Zuomeng HY-012
Contents
Zuomeng Automatic LED Daylight Extender (Model HY-012) Instruction Manual
Intelligent Programmable Timer Light for Chicken Coops
1. Product Overview
The Zuomeng Automatic LED Daylight Extender is designed to provide supplemental lighting for chicken coops, particularly during periods of reduced natural daylight such as fall and winter. This system helps maintain consistent light exposure for hens, which is crucial for supporting their natural laying cycles and egg production.
The system includes a high-performance LED light and an intelligent control unit with programmable timer functions. Its robust design ensures reliable operation in various environmental conditions.

Figure 1.1: Zuomeng Automatic LED Daylight Extender components, including the LED light, control unit, and power adapter.
2. Safety Information
- Ensure the power supply is disconnected before installation or maintenance.
- Do not attempt to modify or disassemble the unit. Refer all servicing to qualified personnel.
- Keep the power adapter and connections dry.
- The controller unit is IP65 waterproof, suitable for outdoor use. However, ensure all connections are secure and protected from direct water exposure where possible.
- Mount the light securely to prevent it from falling.
3. Setup and Installation
The Zuomeng Automatic LED Daylight Extender features a plug-and-play design for straightforward installation.
3.1 Package Contents
- LED Light Unit
- Control Unit with Intelligent Timer
- Power Adapter
3.2 Installation Steps
- Choose a Location: Select a suitable location inside the chicken coop for the LED light, ensuring it provides adequate illumination to the entire area. The control unit can be mounted either inside or outside the coop due to its IP65 waterproof rating.
- Mount the LED Light: Securely attach the LED light unit to a ceiling or wall within the coop using appropriate fasteners (not included). Ensure it is positioned to distribute light evenly.
- Mount the Control Unit: Mount the control unit to a flat surface using screws. Ensure it is easily accessible for programming.
- Connect the LED Light: Plug the cable from the LED light unit into the "Power Out" port on the control unit.
- Connect the Power Adapter: Plug the power adapter into the "Power In" port on the control unit. Then, plug the power adapter into a standard electrical outlet.

Figure 3.1: Example installation of the daylight extender inside a chicken coop.
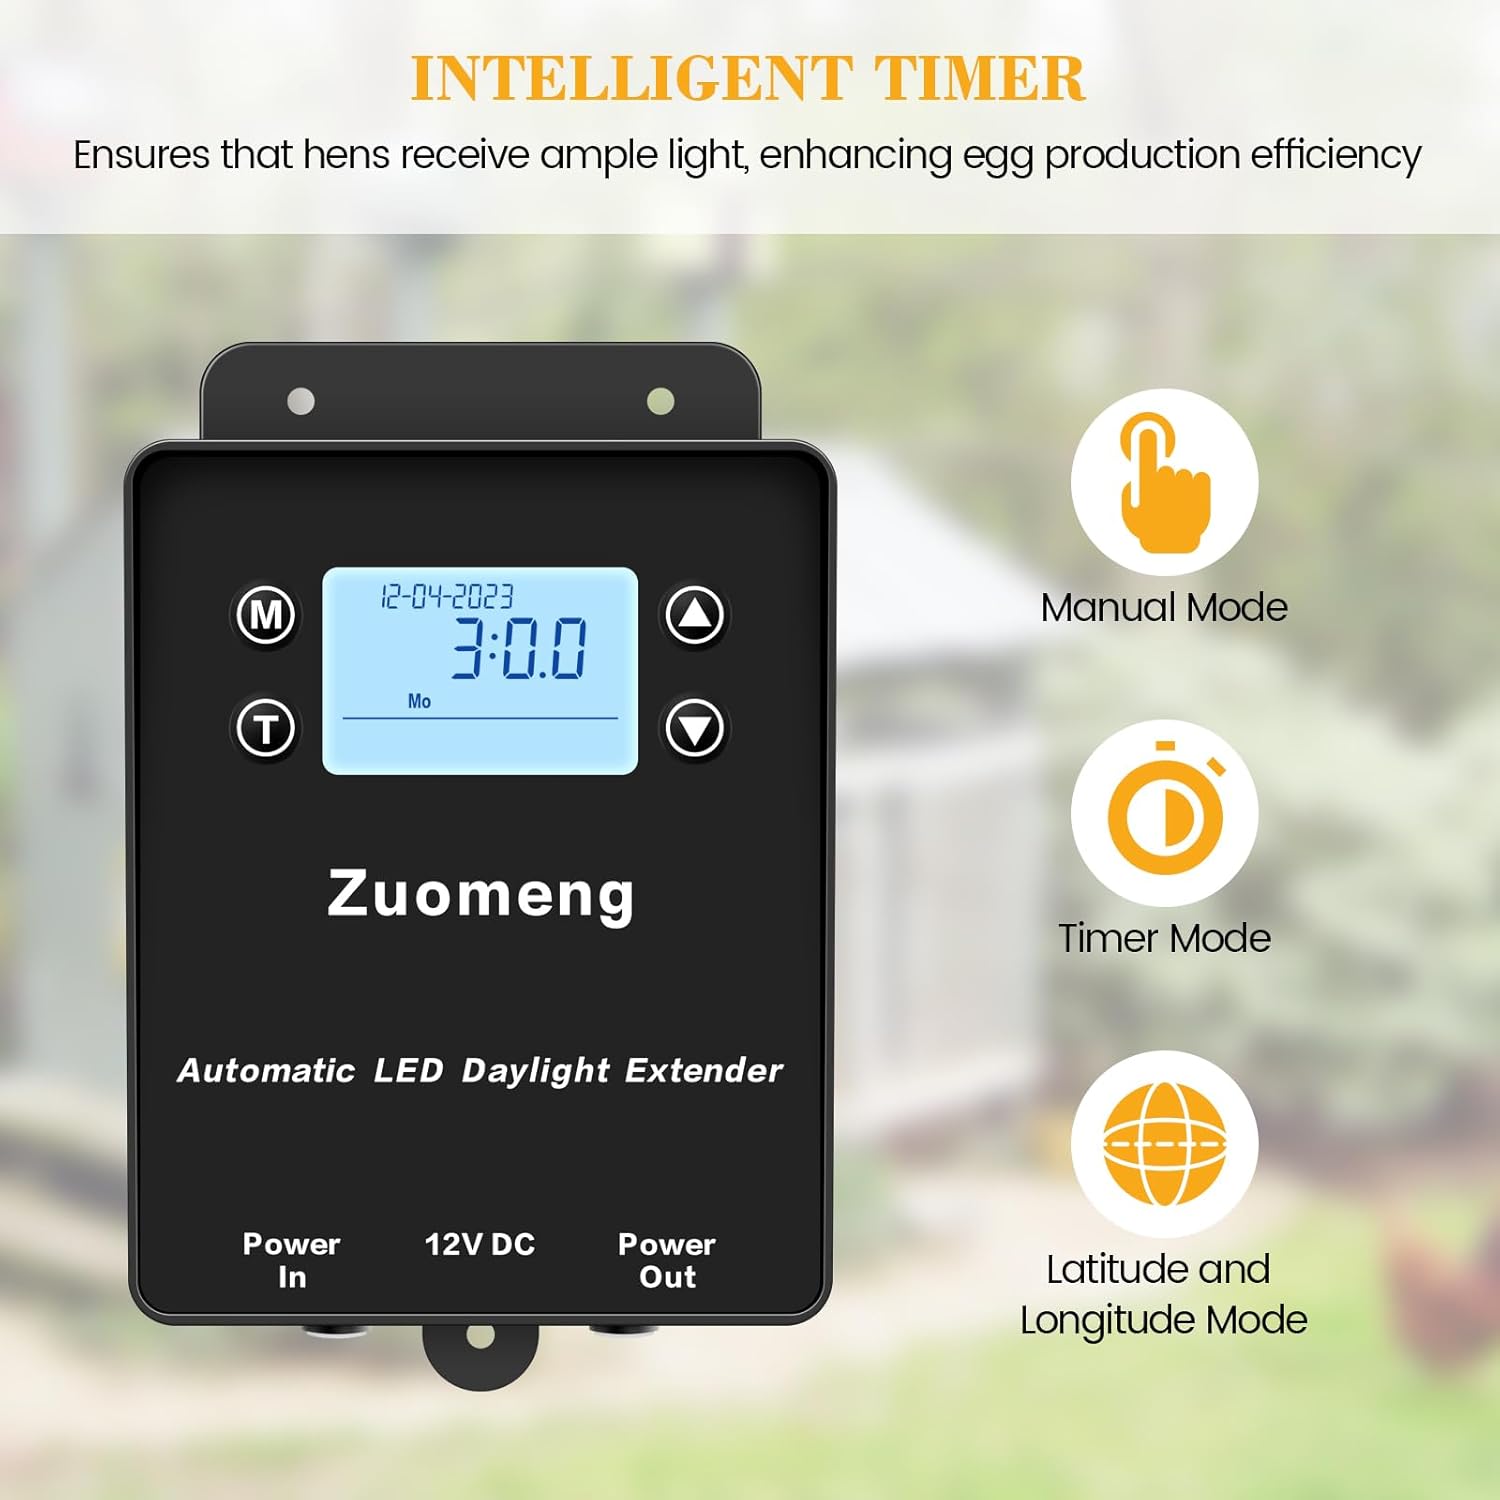
Figure 3.2: The IP65 waterproof control unit can be mounted outside the coop.
4. Operating Instructions
The control unit offers three operating modes: Manual, Timer, and Latitude/Longitude. These modes allow for flexible control over the lighting schedule.

Figure 4.1: Control unit display and mode selection options.
4.1 Setting the Current Time
Before setting any lighting schedules, ensure the current time and date are correctly set on the control unit. Refer to the specific button functions on your device (typically 'M' for Mode, 'T' for Timer, and Up/Down arrows for adjustment) to navigate and set the time.
- Press the 'M' (Mode) button until the time setting option is displayed.
- Use the Up/Down arrow buttons to adjust the hour, minute, and date.
- Press 'M' again to confirm and move to the next setting, or 'T' to exit.
4.2 Operating Modes
- Manual Mode: Allows you to turn the light on or off manually. This mode bypasses any programmed schedules.
- Timer Mode: Enables you to set specific ON and OFF times for the light. This is ideal for creating a consistent daily lighting schedule.
- Latitude/Longitude Mode: This advanced mode automatically adjusts the light schedule based on your geographical location's sunrise and sunset times. You can typically set a desired total light duration (e.g., 14-16 hours), and the system will extend natural daylight accordingly.
4.3 Programming the Timer (General Steps)
While specific button sequences may vary, the general process for setting a timer involves:
- Press the 'T' (Timer) button to enter timer programming mode.
- Use the 'M' button to cycle through different timer settings (e.g., ON time, OFF time, total duration).
- Use the Up/Down arrow buttons to adjust the desired hours and minutes for each setting.
- Confirm each setting by pressing 'M' or 'T' as indicated by the display.
- Ensure the unit is set to the desired operating mode (Timer or Latitude/Longitude) after programming.
Note: For detailed programming instructions, refer to the specific button functions and display prompts on your control unit. User reviews indicate that programming can be challenging; patience and careful attention to the display are recommended.
5. Maintenance
Regular maintenance ensures the longevity and optimal performance of your daylight extender.
- Cleaning: Periodically wipe the LED light and control unit with a soft, dry cloth to remove dust and debris. Do not use abrasive cleaners or solvents.
- Connection Check: Annually inspect all cable connections to ensure they are secure and free from damage or corrosion.
- Environmental Check: Ensure the control unit's waterproof seals remain intact, especially if mounted outdoors.
6. Troubleshooting
If you encounter issues with your Zuomeng Automatic LED Daylight Extender, refer to the following common problems and solutions:
| Problem | Possible Cause | Solution |
|---|---|---|
| Light does not turn on. | No power, loose connection, incorrect mode. | Check power adapter connection to outlet and control unit. Ensure light cable is securely plugged into 'Power Out'. Verify the unit is not in Manual OFF mode. |
| Timer settings do not work. | Incorrect programming, unit not in Timer/Latitude mode, incorrect current time. | Re-check all timer settings carefully. Ensure the current time and date are accurate. Confirm the control unit is set to Timer Mode or Latitude/Longitude Mode. |
| Light is blinking or strobing. | Power fluctuation, internal fault. | Disconnect power for 5 minutes and reconnect. If the issue persists, contact customer support. |
| Automatic (Latitude/Longitude) mode is inaccurate. | Incorrect location setting, incorrect current time. | Verify the latitude/longitude or regional setting is accurate for your location. Ensure the current time and date are correctly set. |
7. Specifications
- Model: HY-012
- Light Type: 9W, 42-LED Circular Warm Light
- LED Chips: Premium 2835
- Light Board Material: Aluminum
- Light Dimensions: Approximately 8.66 inches (diameter), 2 inches (thickness)
- Control Unit Waterproof Rating: IP65
- Input Voltage: 12V DC (via included power adapter)
- Color: White
- Item Weight: Approximately 1.94 pounds (0.88 kg)
- Included Components: LED Light, Control Unit, Power Charger

Figure 7.1: Product dimensions for the LED light and control unit.

Figure 7.2: Features of the high-performance LED light.
8. Warranty and Support
8.1 Warranty Information
Specific warranty details are typically provided with your purchase documentation or can be found on the manufacturer's official website. Please retain your proof of purchase for warranty claims.
8.2 Customer Support
For further assistance, technical support, or inquiries regarding your Zuomeng Automatic LED Daylight Extender, please contact the seller or manufacturer directly through their official channels.
Ask a question about this manual
Ask about setup, troubleshooting, compatibility, parts, safety, or missing instructions. Manuals+ will review the question and use this page’s manual context to help answer it.