1. Introduction and Product Overview
Thank you for choosing the VAXMAY 2 Gallon Battery Powered Sprayer. This electric sprayer is designed for efficient and precise application of liquids for various tasks in your lawn, garden, and household. It features an upgraded handle with adjustable speeds, a battery indicator, and comes with multiple mist nozzles for versatile use.
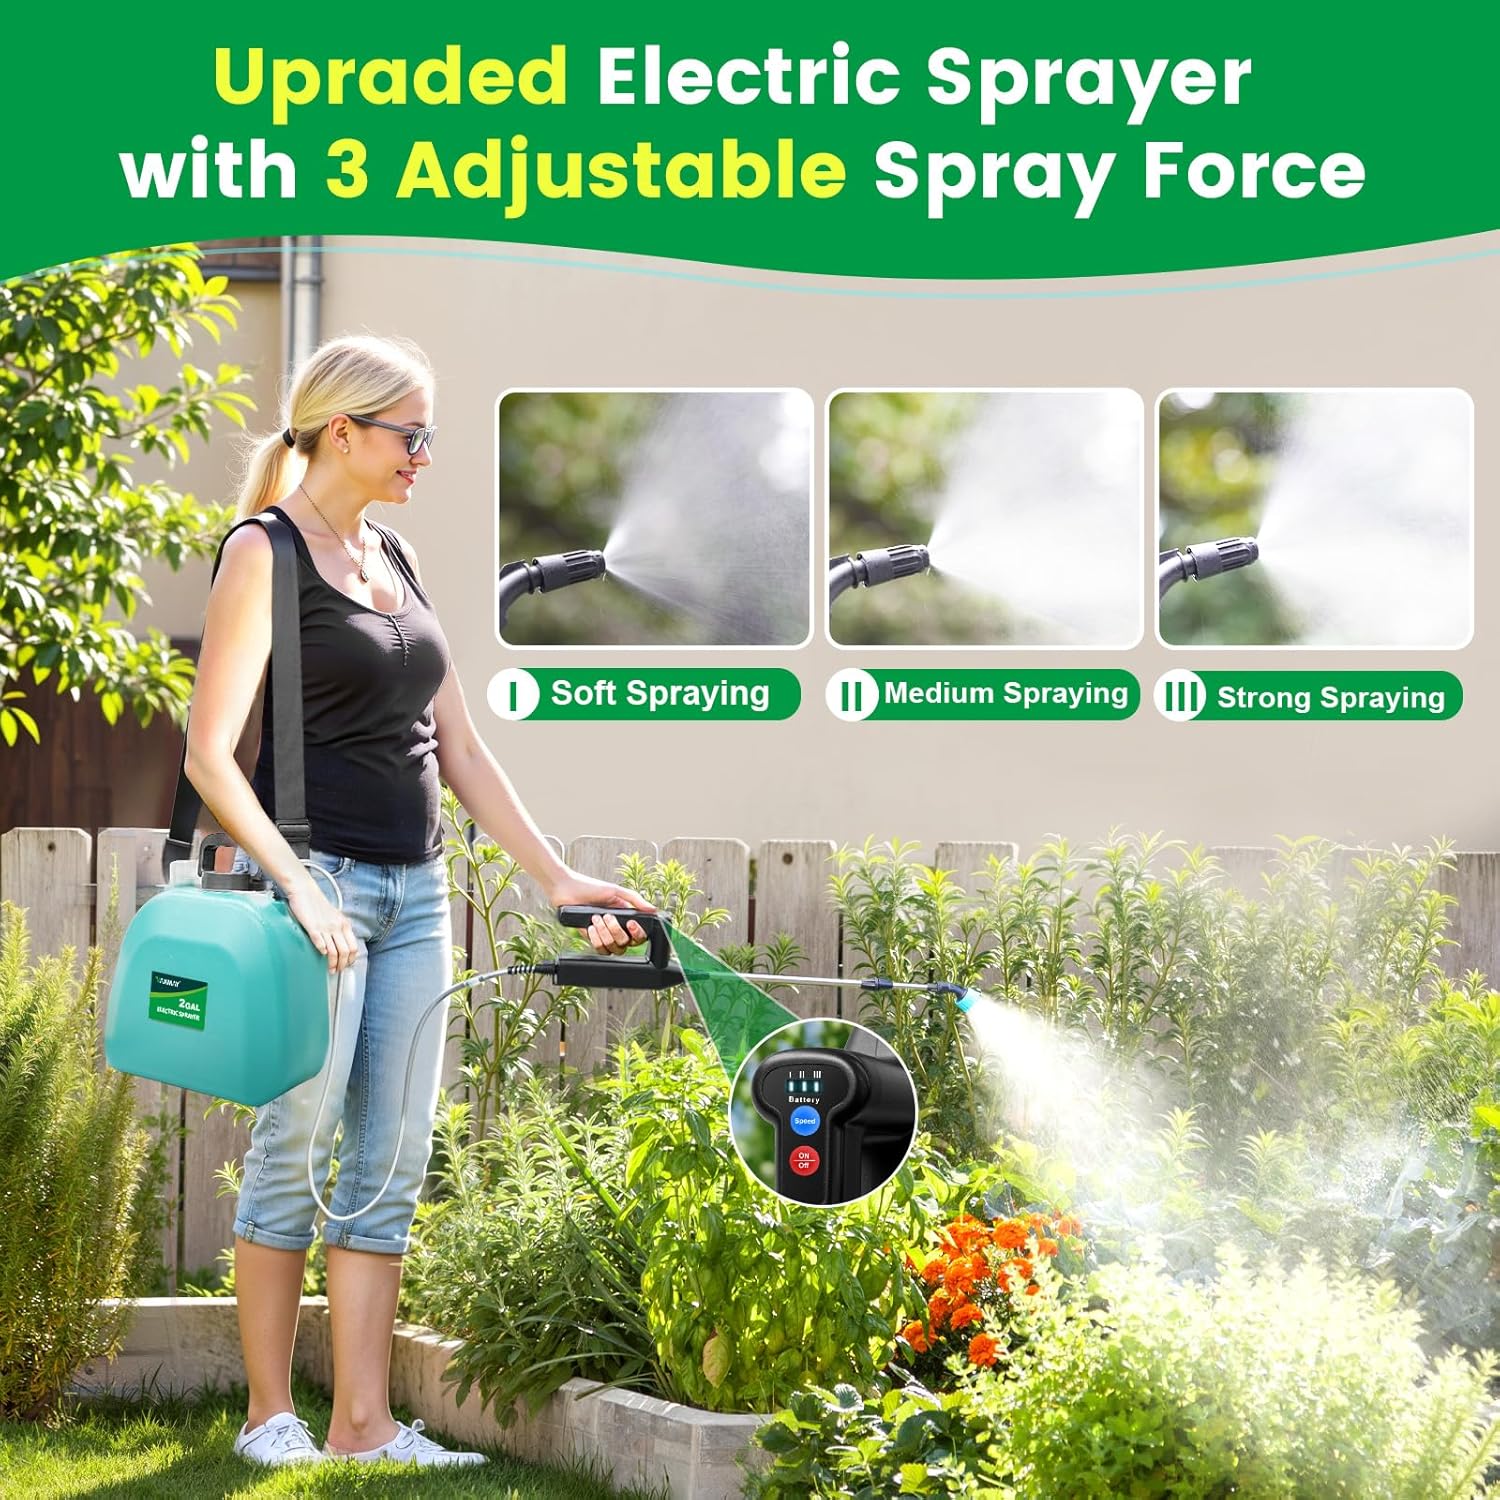
Image 1.1: The VAXMAY 2 Gallon Battery Powered Sprayer being used in a garden setting.
Video 1.1: An overview of the VAXMAY Upgraded 2 Gallon Battery Powered Sprayer, highlighting its features and ease of use.
2. What's in the Box
Please ensure all components are present before assembly and operation:
- 2-Gallon Sprayer Tank (Green)
- Rechargeable Handle with Integrated Pump
- Retractable Wand
- 4 Mist Nozzles (various spray patterns)
- Adjustable Shoulder Strap
- USB-C Charging Cable
- Measuring Cup (integrated into one cap)
- Filter Screens (pre-installed in inlets)
- Extra O-rings

Image 2.1: All included components of the VAXMAY 2 Gallon Battery Powered Sprayer laid out.
3. Setup Instructions
- Attach the Shoulder Strap: Securely attach the adjustable shoulder strap to the designated clips on the sprayer tank.
- Connect the Hose: Connect the hose from the sprayer tank to the rechargeable handle. Ensure a tight fit to prevent leaks. The hose features an anti-coil spring for durability.
- Assemble the Wand: Attach the retractable wand to the rechargeable handle. Twist to secure.
- Select and Attach Nozzle: Choose the desired nozzle from the four provided options and screw it onto the end of the wand. Ensure it is tightened to prevent leaks.
- Charge the Battery: The sprayer handle contains a rechargeable battery. Connect the provided USB-C cable to the charging port on the handle and plug it into a suitable USB power source. The battery indicator lights will show charging status. Ensure the battery is fully charged before first use for optimal performance.
- Fill the Tank: Unscrew the main cap on the sprayer tank. The tank features two wide openings with filter screens to prevent clogs. Use the integrated measuring cup in one of the caps for precise mixing. Fill the tank with your desired liquid, ensuring it does not exceed the 2-gallon capacity. The clear volume scale on the side of the tank helps monitor liquid levels. Securely close the cap.

Image 3.1: Visual guide for installing the spray wand, including attaching the nozzle, extension rod, and hose.
4. Operating Instructions
- Power On: Press the 'On/Off' button on the rechargeable handle to activate the sprayer. The battery indicator lights will illuminate.
- Adjust Spray Speed: Use the 'Speed' button to cycle through the 3 adjustable speeds (low, medium, high). The indicator lights on the handle will show the selected speed.
- Begin Spraying: Point the nozzle towards the target area and press the 'On/Off' button to start spraying. Release the button to stop.
- Adjust Spray Pattern: Depending on the nozzle attached, you can adjust the spray pattern by twisting the nozzle head. The sprayer includes a 6-hole pattern nozzle, cone nozzle, F-type dual nozzle, and fan nozzle to suit various needs like fine mist, fan spray, or direct stream.
- Utilize Retractable Wand: Extend the retractable wand for hard-to-reach areas or to maintain a comfortable distance from the spray.
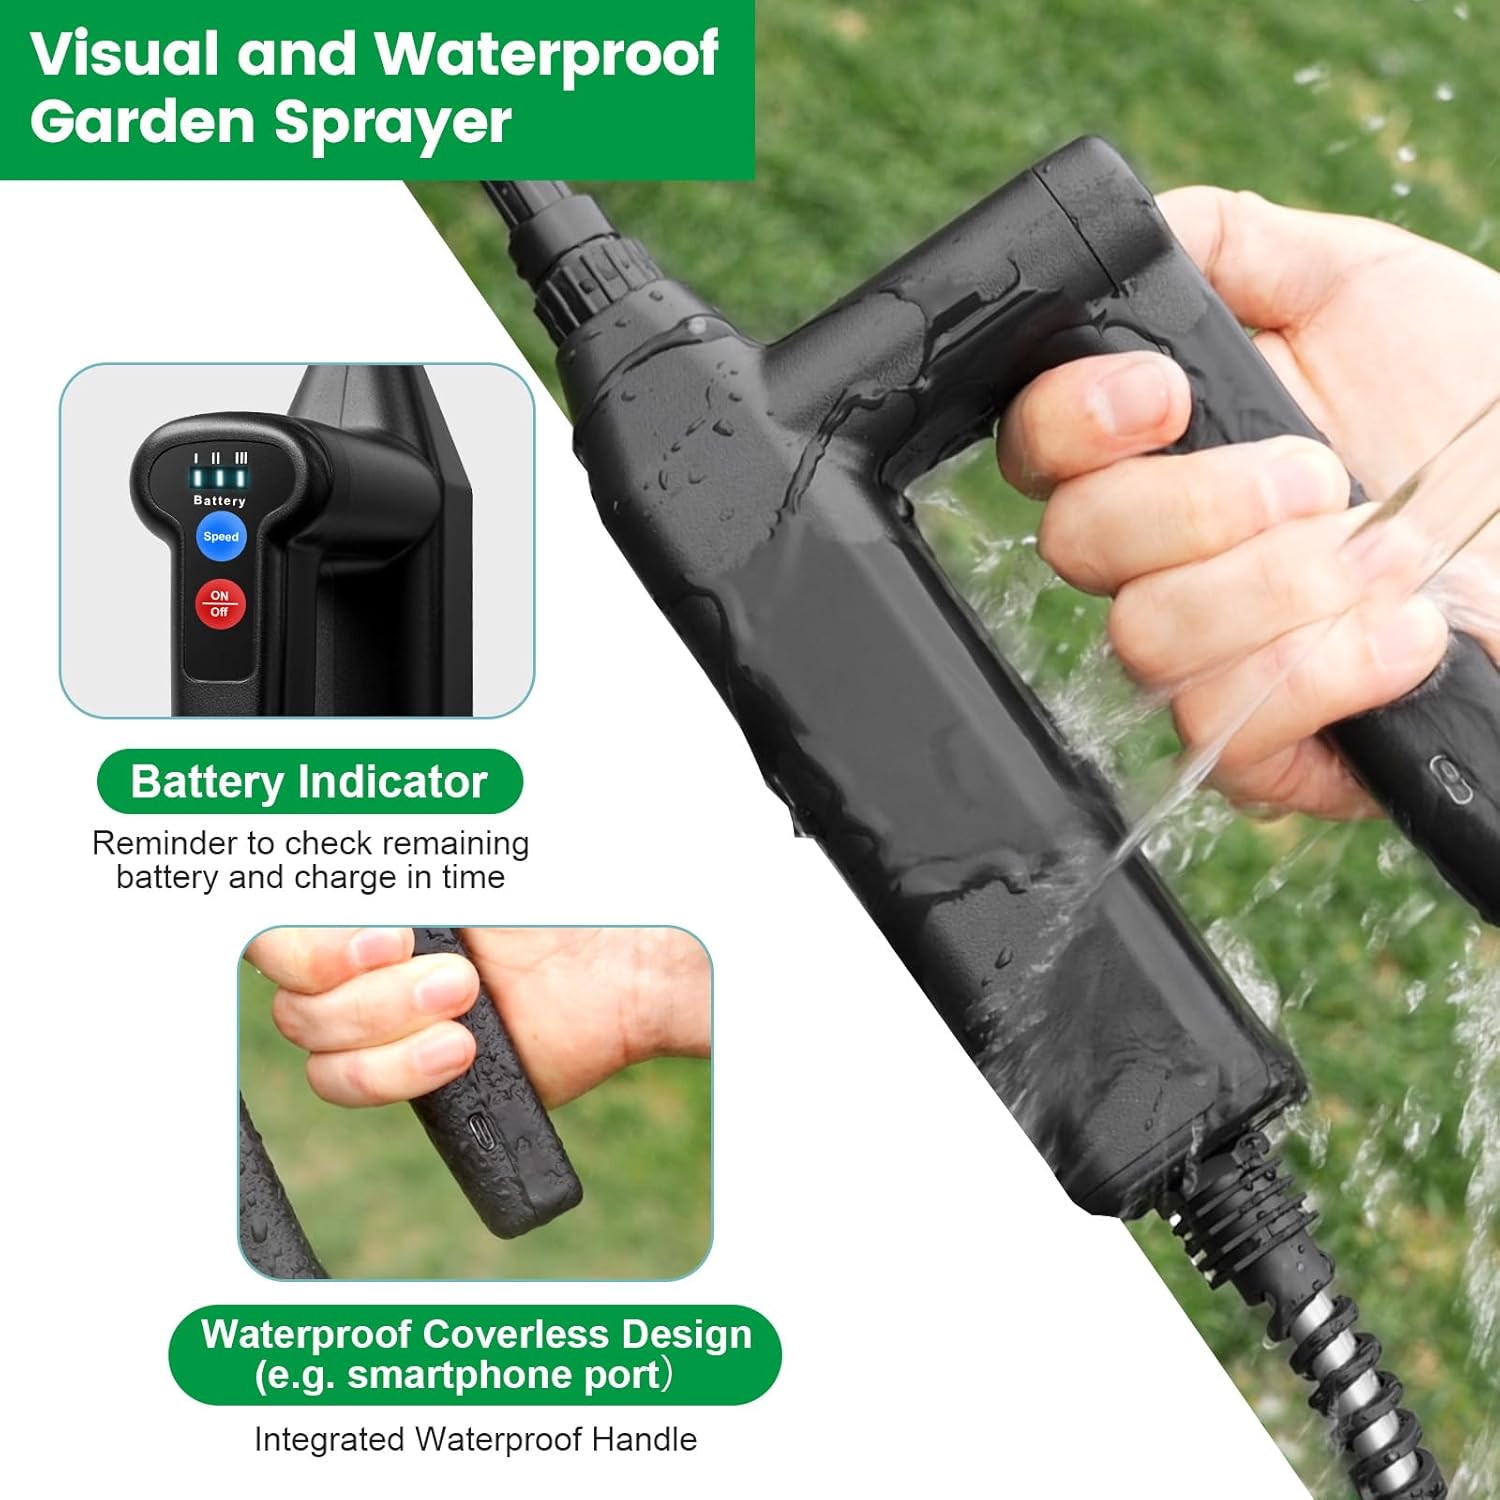
Image 4.1: The waterproof integrated handle with visible battery and speed indicator lights.

Image 4.2: A visual representation of the four adjustable nozzles and their respective spray patterns.
5. Maintenance
Proper maintenance ensures the longevity and optimal performance of your sprayer.
- Empty and Rinse: After each use, empty any remaining liquid from the tank. Rinse the tank thoroughly with clean water.
- Clean Filters: Remove the filter screens from the tank inlets and rinse them under running water to remove any debris.
- Flush the System: Fill the tank with clean water and operate the sprayer until the water runs clear through the nozzle. This helps prevent clogging of the pump and nozzles.
- Clean Nozzles: If a nozzle becomes clogged, remove it from the wand and clean it with water. A small brush or pin can be used to clear stubborn blockages.
- Store Properly: Store the sprayer in a cool, dry place away from direct sunlight and freezing temperatures. Ensure the battery is charged periodically if stored for extended periods.

Image 5.1: The two wide water inlets with integrated filter screens for easy filling and cleaning.
6. Troubleshooting
| Problem | Possible Cause | Solution |
|---|---|---|
| Sprayer not turning on | Low battery; Power button not pressed correctly | Charge the battery; Ensure the 'On/Off' button is fully pressed. |
| No spray or weak spray | Clogged nozzle; Low liquid level; Air in the pump; Hose kinked | Clean the nozzle; Refill the tank; Prime the pump by running with water; Check for kinks in the hose. |
| Leaking from connections | Loose connections; Damaged O-rings | Tighten all connections; Replace damaged O-rings with spares. |
7. Specifications
- Brand: VAXMAY
- Model Name: ST8LPRO-7.4VDXD-GN
- Tank Volume: 2 Gallons (8 Liters)
- Color: Green
- Material: High-Density Polyethylene (HDPE) and Acrylonitrile Butadiene Styrene (ABS)
- Item Weight: 3.23 pounds (1.47 Kilograms)
- Product Dimensions: 7.4"W x 11"H
- Power Source: Battery Powered (2 Lithium Ion batteries included)
- Adjustable Speeds: 3
- Nozzles Included: 4 (6-hole pattern, cone, F-type dual, fan)
- Continuous Spraying Time: Up to 3 hours (on a full charge)
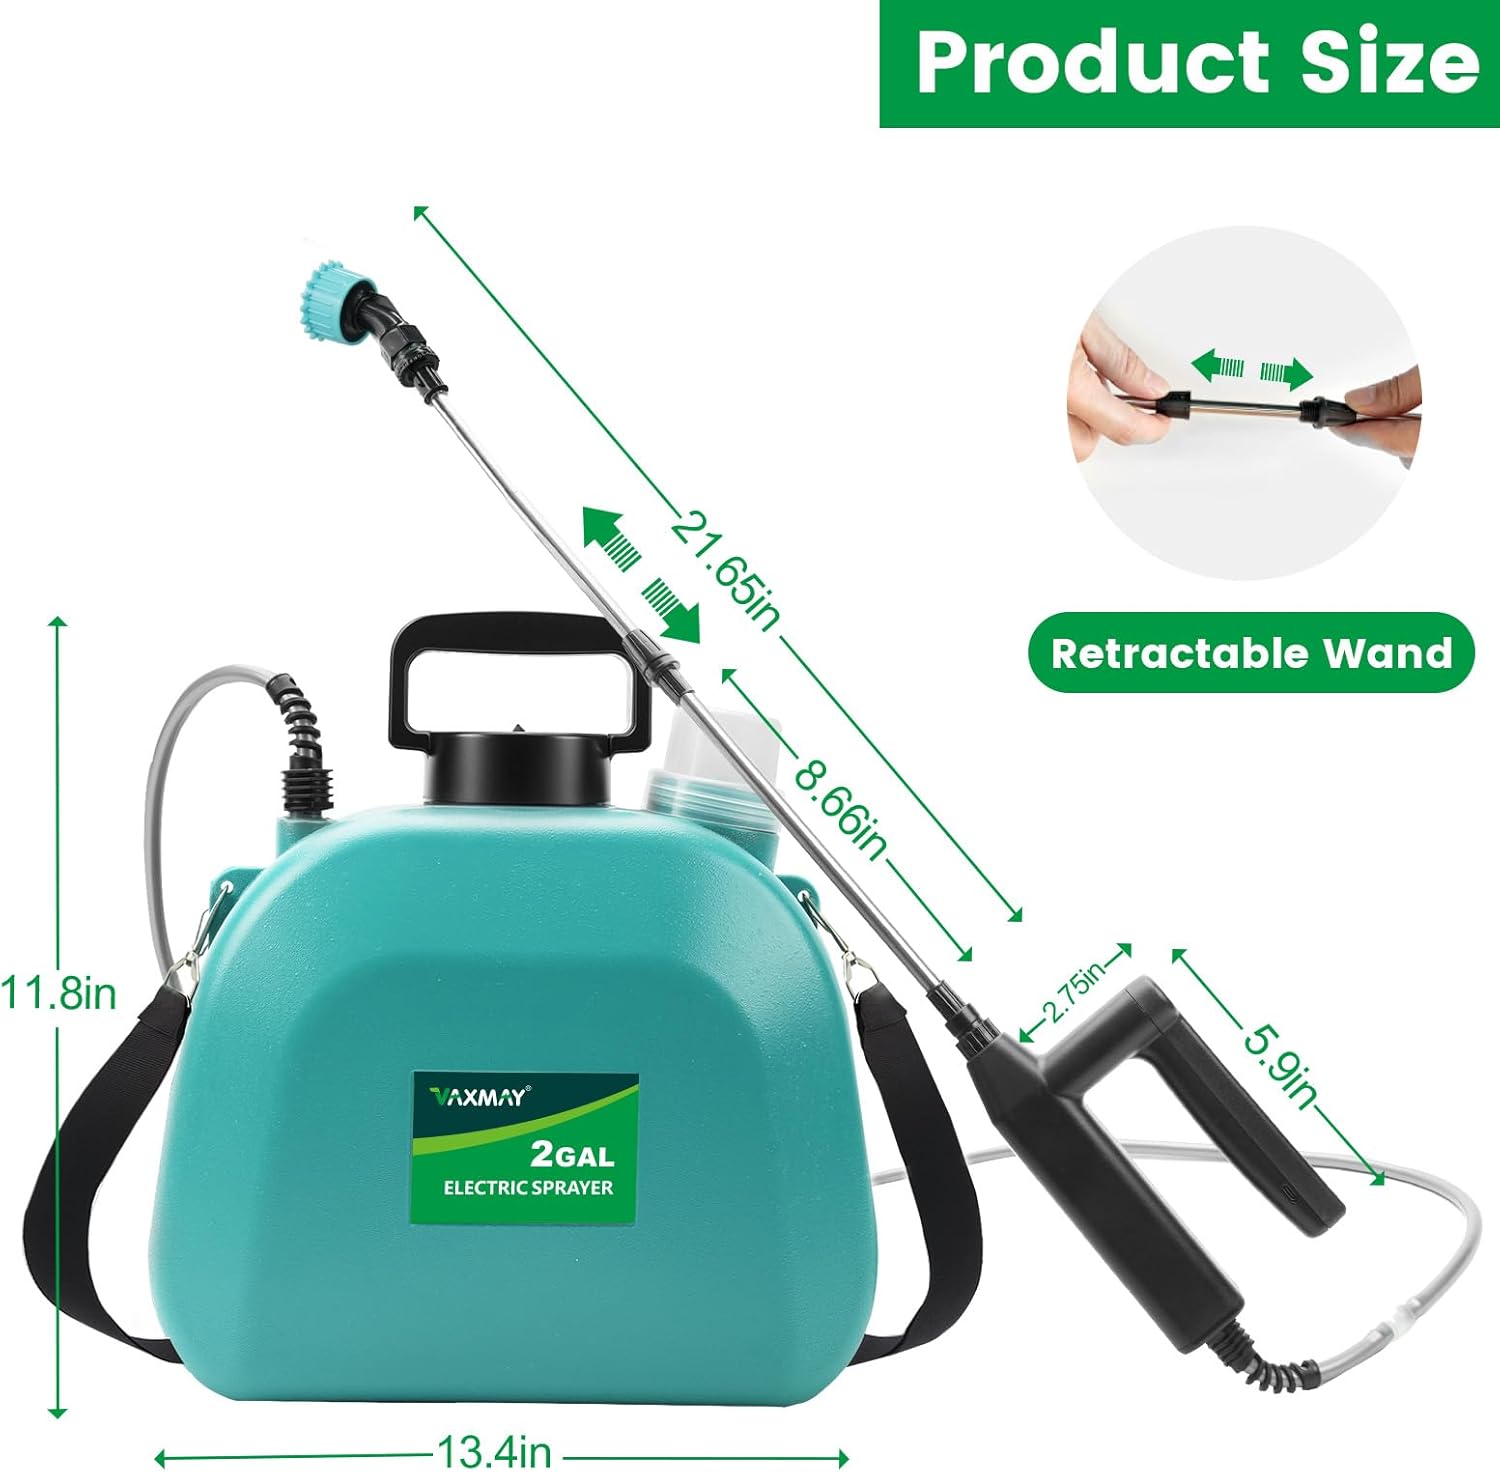
Image 7.1: Detailed product dimensions of the VAXMAY 2 Gallon Battery Powered Sprayer.
8. Warranty and Support
Your VAXMAY 2 Gallon Battery Powered Sprayer comes with a worry-free 12-month warranty. For any questions, concerns, or support needs, please contact VAXMAY customer service. They offer 24/7 online service to assist you.
For further assistance, please visit the VAXMAY Store on Amazon.


