1. Product Overview
The SNIXWOO Lockable Roof Racks Cross Bars are designed to enhance the cargo capacity of your Mazda CX-70 or CX70 PHEV 2025. These cross bars provide a secure and versatile platform for transporting various outdoor gear and accessories.
Key Features:
- Precise Compatibility: Specifically designed to fit Mazda CX70 & CX-70 PHEV 2025 models, integrating with factory side rails for a secure fit.
- Robust Durability: Constructed from heavy-duty steel with a corrosion-resistant black powder coating for long-lasting performance in diverse weather conditions.
- Versatile Design: Accommodates a wide range of accessories, including ski racks, bike mounts, and watersport carriers.
- Quiet Performance: Aluminum construction minimizes wind resistance and noise for a more enjoyable driving experience.
- Hassle-Free Installation: Easy installation without drilling, featuring a clamp locking system and included hardware.
2. What's in the Box
Verify that all components are present before beginning installation:
- Cargo Bar Kit
- Installation Manual
- Mounting Hardware (includes hex socket wrench, Allen wrench, spare screws, and keys)
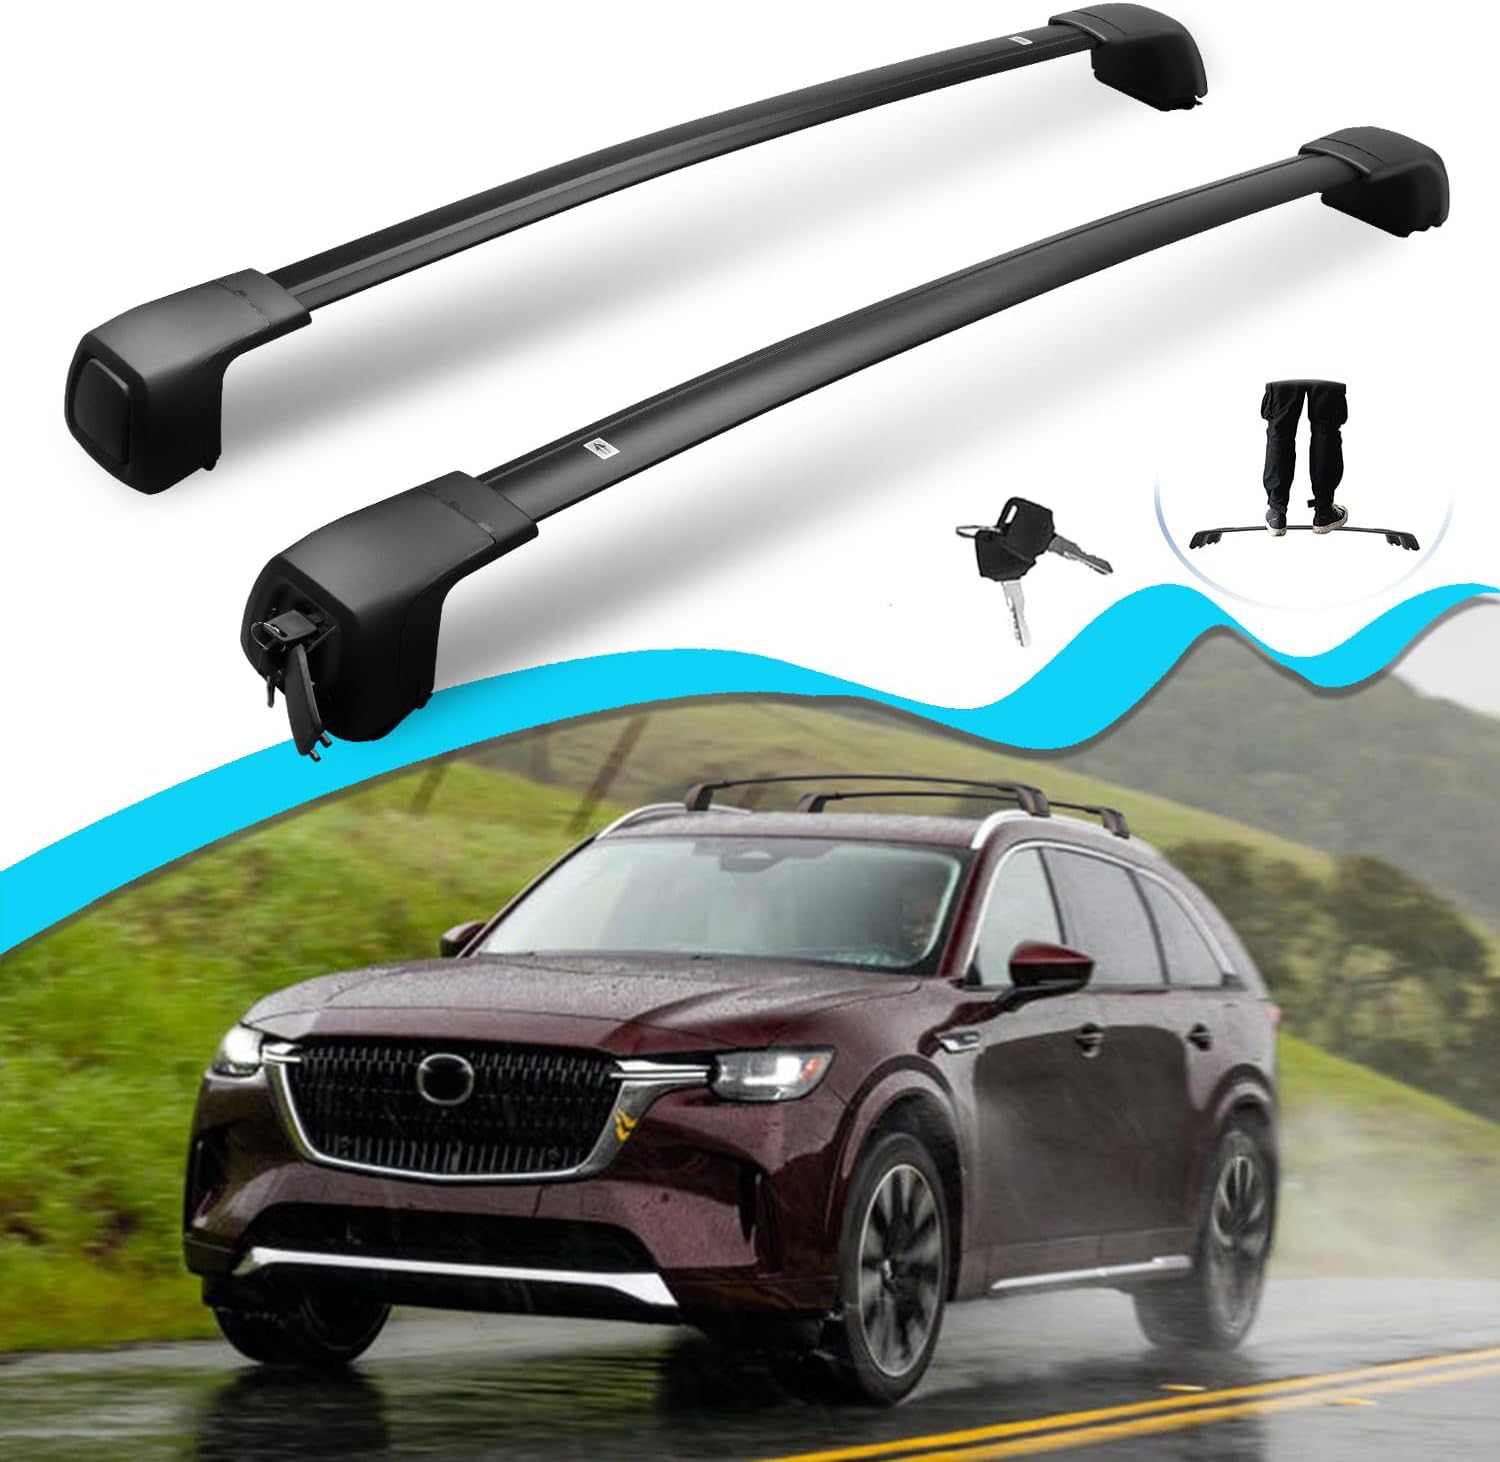
Image 1: Complete set of SNIXWOO Lockable Roof Racks Cross Bars and included tools.
3. Setup and Installation
Follow these steps for proper installation of your SNIXWOO roof racks. Ensure your vehicle is parked on a level surface and the engine is off.
Important Considerations:
- Do not cut the bars or scrape the plastic headers. These crossbars are vehicle specific, and bar lengths vary by model.
- If one bar is longer than the other, the front of your vehicle is wider than the back. In this case, install the longer bar on the front and the shorter bar on the rear.
- If you cannot fit it, re-check the instructions as a point might have been missed.
- If you cut the bars or do not insert cross bars fully into the mount, the bars' carrying capacity will decrease.
Installation Steps:
- Prepare the Cross Bars:
Identify the longer bar for the front and the shorter bar for the rear. The pointed end of each bar should face the rear of your vehicle, and the round end should face the front. - Attach End Supports:
Screw the end supports to the crossbars. Do not fully tighten the screws at this stage to allow for adjustment. - Remove Lock Cover:
Push to open the cap or use a tool to pry it open. Insert the key horizontally and turn 90 degrees anti-clockwise to unlock the base, then remove the outer cover. - Position on Vehicle:
Carefully place the assembled cross bars onto your vehicle's factory side rails. For the front bar, ensure its position does not interfere with the sunroof's operation. - Adjust and Tighten:
Loosen the screws on the clamps so that the lower clamp can move. Move the lower clamp into position under the side rail. Tighten the screws using the provided Allen key. Ensure both driver and passenger side screws are tightened simultaneously to ensure even pressure. - Secure Locks:
Once satisfied with the position and tightness, put the lock mechanism back and lock it with the key. Replace the plastic lock cover.

Image 2: Detailed steps for removing the lock cover to access mounting screws.

Image 3: Visual guide for the hassle-free installation process of the cross bars.
Installation Videos:
Video 1: General installation guide for SNIXWOO roof racks. While specific to a CX5 model, the principles apply to CX-70 installation.
Video 2: Animated installation steps for cross bars, demonstrating the assembly and mounting process.
4. Operating Instructions
Once installed, your SNIXWOO roof racks are ready for use. The maximum load capacity for these cross bars is 165 pounds. Always distribute weight evenly and secure cargo properly.
Usage Tips:
- The crossbars feature an anti-theft design with integrated locks for added security.
- The length of the crossbar can be adjusted to fit your specific cargo needs.
- The aerodynamic design helps minimize wind noise and resistance during travel.

Image 4: Close-up of the anti-theft lock and adjustable length mechanism.

Image 5: Examples of outdoor gear that can be transported using the roof racks.
Safety Guidelines:
- Prepare special carriers when loading surfboards, kayaks, snowboards, etc.
- Use fixing devices to secure the front and rear of long, large items.
- Maintain proper speed based on the load weight and road conditions.
- Check the tightness of all fasteners after a short distance of travel.

Image 6: Visual representation of safety tips for securing cargo.

Image 7: Further safety guidelines for driving with roof-mounted cargo.
5. Maintenance
To ensure the longevity and optimal performance of your roof racks, regular maintenance is recommended:
- Periodically check all bolts and fasteners for tightness, especially after long trips or carrying heavy loads.
- Clean the cross bars with mild soap and water. Avoid abrasive cleaners that could damage the finish.
- Inspect the plastic components and rubber strips for any signs of wear or damage. Replace if necessary.
6. Troubleshooting
If you encounter any issues with your SNIXWOO roof racks, consider the following:
- Whistling Noise: Some users report a whistling noise when driving. This can sometimes be mitigated by adjusting the position of the bars or adding a fairing (not included). Ensure all components are tightly secured.
- Difficulty with Installation: Double-check all steps in the installation guide. Ensure the correct bar (longer for front, shorter for rear) is used and that the clamps are properly aligned with the vehicle's side rails.
- Damaged Parts: If any parts are damaged during installation or use, please contact customer support for assistance.
7. Specifications
| Feature | Detail |
|---|---|
| Brand | SNIXWOO |
| Model | CX-70 |
| Item Weight | 12.38 pounds |
| Package Dimensions | 39.2 x 6.1 x 5.4 inches |
| Manufacturer Part Number | CX7038CSO |
| Color | Black |
| Load Capacity | 165 Pounds |
| Mounting Type | Clamp on |
| Automotive Fit Type | Vehicle Specific Fit |
8. Warranty and Support
For any questions, concerns, or assistance with installation or product support, please contact the seller directly. You can typically do this by clicking or tapping the seller's name on the product page or by navigating to 'Your Orders' and selecting 'Get help' or 'Get product support'. The seller aims to respond with a solution within 24 hours.


