1. Important Safety Instructions
Please read this manual thoroughly before installation, operation, or maintenance of the Mxmoonant 11KW Pool Heater. Failure to follow these instructions may result in electric shock, fire, property damage, or serious injury.
- Electrical Safety: This unit operates on 220V. Installation requires self-wiring by a qualified electrician. If used with 110V, it requires one ground wire and two live wires. Ensure all electrical connections comply with local codes and regulations.
- Disconnect Power: Always disconnect all power to the unit before performing any maintenance, inspection, or service.
- Circulation Pump Requirement: The pool heater requires connection to a circulation pump with a minimum power of 1HP (0.735KW) for proper operation and water flow. Do not use submersible or booster pumps.
- Installation Environment: Suitable for both indoor and outdoor installation. Ensure adequate ventilation and clearance around the unit.
- Obstruction: Do not obstruct the access panel or any vents on the unit.
- Water Quality: Ensure proper water chemistry is maintained in the pool or spa to prevent damage to the heating element and other components.
2. Product Overview
The Mxmoonant 11KW Pool Heater is designed to efficiently heat your swimming pool or spa, providing comfortable water temperatures. It features an automatic circulation heating system, a precise touchscreen display for temperature control, and a durable 316 stainless steel heating element.

Figure 2.1: Front view of the Mxmoonant 11KW Pool Heater, showing the digital display, power switch, and a label detailing key specifications such as power, voltage, current, and pipe size.
3. Specifications
| Feature | Specification |
|---|---|
| Power | 11KW |
| Voltage | 220V |
| Current | 50A |
| Electrical Wire | 3x10mm²/5x4mm² |
| Pipe Connection | 1.5 inch / DN40 |
| Circulation Pump Requirement | ≥ 1HP (0.735KW) |
| Phase | 1 |
| Breaker | 63A |
| Dimensions (L x W x H) | 48 x 10 x 35 cm |
| Weight | 8.96 kg |
4. Installation
4.1 Electrical Connection
Electrical installation must be performed by a qualified electrician in accordance with all national and local electrical codes. The unit is designed for 220V operation. For 110V systems, specific wiring is required (one ground wire and two live wires).
- Ensure the main power supply is disconnected before starting any wiring.
- Connect the electrical wires to the terminal block inside the heater's access panel as shown in the diagram.
- Ensure secure connections for GND (Ground), L1 (Live 1), and L2 (Live 2).
- Install a 63A circuit breaker for the heater.

Figure 4.1: Detailed diagram showing the internal electrical circuit connections for the pool heater, indicating terminals for GND, L1, and L2. It also highlights the requirement for self-wiring and specific wiring for 110V systems.
4.2 Plumbing Connection
The heater must be connected in-line with your pool's filtration system, after the filter and before any chemical feeders. A circulation pump is essential for water flow through the heater.
- Ensure your circulation pump has a power rating of at least 1HP (0.735KW). Submersible or booster pumps are not suitable.
- Connect the inlet and outlet pipes of the heater to your pool's plumbing system using 1.5-inch (DN40) piping.
- Ensure all plumbing connections are watertight to prevent leaks.
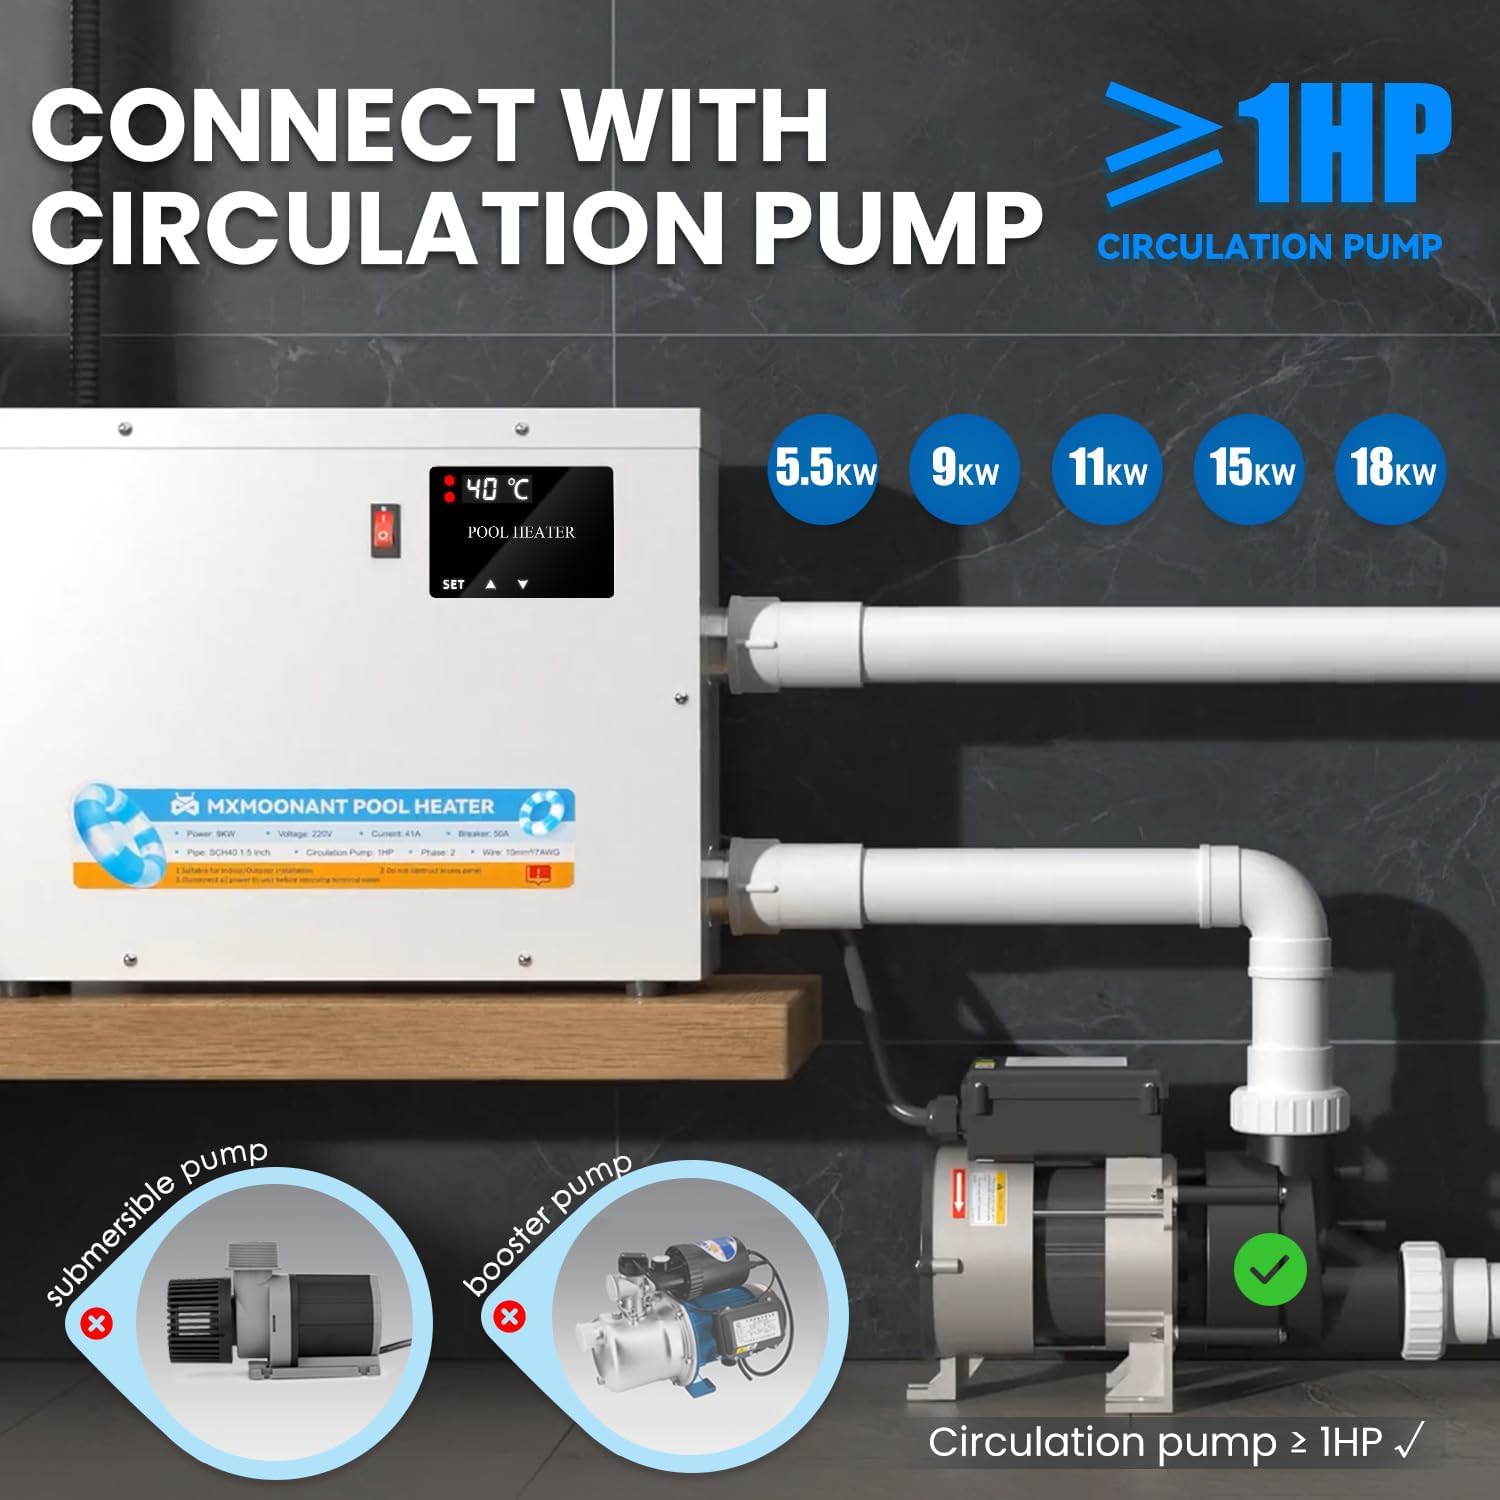
Figure 4.2: Illustration demonstrating the correct connection of the pool heater to a circulation pump. It specifies that the pump must be at least 1HP and differentiates suitable circulation pumps from unsuitable submersible or booster pumps.
5. Operation
5.1 Power On and Display
Once installation is complete and verified, turn on the main power supply to the heater. The digital touchscreen display will illuminate, showing the current water temperature.
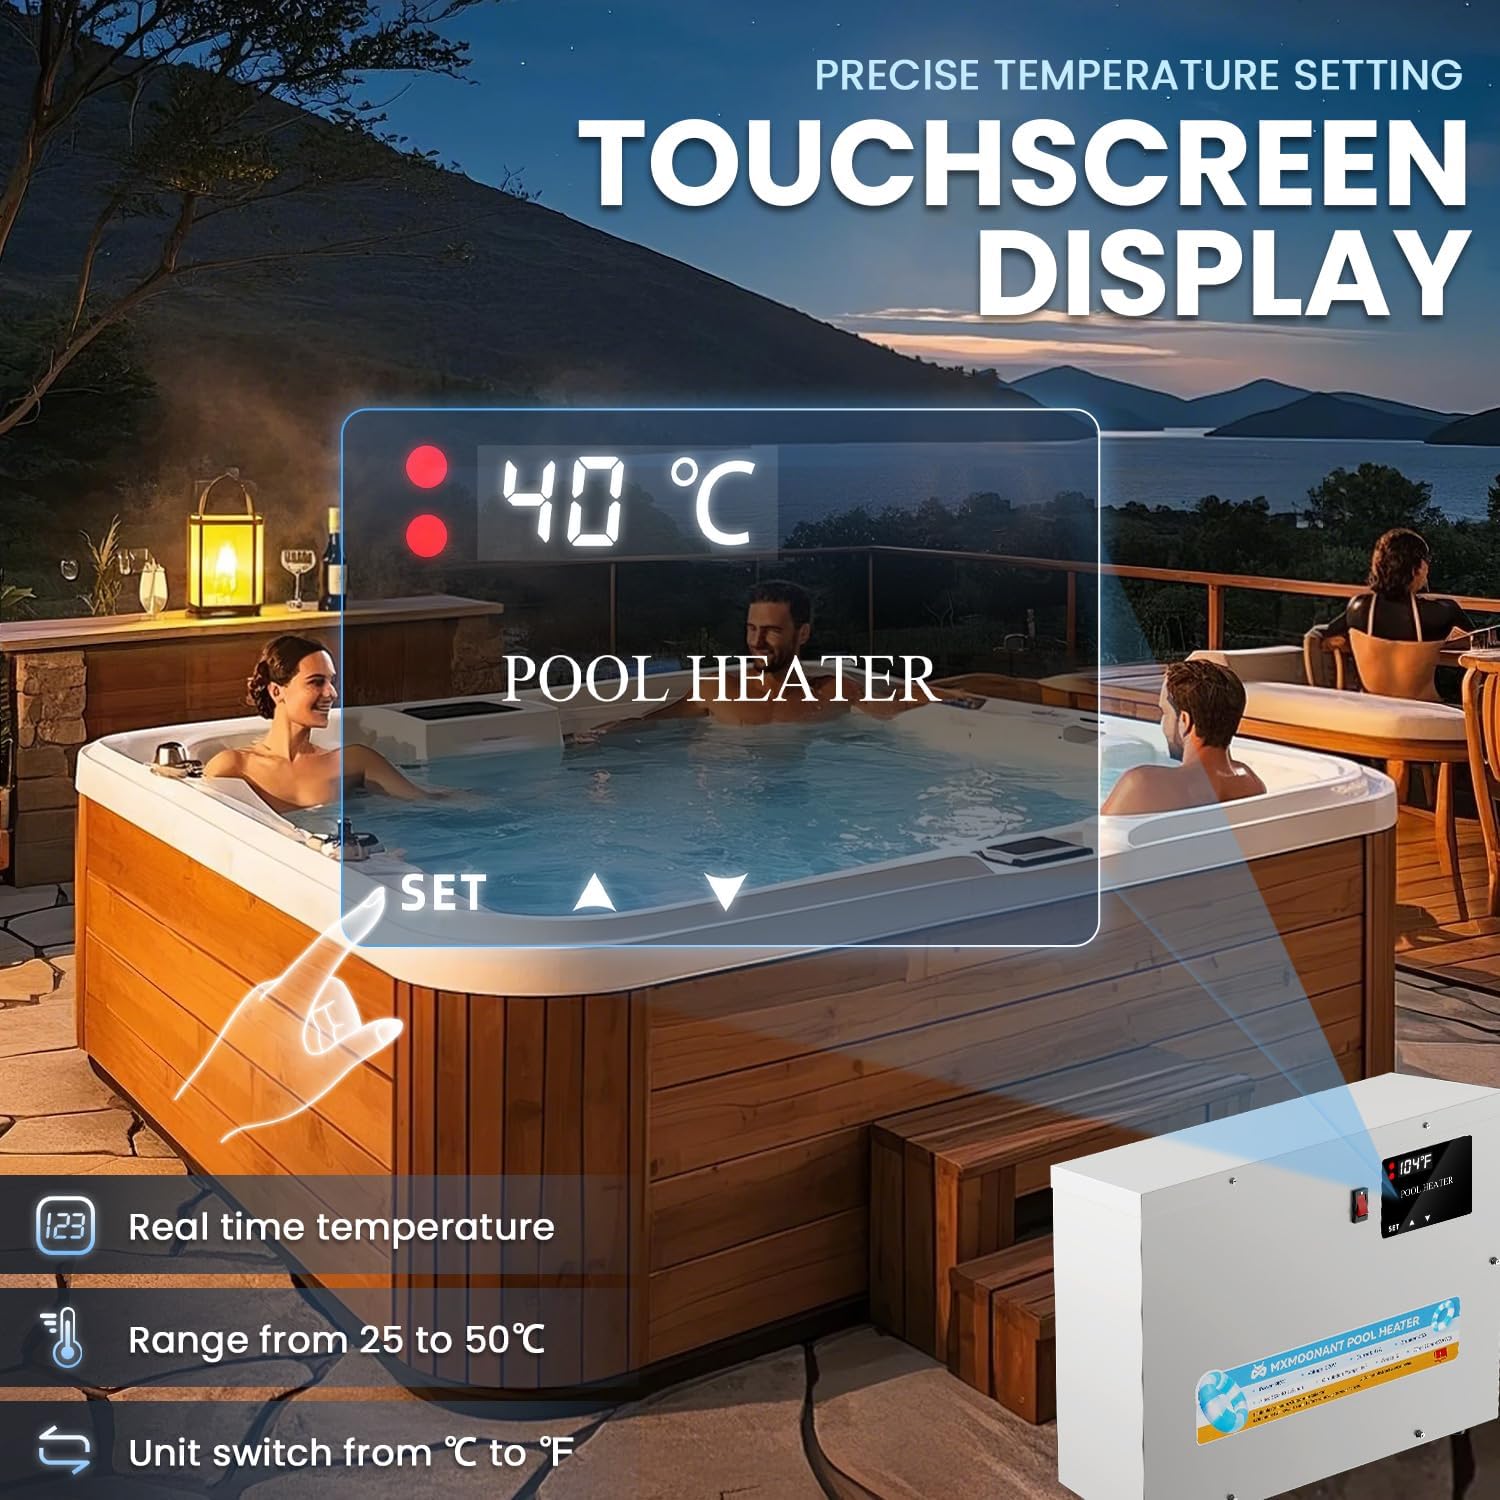
Figure 5.1: Close-up of the pool heater's touchscreen display, illustrating how to set the desired temperature using 'SET' and arrow buttons. It also shows the real-time temperature display and the option to switch between Celsius and Fahrenheit.
5.2 Setting the Temperature
- Press the SET button to enter temperature setting mode.
- Use the ▲ (Up) and ▼ (Down) arrow buttons to adjust the desired water temperature. The adjustable range is typically 25°C to 50°C (77°F to 122°F).
- Press SET again to confirm your selection, or wait a few seconds for the setting to automatically save.
- The unit can switch between Celsius (°C) and Fahrenheit (°F) display modes. Refer to the display for the current unit.
Recommended Temperatures:
- For Pools: 25-30°C (78-86°F)
- For Hot Tubs/Spas: 40°C (104°F)
5.3 Automatic Circulation Heating
The Mxmoonant Pool Heater features an intelligent automatic circulation heating system. Once the desired temperature is set, the heater will activate when the water temperature falls below the set point and deactivate when it reaches or exceeds the set point. This ensures consistent water temperature with optimal energy usage.
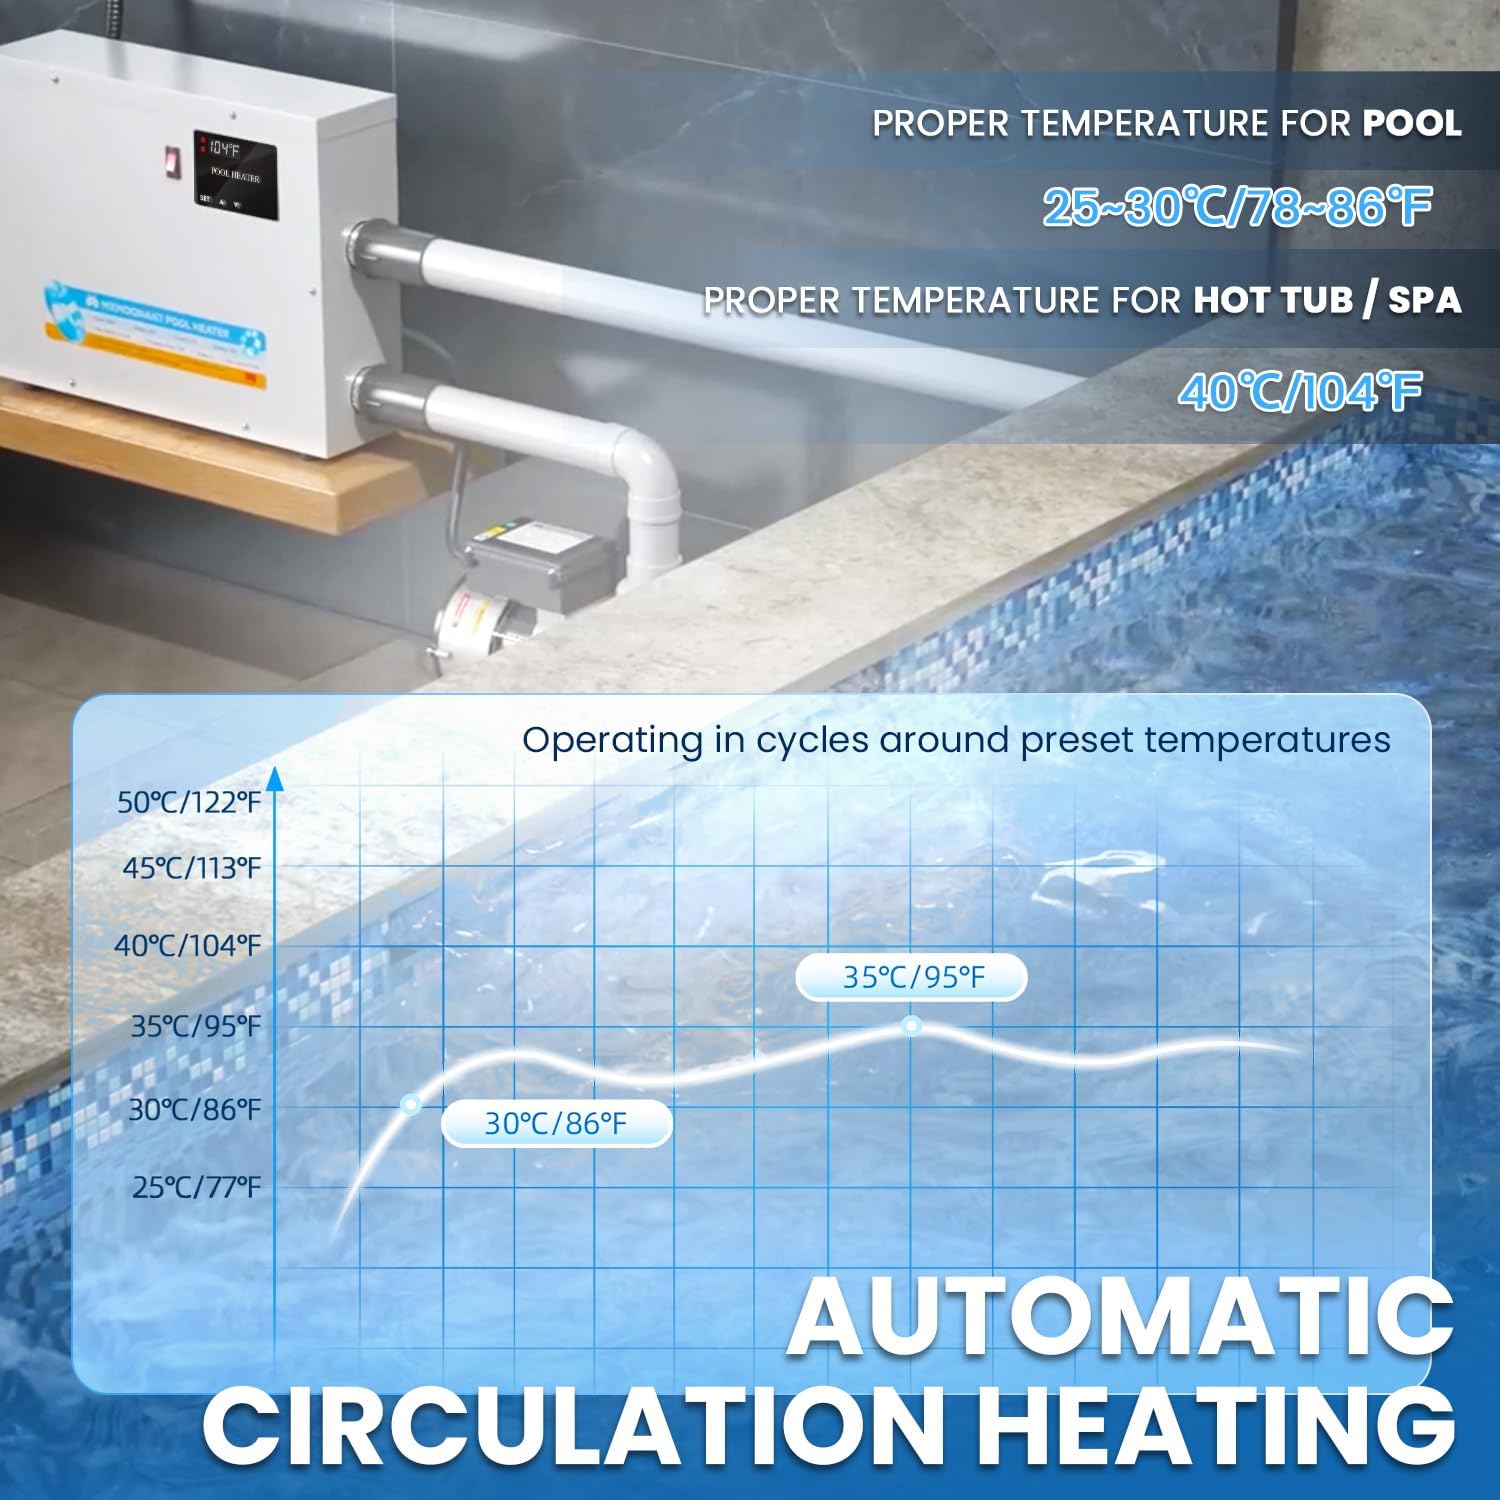
Figure 5.2: A graph demonstrating the automatic circulation heating process, showing how the water temperature fluctuates around the preset temperature (e.g., 30°C/86°F or 35°C/95°F) as the heater cycles on and off to maintain the desired warmth.

Figure 5.3: An internal view of the heater, highlighting the upgraded 316 stainless steel heating element. This image illustrates the water flow path around the heating element, showing how water is heated as it passes through the unit.
6. Maintenance
Regular maintenance ensures the longevity and efficient operation of your pool heater.
- Power Disconnection: Always turn off and disconnect the power supply to the heater before performing any maintenance or cleaning.
- Inspect Connections: Periodically check all electrical and plumbing connections for tightness and signs of wear or corrosion.
- Clean Exterior: Wipe the exterior of the heater with a soft, damp cloth. Do not use abrasive cleaners or solvents.
- Water Chemistry: Maintain proper pool/spa water chemistry as recommended by your pool professional to prevent scale buildup and corrosion inside the heater.
- Winterization: If the heater will be exposed to freezing temperatures, ensure it is properly drained and winterized according to local guidelines to prevent freeze damage.
7. Troubleshooting
If you encounter issues with your Mxmoonant Pool Heater, refer to the following common troubleshooting steps. For problems not listed here, or if issues persist, contact customer support.
| Problem | Possible Cause | Solution |
|---|---|---|
| Heater does not turn on. | No power supply; tripped breaker; faulty wiring. | Check main power, reset circuit breaker, verify electrical connections. |
| Water not heating to desired temperature. | Incorrect temperature setting; insufficient circulation; low water flow; heating element issue. | Verify temperature setting, ensure circulation pump is operating correctly (>=1HP), check for blockages in plumbing. |
| Error code on display. | Sensor malfunction; internal fault. | Note the error code and consult the manufacturer for specific guidance. Power cycle the unit. |
| Water leakage. | Loose plumbing connections; damaged seals or pipes. | Inspect all plumbing connections and tighten as necessary. Check for visible damage to pipes or seals. |
8. Warranty and Support
For warranty information, technical support, or service inquiries, please contact Mxmoonant customer service. Keep your purchase receipt and product model number (11KW) handy when contacting support.
Note: Specific warranty terms and conditions may vary. Refer to your purchase documentation or the official Mxmoonant website for the most current warranty details.


