1. Introduction
The RØDECaster Video is an all-in-one video and audio production console designed to provide intuitive control over content creation. It integrates powerful video switching, recording, and production capabilities with a professional audio mixer, streamlining workflows for studio productions, video podcasts, interviews, and live event streaming with broadcast quality.
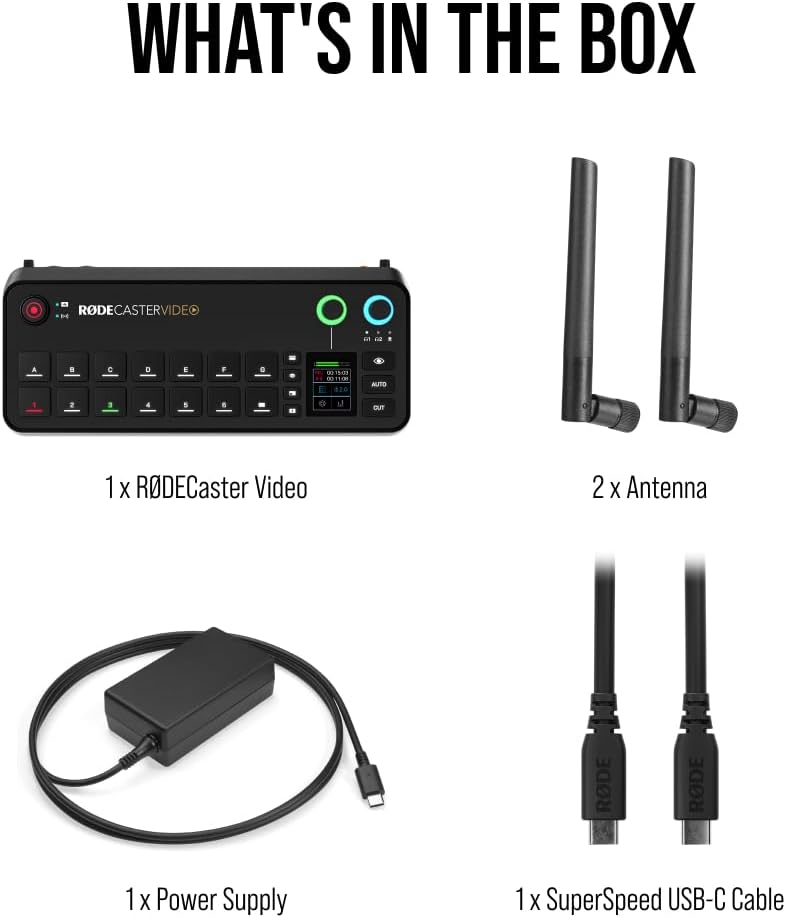
2. What's in the Box
Carefully unpack your RØDECaster Video and ensure all components are present:
- 1 x RØDECaster Video Unit
- 1 x RØDECaster External Video Antenna
- 2 x External Antenna
- 1 x RØDECaster Video Power Supply
- 1 x SuperSpeed USB-C Cable (2m)
- 1 x SC27 Cable
3. Key Features
- Multi-Source Video Switching: Seamlessly switch between up to six video sources (4x HDMI and 2x USB) and seven fully customizable multi-source scenes with dedicated buttons.
- Professional Audio Interface: Features two studio-grade Neutrik combo jacks with ultra-low-noise, high-gain Revolution Preamps for pristine audio from XLR microphones, instruments, or other audio sources.
- Integrated Production Tools: Access media playback, graphic overlays, automatic chroma keying, transitions, and multi-source scene creation directly from the front panel.
- Versatile Streaming & Recording: Stream directly to major platforms via Wi-Fi or Ethernet, or to streaming software via USB. Record directly to an external USB storage device, including isolated (ISO) recording for post-editing flexibility.
- Innovative Workflow Enhancements: Utilize Inspect Mode for safely previewing an input and intelligent auto-switching for seamless hands-free switching of video sources and scenes based on audio inputs.


4. Setup Guide
4.1 Initial Connection
- Power Connection: Connect the provided power supply to the 15V 2A USB PD port on the rear of the RØDECaster Video. Plug the power cable into a suitable power outlet.
- USB-C Connection: Use the SuperSpeed USB-C cable to connect the RØDECaster Video to your computer for streaming, recording, and software control.
- Ethernet Connection (Optional): For direct streaming or network control, connect an Ethernet cable to the Ethernet port.
- Antenna Installation: Attach the two external antennas to the designated ports on the unit for wireless connectivity.
4.2 Video Input Setup
Connect your video sources (cameras, computers, etc.) to the HDMI and USB video input ports on the RØDECaster Video. The unit supports up to 4 HDMI and 2 USB video inputs.
4.3 Audio Input Setup
Connect your microphones or instruments to the Neutrik combo jacks (XLR or 1/4" TRS) on the rear of the unit. The Revolution Preamps will ensure high-quality audio capture.
4.4 Initial Power-Up & Firmware Update
Upon first power-up, follow the on-screen prompts to select your language and perform any necessary firmware updates. It is recommended to keep your device's firmware up-to-date for optimal performance and new features.
5. Operating Instructions
5.1 Basic Controls
- Touch Screen: Navigate menus, adjust settings, and manage scenes via the integrated touch screen.
- Faders: Control the audio levels of individual input channels.
- Rotary Controls: Adjust headphone monitoring levels and other parameters as assigned.
- Dedicated Buttons: Utilize buttons for quick access to chroma keying, media playback, graphics, and transitions.
5.2 Scene-Based Switching
The RØDECaster Video allows you to create and switch between up to seven customizable multi-source scenes. Each scene can combine different video inputs, graphic overlays, and audio configurations. Use the dedicated scene buttons for instant transitions.
5.3 Media Playback & Graphics
Load media (images, video clips) and graphic overlays onto the device's internal storage or an external USB drive. Use the dedicated buttons to trigger playback and display graphics during your production.
5.4 Streaming & Recording
Initiate direct streaming to platforms configured via Wi-Fi or Ethernet. For recording, ensure an external USB storage device is connected. The RØDECaster Video supports isolated (ISO) recording for individual video and audio tracks, providing flexibility for post-production.
5.5 Intelligent Auto-Switching
Enable intelligent auto-switching to automatically transition between video sources based on active audio inputs, allowing for hands-free operation during live productions.
6. Connectivity
The RØDECaster Video offers extensive connectivity options:
- Video Inputs: 4x HDMI, 2x USB-C
- Audio Inputs: 2x Neutrik Combo Jacks (XLR/1/4" TRS) with Revolution Preamps
- Audio Outputs: 2x Headphone outputs, 2x 1/4" TRS line outputs
- Data & Network: 2x USB-C (for computer/storage), Ethernet port, MicroSD card slot, Wi-Fi, Bluetooth
- Security: Kensington lock slot
7. Specifications
| Feature | Detail |
|---|---|
| Model Number | RCV |
| Item Weight | 2.81 pounds (1275 Grams) |
| Product Dimensions | 30.59 x 13.25 x 6.14 inches |
| Color | Black |
| Compatible Devices | Android, Windows, iOS, macOS |
| Connector Type | XLR, 1/4" TRS, USB-C |
| Number of Channels | 6 |
| Power Source | Corded Electric |
| Connectivity Technology | HDMI, USB, XLR |
8. Maintenance
- Cleaning: Use a soft, dry cloth to clean the exterior of the RØDECaster Video. Avoid abrasive cleaners or solvents.
- Firmware Updates: Regularly check the Rode website for firmware updates to ensure optimal performance and access to new features. Follow the instructions provided by Rode for safe updating.
- Storage: Store the unit in a cool, dry place away from direct sunlight and extreme temperatures when not in use.
9. Troubleshooting
- No Power: Ensure the power supply is correctly connected to the unit and a working power outlet. Check the power button on the rear of the unit.
- No Video Input: Verify that HDMI and USB video sources are properly connected and outputting a signal. Check cable integrity.
- No Audio Input: Confirm XLR/TRS cables are securely connected. Ensure phantom power is enabled for condenser microphones if required. Check input levels on the touch screen.
- Streaming Issues: Check Wi-Fi or Ethernet connection. Verify streaming platform settings and stream key.
- Recording Problems: Ensure an external USB storage device is connected and has sufficient free space. Check recording settings on the touch screen.
10. Warranty & Support
The RØDECaster Video comes with a manufacturer's warranty. For detailed warranty information, please refer to the documentation included with your product or visit the official Rode website. For technical support, troubleshooting assistance, or service inquiries, please contact Rode customer support directly.


