
1. Introduction
This manual provides detailed instructions for the setup, operation, and maintenance of your MIZISNR AX-120 12 Channel Audio Mixer. This professional mixing console is designed for various audio applications, including recording, karaoke, podcasting, live performances, and more. It features 3-band equalization, Bluetooth connectivity, USB playback and recording, and +48V phantom power.
Please read this manual thoroughly before operating the device to ensure proper use and to maximize its performance and longevity.

Figure 1: MIZISNR AX-120 12 Channel Audio Mixer Overview
2. Setup
Follow these steps to set up your MIZISNR AX-120 audio mixer:
- Power Connection: Connect the power adapter to the DC input on the mixer and plug it into a standard 110V AC outlet. Ensure the power switch is in the OFF position before connecting.
- Main Output Connection: Connect your main speakers or amplifier to the L MAIN R outputs using appropriate cables (e.g., XLR or TRS).
- Input Connections: Connect microphones, instruments, or other audio sources to the respective input channels. The mixer supports both XLR and 6.35mm (1/4 inch) line inputs.
- USB Flash Disk: For direct playback, insert a USB flash drive containing MP3, WAV, or WMA audio files into the USB port.
- Bluetooth Pairing: Press the mode button on the digital MP3 player section to switch to Bluetooth mode. On your mobile device, search for "BT-Speaker" and connect.
- Computer Connection for Recording: Use a double USB cable to connect the mixer's USB port to your computer for recording purposes. Note: This mixer cannot connect to Macbook for recording.
Video 1: MIZISNR AX-120 Mixer Setup and Feature Overview. This video demonstrates the physical connections for power, main outputs, USB devices, Bluetooth pairing, microphone inputs, and shows the recording process and real-time monitoring capabilities.
3. Operating Instructions
3.1. Overview of Controls

Figure 2: Detailed view of the mixer's interface, highlighting microphone/instrument interfaces, gain controls, auxiliary stereo inputs, effect controls, sound balance controls, peak indicators, volume adjustments, left and right channel master volume controls, reverb volume fader, multifunctional playback/switching window, phantom power meter, power input, main power switch, and high-efficiency cooling network.
3.2. 3-Band EQ Controls
Each channel features independent 3-band equalization for precise sound shaping. Adjust the High (HF), Mid (MF), and Low (LF) frequency knobs to fine-tune your audio sources.
- HF (High Frequency): Boost or cut frequencies above 12kHz by up to ±15dB.
- MF (Mid Frequency): Sweepable mid-range EQ from 250Hz to 6kHz, allowing ±15dB boost or cut.
- LF (Low Frequency): Boost or cut frequencies below 80Hz by up to ±15dB.
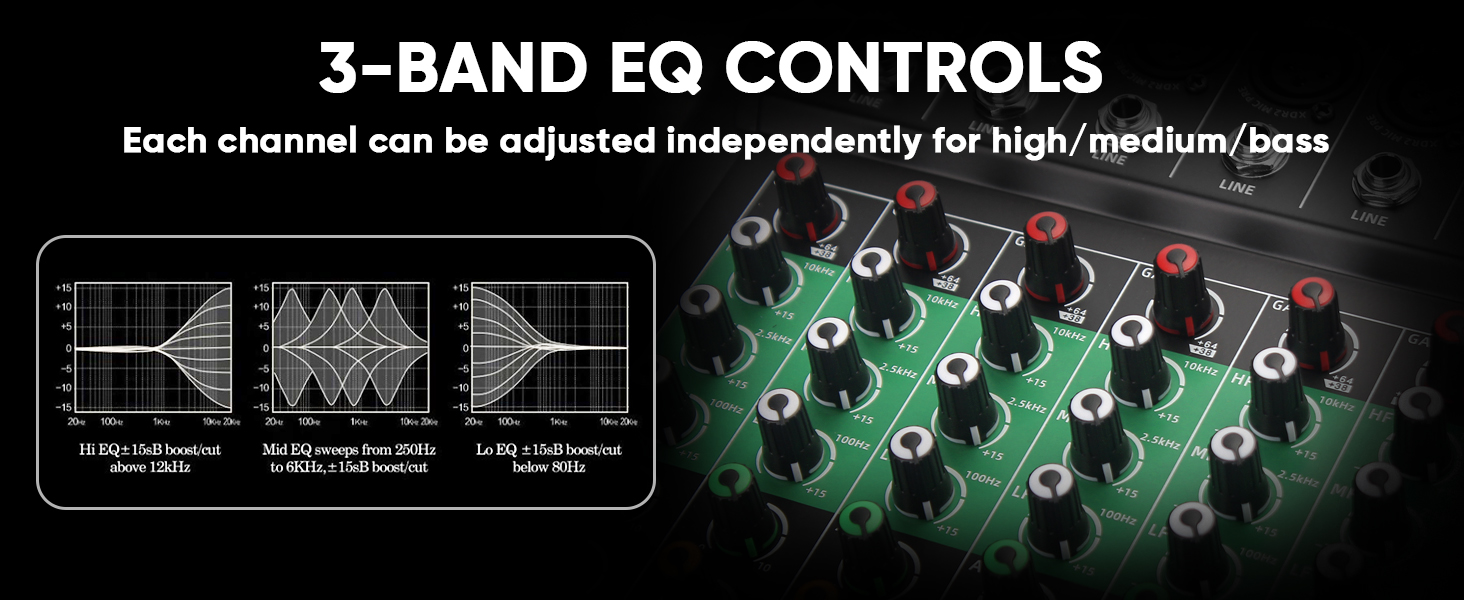
Figure 3: Illustration of the 3-band EQ controls for high, mid, and low frequencies, showing their respective frequency ranges and boost/cut capabilities.
3.3. Bluetooth Playback
To stream audio wirelessly:
- Ensure the mixer is powered on.
- Press the 'Mode' button on the digital MP3 player section until 'Bluetooth' is displayed.
- On your smartphone, tablet, or other Bluetooth-enabled device, go to Bluetooth settings and search for available devices.
- Select "BT-Speaker" from the list to pair. Once connected, you can play audio from your device through the mixer.

Figure 4: Visual guide for connecting a mobile device via Bluetooth to the mixer, showing the 'BT-Speaker' identification.
3.4. USB Playback and Recording
The mixer supports direct USB playback and recording:
- USB Playback: Insert a USB flash drive into the USB port. The mixer's built-in MP3 player supports MP3, WAV, and WMA formats. Use the controls on the digital MP3 player section to navigate and play tracks.
- USB Recording: Connect the mixer to a computer using a double USB cable. The mixer acts as an audio interface, allowing you to record mixed audio directly to your computer. Please note that this mixer is not compatible with Macbooks for recording.

Figure 5: Demonstrates connecting a USB flash drive for playback and a computer for recording, highlighting the USB port on the mixer.
3.5. +48V Phantom Power
The mixer provides +48V phantom power for condenser microphones:
- Locate the +48V button on the mixer.
- Press this button to activate phantom power. A red indicator light will illuminate.
- Ensure condenser microphones are connected before activating phantom power to prevent damage to other equipment.

Figure 6: Shows the +48V phantom power button and its indicator, illustrating its use with a condenser microphone.
3.6. Real-Time Monitoring
Use the 6.35mm monitor jack for real-time audio feedback:
- Connect headphones to the PHONES output jack.
- Adjust the PHONES/AUX SEND knob to control the monitoring volume. This allows you to hear the mixed audio without affecting the main output.

Figure 7: Depicts headphones connected to the mixer for real-time monitoring, essential for recording and live sound checks.
3.7. Reverb Control
The mixer includes built-in reverb effects:
- Each channel has an individual FX knob to send a portion of that channel's signal to the effects processor.
- The overall level of the reverb effect is controlled by the dedicated 'EFFECTS' fader. Adjust this fader to blend the reverb into your mix.
4. Connections
The MIZISNR AX-120 mixer is compatible with a variety of audio devices. Refer to the diagram below for common connection setups:

Figure 8: Connection diagram showing how to connect various devices to the mixer, including wireless microphones, standard microphones, guitars, karaoke machines, power amplifiers, speaker boxes, mobile stereos, condenser microphones, USB flash drives, cell phones, headphones, and computers.
Important Note: The mixing console does not have a built-in amplifier. You must connect it to an external amplifier to power passive speakers.
5. Maintenance
To ensure the longevity and optimal performance of your MIZISNR AX-120 mixer, follow these maintenance guidelines:
- Cleaning: Use a soft, dry cloth to clean the exterior of the mixer. Avoid using liquid cleaners or solvents, as they may damage the finish or internal components.
- Storage: Store the mixer in a cool, dry place away from direct sunlight, extreme temperatures, and high humidity.
- Ventilation: Ensure proper ventilation around the mixer to prevent overheating. Do not block the cooling network vents.
- Cable Management: Keep cables organized and avoid excessive bending or crimping to prevent damage to connectors and wiring.
6. Troubleshooting
If you encounter issues with your MIZISNR AX-120 mixer, refer to the following common troubleshooting steps:
- No Power: Check if the power adapter is securely connected to both the mixer and the power outlet. Ensure the power switch is in the ON position.
- No Sound Output: Verify that the main output faders (L MAIN R) are raised. Check all cable connections from the mixer to your amplifier/speakers. Ensure the amplifier/speakers are powered on and functioning correctly.
- No Sound from a Specific Channel: Check the channel's gain knob, EQ settings, and channel fader. Ensure the input source is properly connected and functioning. If using a condenser microphone, verify that +48V phantom power is activated.
- Bluetooth Connection Issues: Ensure the mixer is in Bluetooth mode and your device's Bluetooth is enabled. Try forgetting and re-pairing "BT-Speaker" on your device.
- USB Recording Not Working with Macbook: As noted, this mixer is not compatible with Macbooks for recording. Please use a Windows PC or other compatible recording device.
- Distorted Sound: Check input gain levels to ensure they are not too high (avoiding clipping, indicated by peak lights). Adjust EQ settings if necessary.
If the problem persists after following these steps, please contact customer support.
7. Specifications
| Feature | Specification |
|---|---|
| Brand | MIZISNR |
| Model | AX-120 |
| Number of Channels | 12 |
| Product Dimensions (D x W x H) | 1.5"D x 20.08"W x 13.4"H |
| Item Weight | 5.6 Kilograms |
| Connectivity Technology | Bluetooth, USB |
| Power Source | Corded Electric |
| Output Connector Type | TRS, XLR |
| Audio Input | XLR |
| Voltage | 110 Volts (AC) |
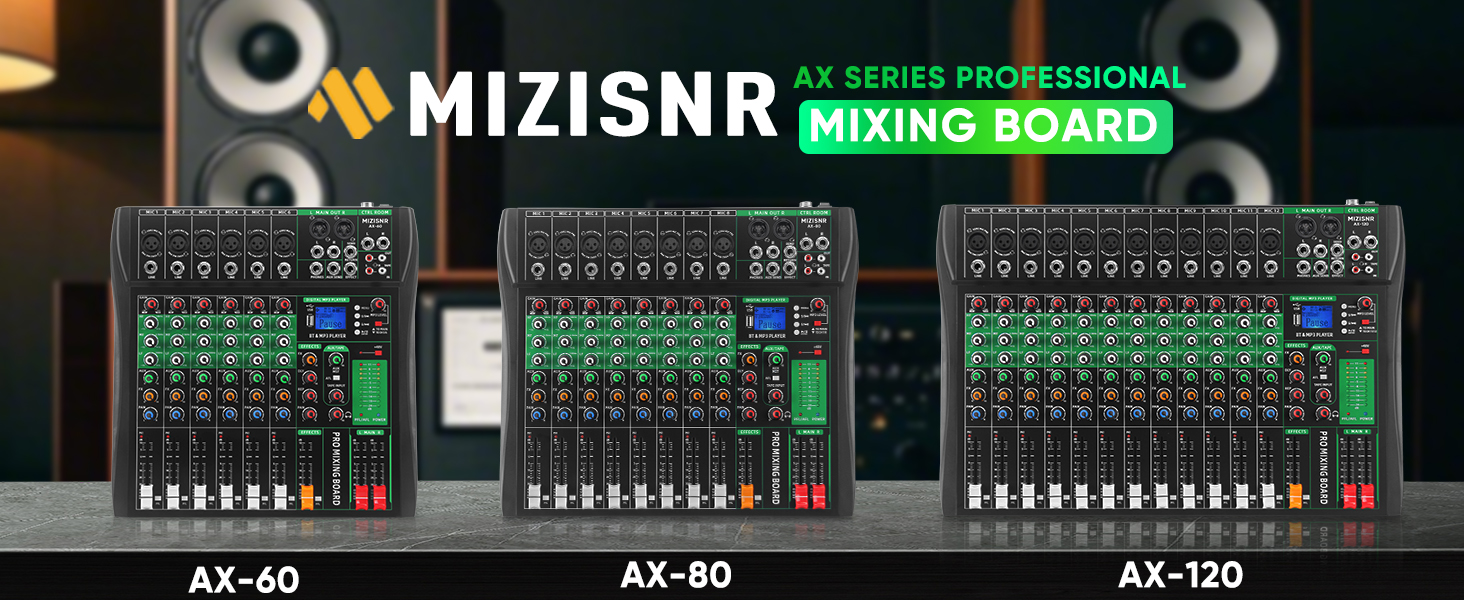
Figure 9: Diagram illustrating the physical dimensions of the MIZISNR AX-120 mixer.
8. Warranty and Support
Your MIZISNR AX-120 Audio Mixer comes with a 2-year warranty.
For any pre-purchase questions or assistance after your purchase, our dedicated support team is available to help. Please reach out to us, and we will respond within 24 hours to ensure a smooth and enjoyable experience.
Contact information for support can typically be found on the product packaging or the official MIZISNR website.