
1. Product Overview
The JIGATONEDA Wireless Doorbell system provides a convenient and reliable solution for home and office use. It features a battery-powered transmitter (push button) and a plug-in receiver (chime unit). With 38 selectable melodies, 3 adjustable volume levels up to 110 dB, LED flashing alerts, and a working range of up to 500 feet, this doorbell is designed for versatility and ease of use. The transmitter is suitable for outdoor installation.
2. Package Contents
Please verify that all items are present in your package:
- 1 x Indoor speaker host (Receiver)
- 1 x Transmitter (with pre-installed 23A 12V battery)
- 1 x Double-sided tape (for transmitter installation)
- 1 x Doorbell reminder sticker
- 1 x User Manual
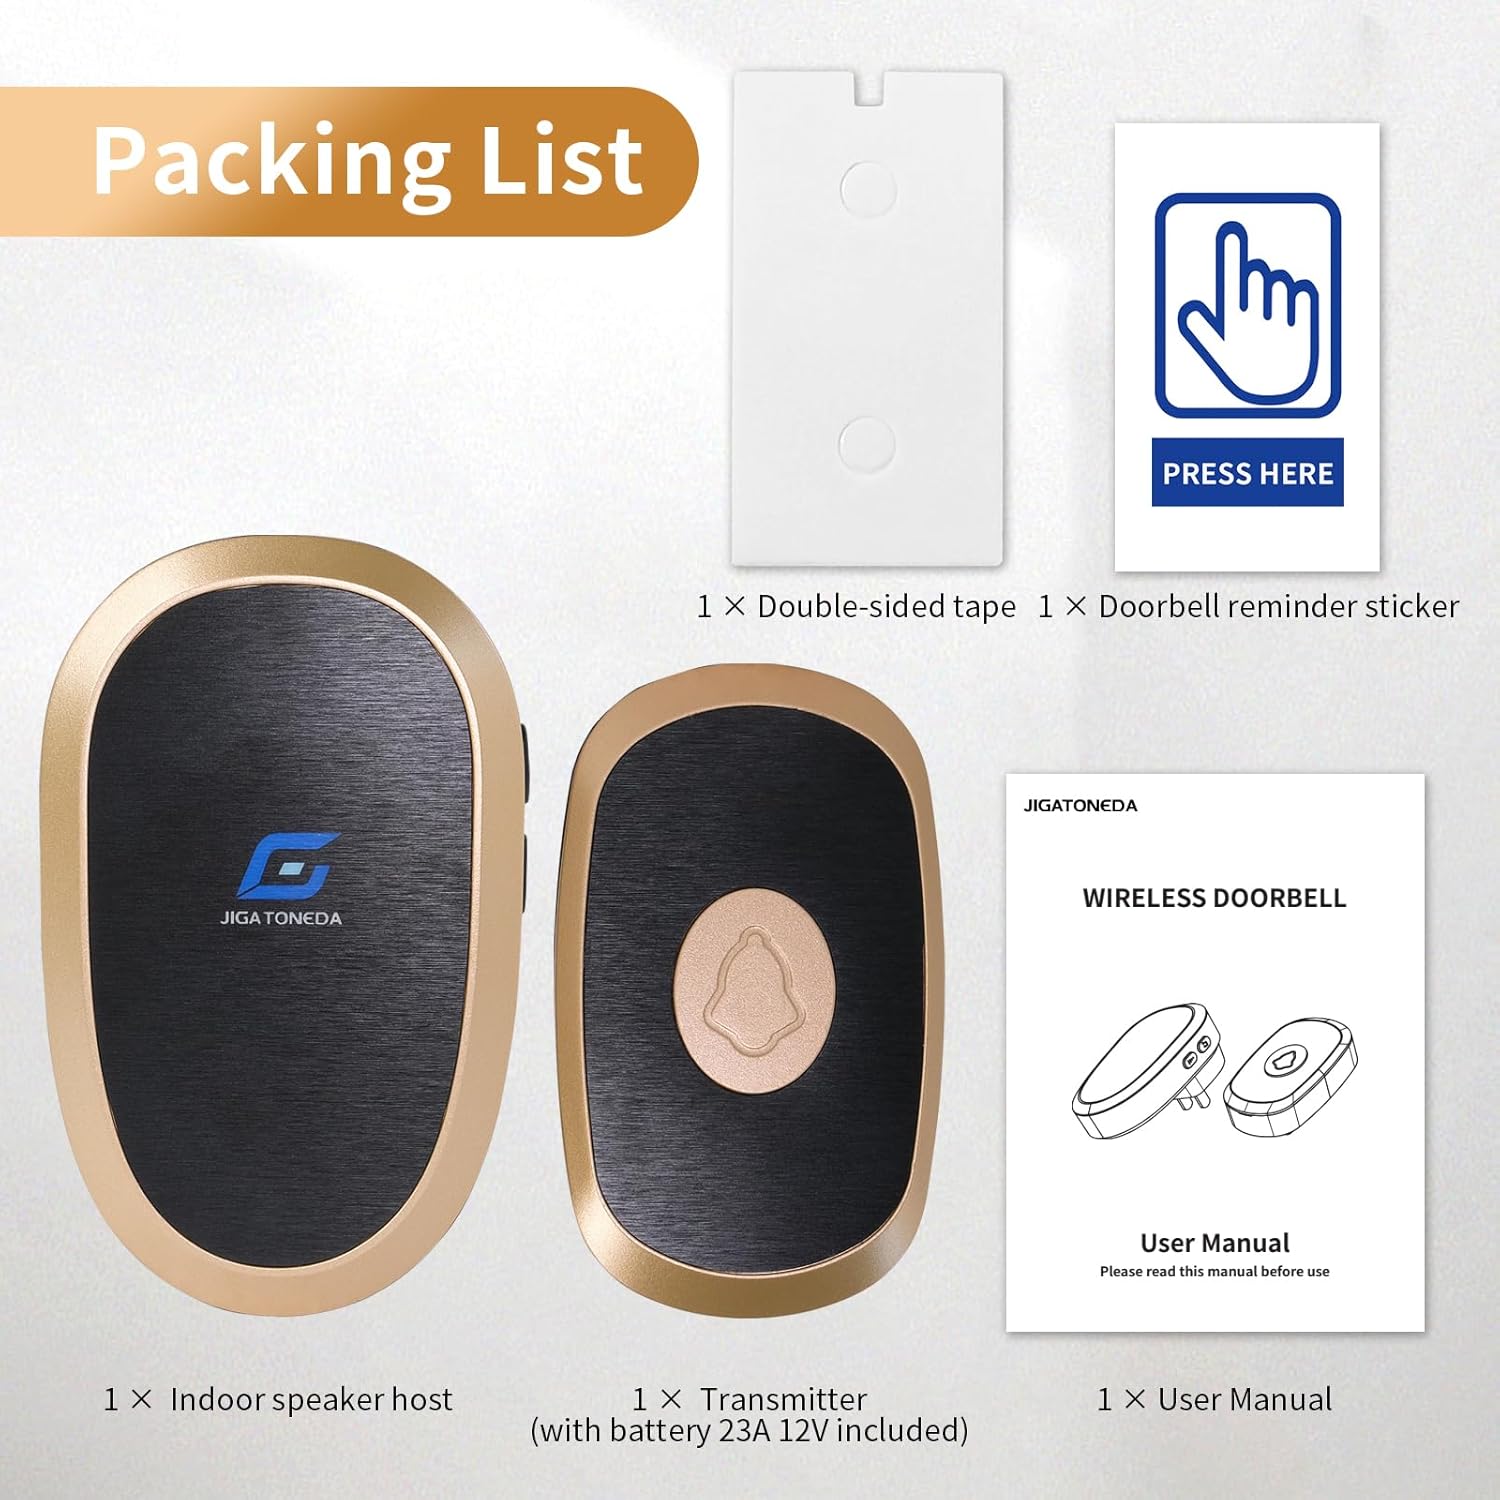
Image 2.1: Contents of the JIGATONEDA Wireless Doorbell package, including the indoor receiver, outdoor transmitter, double-sided tape, doorbell sticker, and user manual.
3. Setup and Installation
Follow these steps to set up your JIGATONEDA Wireless Doorbell:
- Install the Receiver: Plug the indoor speaker host (receiver) into a standard electrical outlet in your desired location. Ensure it is within the 500-foot range of where you plan to place the transmitter.
- Prepare the Transmitter: The transmitter comes with a pre-installed 23A 12V alkaline battery. No initial battery installation is required.
- Mount the Transmitter: Clean the surface where you intend to mount the transmitter. Peel off one side of the double-sided adhesive tape and apply it firmly to the back of the transmitter. Peel off the other side and press the transmitter firmly onto the desired outdoor surface (e.g., door frame, wall). Hold for a few seconds to ensure a secure bond.
- Test the Doorbell: Press the transmitter button. The receiver should chime and its LED light should flash.

Image 3.1: Visual guide demonstrating how to plug in the indoor receiver and attach the outdoor transmitter using double-sided adhesive tape.
4. Operation
4.1. Adjusting Volume Levels
The receiver has 3 adjustable volume levels, with a maximum output of 110 dB. To adjust the volume:
- Locate the Volume Key on the side of the receiver.
- Press the Volume Key repeatedly to cycle through the available volume levels until you reach your desired setting.

Image 4.1: Illustration showing different volume levels (0dB for mute, 50dB for TV, 80dB for renovations, 110dB for party) and the receiver unit.
4.2. Selecting Melodies
The doorbell offers 38 distinct melodies. To change the melody:
- Locate the Music Key on the side of the receiver.
- Press the Music Key repeatedly to cycle through the 38 available melodies. Each press will play the next melody.
- Once you hear a melody you like, stop pressing the Music Key. The receiver will remember this selection.
- To confirm the selected melody, press the transmitter button. The receiver will play the chosen melody.

Image 4.2: Step-by-step guide on how to switch melodies using the music key on the receiver and testing with the transmitter.
4.3. Mute Mode and LED Flashing
The doorbell features a mute mode, which disables the audio chime while still providing a visual alert via LED flashing. This is useful for quiet environments or for individuals with hearing impairments.
- To activate mute mode, cycle through the volume levels using the Volume Key until the volume is set to 0 dB.
- When the transmitter button is pressed in mute mode, only the LED light on the receiver will flash.
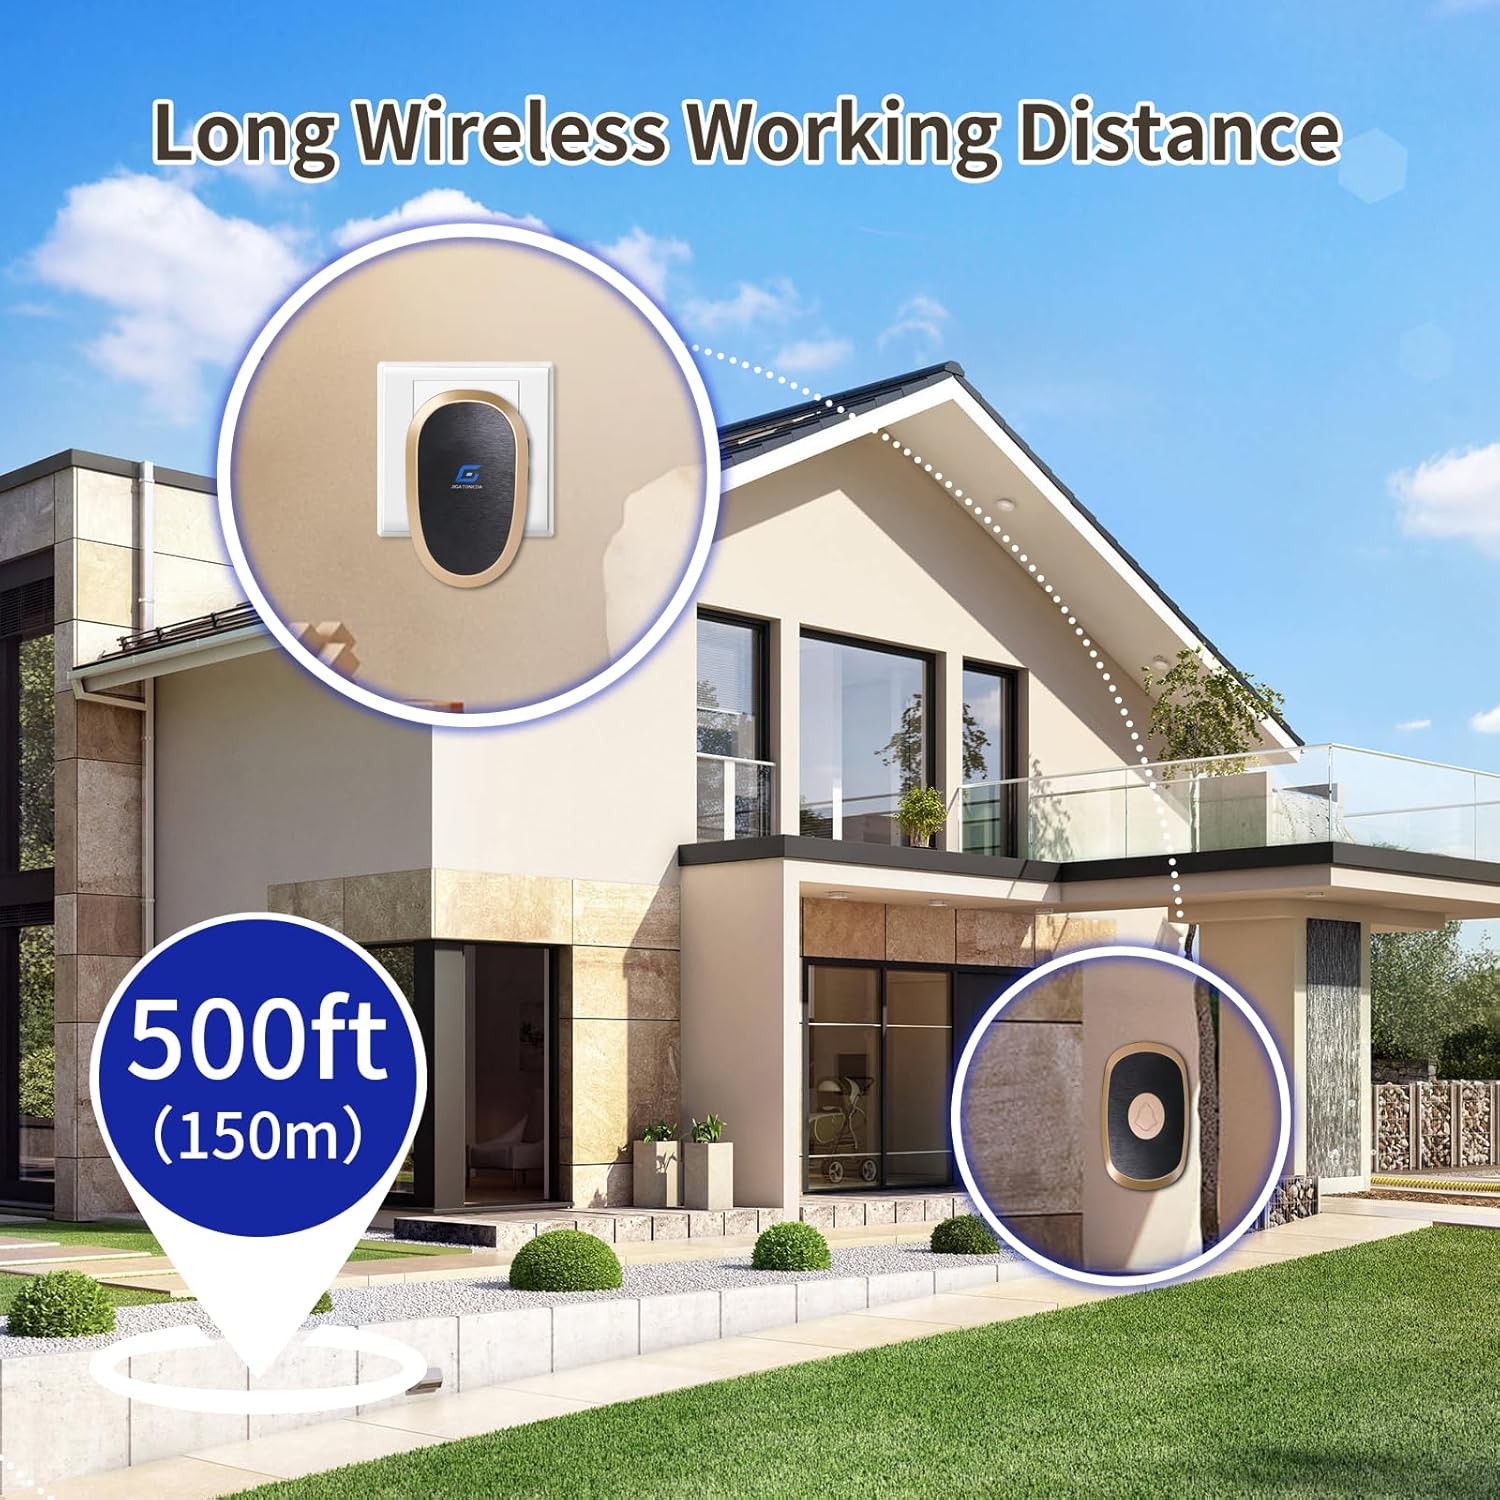
Image 4.3: The receiver in mute mode, indicated by a flashing LED, next to a sleeping baby, illustrating its use for quiet environments.
4.4. Pairing Additional Devices
You can pair multiple transmitters to one receiver or multiple receivers to one transmitter. To pair additional devices:
- Step 1: On the receiver, press and hold both the Music Key and the Volume Key simultaneously for 3 seconds until the LED light on the receiver begins to flash. This indicates it is in pairing mode.
- Step 2: Within 5 seconds, press the push button on the transmitter you wish to pair. You should hear a beep from the receiver.
- Step 3: Wait for 3 seconds. Press the transmitter button again. The receiver will ring with the currently selected melody, confirming successful pairing.

Image 4.4: Detailed steps for pairing additional doorbell transmitters or receivers, showing the sequence of button presses and LED indicators.
5. Maintenance
5.1. Battery Replacement (Transmitter)
The transmitter uses a 23A 12V alkaline battery. When the doorbell's range decreases or the transmitter stops working, it may be time to replace the battery.
- Carefully open the transmitter casing.
- Remove the old 23A 12V battery.
- Insert a new 23A 12V alkaline battery, ensuring correct polarity.
- Close the transmitter casing securely.
5.2. Cleaning
To maintain the appearance and functionality of your doorbell:
- Wipe the receiver and transmitter with a soft, dry cloth.
- Avoid using abrasive cleaners or solvents, as these can damage the finish.
5.3. Outdoor Use Considerations
The transmitter is designed for outdoor use and can withstand various weather conditions. It operates effectively within a temperature range of -4°F to 140°F (-20°C to 60°C).

Image 5.1: Depiction of the doorbell transmitter installed outdoors, highlighting its weather resistance and wide operating temperature range.
6. Troubleshooting
If you encounter issues with your JIGATONEDA Wireless Doorbell, refer to the following common problems and solutions:
| Problem | Possible Cause | Solution |
|---|---|---|
| Doorbell does not chime or LED does not flash. |
|
|
| Cannot change melody or it reverts to original. |
|
|
| Short working range. |
|
|
| Volume is too low or too high. | Volume setting is incorrect. | Adjust the volume using the Volume Key on the receiver (refer to Section 4.1). |
7. Specifications
| Feature | Detail |
|---|---|
| Brand | JIGATONEDA |
| Model Number | Doorbell-801-BK1 |
| Item Weight | 4.2 ounces |
| Product Dimensions | Receiver: 3.54 x 1.77 x 2.17 inches; Transmitter: 2.95 x 1.77 inches (approx.) |
| Color | Black |
| Wireless Range | Up to 500 feet (150 meters) |
| Melodies | 38 selectable |
| Volume Levels | 3 adjustable (up to 110 dB) |
| Special Features | LED Flashing, Mute Mode, Memory Function |
| Transmitter Battery | 1 x 23A 12V Alkaline (pre-installed) |
| Operating Temperature | -4°F to 140°F (-20°C to 60°C) |
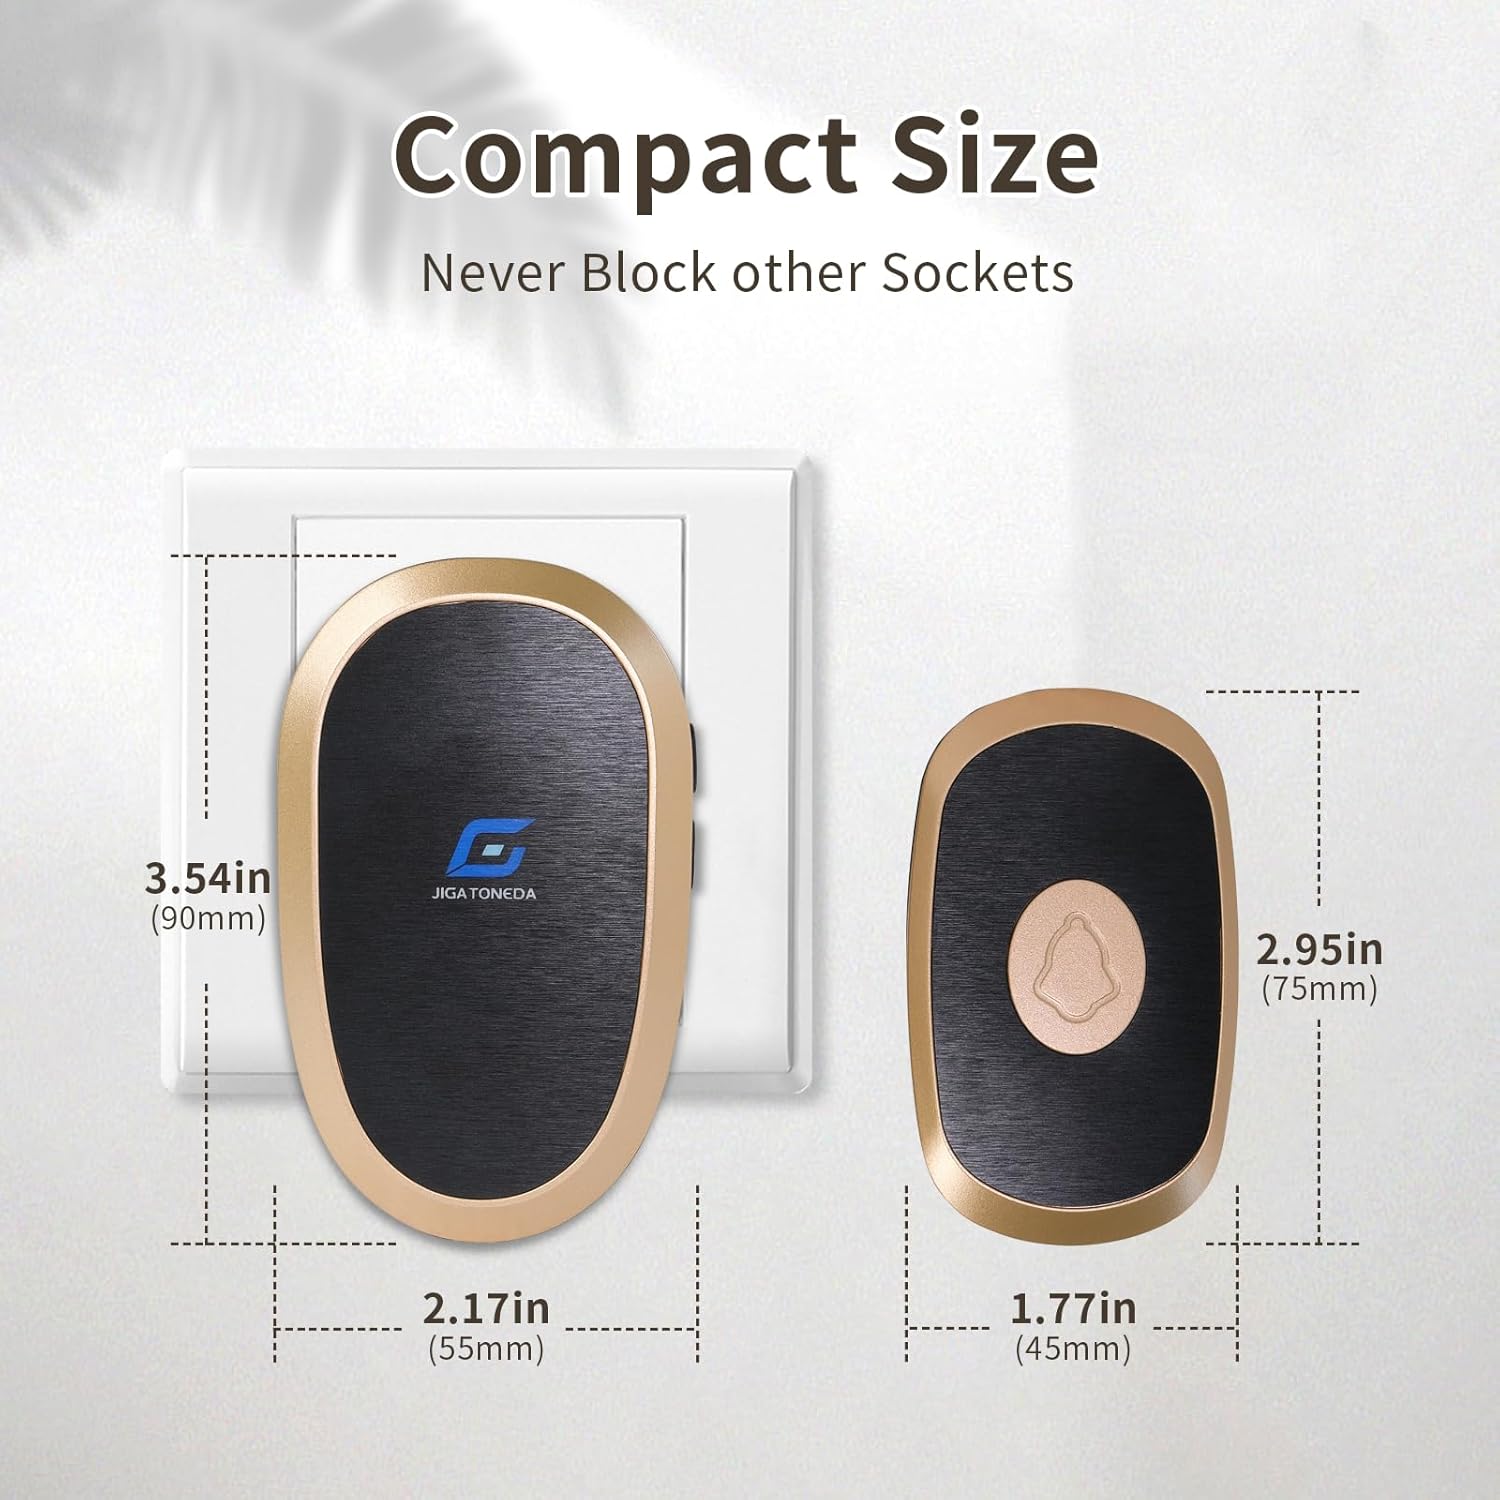
Image 7.1: Diagram illustrating the compact dimensions of both the indoor receiver and outdoor transmitter units.
8. Warranty and Customer Support
JIGATONEDA offers a 3-year warranty for this wireless doorbell. If you encounter any issues or require assistance, please do not hesitate to contact customer service.
For support, please refer to the contact information provided with your purchase or visit the official JIGATONEDA store page on Amazon.

Image 8.1: Information regarding JIGATONEDA's 3-year warranty and guidance on how to contact customer service for support.