
Miniature Motors BBH-060
MINIATURE MOTORS 24V 4WD Ride-On UTV User Manual
Model: BBH-060
1. Introduction
Thank you for choosing the MINIATURE MOTORS 24V 4WD Ride-On UTV. This manual provides essential information for the safe assembly, operation, and maintenance of your new ride-on toy. Please read it thoroughly before use and retain it for future reference.
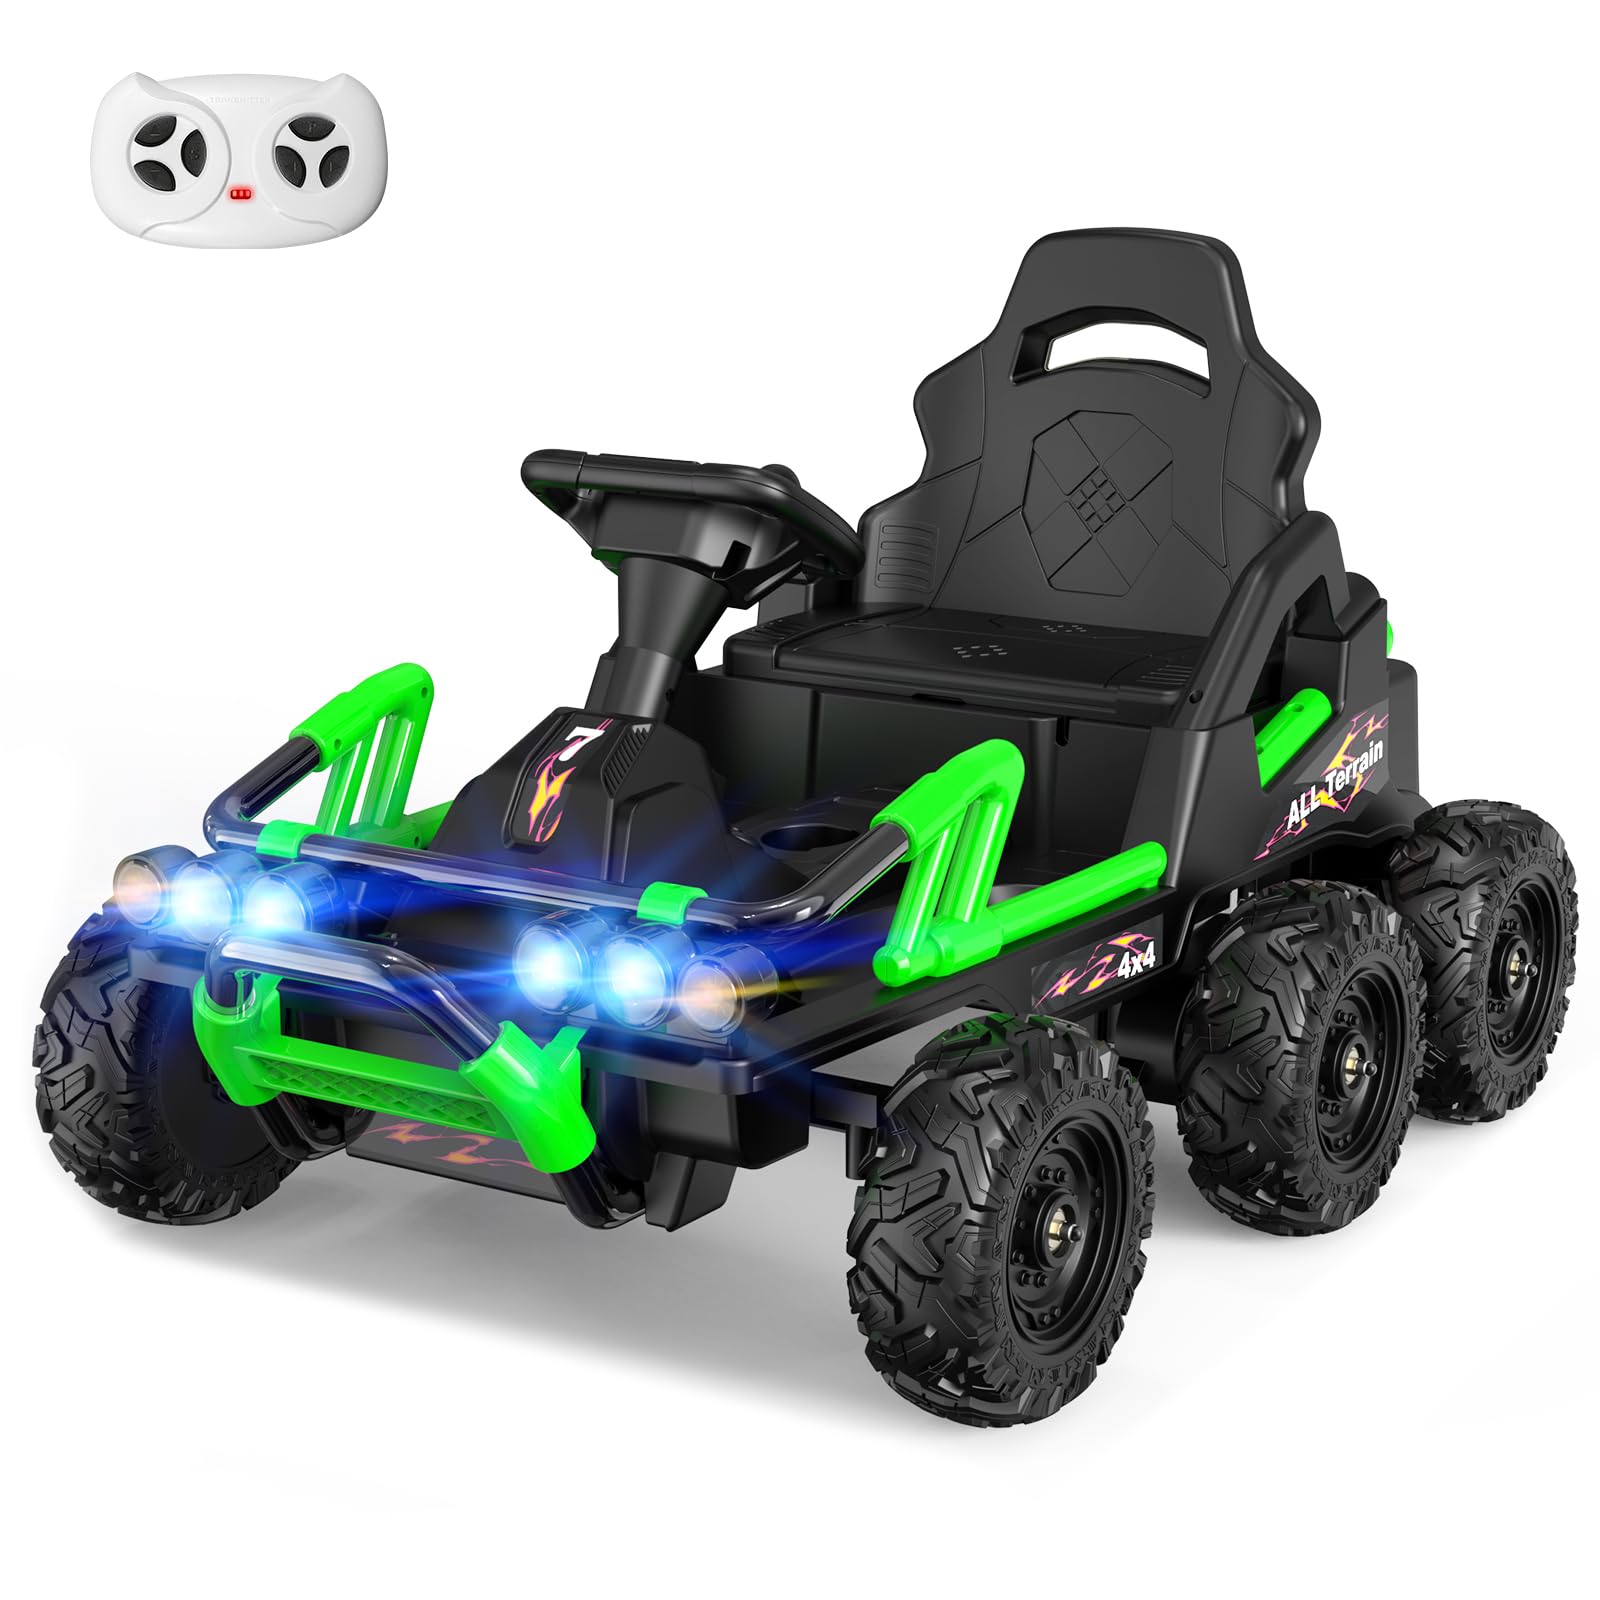
Image: The MINIATURE MOTORS 24V 4WD Ride-On UTV, showcasing its robust design and six-wheel configuration.
2. Important Safety Warnings
- This product is exclusively provided by MINIATURE MOTORS and requires adult assembly.
- Always supervise children during operation.
- Ensure the seat belt is securely fastened before each ride.
- Do not use the vehicle in traffic, near motor vehicles, on or near steep inclines or steps, swimming pools, or other bodies of water.
- The maximum carrying capacity is 132 lbs.
- This toy is unsuitable for children under 3 years due to small parts.
- Always wear appropriate safety gear, including a helmet.
- Do not modify the electrical system. Alterations can create a fire hazard and may cause uncontrolled operation.
3. What's in the Box
Upon unpacking, please verify that all components are present:
- MINIATURE MOTORS 4WD Ride on Toys for Kids
- 1x Charger
- 1x Remote Control
- 2x Spanners
- User Manual (this document)
4. Setup and Assembly
The MINIATURE MOTORS 24V 4WD Ride-On UTV requires adult assembly. Please follow the steps below carefully. For a visual guide, refer to the official assembly video.
4.1 Assembly Video Guide
Video: Official assembly guide for the MINIATURE MOTORS 24V Ride-On UTV. This video demonstrates the step-by-step process of putting the vehicle together, including attaching wheels, connecting the battery, and securing the seat.
4.2 Step-by-Step Assembly
- Unpack Components: Carefully remove all parts from the packaging.
- Install Axles: Insert the metal axles into the designated slots on the underside of the vehicle.
- Attach Wheels: Slide the EVA wheels onto the axles. Secure them with the provided washers and nuts using the spanners. Ensure all wheels are firmly attached.
- Install Front and Rear Bumpers: Attach the front and rear bumper assemblies to the chassis using the provided screws.
- Connect Battery: Locate the battery compartment, typically under the seat. Connect the red battery connector firmly.
- Install Steering Wheel: Insert the steering column into its housing and secure it with the provided screw.
- Secure Seat: Place the seat into position and fasten it with the screws. Ensure the seat belt is accessible and functional.
5. Operating Instructions
Familiarize yourself with the controls and features for a safe and enjoyable experience.
5.1 Driving Modes
- Manual Control: The child can drive autonomously using the steering wheel and pedals.
- Remote Control: Parents can use the remote control to stop the vehicle in an emergency, or completely control its direction and speed. This feature enhances safety.
5.2 Speed Control
The vehicle features a unique speed switch mechanism:
- To switch to high-speed mode (up to 5 mph), press both the left and right pedals simultaneously.
- To switch to low-speed mode (3 mph), release the left pedal.
5.3 Multimedia Features
The UTV includes integrated entertainment options:
- Bluetooth Music Mode: Connect your device via Bluetooth to play music through the vehicle's speakers.
- Built-in Music: Pre-loaded music tracks are available for immediate enjoyment.
- Headlights: Functional LED headlights enhance visibility and realism.
5.4 Remote Control Pairing
To pair the remote control with the vehicle:
- Ensure the remote control has two AAA (1.5V) batteries installed.
- Hold down the 'Forward' and 'Backward' keys on the remote for 3 seconds until the LED flickers.
- Turn on the vehicle. The remote's LED will stop flashing, indicating successful pairing.
Video: This video demonstrates the features and operation of the MINIATURE MOTORS 24V Ride-On UTV, including its driving capabilities and entertainment options.
6. Maintenance
6.1 Battery Charging
Proper battery care is crucial for longevity and performance:
- After each use, charge the 22.2V Li-ion battery for at least 2-3 hours.
- Never charge for longer than 8 hours. Overcharging can damage the battery and void the warranty.
- Recharge the battery at least once a month, even if not in use, to ensure proper care and a longer lifespan.
6.2 General Care
- Do not use the vehicle in rainy or snowy weather.
- Keep the vehicle indoors when not in use to protect it from elements.
- Regularly inspect the vehicle for any loose parts or damage.
7. Troubleshooting
If you encounter issues with your MINIATURE MOTORS UTV, refer to the following common solutions:
- Vehicle not moving: Check battery connection, ensure the battery is charged, and verify remote control pairing.
- Remote control not working: Replace remote batteries, re-pair the remote with the vehicle.
- Reduced power/speed: Fully charge the battery. If the issue persists, the battery may need replacement.
- Unusual noises: Inspect wheels and axles for obstructions or loose components.
For persistent issues, please contact customer support.
8. Specifications
| Feature | Detail |
|---|---|
| Brand | Miniature Motors |
| Model Number | BBH-060 |
| Battery | 22.2V 4Ah Li-ion |
| Motors | 4x75W |
| Drive System | 4WD (6-wheeler) |
| Speed Range | 3-5 mph |
| Wheels | 10" Off-road grade EVA Foam |
| Max Weight Capacity | 132 lbs |
| Recommended Age | 36 months and up (Suitable for kids over 50" tall) |
| Dimensions (L x W x H) | 49.6"L x 31.1"W x 30.3"H |
| Item Weight | 51.5 Pounds |
| Material Type | Metal, Plastic |
| Certifications | CPSIA and ASTM F963-17 |
9. Warranty and Support
MINIATURE MOTORS is committed to providing high-quality products. This product comes with a manufacturer's warranty. Please refer to the warranty card included in your packaging for specific terms and conditions. Failure to follow charging instructions may void your warranty.
For technical support, replacement parts, or any inquiries, please contact MINIATURE MOTORS customer service. Contact information can typically be found on the product packaging or the official brand website.
Ask a question about this manual
Ask about setup, troubleshooting, compatibility, parts, safety, or missing instructions. Manuals+ will review the question and use this page’s manual context to help answer it.