
1. Introduction
This manual provides detailed instructions for the setup, operation, and maintenance of your MIZISNR V10_SC 4-Channel UHF Wireless Microphone System. This professional system is designed to deliver stable, interference-free audio transmission with a long-range capability, making it suitable for various applications including singing, public speaking, and performances. Each microphone features 50 adjustable frequencies, auto-scan functionality, and a screen lock to ensure optimal performance and ease of use.

Image: The MIZISNR V10_SC 4-Channel UHF Wireless Microphone System, featuring the receiver unit and four handheld microphones.
2. Package Contents
Please verify that all items listed below are included in your package:
- 4 x Handheld Microphones
- 1 x UHF Metal Receiver
- 1 x 6.35mm Audio Cable
- 1 x Power Adapter
- 4 x Anti-slip Rings
- 4 x Mic Covers
- 1 x User Manual (this document)

Image: A visual representation of the accessories included: four anti-slip rings, four mic covers, a 6.35mm audio cable, a power adapter, and the user manual.
3. Setup Instructions
Follow these steps to set up your MIZISNR V10_SC wireless microphone system:
- Connect Antennas: Screw the two antennas onto the ANT-A+B and ANT-C+D jacks on the rear panel of the UHF receiver. Ensure they are securely tightened for optimal signal reception.
- Power Connection: Connect the provided power adapter to the DC 12V IN socket on the receiver and plug it into a power outlet.
- Audio Output Connection: Connect the receiver to your audio mixer, amplifier, or speaker system using the appropriate output cables. The receiver offers individual XLR outputs for each microphone (MIC-A OUTPUT, MIC-B OUTPUT, MIC-C OUTPUT, MIC-D OUTPUT) and a mixed 6.35mm (1/4") unbalanced output.
- Microphone Batteries: Each handheld microphone requires 2 AA batteries (not included). Open the battery compartment at the bottom of the microphone and insert the batteries, observing correct polarity.
- Power On: Press the POWER button on the receiver to turn it on. The LCD display will illuminate. Turn on each handheld microphone by pressing its power button.
- Frequency Synchronization (IR Sync):
a. On the receiver, press the SET button twice to activate the IR pairing function for the desired channel.
b. Hold the microphone close to the IR port on the receiver. The microphone and receiver will automatically synchronize their frequencies. The display on both units will confirm successful pairing.

Image: The rear panel of the UHF receiver, showing antenna jacks, individual XLR outputs, a mixed 6.35mm output, and the DC power input.
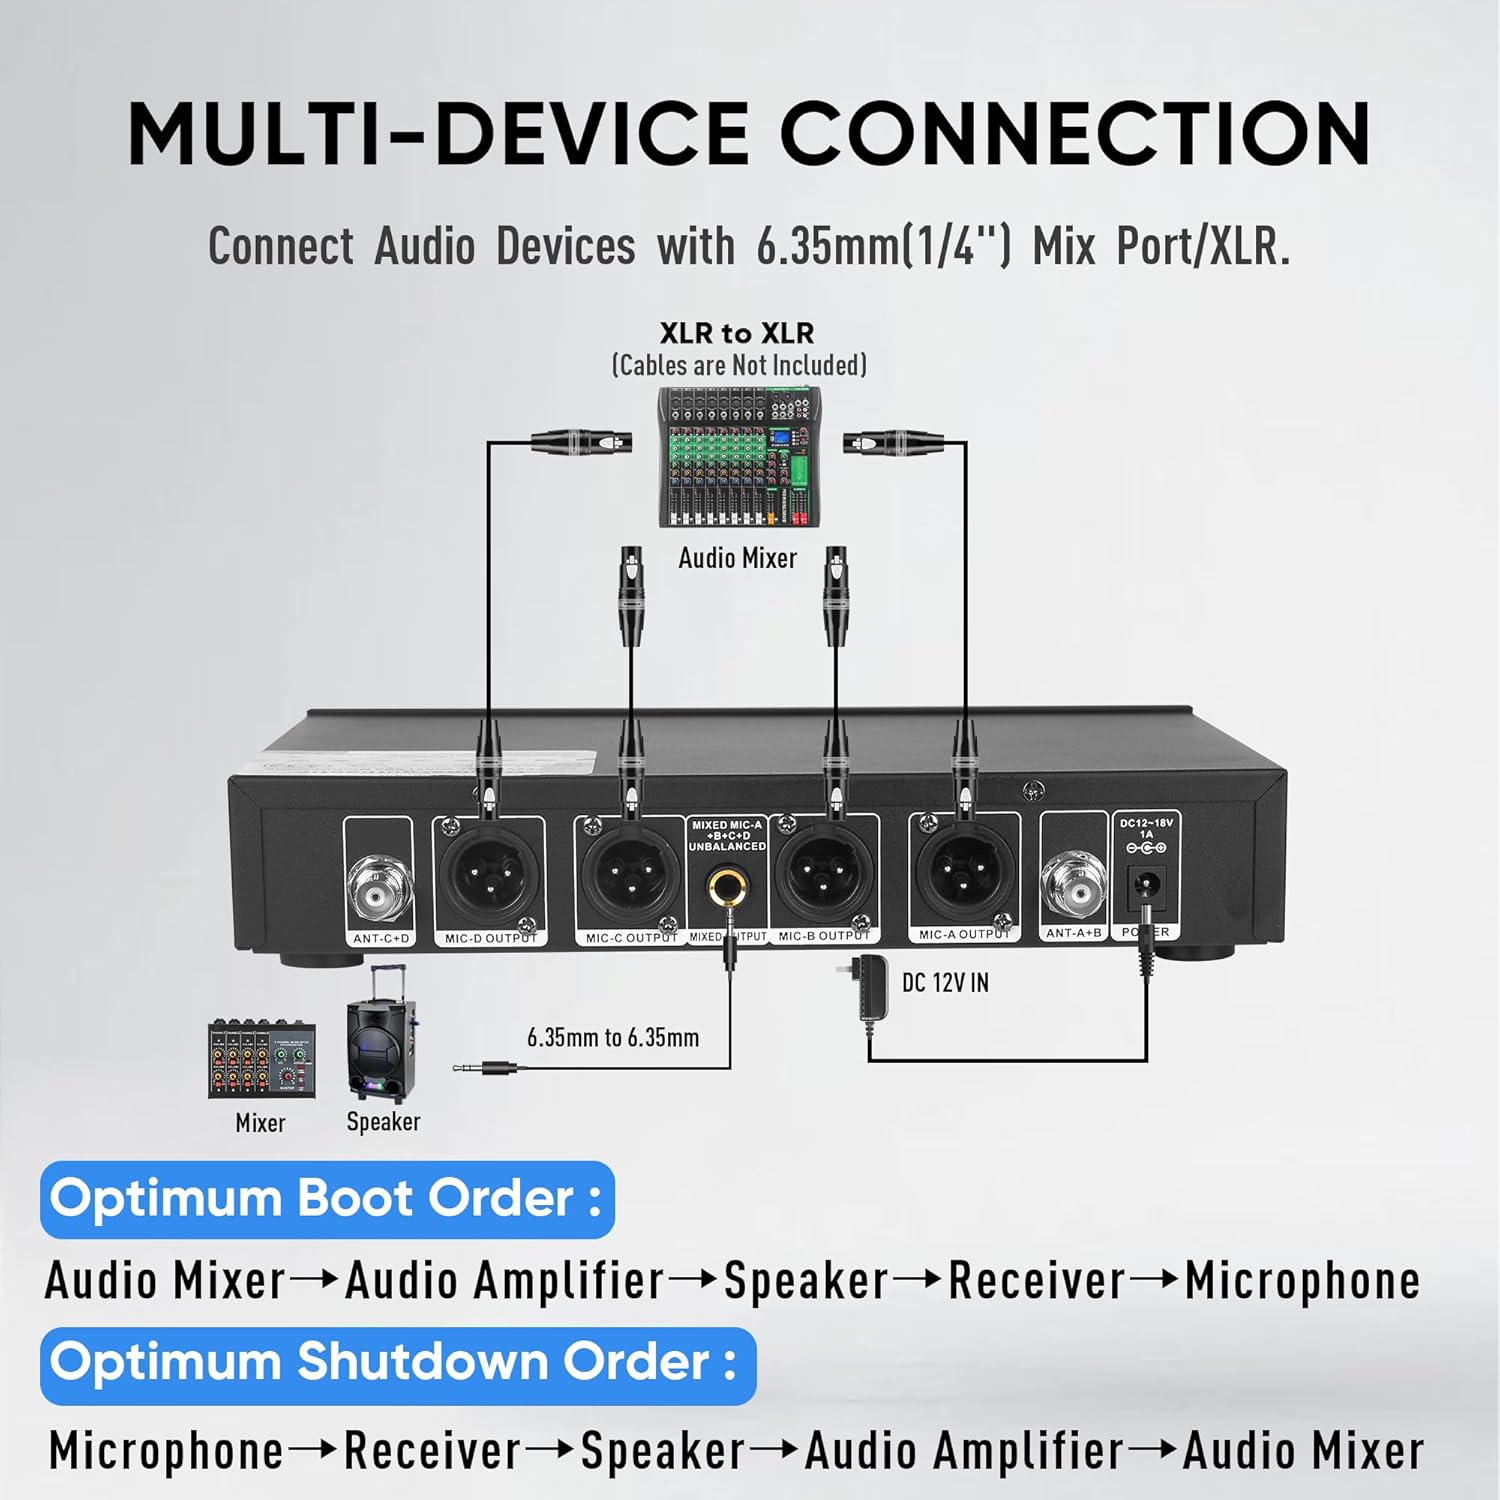
Image: A diagram illustrating how to connect the receiver to an audio mixer, amplifier, and speaker system using 6.35mm or XLR cables.
Video: An instructional video demonstrating the setup process, including powering on the receiver, pairing microphones via IR sync, and connecting antennas.
4. Operating Instructions
Understand the various functions of your wireless microphone system for optimal performance:
4.1. Receiver Controls
- Channel Buttons (1-4): Press to select the desired microphone channel for adjustment.
- UP/DOWN Buttons: Use these buttons to adjust frequencies or menu settings for the selected channel.
- SET Button: Press to enter menu options or confirm selections. Double-press to initiate IR sync.
- LOCK Button: Press and hold to lock or unlock the receiver's settings, preventing accidental changes.
- POWER Button: Turns the receiver on or off.
4.2. Microphone Features
- On/Off Switch: Located on the microphone body, press to power the microphone on or off.
- Informative Display: Shows real-time frequency and battery level.
- Cardioid Pickup Pattern: Designed to reduce ambient noise and focus on the sound source directly in front of the microphone.
- Anti-drop Net Cover: Enhances microphone durability and helps prevent damage from accidental drops.
- High Sensitivity: Captures natural and balanced sound effectively.

Image: A detailed view of the UHF handheld transmitter, highlighting its metal build, professional circuitry, informative display, and on/off switch.

Image: Visual representation of the microphone's sound quality features, including cardioid pickup, anti-drop net cover, and high sensitivity.
4.3. Advanced Functions
- Auto Scan: The system can automatically scan for the best available frequency to ensure optimal performance and avoid interference.
- Memory Function: The system saves the last used channel settings, allowing for quick reconnection without reconfiguration.
- Multiset Operation: Multiple systems can operate simultaneously without disruption, expanding your setup seamlessly.
- Adjustable Frequencies: Each microphone offers 50 frequency options, providing flexibility to switch frequencies and maintain a clear signal in various environments.
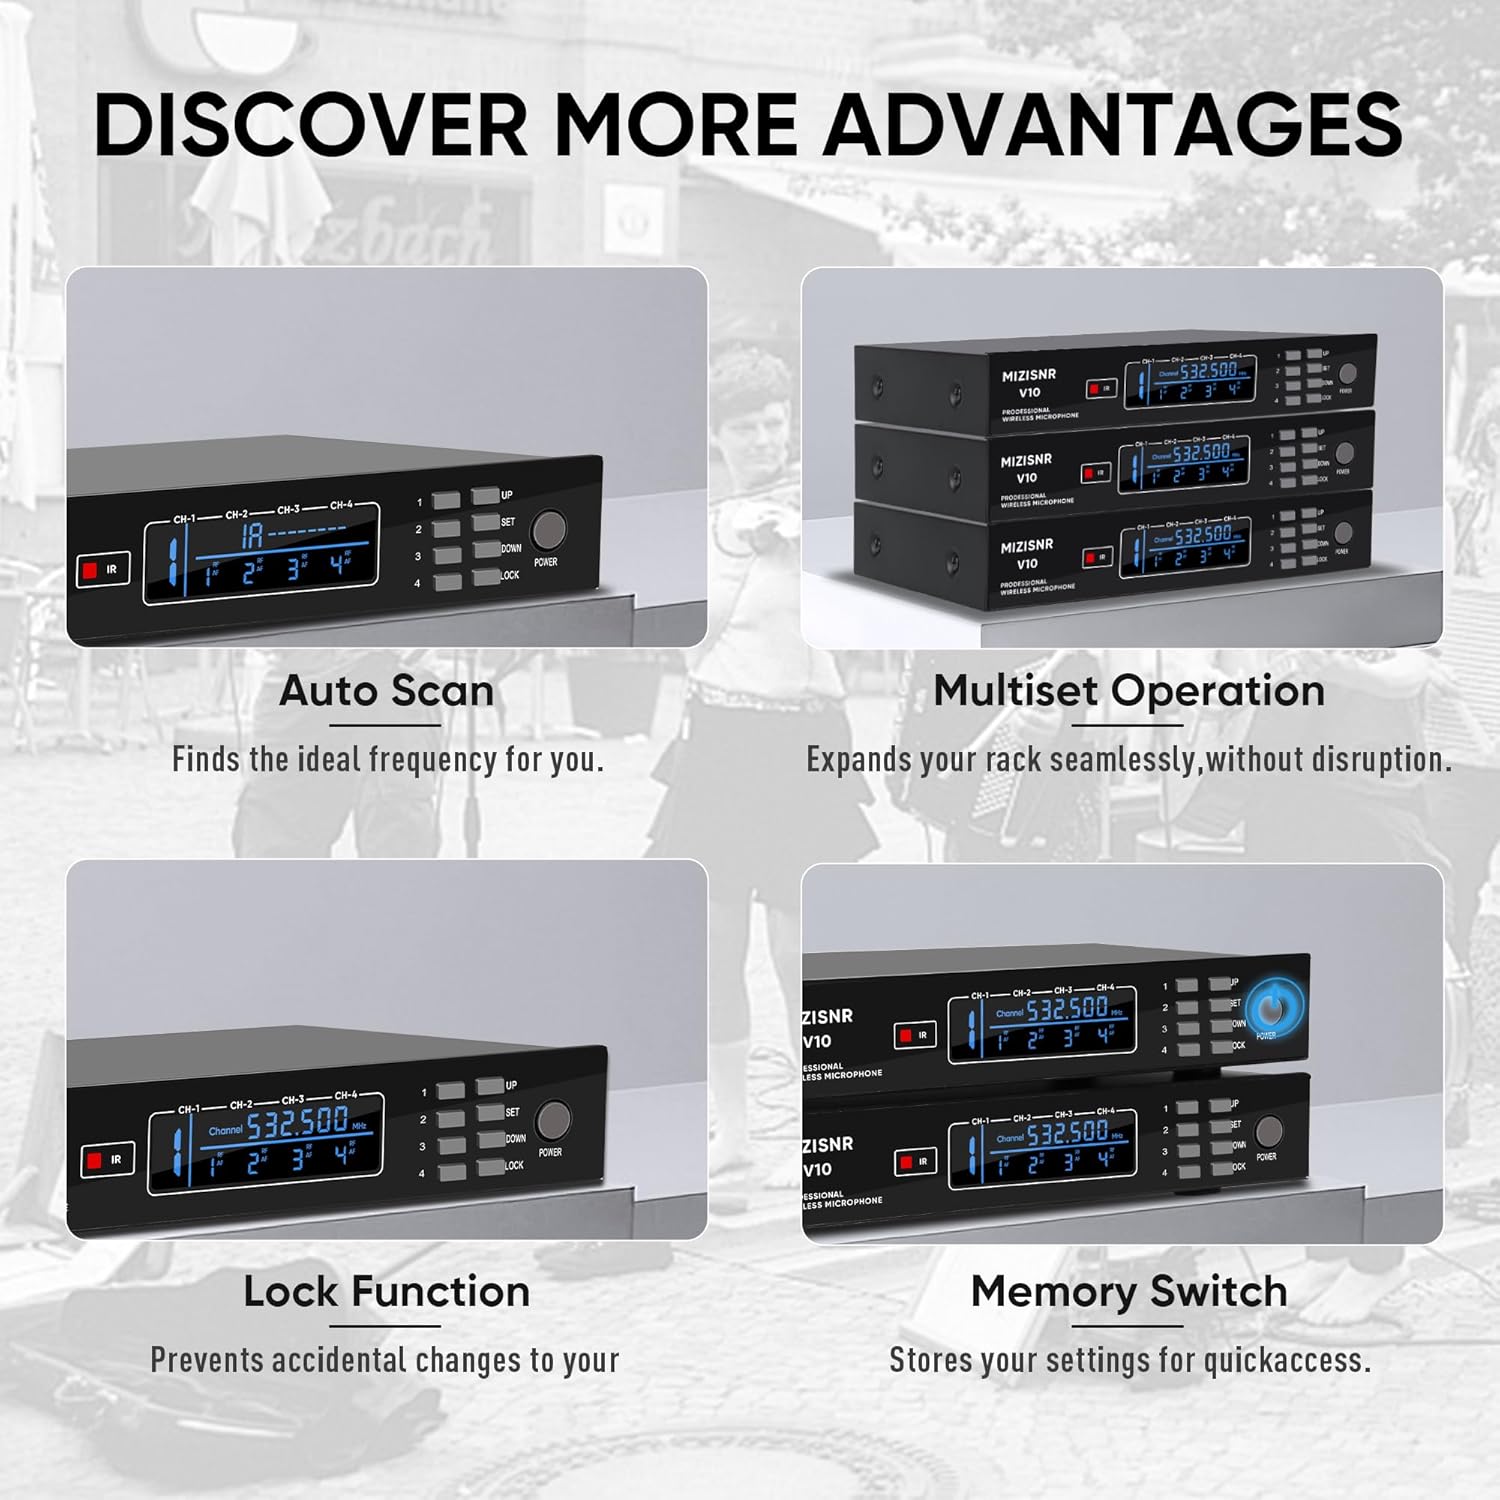
Image: A display of the system's advanced features: Auto Scan for ideal frequencies, Multiset Operation for expanded use, Lock Function to prevent accidental changes, and Memory Switch for quick access to settings.
5. Maintenance
Proper maintenance ensures the longevity and performance of your wireless microphone system:
- Cleaning: Use a soft, dry cloth to clean the receiver and microphones. Avoid using liquid cleaners or solvents, which can damage the components.
- Battery Replacement: Replace microphone batteries when the low battery indicator appears on the microphone display. Always use fresh AA batteries. Remove batteries if the microphones will not be used for an extended period to prevent leakage.
- Storage: Store the system in a cool, dry place away from direct sunlight and extreme temperatures.
- Cable Care: Avoid bending or twisting cables excessively. Store them neatly to prevent damage.
6. Troubleshooting
If you encounter issues with your MIZISNR V10_SC system, refer to the following common problems and solutions:
| Problem | Possible Cause | Solution |
|---|---|---|
| No sound from microphones | Microphone not powered on Low or dead batteries Microphone not paired with receiver Receiver not connected to audio system Volume levels too low | Ensure microphone is on Replace batteries Perform IR sync (Section 3.5) Check audio cable connections Increase volume on receiver and audio system |
| Interference or signal drops | Operating too far from receiver Obstructions between mic and receiver Conflicting frequencies External RF interference | Reduce distance between mic and receiver (max 300ft/90m) Ensure clear line of sight Use auto-scan to find a clear frequency Change microphone frequency manually (50 options per mic) |
| Receiver display is locked | Lock function activated | Press and hold the LOCK button on the receiver to unlock settings. |
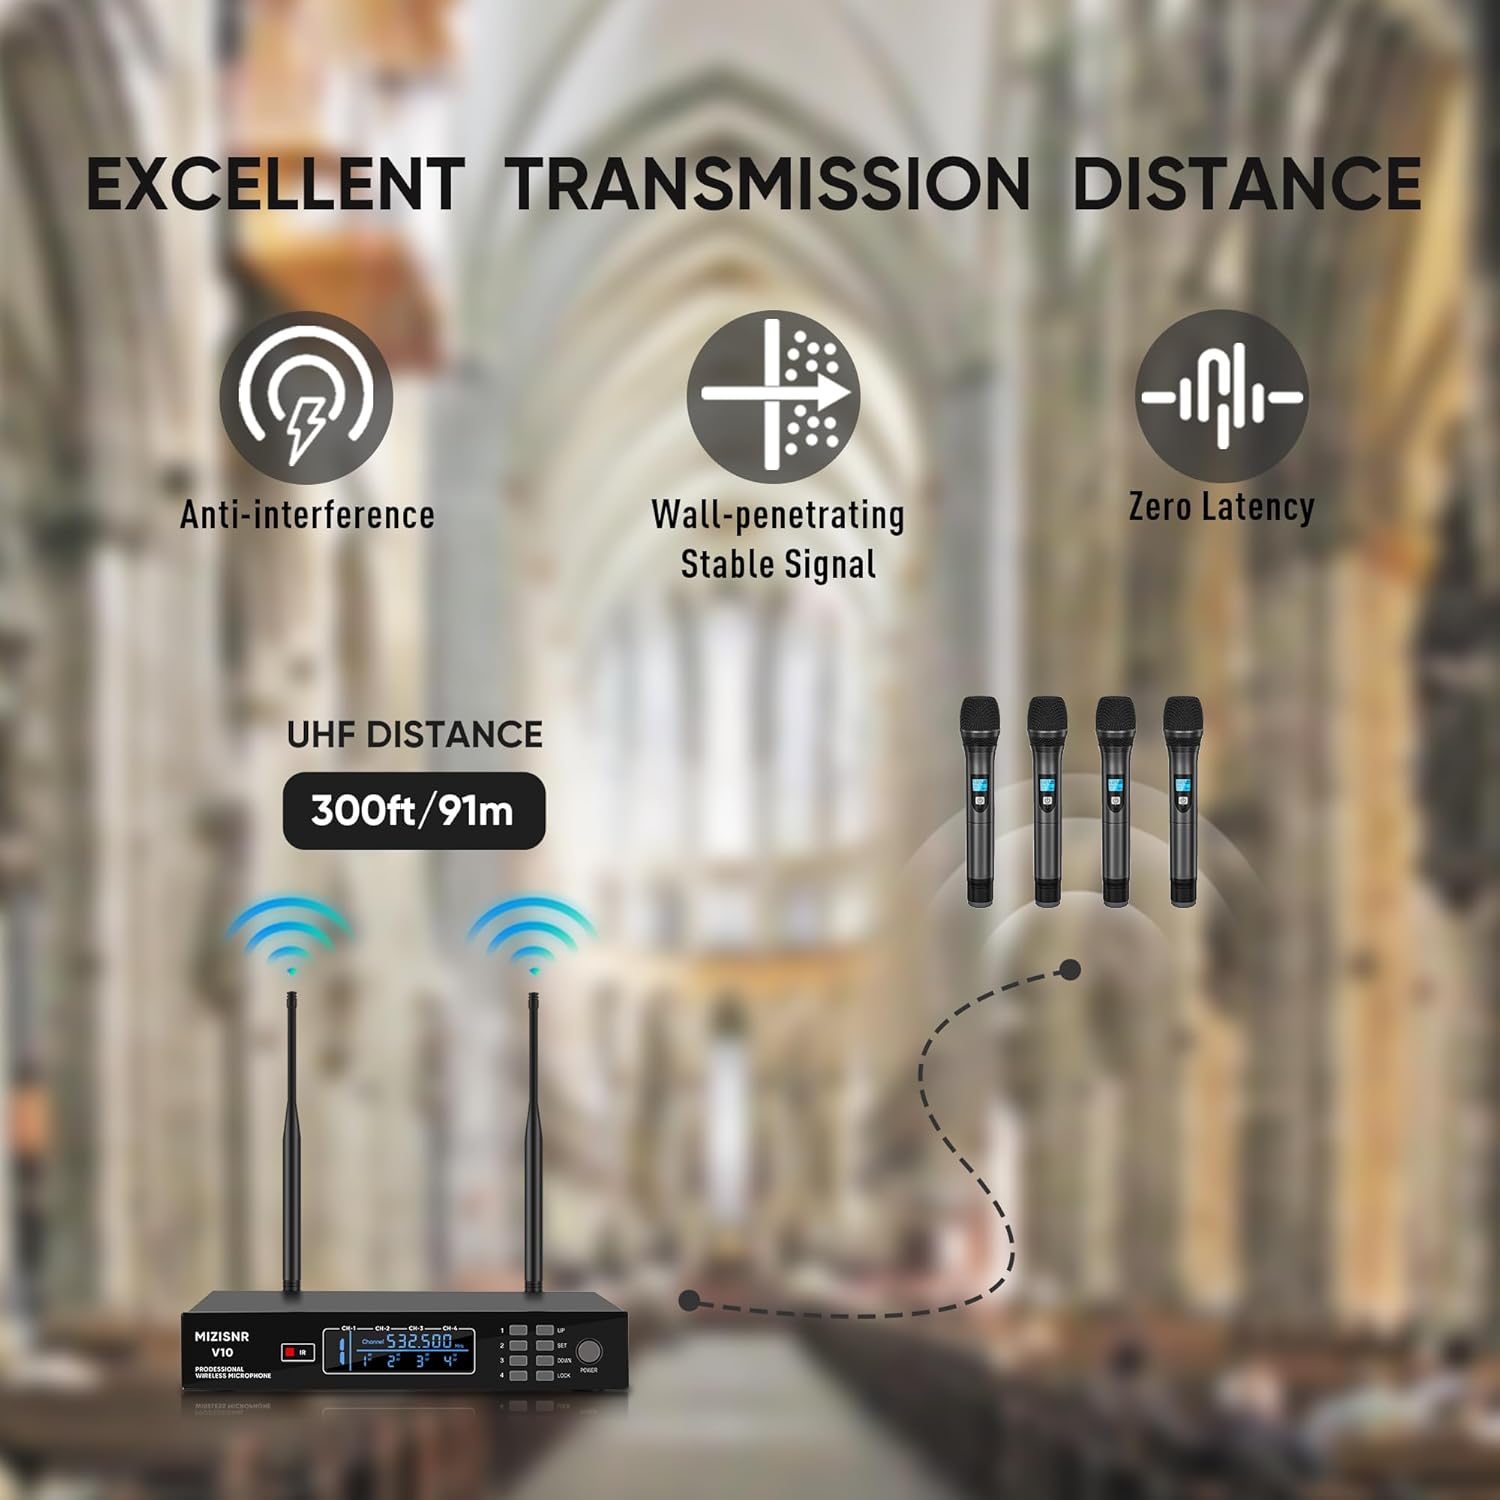
Image: A visual representation of the system's transmission capabilities, highlighting anti-interference, wall-penetrating stable signal, zero latency, and a UHF distance of 300ft/91m.
7. Specifications
Key technical specifications for the MIZISNR V10_SC Wireless Microphone System:
- Brand: MIZISNR
- Model Number: V10_SC
- Color: Black
- Connectivity Technology: UHF Wireless, XLR, 6.35 mm Jack
- Power Source: Battery Powered (Microphones), DC 12V (Receiver)
- Number of Microphones: 4
- Special Feature: Volume Control, Auto Scan, Adjustable Frequency, Screen Lock
- Recommended Uses: Karaoke, Singing, Conferences, Broadcasting, Social Events, Small to Medium-sized Venues
- Item Weight: 6.6 Pounds (approx. 3 kg)
- Compatible Devices: Amplifier, Audio Interface, Audio Mixer
8. Warranty Information
The MIZISNR V10_SC 4-Channel UHF Wireless Microphone System is covered by a 2-Year Manufacturer's Warranty. This warranty covers defects in materials and workmanship under normal use. Please retain your proof of purchase for warranty claims. For specific terms and conditions, refer to the warranty card included in your package or contact MIZISNR customer support.
9. Support
For further assistance, technical support, or inquiries regarding your MIZISNR V10_SC Wireless Microphone System, please contact MIZISNR customer service. You can typically find contact information on the manufacturer's official website or on the product packaging.
Please have your model number (V10_SC) and purchase details ready when contacting support.