
1. Introduction
This manual provides comprehensive instructions for the installation, setup, and operation of your Uckazy Ultra Narrow 12.3 Inch Touch Screen. This device is designed to enhance your driving experience by integrating modern multimedia features while retaining your vehicle's original functionalities. Please read this manual thoroughly before installation and use.
2. Product Features
- Compatibility: Designed for Mercedes Benz W207 C207 E Class 2009-2012 with NTG 4.0 System (Dual doors). Features a 10-pin LVDS plug.
- Display: Ultra narrow 12.3-inch HD (1920*720) IN-CELL screen with full lamination technology, reducing reflection by 75% for enhanced clarity.
- Dual System Integration: Seamless one-click switching between the Linux system and the original car system. Retains original radio, amplifier, steering wheel control, mouse knob, speed display, fuel level, oil pressure, safety warnings, and original reverse camera. No modifications to the vehicle's control unit software.
- Connectivity: Supports wireless and wired Apple Carplay, wireless and wired Android Auto, wireless Mirrorlink for iOS and Android phones, Bluetooth, and Wi-Fi.
- Audio Enhancement: Built-in Digital Sound Processor (DSP) with 16 EQ segments for detailed sound quality adjustment and speaker positioning to suit personal preferences.
3. Package Contents
Verify that all items are present in your package:
- Ultra narrow 12.3" in-cell display screen
- Plug and play power Cable/Frame
- USB/AUX/RCA Cable
- AMI Cable
- Installation tools and touch pen

This image displays the main unit, the Mercedes-Benz E-Class frame, AUX cable, AMI cable, power/USB cable, and installation tools with a touch pen.
4. Compatibility
This unit is specifically designed for Mercedes Benz E-Class C207 (2009-2012) dual-door vehicles equipped with the original radio and NTG4.0 system. It is crucial to confirm your vehicle's NTG system type before installation. The NTG 4.0 system is identified by a 10-pin LVDS plug.

The image illustrates how to distinguish between NTG 4.0, NTG 4.5/4.7, and NTG 5.0/5.1 systems by examining the original radio unit and the LVDS plug type. Ensure your vehicle matches the NTG 4.0 configuration.
5. Installation Guide
The installation process is designed to be plug-and-play. Follow these steps carefully:
5.1. Fiber Optic Cable Connection
If your vehicle uses fiber optic cables for audio, you will need to transfer them to the new power cable harness. This is a critical step for sound functionality.
This video demonstrates the process of carefully removing the fiber optic cables from the original connector and inserting them into the new power cable harness. Ensure correct orientation and secure connection.
5.2. Power Cable and Wiring
Connect the provided power cable to your vehicle's original power cable. Pay close attention to the correct interface to ensure proper functionality.

This diagram illustrates the wire definitions and how to link them to the car machine system. It also shows how to unplug the 2P fiber optic harness from the original car CD and insert it into the Linux system harness.
5.3. Wired CarPlay/Android Auto Connection
For wired CarPlay or Android Auto functionality, use USB1. USB2 is typically for read storage.

This image shows that USB IN 1 must be used for wired CarPlay or Android Auto. It also provides a visual cue for connecting 'AB' if sound distortion occurs.
5.4. AMI/AUX Connection
Directly insert the AMI cable. If you are unsure, insert the original AUX cable (found in the manual gear position or passenger side storage box). Then, navigate to settings and turn off the AUX auto-switching setting.

This image displays the AMI and AUX ports, along with a screenshot of the 'Car Settings' menu, highlighting the 'AUX Activation' and 'Auto Switch to AUX' options.
5.5. Visual Comparison (Before & After)

This image provides a visual comparison, showing the original car dashboard display versus the new 12.3-inch touch screen installed.
6. Setup
After physical installation, configure the system settings for optimal performance.
This video provides a walkthrough of the Linux operating system interface and various settings, including how to access and adjust them.
6.1. OEM Resolution Settings
It is essential to set the correct OEM screen resolution in the system settings. Incorrect settings may prevent original car information from displaying correctly.

This image shows the 'Original Car's Screen Resolution' menu within 'Car Settings', where you can select the appropriate resolution for your NTG system (e.g., NTG4.0 576x124 or NTG4.0/4.5/4.7 800x480).
6.2. OEM Camera Settings
If your vehicle has an original reverse camera, ensure the correct camera type is selected in the settings for it to function properly.

This image displays the 'Reversing Settings' menu, where you can choose between 'Original Camera' and 'Aftermarket Camera' to ensure your reverse camera works correctly.
6.3. Auto Switch to AUX
To ensure audio output through the car's speakers, configure the 'Auto Switch to AUX' setting.

This image shows the 'Car Settings' menu, indicating the 'AUX Activation' and 'Auto Switch to AUX' options. Ensure this is correctly configured for audio output.
7. Operating Instructions
7.1. Dual System Switching
The unit allows for seamless switching between the new Linux system and your car's original NTG system with a single click.

This image visually represents the ability to switch between the original car's interface and the new Linux system interface.
7.2. CarPlay and Android Auto
Access navigation, phone contacts, email, notifications, and music through wireless or wired Apple CarPlay and Android Auto. Voice assistants like Siri or Google Voice Assistant can be used for hands-free operation.

This image shows the main interface of the new screen, highlighting the OEM Car Info, CarPlay, Android Auto, HiCar, and Autolink options.
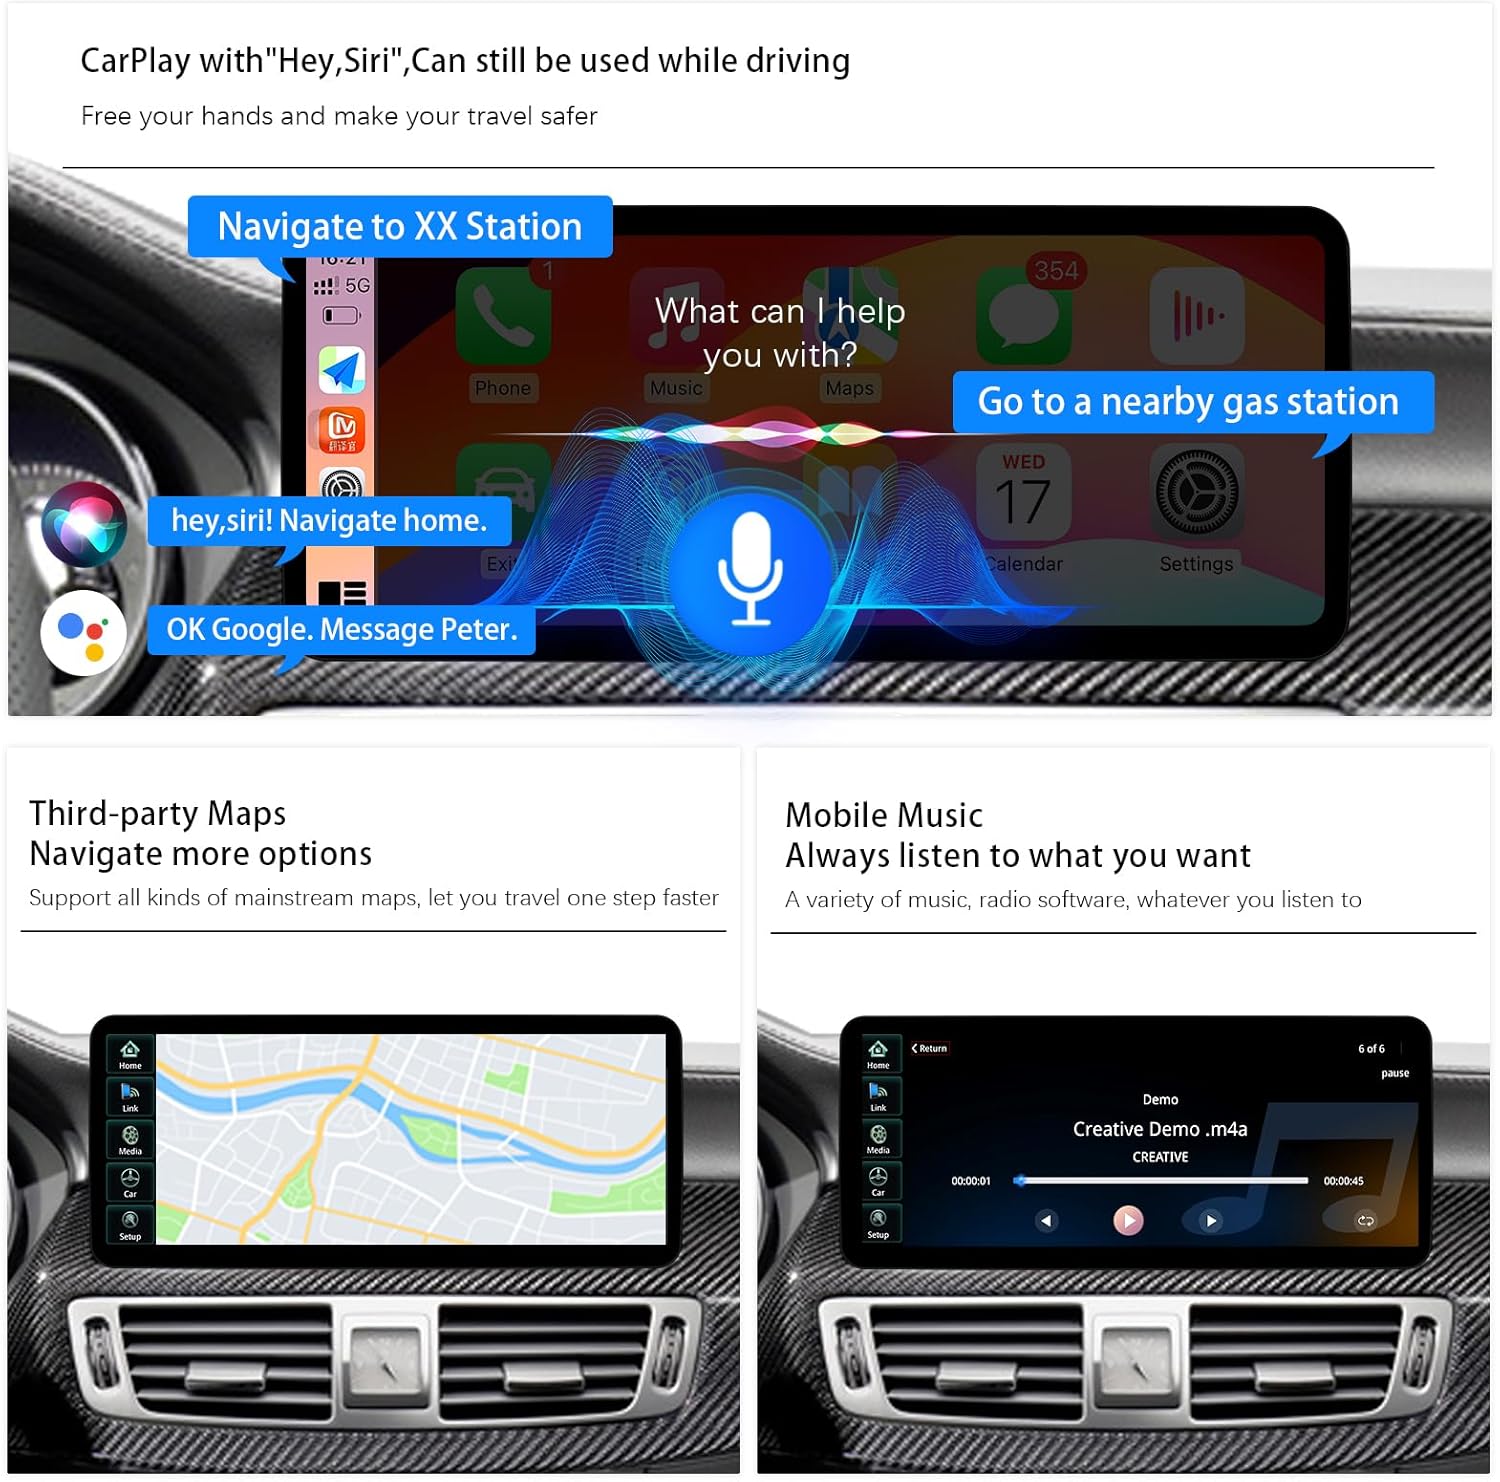
This image illustrates the use of voice commands for navigation and messaging, as well as the display of third-party maps and mobile music playback.
7.3. Automatic Light Sensitivity
The screen features automatic light sensitivity, adjusting day and night modes based on your car's original headlights for optimal visibility.
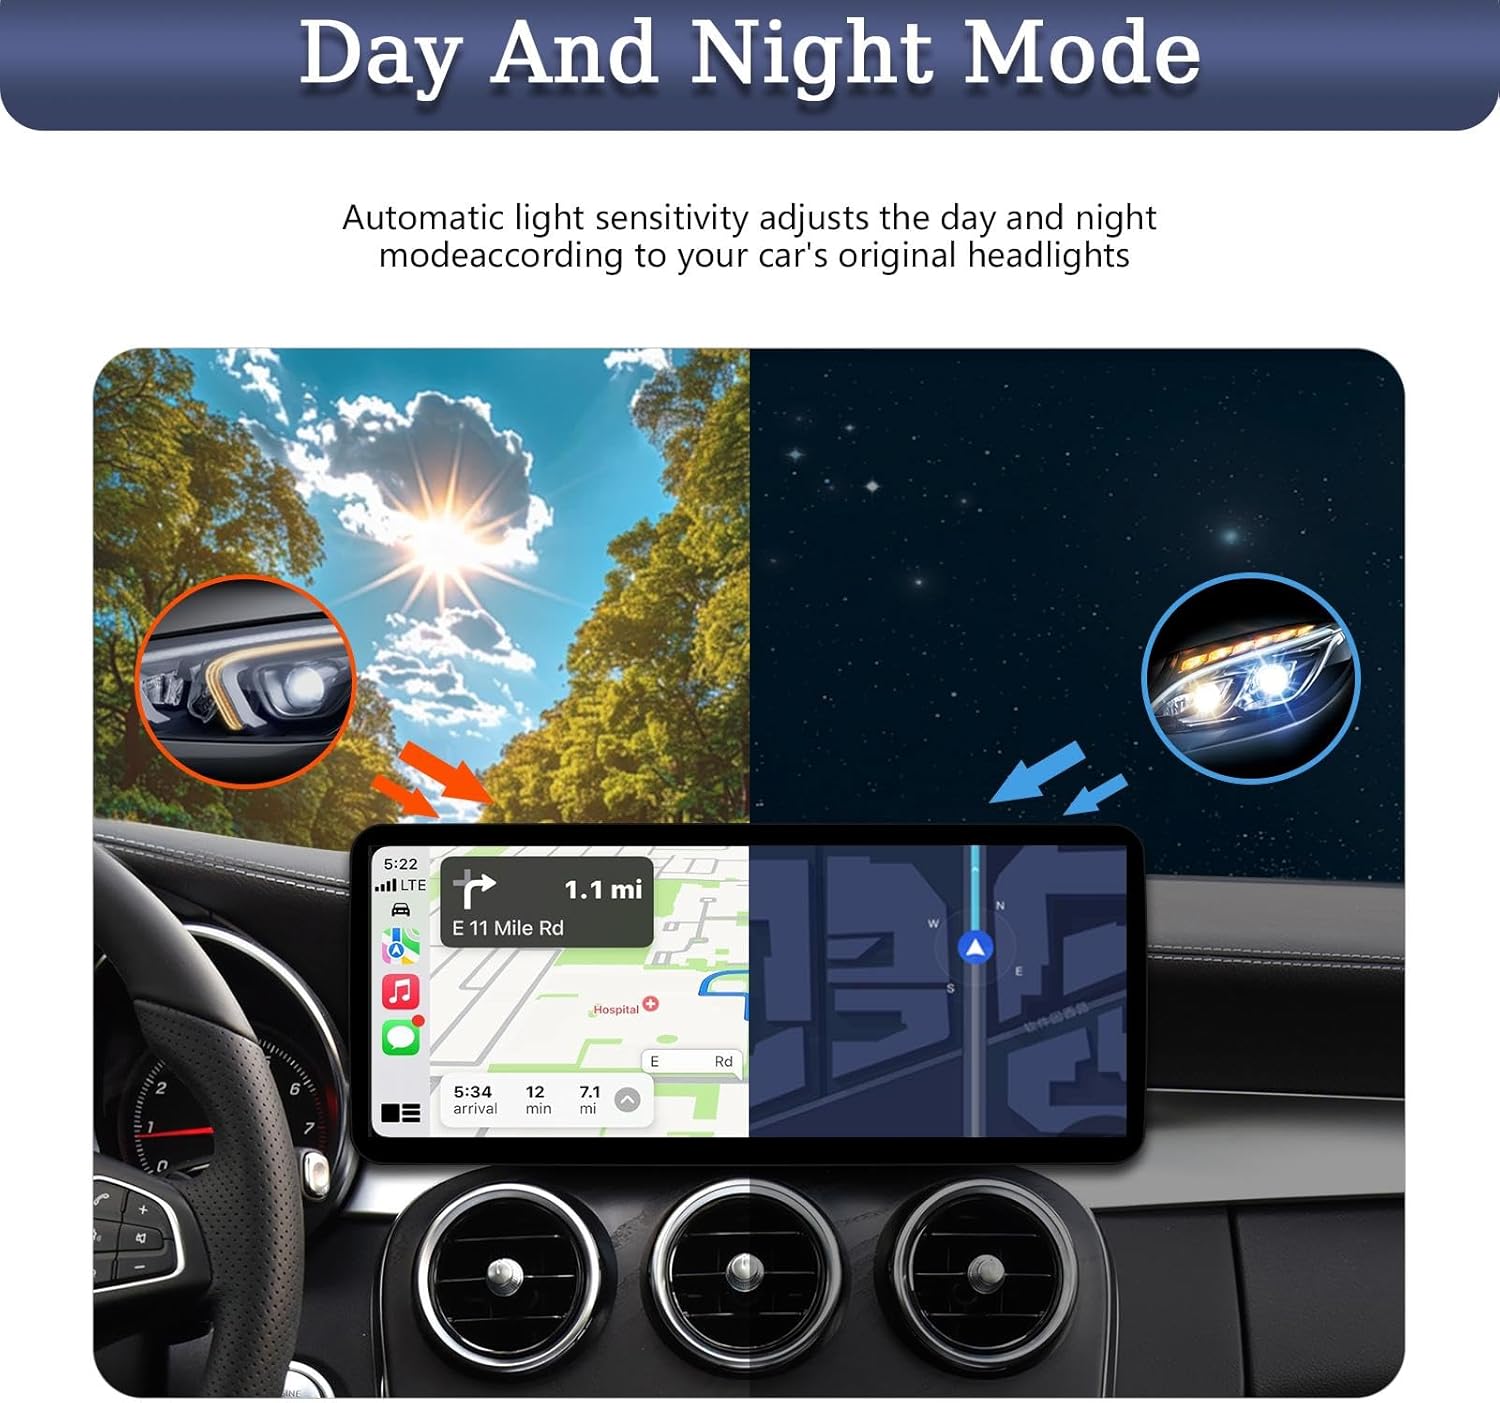
This image demonstrates the automatic adjustment of the screen's brightness and display mode between day and night conditions.
7.4. Retained Original Functions
The upgraded touch screen retains full functionality of your original car's systems.
- Support Steering Wheel Control
- Compatible OEM Reversing camera parking radar
- Support iDrive control
- Sound From the Original Car Stereo
- Keep the Original CD
- Keep the Original Car System

This image highlights the seamless integration with existing car features such as the original car knob, steering wheel buttons, hand-touch, factory rear view camera, amplifier system, and Bluetooth.
8. Maintenance
To ensure the longevity and optimal performance of your Uckazy touch screen, follow these general maintenance guidelines:
- Cleaning: Use a soft, lint-free cloth to gently wipe the screen. For stubborn smudges, slightly dampen the cloth with water or a screen-safe cleaner. Avoid harsh chemicals or abrasive materials.
- Temperature: Avoid exposing the device to extreme temperatures, both hot and cold, for extended periods.
- Physical Protection: While the screen features full lamination technology for durability, avoid applying excessive force or sharp objects to the display.
- Software Updates: Periodically check for any available software updates from the manufacturer to ensure the system runs efficiently and securely.
9. Troubleshooting
If you encounter any issues with your Uckazy touch screen, please refer to the following general advice. For complex problems, contact technical support.
- No Sound: Verify that the fiber optic cables are correctly transferred and securely connected. Check the AUX activation settings in the 'Car Settings' menu.
- Display Issues: Ensure the correct OEM screen resolution is selected in the 'Car Settings'. If the screen is blank or distorted, recheck all cable connections.
- CarPlay/Android Auto Not Connecting: For wired connections, ensure you are using USB1. For wireless, check Bluetooth and Wi-Fi connections and permissions on your phone.
- Original Camera Not Working: Confirm that the correct camera type (Original Camera) is selected in the 'Reversing Settings'.
Many issues can be resolved by carefully reviewing the installation steps and system settings. If problems persist, please contact Uckazy technical support for assistance.

This image provides guidance on how to reach out for technical support through the seller's platform, emphasizing the importance of contacting them for installation, sound, CarPlay, or original UI display issues.
10. Specifications
| Feature | Detail |
|---|---|
| Product Dimensions | 12.3 x 12.3 x 12.3 inches |
| Item Weight | 3.83 pounds |
| Model Name | Ultra Narrow 12.3 Inch Touch Screen |
| Vehicle Service Type | Car |
| Screen Size | 12.3 Inches |
| Special Feature | Touchscreen |
| Connectivity Technology | Bluetooth |
| Map Type | Online |
| Audio Output Mode | Stereo |
| Mounting Type | Dashboard Mount |
11. Warranty and Support
For warranty information and technical support, please refer to the seller's information on the product purchase page. It is recommended to contact the seller directly for any product-related inquiries or assistance.