1. Introduction
This manual provides comprehensive instructions for the installation, operation, and maintenance of your Pholiten Quad 4 Monitor Arm Desk Mount. This mount is designed to support up to four monitors, each with a maximum size of 32 inches and a weight of 10kg (22lbs). It features gas spring adjustment for ergonomic positioning and supports VESA 75x75mm and 100x100mm mounting patterns.
2. Safety Information
- Weight Capacity: Do not exceed the maximum weight capacity of 10kg (22lbs) per monitor. Exceeding this limit can result in instability and potential damage or injury.
- Monitor Size: Ensure your monitors do not exceed 32 inches in size for optimal performance and stability.
- Desk Stability: Install the mount only on a sturdy and stable desk surface capable of supporting the combined weight of the mount and all attached monitors.
- Proper Installation: Follow all installation steps carefully. Improper installation can lead to product failure or injury.
- Gas Spring Adjustment: Adjust the gas spring tension only when a monitor is attached to prevent the arm from springing up unexpectedly.
- Children and Pets: Keep children and pets away from the installation area.
3. Package Contents
Please verify that all components are present before beginning installation:
- Main Support Pole
- Monitor Arms (4 units)
- VESA Plates (4 units)
- Desk Clamp (C-Clamp)
- Grommet Base
- Hardware Kit (screws, washers, spacers)
- Tools (Allen wrenches)
- Instruction Manual
4. Specifications
| Model | MD18864 |
| Monitor Compatibility | Up to 4 monitors |
| Max Screen Size | 32 inches per monitor |
| Max Weight Capacity | 10kg (22lbs) per monitor |
| VESA Patterns | 75x75mm, 100x100mm |
| Mounting Options | C-Clamp, Grommet Install |
| Desk Thickness (Max) | 98mm (for both C-Clamp and Grommet) |
| Grommet Hole Diameter (Min) | 42mm |
| Adjustments | Tilt (±80°), Swivel (±90°), Rotation (360°) |
| Material | Metal |
| Color | Black |

Figure 4.1: Product dimensions for the Pholiten Quad 4 Monitor Arm.

Figure 4.2: Compatible VESA patterns and how to measure them.

Figure 4.3: Monitor compatibility details including VESA, size, and weight limits.
5. Setup and Installation
5.1 Choose Installation Method
The Pholiten Quad 4 Monitor Arm offers two installation methods: C-Clamp or Grommet Install. Select the method best suited for your desk.

Figure 5.1: C-Clamp and Grommet installation options.
5.2 C-Clamp Installation
- Attach the C-Clamp to the bottom of the main support pole.
- Position the C-Clamp on the edge of your desk. Ensure the desk thickness is no more than 98mm.
- Tighten the C-Clamp screw firmly until the pole is securely fastened to the desk.
5.3 Grommet Installation
- If your desk has a grommet hole, ensure its diameter is at least 42mm and the desk thickness is no more than 98mm.
- Attach the grommet base to the bottom of the main support pole.
- Insert the pole through the grommet hole.
- Secure the grommet base from underneath the desk using the provided hardware, tightening until the pole is stable.
5.4 Attaching Monitor Arms and VESA Plates
- Slide the monitor arms onto the main support pole at your desired heights. Use the provided clips or screws to secure them in place.
- Attach the VESA plates to the back of each monitor using the appropriate screws from the hardware kit. Ensure the screws are tightened securely.
- Carefully lift each monitor and slide its VESA plate onto the corresponding monitor arm bracket. Ensure it clicks into place or is secured with the locking mechanism.

Figure 5.2: Fully assembled Pholiten Quad 4 Monitor Arm with monitors.
5.5 Cable Management
Utilize the integrated cable management clips or channels on the monitor arms and pole to route your monitor cables neatly. This helps maintain a clean workspace and prevents cable damage.
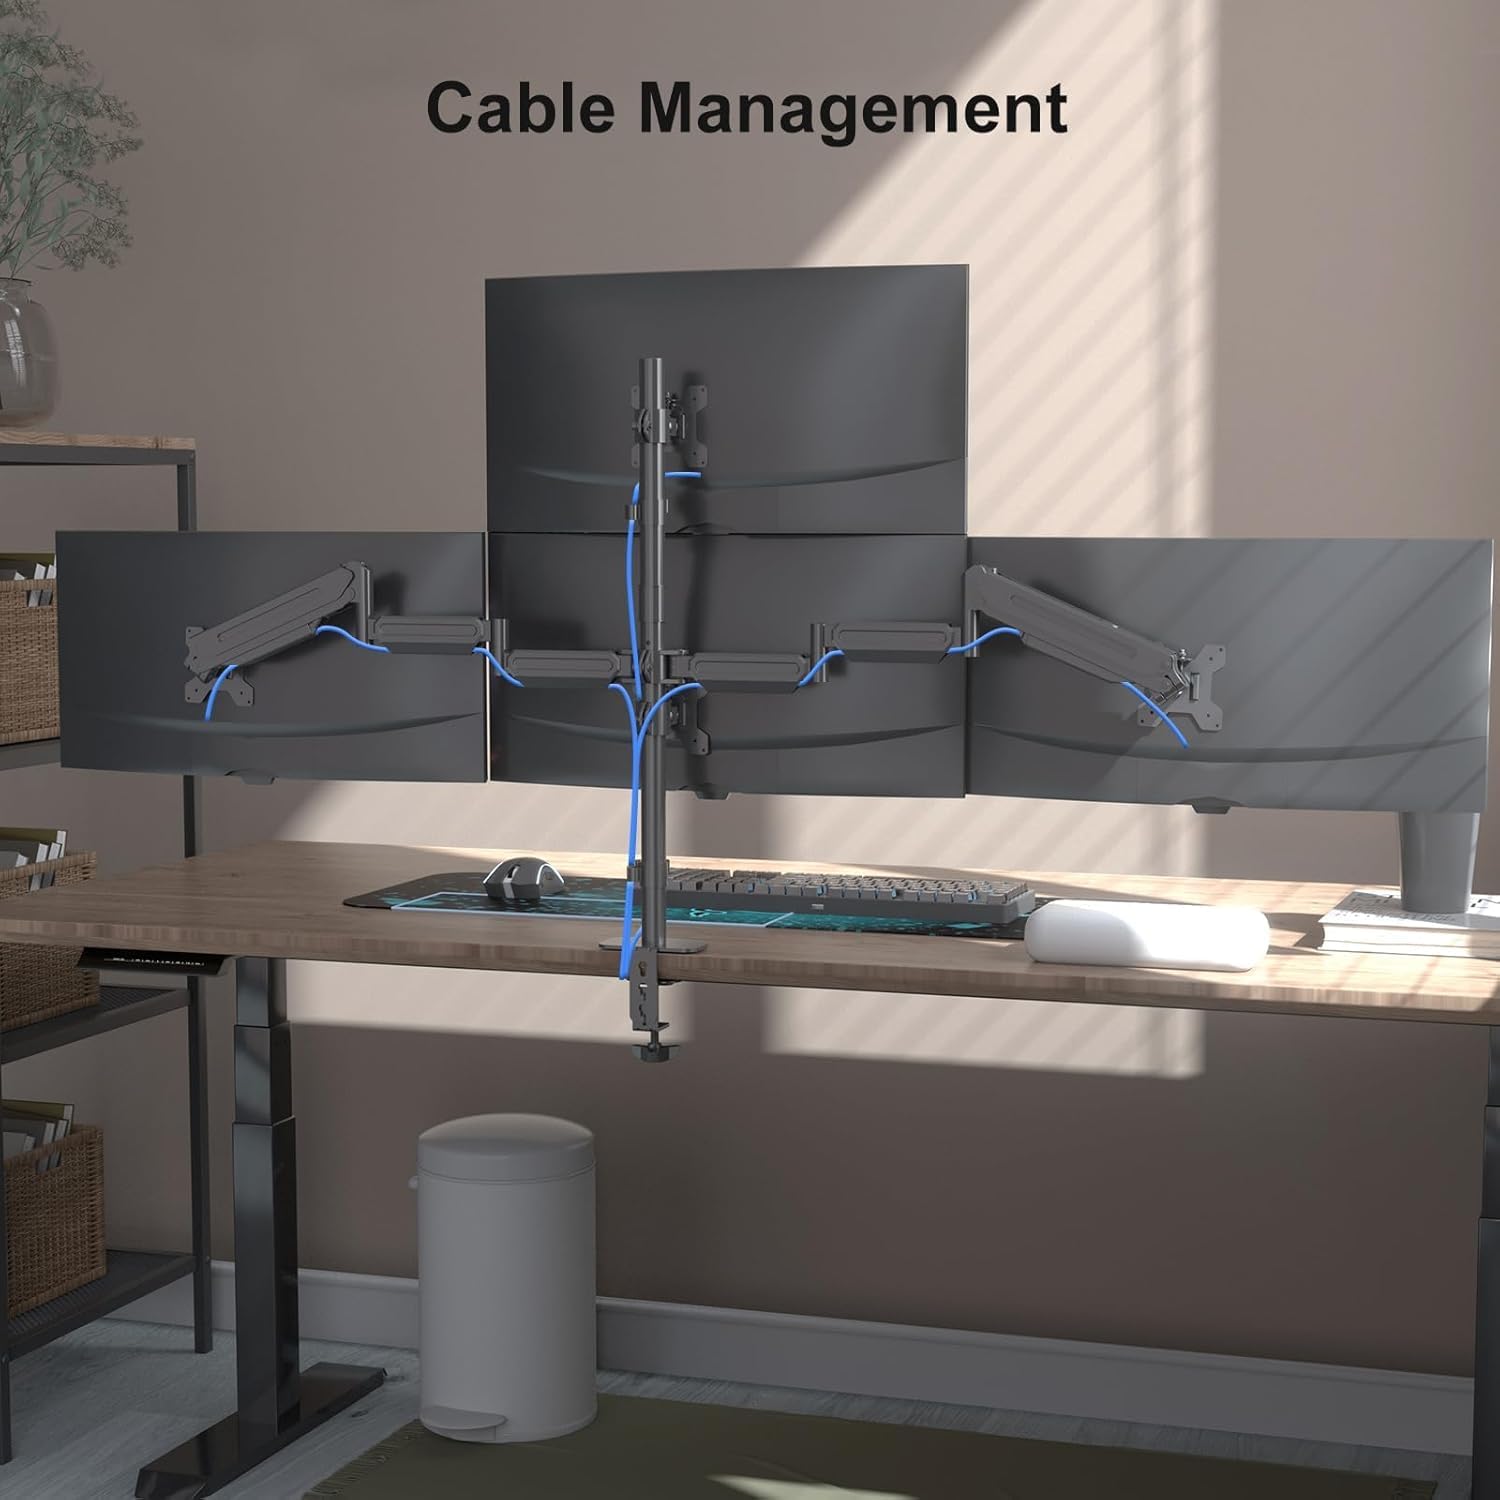
Figure 5.3: Example of cable management.
6. Operating and Adjustments
The Pholiten Quad 4 Monitor Arm allows for various adjustments to achieve an ergonomic viewing experience.
6.1 Height Adjustment
The monitor arms can be adjusted vertically along the main support pole. Additionally, the gas spring mechanism in each arm allows for smooth vertical movement of the attached monitor.
- To adjust the height of the entire arm assembly on the pole, loosen the securing screw, slide the arm to the desired height, and re-tighten.
- For fine-tuning the height of an individual monitor, gently push or pull the monitor up or down. The gas spring will hold it in position.

Figure 6.1: Height adjustment mechanism.
6.2 Tilt, Swivel, and Rotation
Each monitor can be independently adjusted for optimal viewing angles:
- Tilt (±80°): Adjust the monitor screen up or down to reduce glare and improve viewing comfort.
- Swivel (±90°): Pivot the monitor left or right to share your screen or change your viewing angle.
- Rotation (360°): Rotate the monitor from landscape to portrait orientation as needed.

Figure 6.2: Flexible adjustment options: Rotation, Swivel, and Tilt.

Figure 6.3: Examples of multiple screen combinations.
6.3 Gas Spring Tension Adjustment
If a monitor sags or does not stay in its desired position, the gas spring tension may need adjustment. This is crucial for monitors of different weights.
- Locate the gas spring adjustment screw on the arm (refer to the diagram below).
- Using the provided Allen wrench, turn the screw:
- Turn clockwise (-) to decrease tension for lighter monitors (if the arm springs up too easily).
- Turn counter-clockwise (+) to increase tension for heavier monitors (if the arm sags).
- Adjust gradually and test the arm's movement until the monitor holds its position smoothly.

Figure 6.4: Gas spring tension adjustment point.
7. Maintenance
- Cleaning: Wipe the mount with a soft, damp cloth. Avoid abrasive cleaners or solvents.
- Periodic Checks: Periodically check all screws and connections to ensure they remain tight and secure. Re-tighten if necessary.
- Gas Spring: The gas spring is designed for long-term use and generally requires no maintenance. If performance degrades, refer to the troubleshooting section.
8. Troubleshooting
- Monitor Sags or Does Not Hold Position:
Pholiten Quad 4 Monitor Arm Desk Mount for Max 32 inch Screens, Gas Spring Adjustment Monitor Stand with VESA 75x75mm, 100x100 mm, Clamp & Grommet Install Black MD18864 - Desk Clamp/Grommet Loose: Ensure the clamp or grommet bolt is fully tightened. Check for any obstructions preventing a secure fit.
- Difficulty Moving Arm: Check if the gas spring tension is too high for a lighter monitor. Adjust the tension screw counter-clockwise to decrease it.
- Arm Springs Up Too Quickly: The gas spring tension might be too low for a heavier monitor. Adjust the tension screw clockwise to increase it.
- Monitor Not Level: Ensure the VESA plate is securely attached to the monitor and the monitor is properly seated on the arm bracket. Some VESA plates allow for minor leveling adjustments.
9. Warranty Information
Please refer to the product packaging or the official Pholiten website for detailed warranty information regarding the Pholiten Quad 4 Monitor Arm Desk Mount (MD18864).
10. Support
For further assistance, technical support, or inquiries regarding your Pholiten Quad 4 Monitor Arm Desk Mount, please contact Pholiten customer service through their official website or the contact information provided with your product packaging.