1. Introduction
Thank you for choosing the HinsGEAR HG160 Rechargeable Flashlight. This high-performance flashlight is designed for versatility and durability, featuring a powerful LED, multiple lighting modes, a magnetic base, and a rechargeable battery with power bank functionality. This manual provides essential information for the safe and effective use of your flashlight.

Image 1.1: The HinsGEAR HG160 Rechargeable Flashlight and its retail packaging.
2. Package Contents
Please check the package contents to ensure all items are present:
- HinsGEAR HG160 Rechargeable Flashlight
- High-capacity Rechargeable Battery
- USB-C Charging Cable
- Lanyard
- AAA Battery Holder
- AAA Battery Stabilizer
- User Manual (this document)

Image 2.1: Visual representation of all items included in the package.
3. Product Features
- High Lumens & Long Range: Equipped with an upgraded XHP160 LED chip, delivering up to 500,000 lumens and a beam distance of up to 1300 feet.
- Dual Switch & 9 Lighting Modes: Independent control for the main light (High, Medium, Low, S.O.S, Strobe) and COB side light (High, Low, Red Light, Red Light Strobe).
- Large-capacity Rechargeable Battery: Includes a 5000 mAh battery, providing extended runtime.
- USB-C Charging & Power Bank Function: Built-in USB-C port for direct charging and a USB-A output to charge other devices.
- Adjustable Focus: Allows for seamless transition between a wide floodlight and a focused spotlight.
- Magnetic Base: Integrated magnet in the tail cap for hands-free attachment to metal surfaces.
- Durable & Waterproof: Constructed from military-grade aluminum with an IP65 waterproof rating.
- LCD Digital Display: Shows real-time battery percentage.
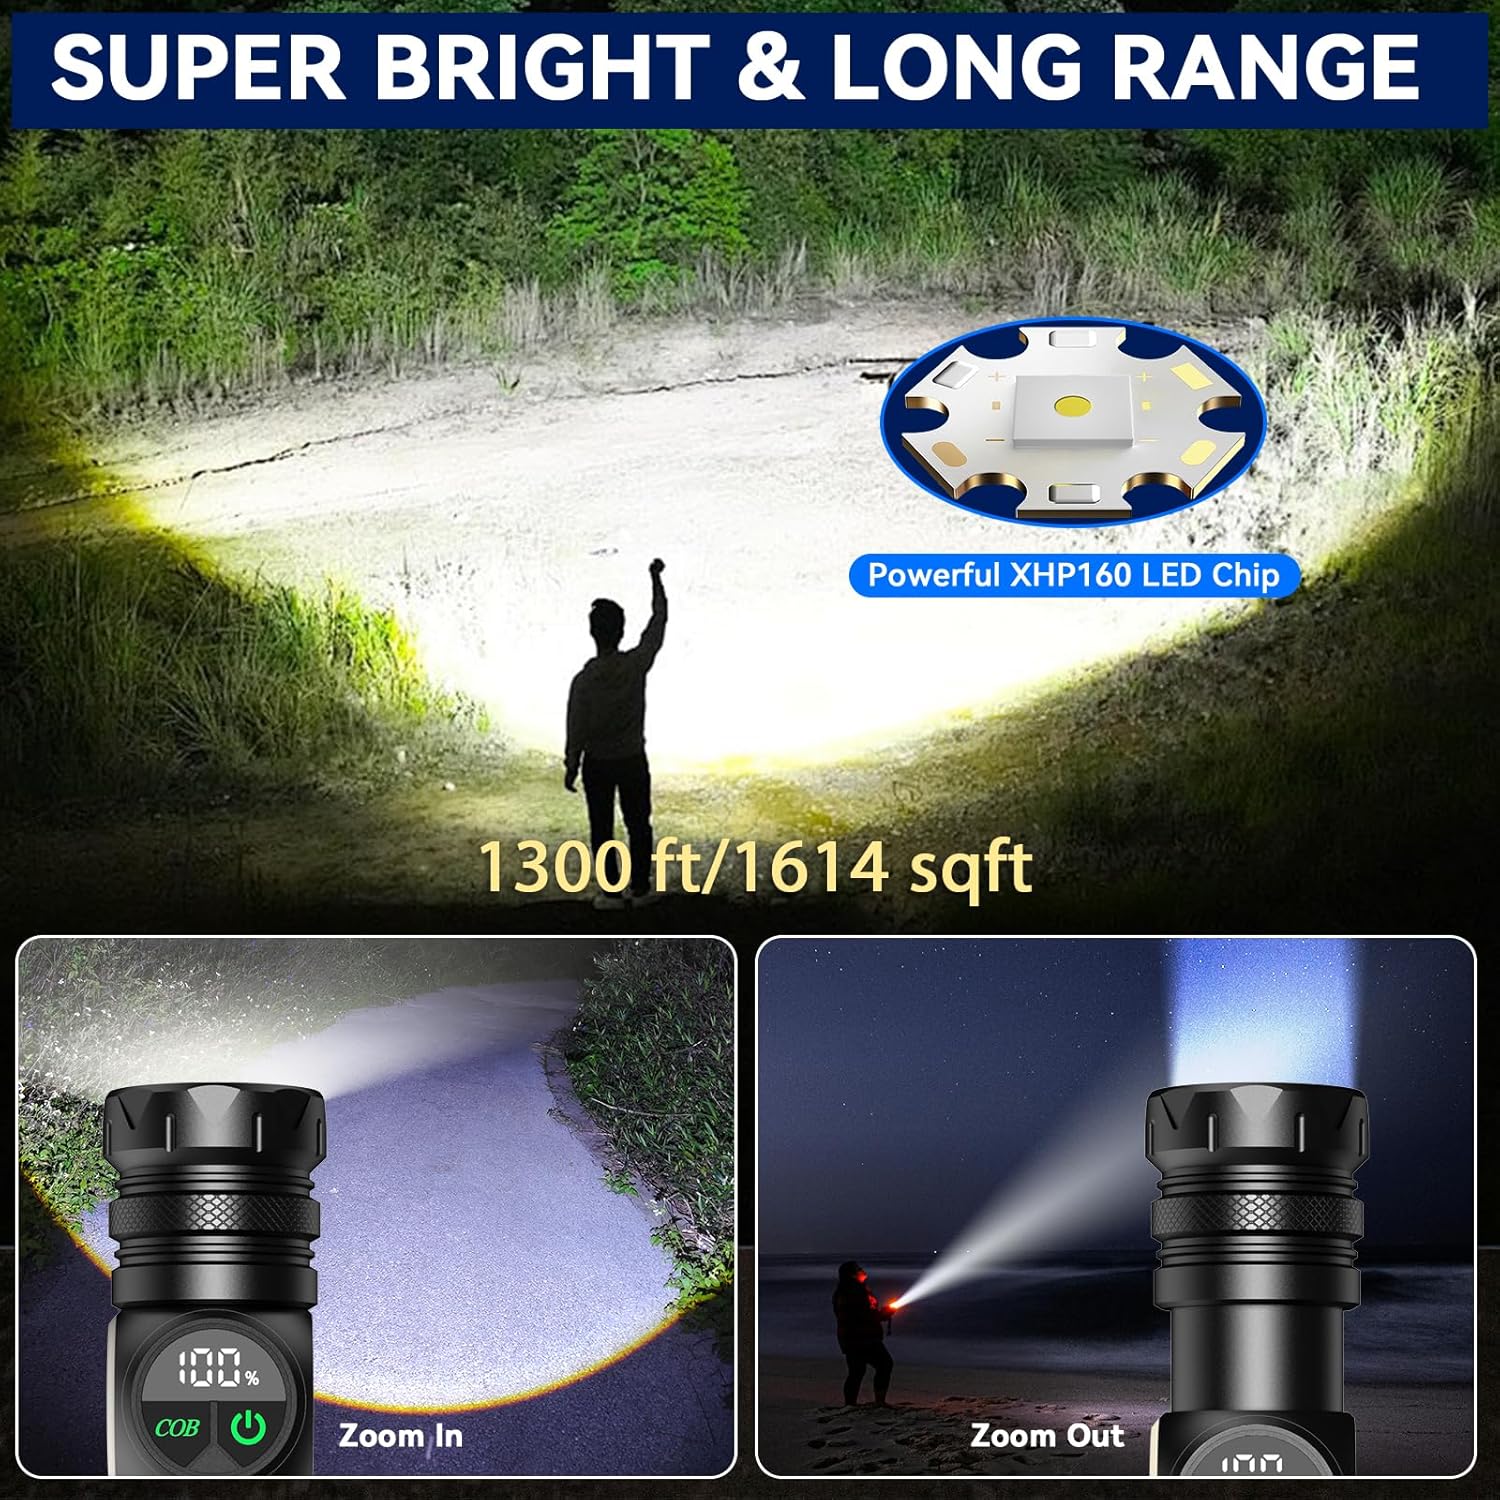
Image 3.1: The HG160 flashlight's powerful beam and long-range illumination capabilities.

Image 3.2: The HG160 flashlight demonstrating its IP65 waterproof and durable aluminum construction.
4. Setup
4.1 Battery Installation
The HinsGEAR HG160 flashlight comes with a pre-installed rechargeable battery. If you need to replace it or use AAA batteries:
- Unscrew the tail cap of the flashlight.
- For Rechargeable Battery: Insert the provided high-capacity rechargeable battery with the positive (+) end facing towards the flashlight head.
- For AAA Batteries: Place three AAA batteries (not included) into the provided AAA battery holder, ensuring correct polarity. Insert the holder into the flashlight with the positive (+) end facing towards the flashlight head. Use the AAA battery stabilizer if needed.
- Screw the tail cap back on securely.
4.2 Initial Charging
Before first use, fully charge the flashlight's rechargeable battery.
- Locate the USB-C charging port on the flashlight body.
- Connect the provided USB-C cable to the flashlight's USB-C port.
- Connect the other end of the USB-C cable to a compatible USB power source (e.g., wall adapter, computer USB port, power bank, car charger).
- The LCD digital display will show the charging progress. The battery is fully charged when the display shows 100%.
- Disconnect the cable once charging is complete.
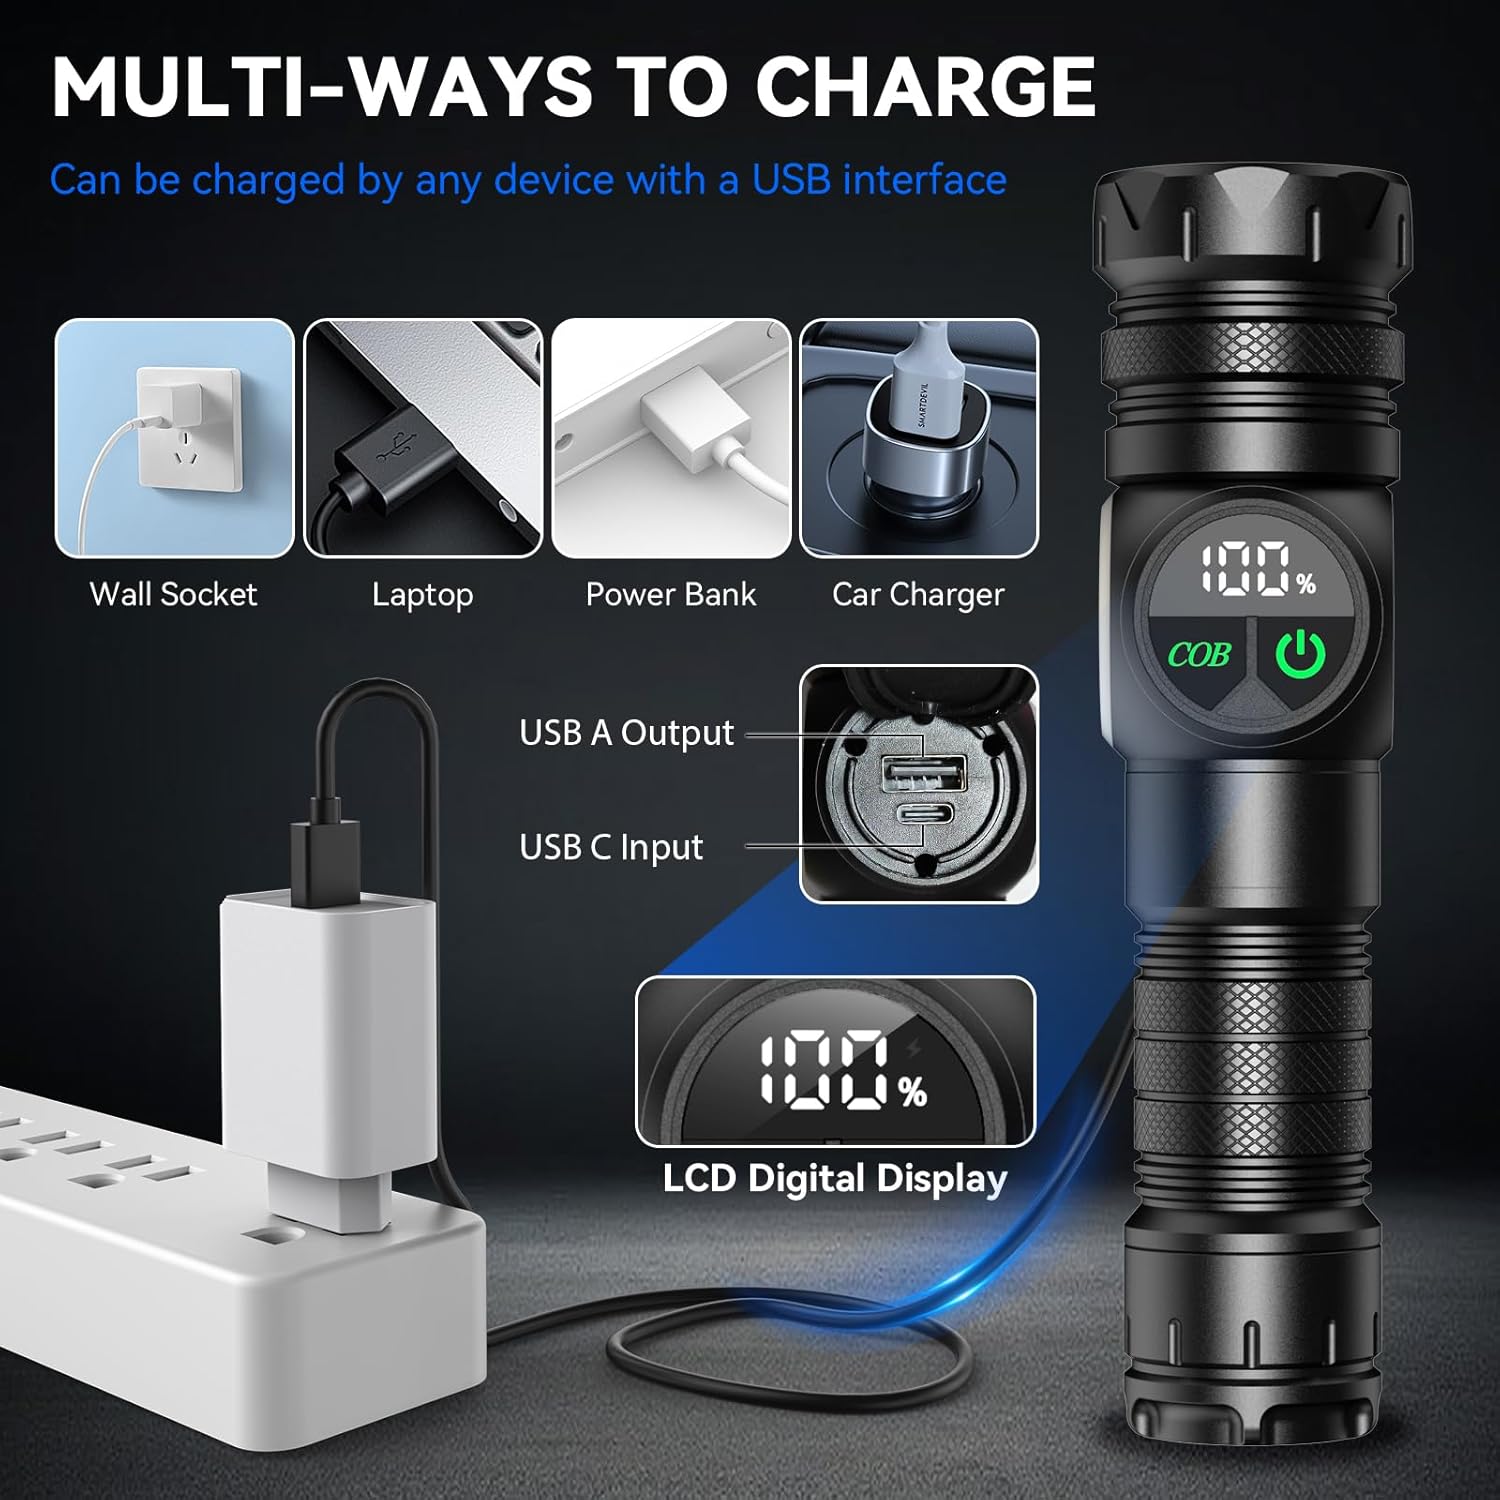
Image 4.1: Various methods for charging the HG160 flashlight.
5. Operation
5.1 Power On/Off
Press either the main light button (right) or the COB light button (left) to turn on the flashlight. Press and hold the respective button for approximately 2 seconds to turn off the light.
5.2 Main Light Modes
With the main light off, press the main light button (right) to cycle through the following modes:
- High Brightness
- Medium Brightness
- Low Brightness
- S.O.S (Morse code for distress)
- Strobe (rapid flashing)
A quick press cycles to the next mode. Press and hold to turn off.
5.3 COB Side Light Modes
With the COB light off, press the COB light button (left) to cycle through the following modes:
- High Brightness (white light)
- Low Brightness (white light)
- Red Light (steady)
- Red Light Strobe (flashing)
A quick press cycles to the next mode. Press and hold to turn off.
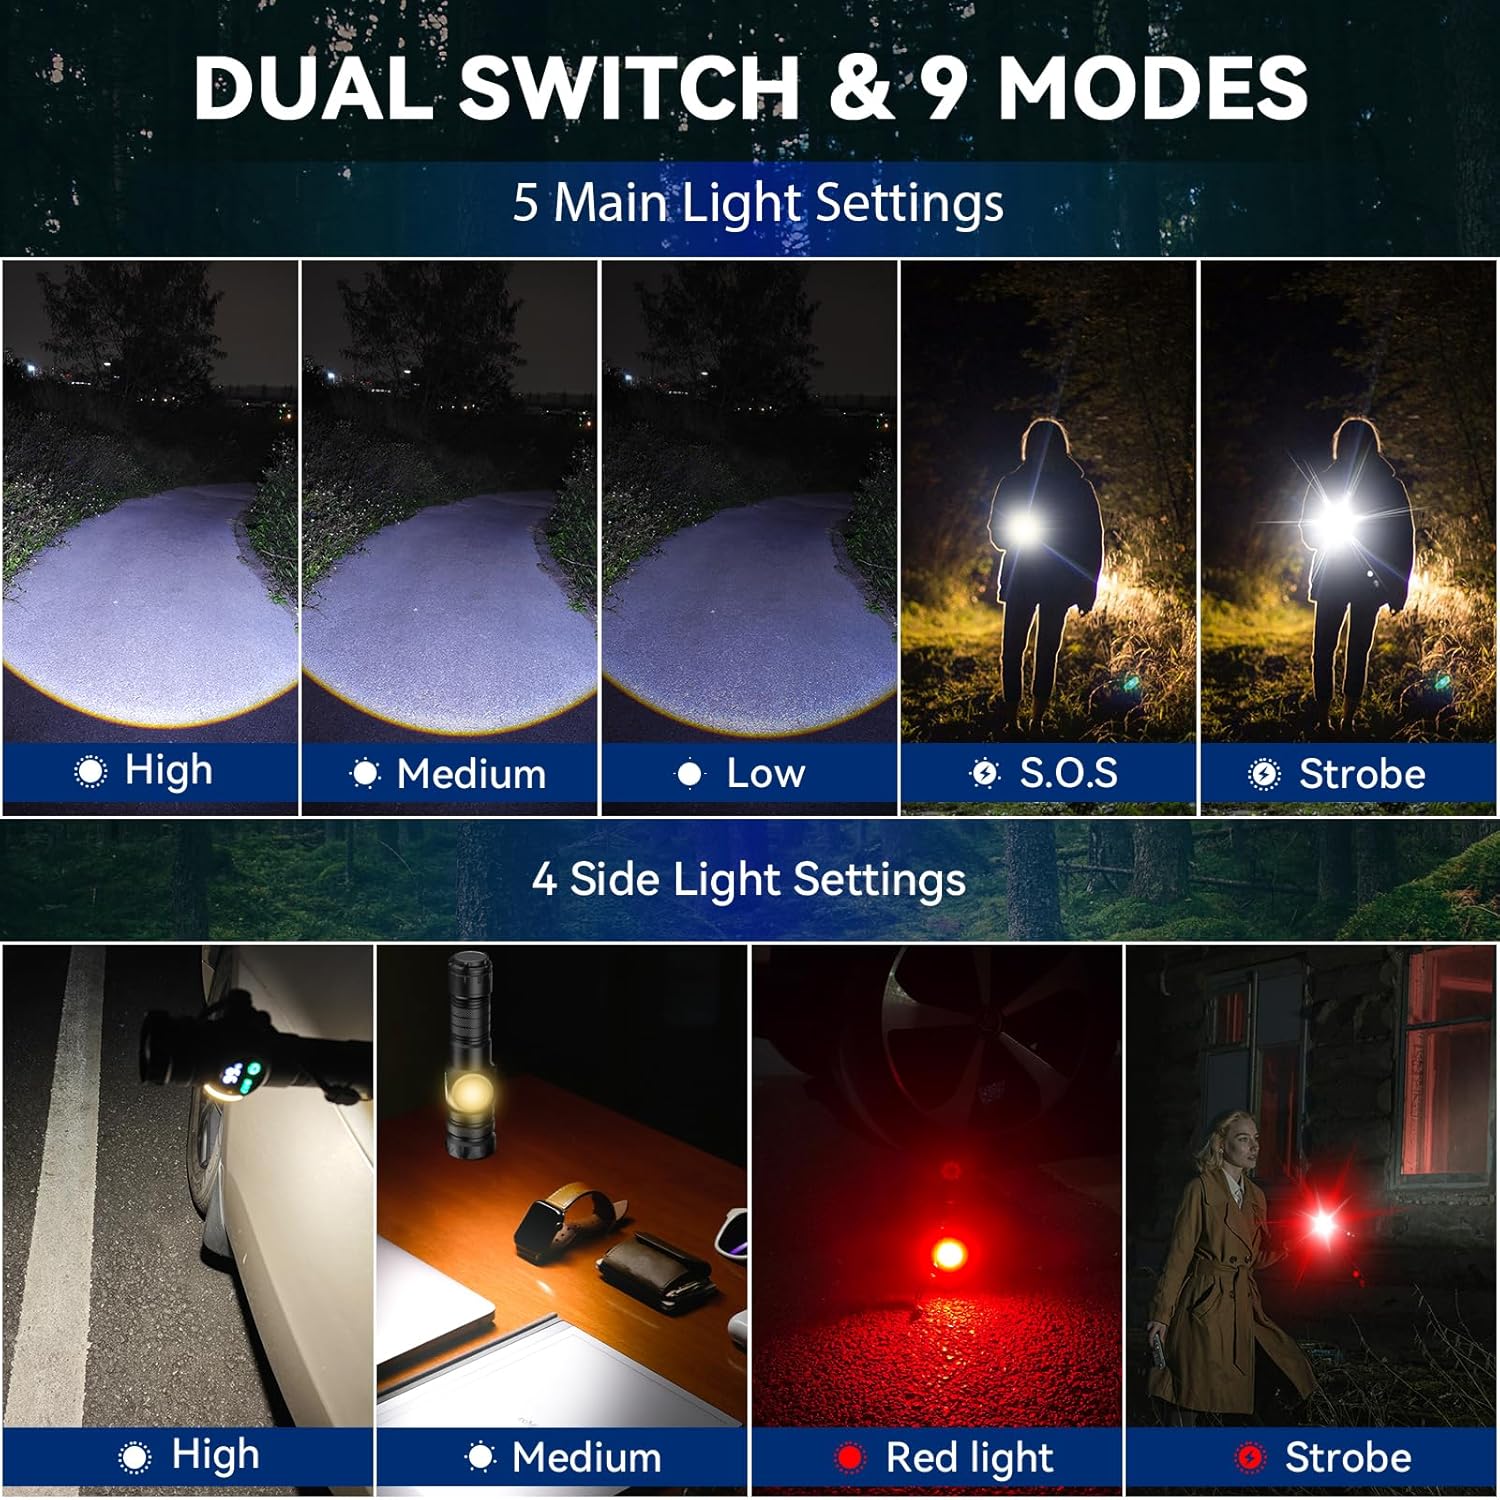
Image 5.1: Overview of the 9 distinct lighting modes available on the HG160 flashlight.
5.4 Adjustable Focus
To adjust the beam focus, gently push or pull the head of the flashlight. Pushing the head forward narrows the beam for a concentrated spotlight, while pulling it back widens the beam for a broad floodlight.
5.5 Magnetic Base
The tail cap of the flashlight contains a strong magnet. This allows you to attach the flashlight to any ferrous metal surface for hands-free operation, ideal for tasks like vehicle maintenance or working in dark spaces.
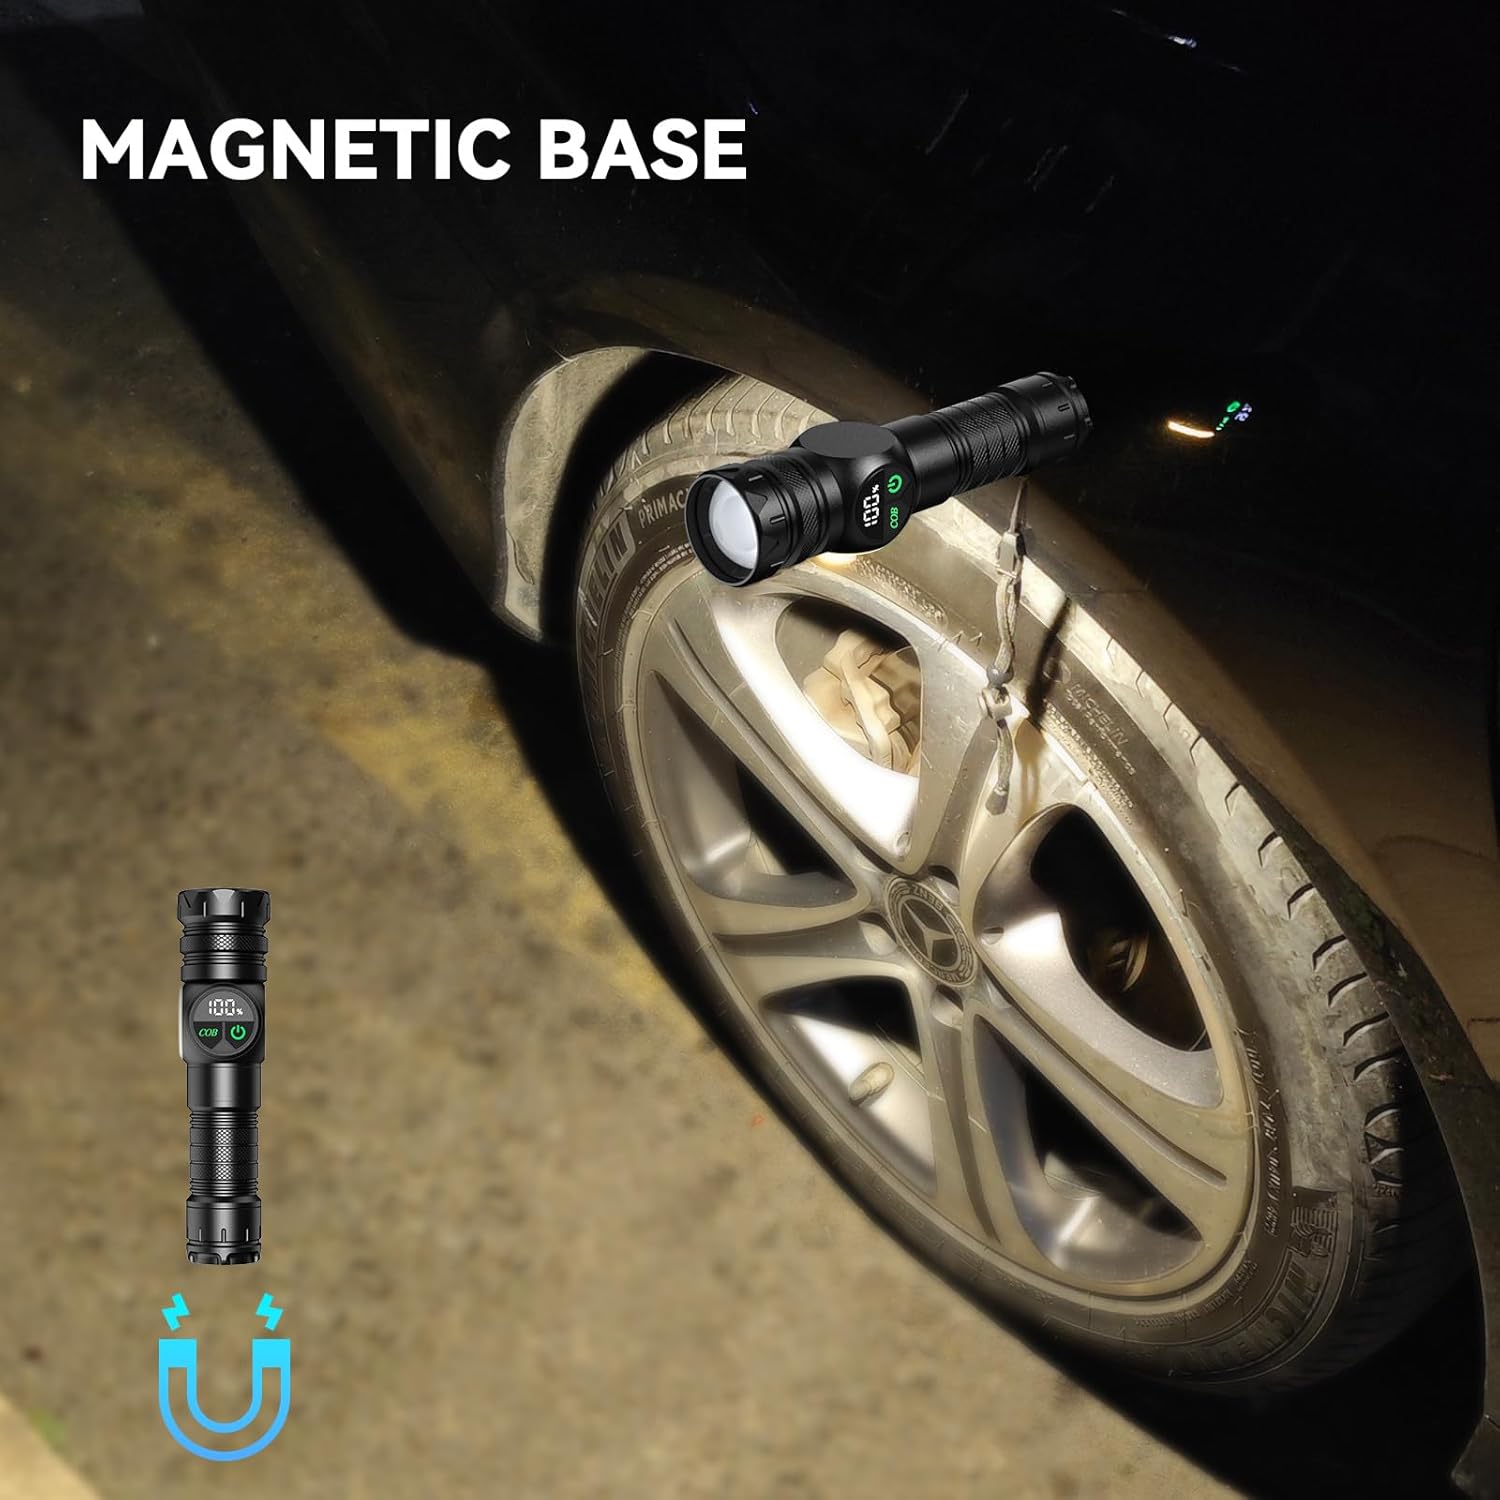
Image 5.2: The HG160 flashlight utilizing its magnetic base for hands-free illumination.
6. Charging and Power Bank Function
6.1 Charging the Flashlight
To charge the flashlight, connect the provided USB-C cable to the flashlight's USB-C input port and a suitable USB power source. The LCD display will indicate the charging status. A full charge is indicated by 100% on the display.
6.2 Using as a Power Bank
The HinsGEAR HG160 can also function as a power bank to charge other USB-powered devices.
- Locate the USB-A output port on the flashlight.
- Connect your device's charging cable (USB-A end) to the flashlight's USB-A output port.
- Connect the other end of your device's charging cable to your device.
- The flashlight will begin charging your device. Monitor your device's charging indicator.

Image 6.1: The HG160 flashlight's USB-C fast charge and power bank capabilities.
7. Maintenance
- Cleaning: Wipe the flashlight with a soft, damp cloth. Do not use abrasive cleaners or solvents.
- Storage: Store the flashlight in a cool, dry place away from direct sunlight and extreme temperatures. If storing for extended periods, charge the battery every 3-6 months to maintain its health.
- Battery Care: Avoid fully depleting the battery frequently. Recharge promptly when the battery level is low.
- Water Resistance: While IP65 water-resistant, avoid submerging the flashlight in water. Ensure the charging port cover is securely closed when not in use to maintain water resistance.
8. Troubleshooting
| Problem | Possible Cause | Solution |
|---|---|---|
| Flashlight does not turn on. | Low battery; incorrect battery installation; faulty switch. | Charge the battery; check battery polarity; contact customer support if issue persists. |
| Flashlight does not charge. | Faulty cable; power source issue; charging port obstruction. | Try a different USB-C cable and power source; ensure charging port is clean and free of debris. |
| Light is dim or flickers. | Low battery; loose connections. | Recharge the battery; ensure tail cap is securely tightened. |
| Power bank function not working. | Low flashlight battery; incompatible device; faulty cable. | Ensure flashlight battery is sufficiently charged; try a different device or charging cable. |
9. Specifications
| Model Number | HG160 |
| Light Source | XHP160 LED (Main), COB LED (Side) |
| Brightness | Up to 500,000 Lumens |
| Beam Distance | Up to 1300 ft |
| Battery Type | Rechargeable Lithium Ion (5000 mAh), or 3x AAA (with adapter) |
| Charging Port | USB-C Input |
| Output Port | USB-A Output (Power Bank Function) |
| Material | Military-grade Aluminum |
| Water Resistance | IP65 |
| Dimensions (L x W x H) | 6.7" x 1.57" x 1.08" (approx.) |
| Weight | 6.72 ounces |
| Special Features | Adjustable Focus, Magnetic Base, LCD Digital Display |
10. Warranty and Support
HinsGEAR is committed to providing high-quality products and customer satisfaction. If you encounter any issues with your HG160 flashlight, please do not hesitate to contact our customer service team.
- Customer Service: We offer 24/7 customer support to assist you with any questions or concerns.
- Money Back Service: If you receive a defective product, a money-back service is available.
- For support, please refer to the contact information provided on the product packaging or the official HinsGEAR website.


