Introduction
Thank you for choosing the RETLLAS 1.8 Cu Ft Home Safe Box. This manual provides essential information for the proper setup, operation, and maintenance of your new digital safe. Please read these instructions carefully before use to ensure optimal security and functionality. Keep this manual for future reference.
Package Contents
Verify that all components listed below are included in your package. If any items are missing or damaged, please contact customer support.
- RETLLAS 1.8 Cu Ft Home Safe Box
- Emergency Keys (x2)
- Mounting Screws (x4)
- Instruction Manual
- Felt Mat (x1)
- Removable Shelf (x1)

Figure 1: Package Contents. This image displays the RETLLAS 1.8 Cu Ft Home Safe Box along with its standard accessories: two emergency keys, four mounting screws, the instruction manual, a felt mat, and a removable shelf.
Setup
1. Battery Installation and Initial Access
The safe requires 4 AA batteries (not included) for the electronic keypad.
- Locate the battery compartment on the inside of the safe door.
- Insert 4 AA batteries, ensuring correct polarity.
- To open the safe for the first time, use one of the emergency keys. Insert the key into the keyhole, turn it clockwise, and simultaneously turn the knob clockwise to open the door.
- The initial factory password is 159#. You can also open the safe by entering 159# on the keypad and turning the knob clockwise.
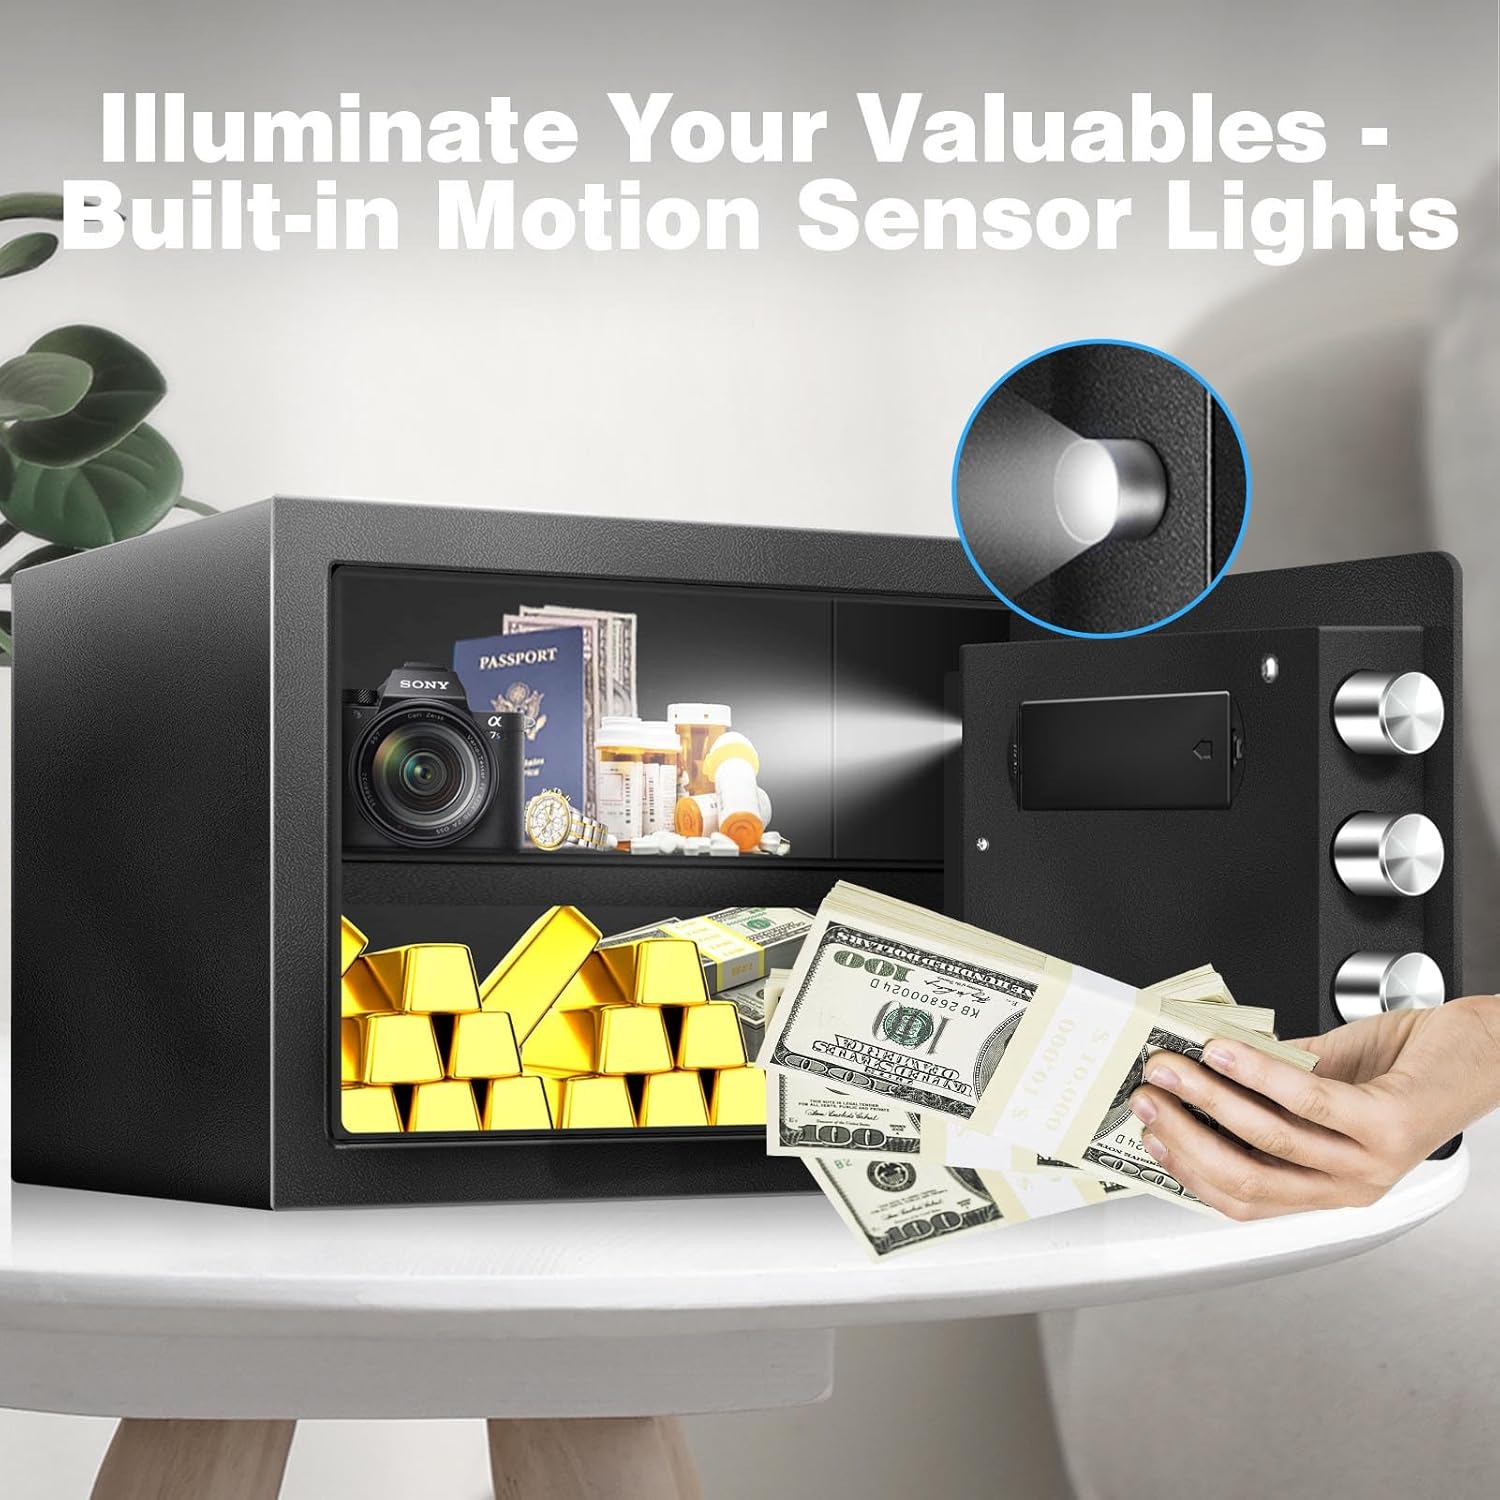
Figure 2: Initial Access and Battery. This image demonstrates the two methods for initial access: using the emergency key or the factory default passcode (159#) on the keypad, followed by turning the knob.
2. Mounting Instructions
For enhanced security, it is recommended to anchor the safe to a wall, floor, or inside a cabinet using the provided mounting hardware.
- Choose a suitable location for mounting. The safe has pre-drilled holes on the back and bottom.
- Position the safe and mark the drilling points through the pre-drilled holes onto the mounting surface.
- Drill pilot holes into the wall or floor at the marked positions.
- Align the safe with the drilled holes and secure it using the provided mounting screws. Ensure the screws are tightened firmly.

Figure 3: Wall Mounting. This diagram shows the process of securely mounting the safe to a wall, involving marking, drilling, and fastening.
Operating Instructions
1. Opening the Safe
The safe can be opened using either your programmed passcode or the emergency key.
- Using Passcode: Enter your 3-8 digit passcode followed by the '#' key. The green light will illuminate. Within 5 seconds, turn the knob clockwise to open the door.
- Using Emergency Key: If batteries are depleted or you forget your passcode, insert the emergency key into the keyhole, turn it clockwise, and simultaneously turn the knob clockwise to open the door.

Figure 4: Two Ways to Unlock. This image visually explains how to open the safe using either the electronic keypad with a passcode or the physical emergency key.
2. Changing Your Passcode
It is highly recommended to change the factory default passcode immediately after initial setup.
- With the safe door open, locate the red reset button on the inside of the door (often near the hinge or battery compartment).
- Press the red reset button. You will hear a beep, and the yellow light on the keypad will illuminate.
- Within 5 seconds, enter your new 3-8 digit passcode on the keypad, then press the '#' key.
- Test your new passcode with the door open to ensure it works correctly before closing the safe.
Figure 5: Password Reset Button. This image shows the location of the password reset button inside the safe door, used for changing the access code.
3. Smart Alarm System
The safe is equipped with a smart alarm system to deter unauthorized access.
- If an incorrect passcode is entered multiple times consecutively, the alarm will activate.
- Any attempts to tamper with or forcefully open the safe will also trigger the alarm.
- To silence the alarm, enter the correct passcode or use the emergency key.

Figure 6: Smart Alarm System. This image illustrates the safe's alarm system, which activates upon multiple incorrect code entries or tampering attempts.
4. Silent Keypad Mode
For discreet access, you can enable the silent keypad mode.
- To turn on silent mode: Press *633.
- To turn off silent mode: Press *66.
- When silent mode is active, the keypad will not emit beeping sounds during operation.

Figure 7: Optional Silent Mode. This image illustrates how to activate and deactivate the silent keypad mode for discreet operation.
5. Motion Sensor LED Light
The safe includes a built-in motion sensor LED light for improved visibility of contents in low-light conditions.
- The LED light automatically illuminates when the safe door is opened and motion is detected inside.
- The light will turn off automatically after a short period of inactivity.
Figure 8: Motion Sensor LED Light. This image demonstrates the internal LED light illuminating the safe's contents for easy viewing.
6. Movable Partition
The safe features a removable shelf to customize the interior storage space.
- The shelf can be easily inserted or removed to accommodate items of different sizes.
- To adjust, simply lift the shelf and reposition it on the desired support brackets.

Figure 9: Removable Shelf. This image illustrates the adjustable shelf feature, allowing for versatile organization of the safe's interior.
Maintenance
- Battery Replacement: Replace batteries annually or when the low battery indicator appears. Always use 4 new AA alkaline batteries. Do not mix old and new batteries.
- Cleaning: Wipe the safe's exterior with a soft, damp cloth. Avoid abrasive cleaners or solvents.
- Key Storage: Store emergency keys in a secure location away from the safe. Do not store them inside the safe.
Troubleshooting
| Problem | Possible Cause | Solution |
|---|---|---|
| Safe does not open with passcode. | Incorrect passcode entered; low batteries; keypad malfunction. |
|
| Keypad is unresponsive. | Dead batteries. | Replace batteries. Use emergency key if necessary. |
| Alarm sounds unexpectedly. | Multiple incorrect entries; tampering detected. | Enter correct passcode or use emergency key to silence. |
| Door does not close or lock properly. | Obstruction in door frame; locking bolts misaligned. |
|
| Battery pack hangs from wire. | Potential design or installation oversight. | Ensure the battery pack is securely placed within its designated compartment. If it consistently hangs, contact customer support for guidance. |
Specifications
| Feature | Detail |
|---|---|
| Brand | RETLLAS |
| Model Number | 30G |
| Product Dimensions (External) | 14.57"W x 12.2"D x 11.81"H |
| Capacity | 1.8 Cubic Feet |
| Lock Type | Electronic Combination Lock |
| Material | Alloy Steel |
| Color | Black |
| Special Features | Alarm System, Silent Keypad Mode, Motion Sensor LED Light, Movable Partition |
| Mounting Type | Floor Mount (also suitable for wall/cabinet) |
| Item Weight | 22.1 Pounds |
| Batteries Required | 4 x AA (not included) |
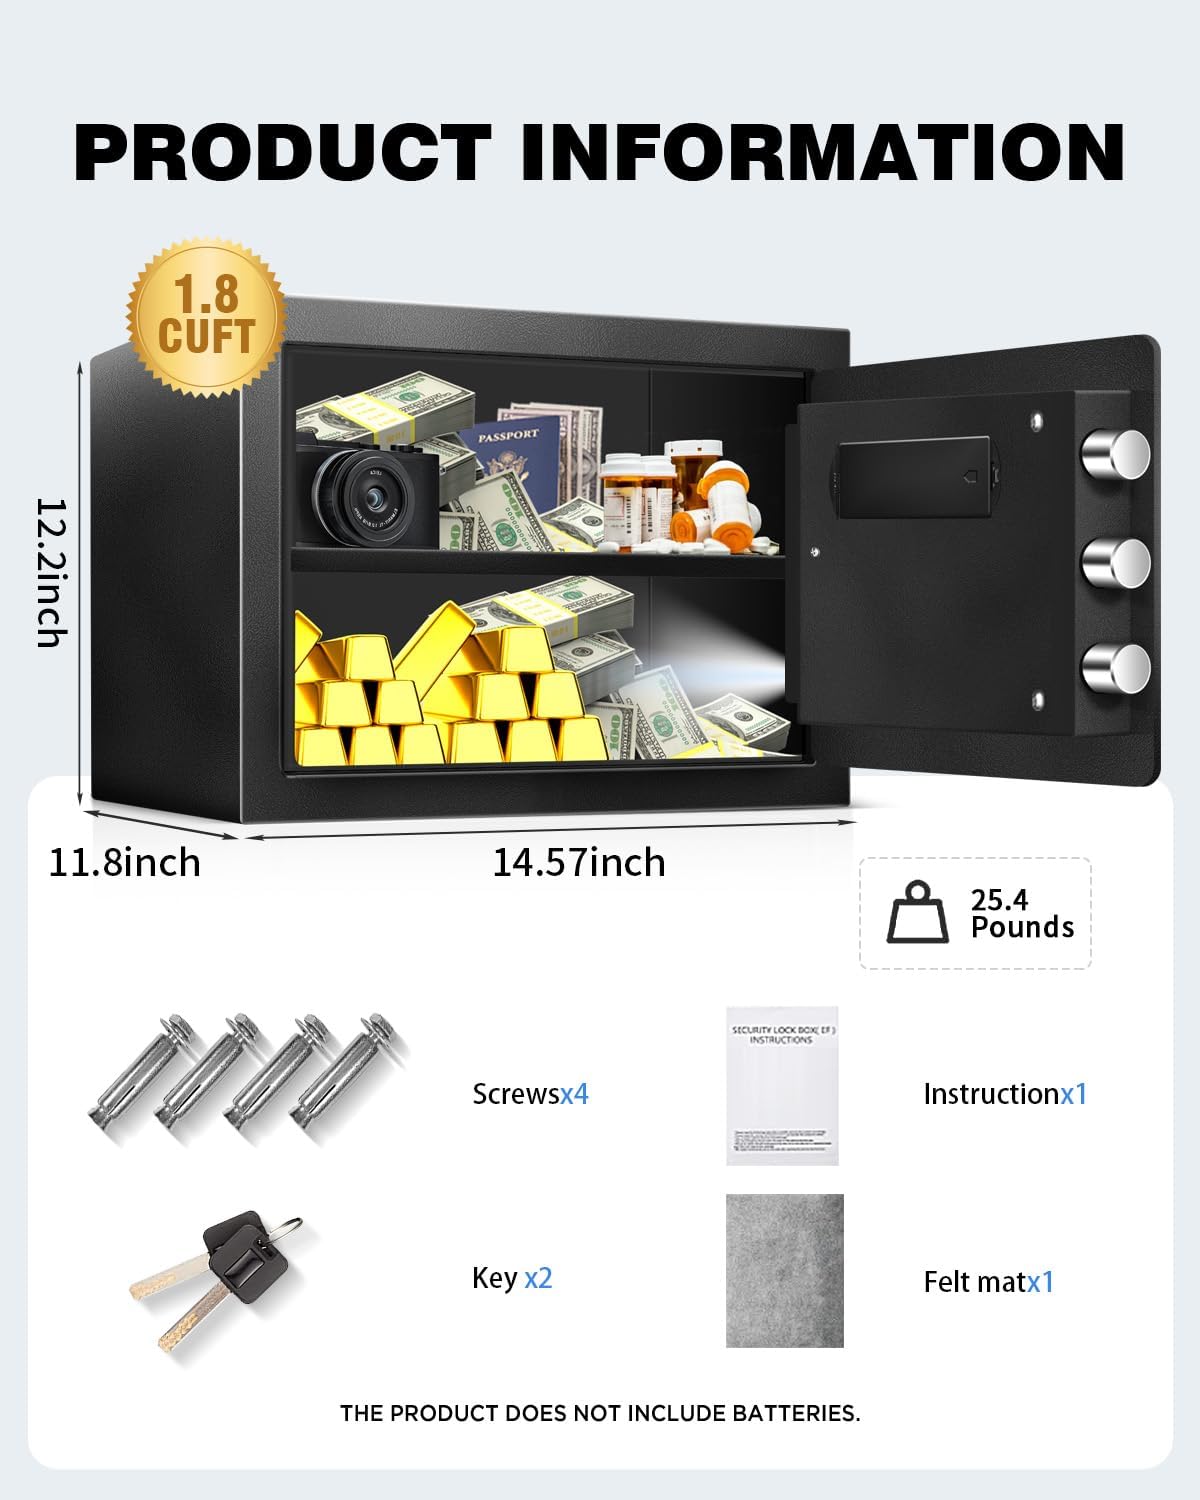
Figure 10: Product Information. This image provides a visual overview of the safe's key dimensions and weight.
Warranty and Support
RETLLAS offers a lifetime warranty for this product, ensuring long-term reliability and satisfaction.
For any questions, concerns, or technical assistance, please contact RETLLAS customer support. Our team is available 24/7 to provide assistance. Refer to the product packaging or the official RETLLAS website for contact details.


