
1. Introduction
The Srliya LM100A is a compact and portable infrared distance meter designed for accurate and efficient distance measurements up to 100 meters. This device is ideal for various applications requiring precise length, area, or volume calculations. Its ergonomic design ensures comfortable handling, while the clear display provides immediate data readings.
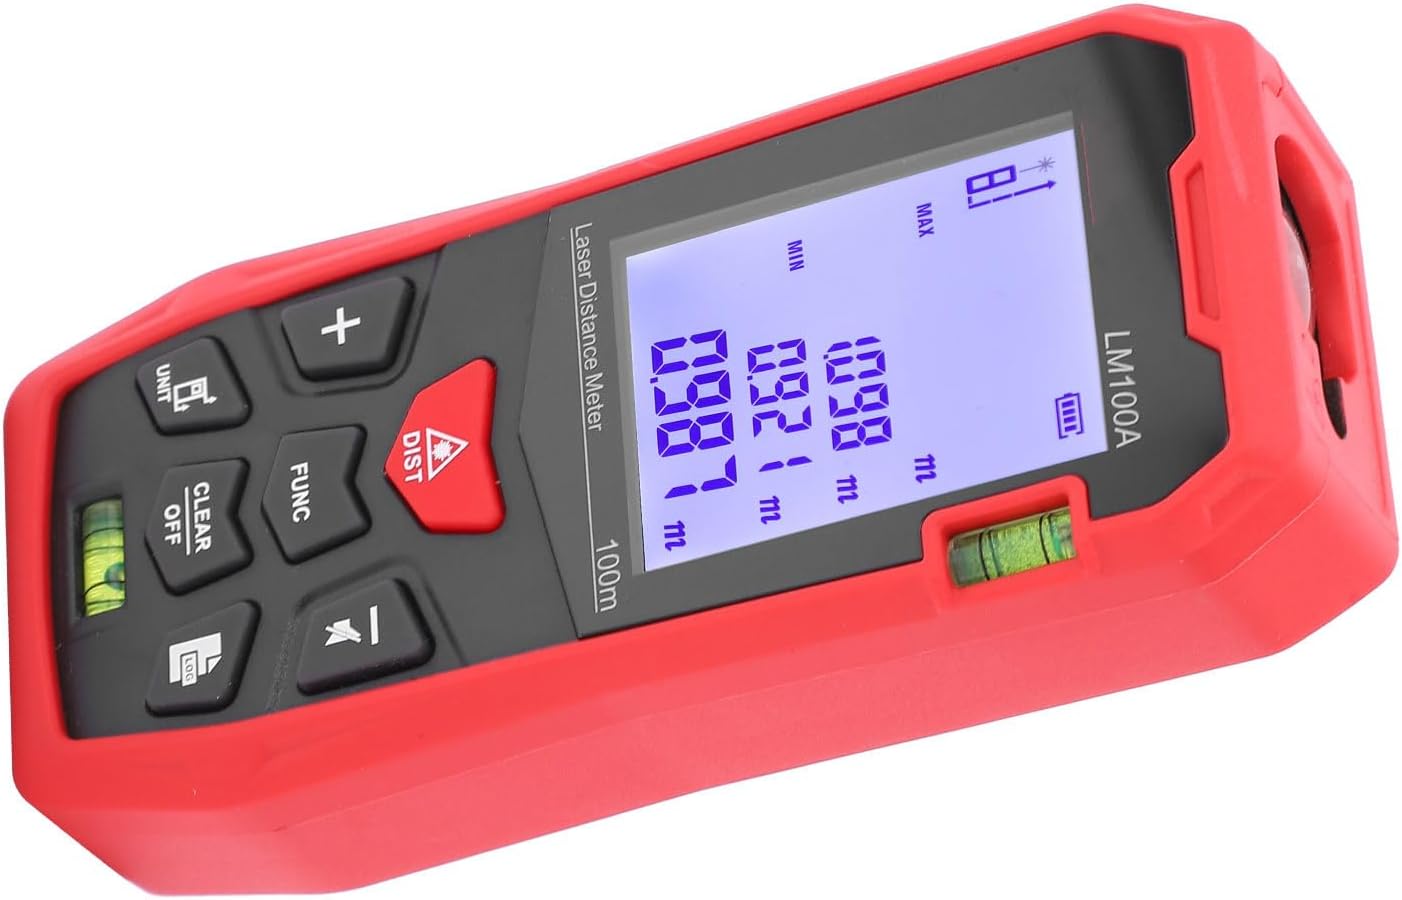
Figure 1.1: Srliya LM100A Infrared Distance Meter. This image displays the device from an angled perspective, highlighting its red casing, black control panel with various buttons, and the illuminated digital display showing measurement readings.
2. Package Contents
- 1 x Srliya LM100A Rangefinder (Battery Not Included)
- 1 x User Manual
- 1 x Tool Bag

Figure 2.1: Srliya LM100A Rangefinder with its accompanying black tool bag. The image shows the red and black rangefinder placed next to its protective carrying case.
3. Specifications
| Feature | Specification |
|---|---|
| Model | LM100A |
| Material | ABS (Acrylonitrile Butadiene Styrene) |
| Ranging Range | Approx. 100m / 328.1ft |
| Laser Class | Class II (630~670nm, <1mW) |
| Power Supply | 2 x AAA 1.5V Batteries (not included) |
| Number of Storage | 99 sets of data |
| Automatic Laser Cut-off | 20 seconds (single measurement) |
| Automatic Shutdown | Approx. 150 seconds |
| Maximum Battery Life | Approx. 8000 times measurements |
| Storage Temperature | -20℃ ~ 60℃ (-4℉ ~ 140℉) |
| Working Temperature | 0℃ ~ 40℃ (32℉ ~ 104℉) |
| Storage Humidity | 20% ~ 80% RH |
| Item Package Dimensions | 5.51 x 2.76 x 1.97 inches |
| Package Weight | 132 Grams |
4. Setup
4.1 Battery Installation
The Srliya LM100A requires two (2) AAA 1.5V batteries (not included) for operation.
- Locate the battery compartment cover on the back of the device.
- Gently slide the cover downwards or outwards to open the compartment.
- Insert two AAA batteries, ensuring the correct polarity (+ and -) as indicated inside the compartment.
- Close the battery compartment cover by sliding it back into place until it clicks securely.

Figure 4.1: Open battery compartment of the Srliya LM100A. This image shows the back of the red rangefinder with the battery cover removed, revealing the slots for two AAA batteries and polarity markings.
5. Operating Instructions
5.1 Device Layout and Buttons

Figure 5.1: Front view of the Srliya LM100A showing the display and control panel. The image highlights the large digital screen at the top and the array of black buttons below it, including 'DIST', 'FUNC', 'UNIT', 'CLEAR OFF', '+', and '-'.

Figure 5.2: Close-up view of the control buttons on the Srliya LM100A. This image provides a detailed look at the 'DIST' button (red triangle), 'FUNC', 'CLEAR OFF', 'UNIT', '+', and '-' buttons, along with the 'LOG' button.
- DIST Button (Red Triangle): Used to initiate a measurement.
- FUNC Button: Cycles through different measurement functions (e.g., single measurement, continuous measurement, area, volume).
- UNIT Button: Changes the unit of measurement (e.g., meters, feet, inches).
- CLEAR OFF Button: Clears the current measurement or turns off the device (long press).
- '+' Button: Used for addition in calculation modes or navigation.
- '-' Button: Used for subtraction in calculation modes or navigation.
- LOG Button: Accesses stored measurement data.
5.2 Basic Distance Measurement
- Power On: Press the DIST button briefly to power on the device. The display will illuminate.
- Standby Mode: The device enters standby mode after powering on.
- Initiate Measurement: In standby mode, short press the DIST button. The instrument will emit a laser beam to lock onto the measurement point.
- Perform Measurement: Press the DIST button again to perform a single distance measurement.
- Read Result: The measurement result will be displayed in the main display area.
5.3 Changing Units
To change the unit of measurement (e.g., from meters to feet or inches), press the UNIT button repeatedly until your desired unit is displayed.
5.4 Accessing Stored Data
The device can store up to 99 sets of measurement data. To access this data, press the LOG button. Use the + and - buttons to navigate through the stored records.
6. Maintenance
- Cleaning: Use a soft, dry cloth to clean the device. Do not use abrasive cleaners or solvents. Ensure the laser lens and display are kept clean for optimal performance.
- Storage: When not in use for extended periods, remove the batteries to prevent leakage and store the device in its tool bag in a cool, dry place, away from direct sunlight and extreme temperatures.
- Battery Replacement: Replace batteries when the low battery indicator appears on the display to ensure accurate measurements.
- Avoid Impact: Protect the device from drops and impacts, as this can damage internal components or affect calibration.
7. Troubleshooting
| Problem | Possible Cause | Solution |
|---|---|---|
| Device does not power on. | Batteries are dead or incorrectly installed. | Check battery polarity. Replace with new AAA batteries. |
| Inaccurate measurements. | Laser lens is dirty; target surface is too reflective/absorbent; device is not stable during measurement. | Clean the laser lens with a soft cloth. Measure against a non-reflective, solid surface. Ensure the device is held steady. |
| Laser does not emit. | Device in standby; internal error. | Ensure the device is powered on and press the DIST button to activate the laser. If problem persists, try removing and reinserting batteries. |
| Display is blank or flickering. | Low battery; environmental interference. | Replace batteries. Move to an environment with stable temperature and humidity. |
8. Warranty and Support
The Srliya LM100A Rangefinder comes with a manufacturer warranty for 90 days from the date of purchase. This warranty covers defects in materials and workmanship under normal use.
For warranty claims, technical support, or any inquiries regarding your device, please contact the manufacturer or your point of purchase. Please retain your proof of purchase for warranty validation.