
Introduction
This manual provides comprehensive instructions for the installation, operation, and maintenance of your NB ERGONOMIC Gaming Monitor Arm, Model A5. Designed for flat, ultrawide, and curved monitors ranging from 27 to 50 inches, this heavy-duty mount supports loads up to 18 kg and is compatible with VESA 75x75 mm and 100x100 mm patterns. Please read this manual thoroughly before installation and use to ensure proper functionality and safety.
Key Features
- Robust Compatibility: Supports flat, ultrawide, and curved monitors from 27 to 50 inches.
- High Load Capacity: Safely holds monitors weighing between 2 kg and 18 kg.
- VESA Standard Support: Compatible with VESA 75x75 mm and 100x100 mm mounting patterns.
- Flexible Adjustments: Offers upright adjustment of 250 mm (9.8 inches), 360-degree rotation, tilt angles from -50 to +50 degrees, and swivel angles from -90 to +90 degrees.
- Ergonomic Design: Allows for precise positioning of your monitor to reduce strain on the spine, neck, and shoulders, promoting a healthier posture during long gaming or work sessions.
- Integrated Cable Management: Features a cable slot to keep wires organized and protected, freeing up desktop space and reducing clutter.
- Quick Installation: Designed for easy setup with detailed instructions and all necessary hardware included.
- Durable Construction: Made from high-quality aluminum alloy, cold-rolled steel, and ABS for long-lasting performance and scratch resistance.
- Mechanical Spring System: Ensures stable and smooth adjustments, tested for over 50,000 exercise cycles.
Setup and Installation
Follow these steps for a secure and efficient installation of your monitor arm.
1. Check Desktop Compatibility
Ensure your desktop is suitable for monitor arm installation. Avoid fragile materials like marble or glass, desks with too narrow clamp surfaces due to bottom baffles, or desks with irregular or beveled edges.
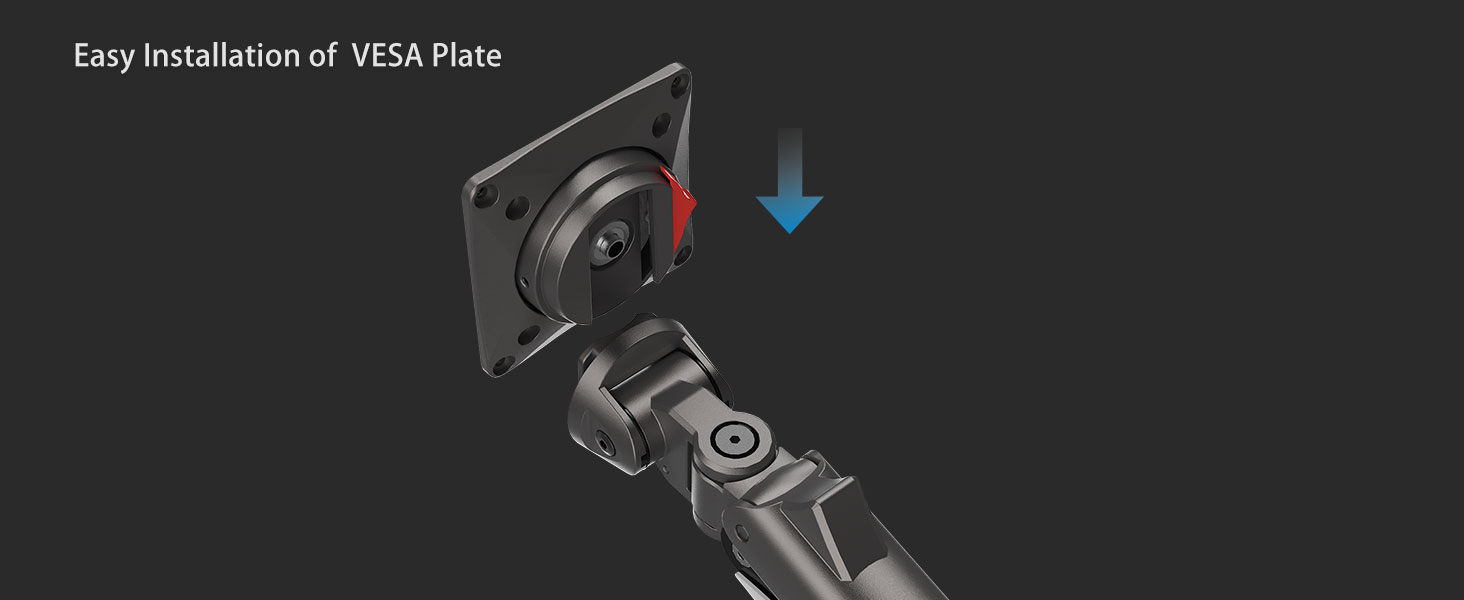
Figure 1: Examples of unsuitable desktop surfaces (fragile, narrow, irregular edges).
The monitor arm supports two mounting types: Grommet and C-Clamp. Both require a desk thickness between 20-90mm (0.8"-3.5"). For Grommet type, the hole diameter should be 10-60mm (0.4"-2.3"). For C-Clamp type, the depth of the bottom above should be >50mm (1.97").
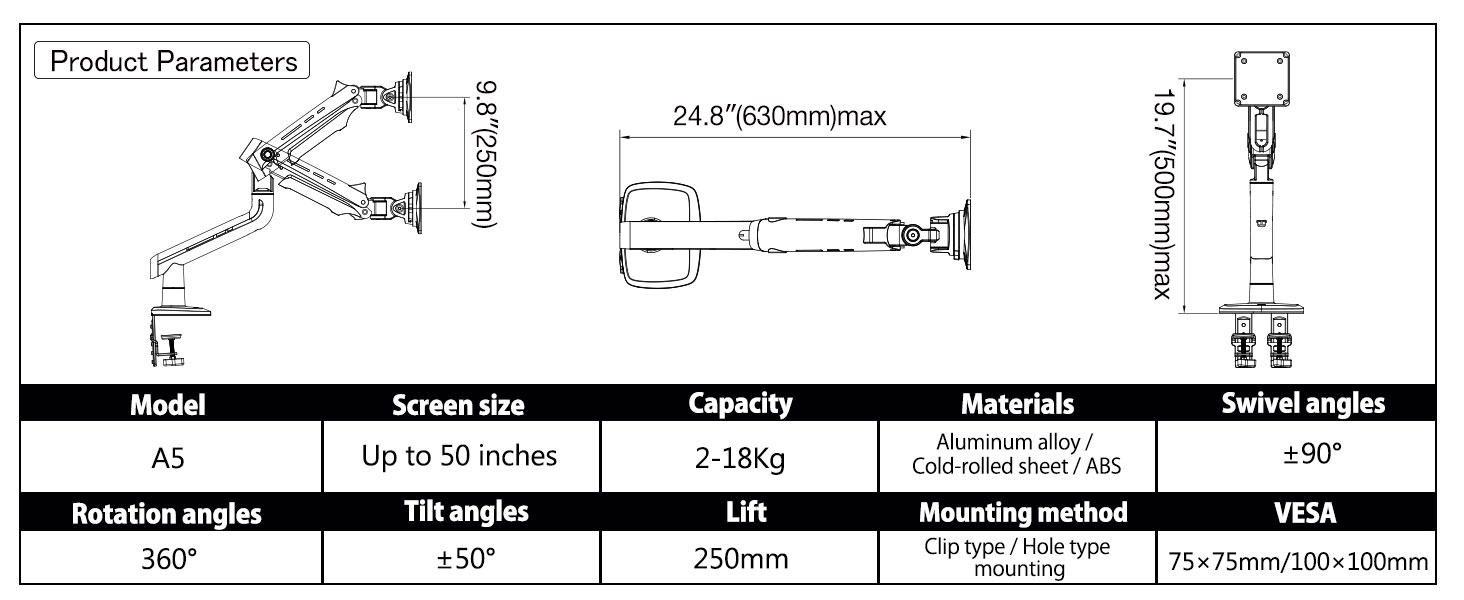
Figure 2: Grommet and C-Clamp mounting options with desk thickness and hole/depth requirements.
2. Confirm VESA Hole Position on Monitor
Locate the VESA mounting holes on the back of your monitor. These are typically square patterns of 75x75mm or 100x100mm. If your monitor has an embedded hole, you can use the heightening pads and lengthened screws provided in the screw package if the embedded position is small or the panel cannot be placed directly.

Figure 3: Identifying VESA mounting holes and options for embedded holes.
3. Assemble the Monitor Arm
The package includes all necessary hardware. Begin by installing the product base to your desk using either the C-Clamp or Grommet method. Then, attach the VESA plate to your monitor.

Figure 4: Overview of monitor arm components and mounting options.

Figure 5: Quick installation of the VESA plate onto the monitor arm.
Once the base is secure and the VESA plate is attached to your monitor, mount your monitor onto the arm. The quick-release VESA head allows for easy attachment and detachment.
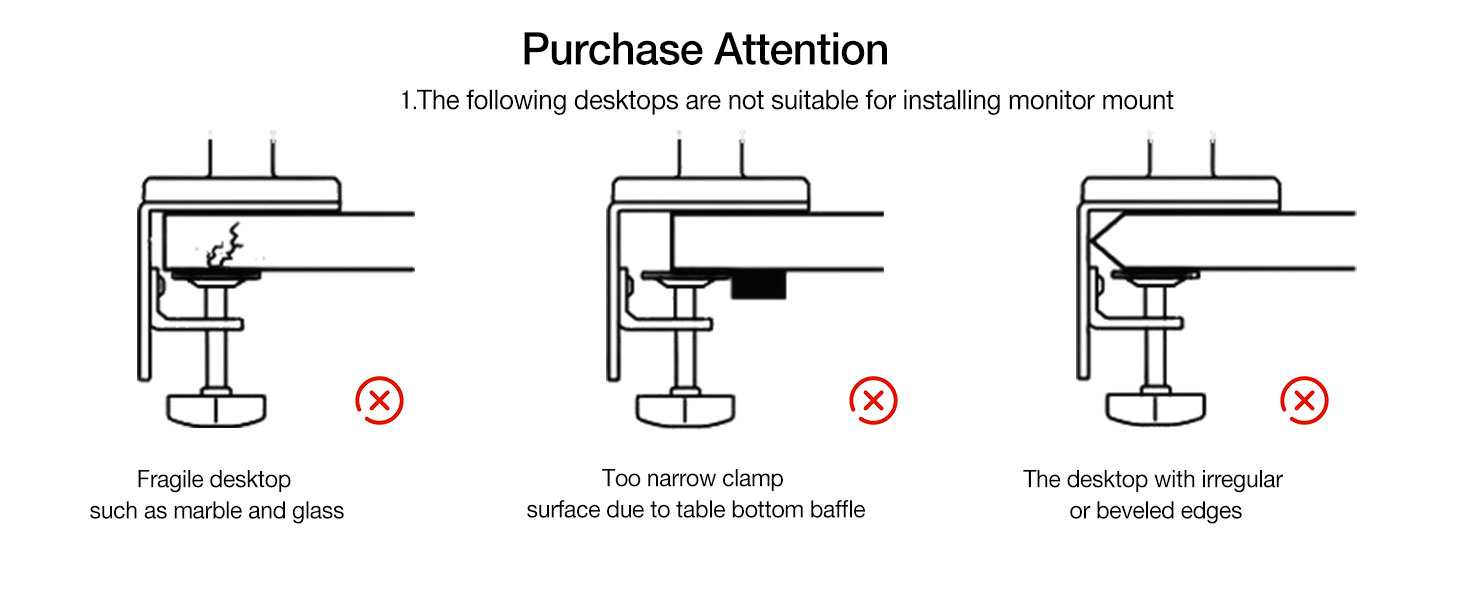
Figure 6: Monitor mounted on the arm, demonstrating cable management.
4. Adjust Tension
After mounting the monitor, you will need to adjust the tension screw to match your monitor's weight. Important: Do not adjust the tension screw without the monitor on the arm.
- If the monitor raises up, turn the tension screw in the "-" direction to reduce tension for a lighter monitor.
- If the monitor falls down, turn the tension screw in the "+" direction to increase tension for a heavier monitor.
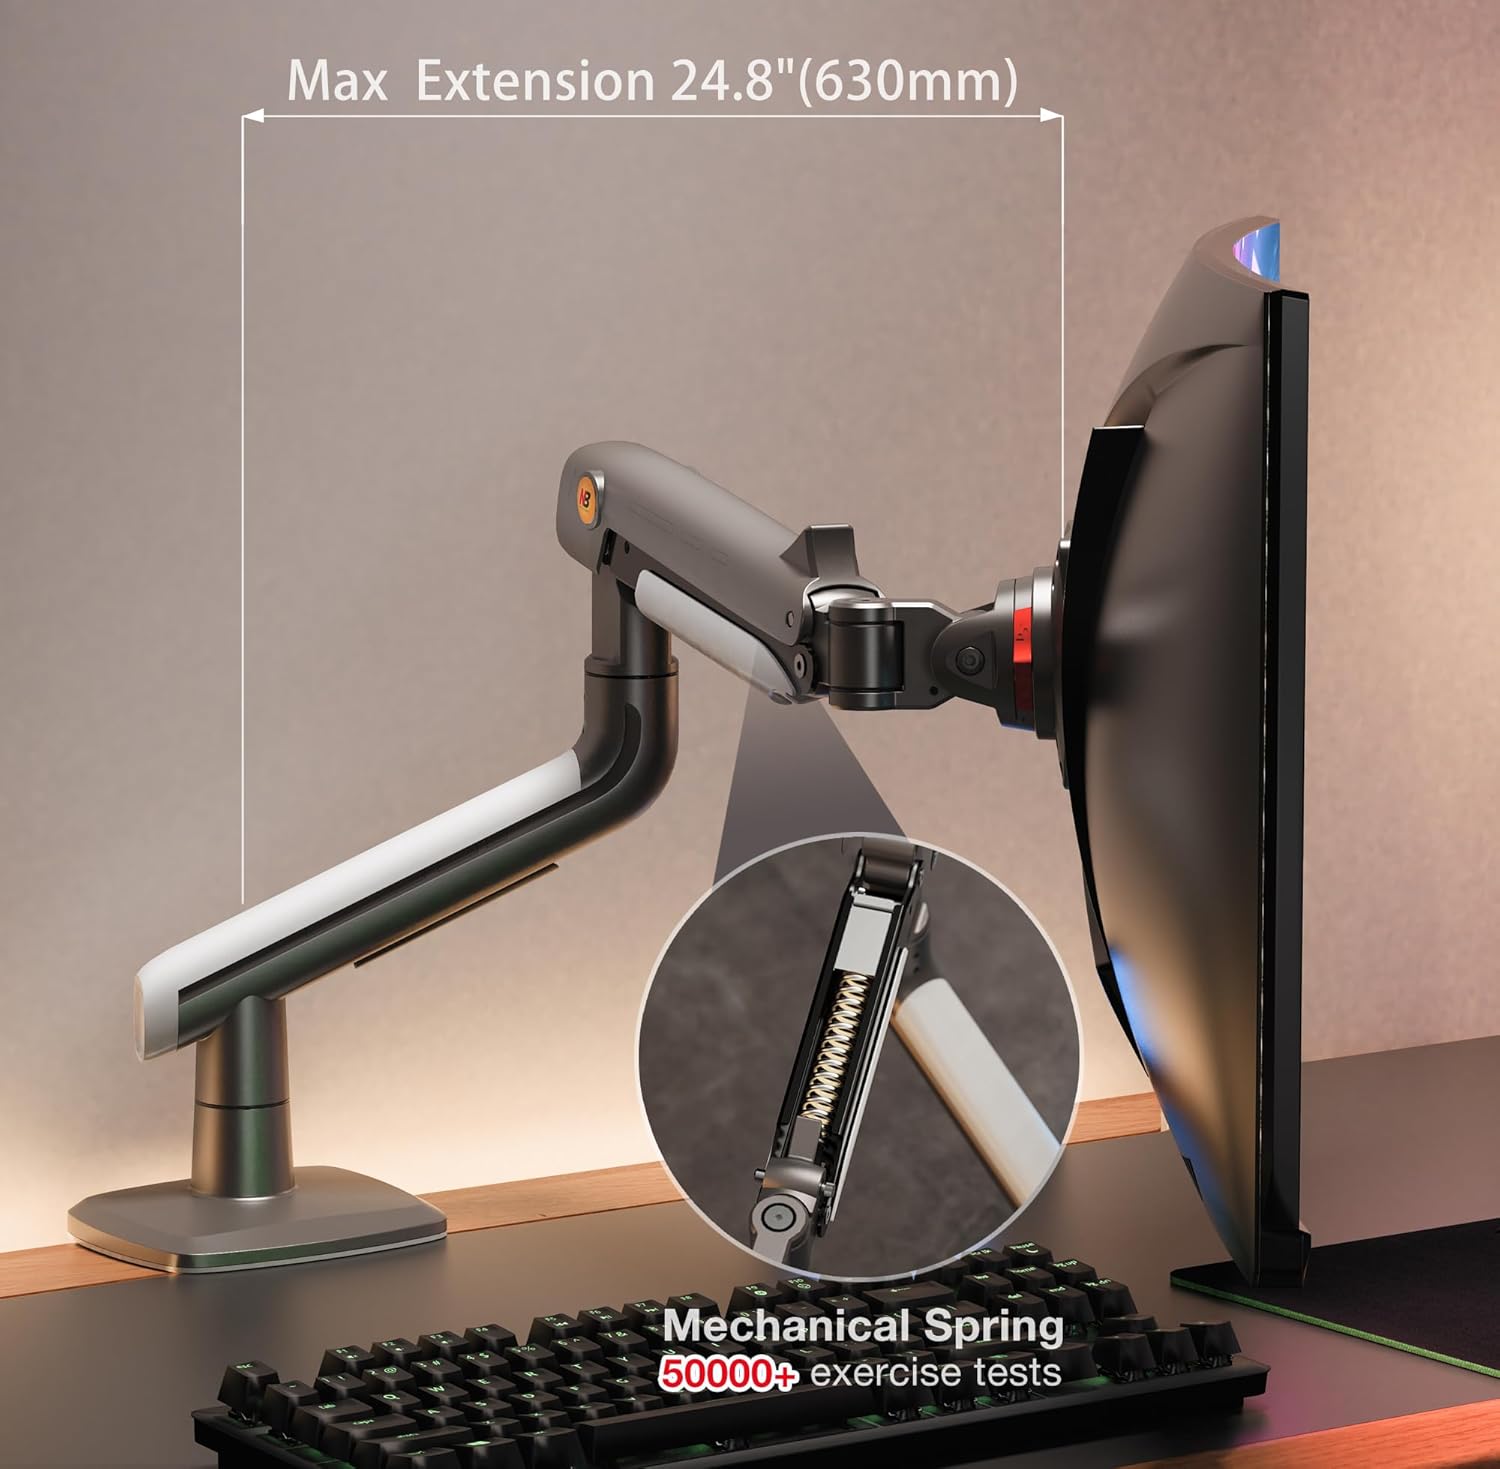
Figure 7: Location of the tension adjustment screw.
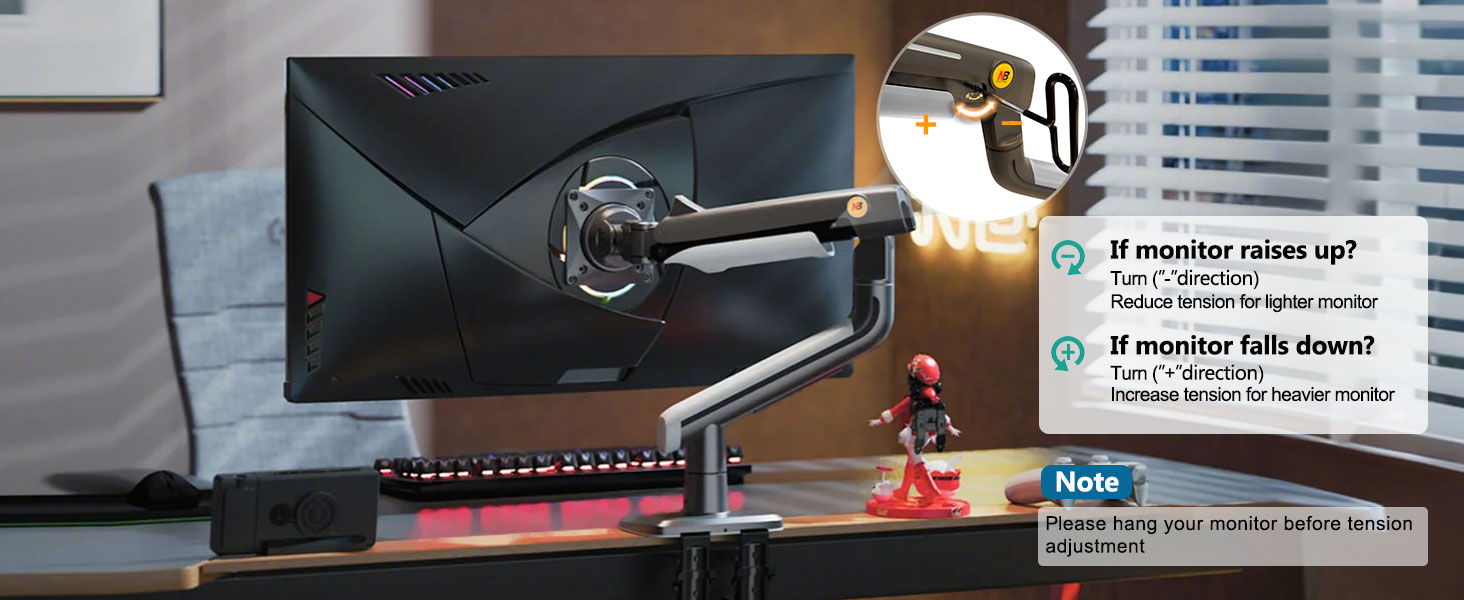
Figure 8: Guide for adjusting arm tension for optimal monitor stability.
Operating the Monitor Arm
The NB ERGONOMIC Monitor Arm A5 offers a wide range of motion for optimal viewing comfort and ergonomic benefits.
Adjustments
- Height Adjustment: The arm allows for an upright adjustment of up to 250 mm (9.8 inches), enabling you to position your monitor at eye level.
- Rotation: The monitor can rotate 360 degrees, allowing for easy switching between landscape and portrait orientations.
- Tilt: Adjust the screen's vertical angle with a tilt range of -50 to +50 degrees to reduce glare and optimize viewing.
- Swivel: Pivot the monitor horizontally up to 360 degrees (-90 to +90 degrees from center) to share your screen or adjust your viewing angle from different positions.
- Extension: The arm can extend up to 630 mm (24.8 inches) from the mounting point, providing ample reach.
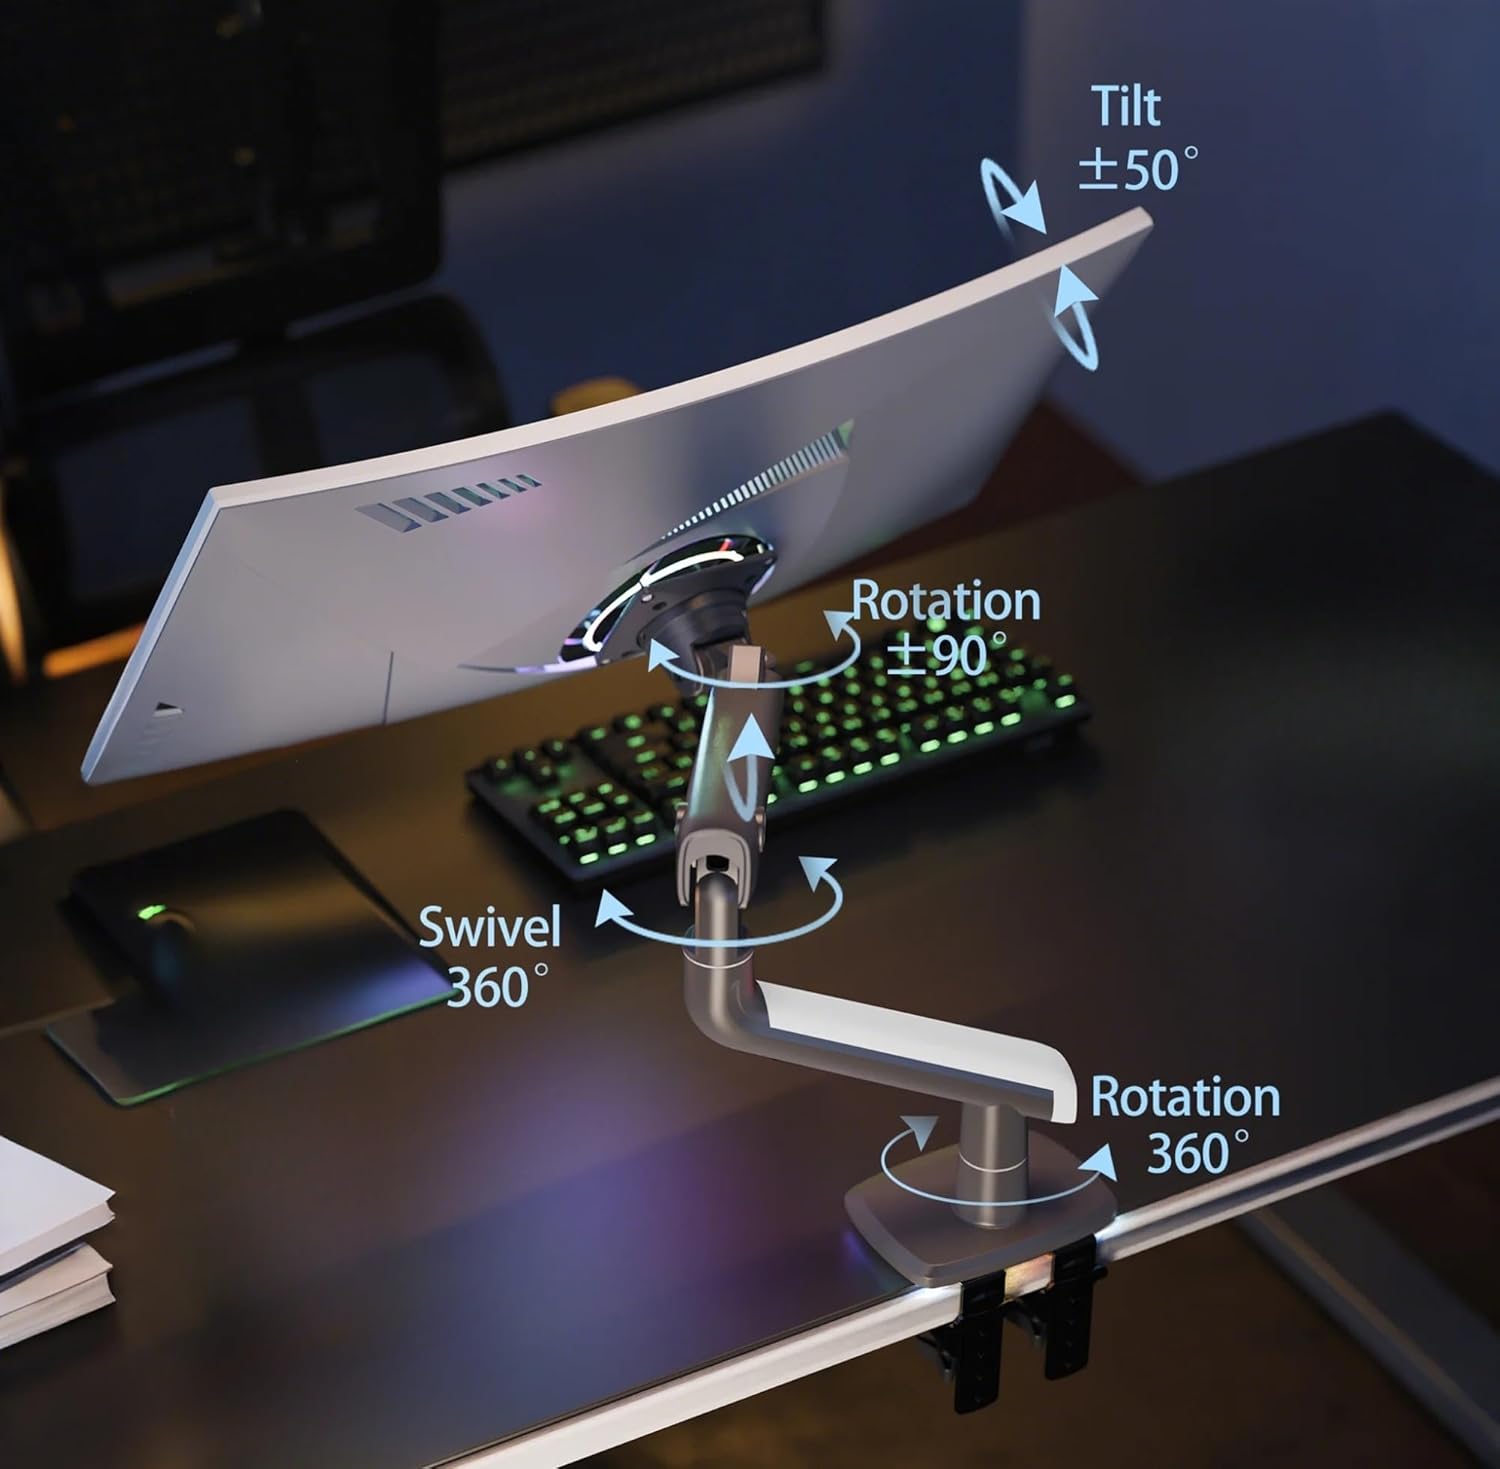
Figure 9: Illustrates the full range of motion for the monitor arm.

Figure 10: Demonstrates the monitor arm's vertical height adjustment range.
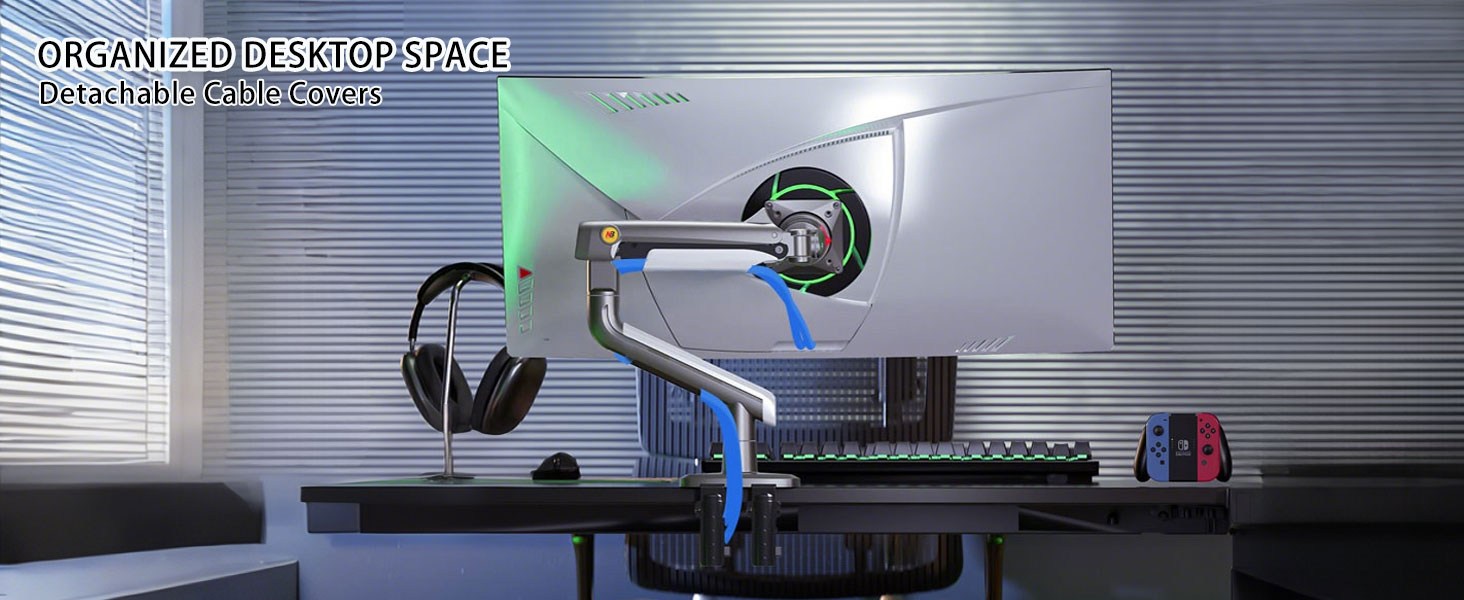
Figure 11: Illustrates the maximum horizontal extension of the monitor arm.
Cable Management
The monitor arm features detachable cable covers along its arm. Route your monitor and power cables through these channels to maintain a clean and organized workspace.
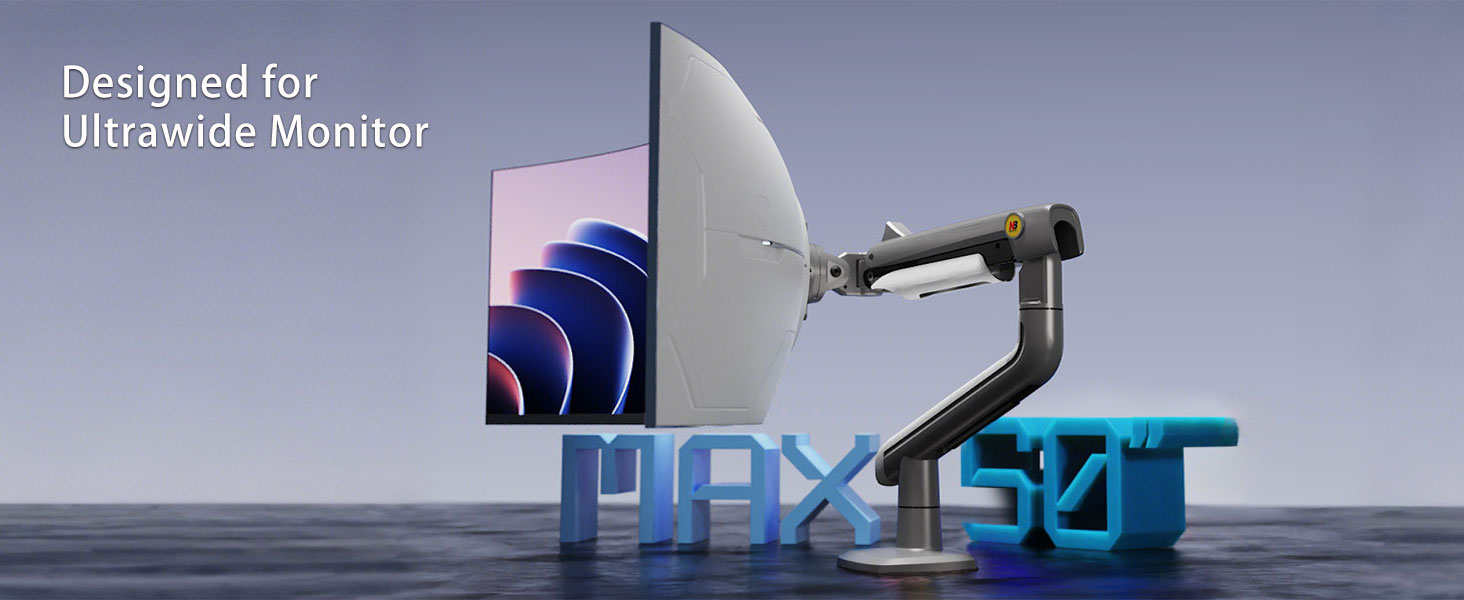
Figure 12: Cables neatly organized within the arm's cable management channels.
Product Video
Video 1: Official product demonstration of the NB ERGONOMIC Gaming Monitor Arm A5, showcasing its features and adjustments.
Maintenance
To ensure the longevity and optimal performance of your monitor arm, regular maintenance is recommended:
- Cleaning: Wipe the arm surfaces with a soft, damp cloth. Avoid abrasive cleaners or solvents that could damage the finish.
- Check Connections: Periodically check all screws and mounting points to ensure they remain tight and secure.
- Tension Adjustment: If you notice the monitor sagging or rising unexpectedly, re-adjust the tension as described in the "Setup and Installation" section.
Troubleshooting
If you encounter any issues with your monitor arm, refer to the following common solutions:
- Monitor Sags/Doesn't Stay Up: The arm tension is too low for the monitor's weight. Increase the tension using the adjustment screw (turn in "+" direction). Ensure the monitor's weight is within the 2-18 kg (4.4-39.6 lbs) range.
- Monitor Rises/Doesn't Stay Down: The arm tension is too high for the monitor's weight. Decrease the tension using the adjustment screw (turn in "-" direction).
- Arm is Loose/Wobbly: Check all mounting screws (desk clamp/grommet and VESA plate screws) to ensure they are securely tightened.
- Difficulty Adjusting: Ensure the tension is correctly set for your monitor's weight. If movements are stiff, try lubricating pivot points with a silicone-based lubricant (avoid oil-based lubricants).
Specifications
| Parameter | Value |
|---|---|
| Model | A5 |
| Brand | NB ERGONOMIC |
| Screen Size Compatibility | 27'' to 50'' |
| Load Capacity | 2 kg to 18 kg (4.4 lbs to 39.6 lbs) |
| VESA Compatibility | 75x75 mm, 100x100 mm |
| Upright Adjustment | 250 mm (9.8 inches) |
| Rotation Angles | 360 degrees |
| Tilt Angles | -50 to +50 degrees |
| Swivel Angles | -90 to +90 degrees |
| Max Extension | 630 mm (24.8 inches) |
| Materials | Aluminum alloy, Cold-rolled sheet, ABS |
| Mounting Type | C-Clamp / Grommet |
| Item Weight | 11 pounds |
| Product Dimensions | 24.41 x 7.09 x 19.29 inches |
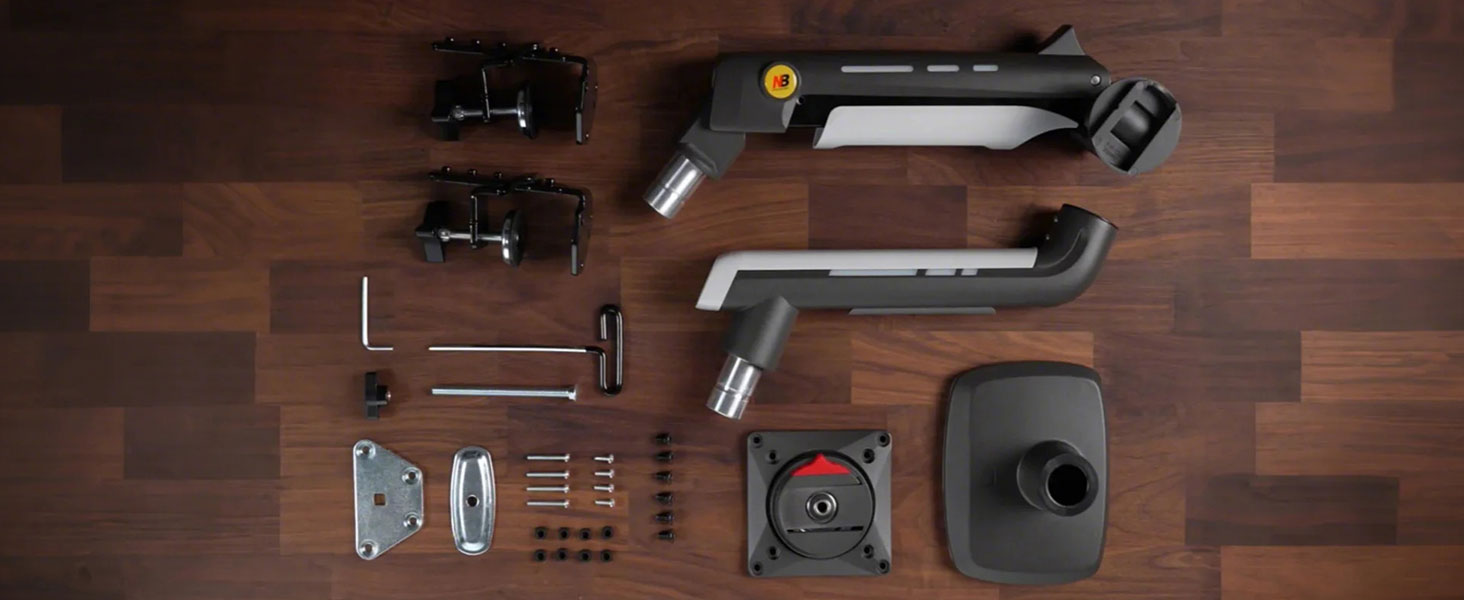
Figure 13: Detailed product parameters and dimensions.
Warranty and Support
Your NB ERGONOMIC Monitor Arm A5 comes with a standard manufacturer's warranty. For specific warranty details, claims, or technical support, please refer to the warranty card included in your product packaging or visit the official NB ERGONOMIC website. Keep your purchase receipt as proof of purchase.