
Introduction
This manual provides detailed instructions for the installation, operation, and maintenance of your AZDOME GS63Pro Dash Cam. Please read this manual thoroughly before using the product to ensure proper function and safety. Keep this manual for future reference.
Package Contents
Verify that all items listed below are included in your package:
- AZDOME GS63Pro 4K Dash Cam (Front Camera)

Image: The main 4K dash camera unit.
- 1080P Rear Camera (with 6m/20ft cable)

Image: The rear camera unit with its connecting cable.
- Dual USB Car Charger
- 360° 3M Sticky Mount
- 360° Suction Mount
- Type-C Charging Cable (3.5m/12ft)
- Cable Clips (x5)
- Installation Tool
- Electrostatic Stickers (2 Large, 2 Small)
- User Manual
Product Overview
Main Unit (Front Camera)
The front camera features a 2.4-inch LCD screen, lens, and control buttons. It records in 4K UHD resolution.
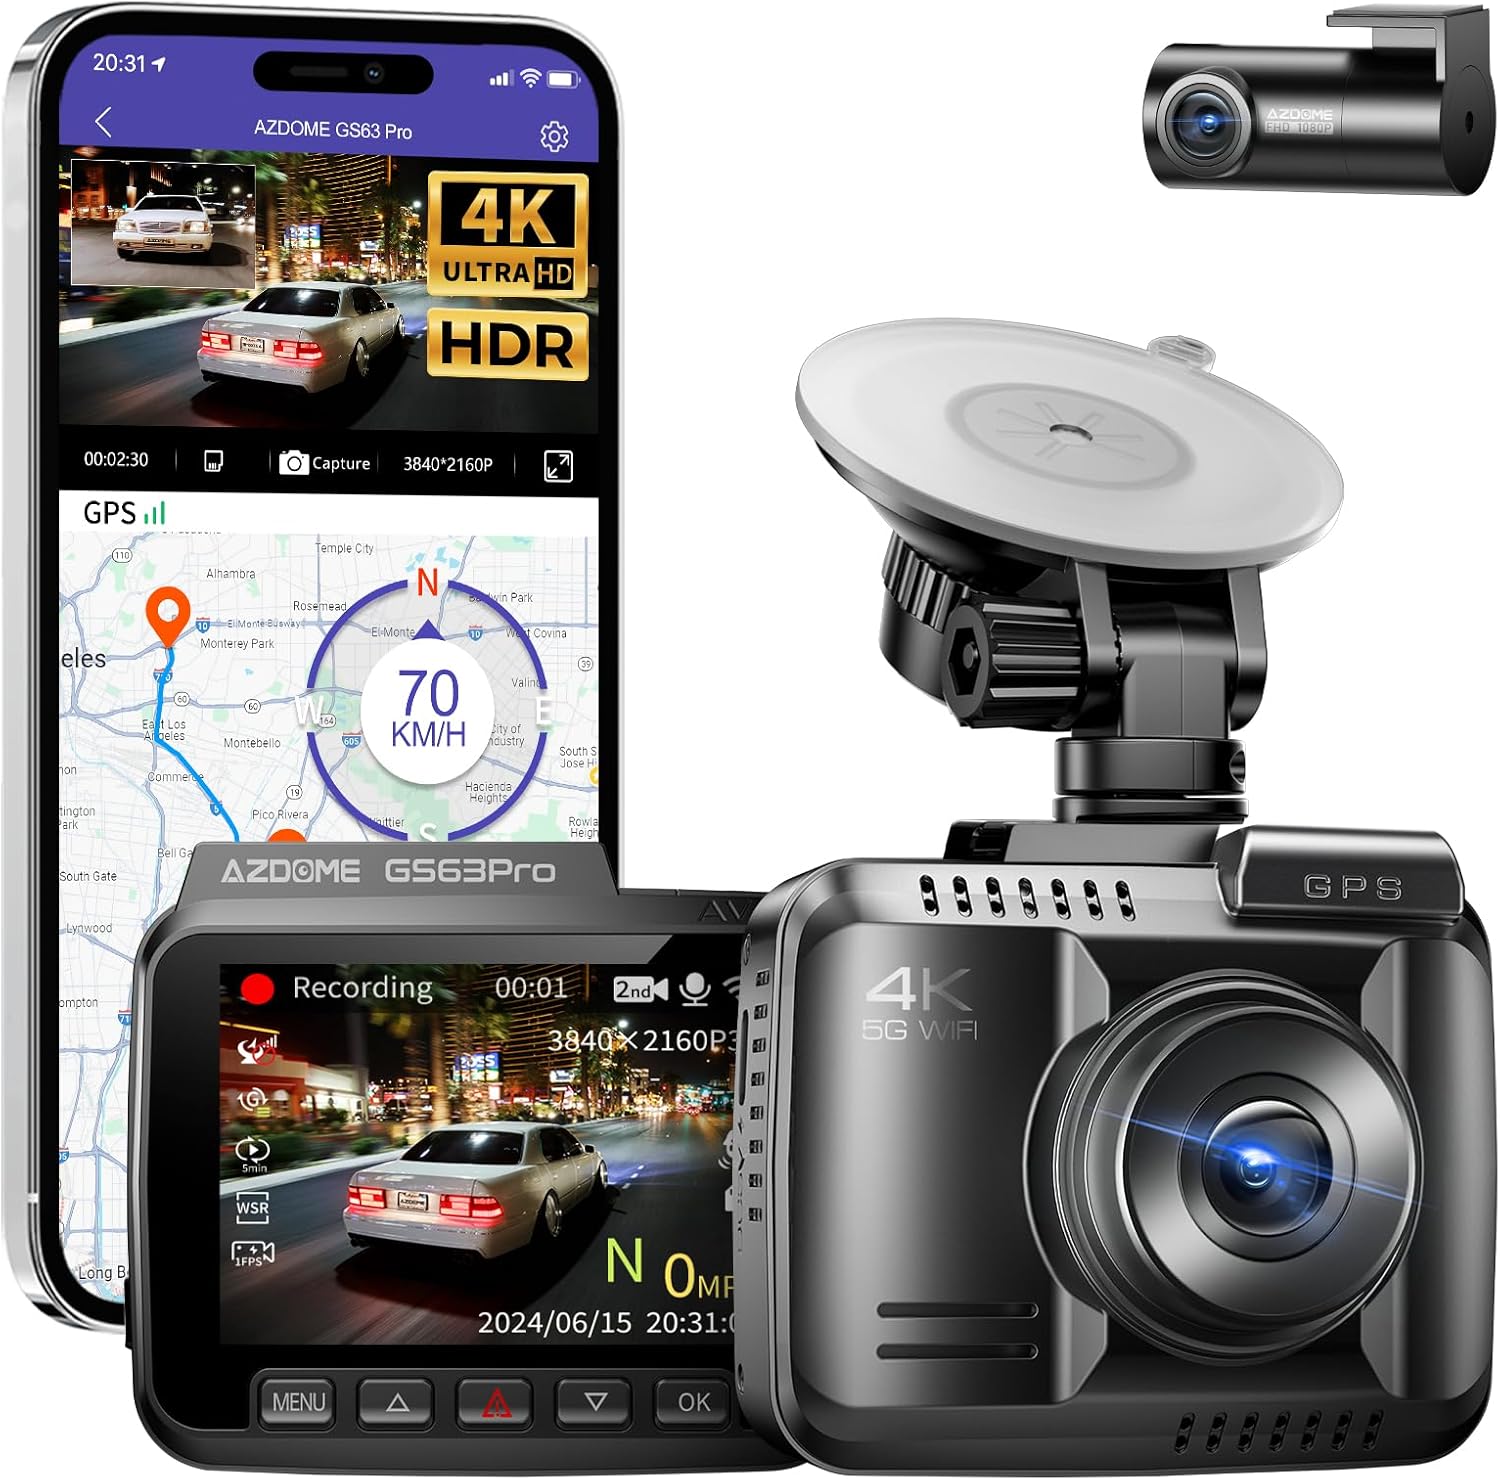
Image: Front view of the AZDOME GS63Pro dash camera, showing the lens and screen.
Rear Camera
The rear camera provides 1080P FHD recording and connects to the main unit via a cable.
Image: The compact rear camera unit.
Key Features
- Integrated 128GB eMMC Storage: Eliminates the need for an external SD card, providing stable and reliable recording.
- Dual Recording (4K Front + 1080P Rear): Captures clear and detailed footage from both front and rear views.

Image: Illustration showing simultaneous 4K front and 1080P rear recording.
- HDR/WDR Technology: Enhances image quality in varying light conditions, especially for night vision, using an advanced 4-megapixel OS04A10 image sensor.

Image: Comparison of normal and HDR/WDR enhanced night vision footage.
- 5.8GHz WiFi Connectivity: Allows seamless connection to the AZDOME app on your smartphone for viewing, playback, downloading, and sharing videos.

Image: Diagram illustrating 5.8GHz WiFi connection to a smartphone app for control and data transfer.
- Built-in GPS: Records accurate route and speed information, viewable via the AZDOME app player.

Image: Screenshot of the AZDOME app showing GPS route tracking on a map.
- 24-Hour Parking Monitoring: (Requires optional hardwire kit) Detects impacts via G-sensor and records automatically. Supports time-lapse recording.

Image: Benefits of the AZDOME OBD hardwire kit for parking monitoring, including intelligent recognition and low voltage monitoring.
- Compact Design: Minimizes obstruction of driver's view.
Setup
1. Initial Power-On and Language Settings
- Connect the dash cam to a power source using the provided car charger.
- The device will power on automatically.
- On the screen, select your preferred language (e.g., English).
- Set the correct time zone (e.g., GMT+9 for Japan).
- Adjust the date and time settings.
Note: Before permanent installation, it is recommended to test the main unit and rear camera by connecting them to power to ensure they function correctly.
2. Mounting the Dash Cam
Choose a mounting location on your windshield that does not obstruct your view. Clean the windshield surface thoroughly before applying the mount.
- Using the Suction Mount: Attach the suction mount to the windshield and secure the dash cam.
- Using the 3M Sticky Mount: Apply an electrostatic sticker to the windshield first, then attach the 3M sticky mount to the sticker. This allows for easier removal without leaving residue.

Image: Example of the dash cam mounted on a windshield.
3. Installing the Rear Camera
Mount the rear camera on the rear windshield. Route the rear camera cable neatly along the car's interior trim to the front dash cam unit. Use the provided cable clips and installation tool to hide the cable.

Image: Illustration of routing the rear camera cable.
4. Power Connection
Connect the Type-C charging cable to the dash cam and plug the dual USB car charger into your vehicle's cigarette lighter socket. The dash cam will power on and begin recording automatically when the vehicle starts.
Operating Instructions
Basic Recording
- Automatic Recording: The dash cam starts recording automatically when powered on.
- Loop Recording: The device records in continuous loops, overwriting the oldest files when the storage is full. Important files can be locked to prevent overwriting.
- G-Sensor: In case of a sudden impact or collision, the G-sensor automatically locks the current recording to prevent it from being overwritten.
Menu Navigation
Use the buttons on the dash cam to navigate through the menu options. The specific button functions (Menu, Up, Down, OK) are typically labeled on the device or explained in the quick start guide.
- Video Resolution: Adjust front and rear camera resolutions.
- Loop Recording Duration: Set the length of each video segment (e.g., 1, 3, 5 minutes).
- G-Sensor Sensitivity: Adjust the sensitivity of impact detection.
- Exposure Compensation: Fine-tune brightness levels.
- Date/Time Stamp: Enable or disable the date and time display on recordings.
Using the AZDOME App (5.8GHz WiFi)
- Download the "AZDOME" app from the App Store (iOS) or Google Play Store (Android).

Image: Screenshot showing the AZDOME app interface and download options.
- Turn on WiFi on your smartphone.
- On the dash cam, enable WiFi (refer to the dash cam's menu).
- Connect your smartphone to the dash cam's WiFi network (SSID: AZDOME-GS63Pro-XXXX, Password: 12345678).
- Open the AZDOME app to view live footage, playback recorded videos, download files to your phone, or share them.
The 5.8GHz WiFi offers faster download speeds compared to 2.4GHz.
GPS Functionality
The built-in GPS module automatically records your driving route and speed. This data can be viewed using the AZDOME app player on your smartphone or computer.
Parking Monitoring (Optional)
To enable 24-hour parking monitoring, an optional hardwire kit (AZDOME OBD Hardwire Kit) is required. This kit provides continuous power to the dash cam after the engine is turned off, protecting against various risks.
- G-Sensor Detection: If an impact is detected while parked, the dash cam will automatically power on and record a short video, then lock the file.
- Motion Detection: The dash cam can be set to record when motion is detected in front of the vehicle.
- Time-Lapse Recording: Records continuously at a low frame rate (e.g., 1 frame per second) to save storage space while covering a long period.
Image: Benefits of the AZDOME OBD hardwire kit for parking monitoring, including intelligent recognition and low voltage monitoring.

Image: Diagram showing multiple protection features of the hardwire kit, such as safety protection, input short circuit protection, and output overvoltage protection.
ADAS (Advanced Driver-Assistance System)
The GS63Pro may include ADAS features to enhance driving safety. These typically include:
- Lane Departure Warning: Alerts you if your vehicle drifts out of its lane.
- Forward Collision Warning: Warns you of a potential collision with a vehicle ahead.
- Pedestrian Collision Warning: Alerts you to potential collisions with pedestrians.

Image: Visual representation of ADAS features: lane departure warning, forward collision warning, and pedestrian collision warning.
Maintenance
- Cleaning: Use a soft, dry cloth to clean the camera lens and screen. Avoid using abrasive cleaners or solvents.
- Firmware Updates: Periodically check the AZDOME official website for firmware updates to ensure optimal performance and new features.
- Data Backup: Regularly download important video files to your computer or cloud storage to prevent loss.
- Temperature: Avoid exposing the dash cam to extreme temperatures (hot or cold) for extended periods, as this can affect battery life and device performance.
Troubleshooting
| Problem | Possible Cause / Solution |
|---|---|
| Dash cam does not power on. |
|
| Recording stops unexpectedly. |
|
| Video footage is blurry or unclear. |
|
| WiFi connection issues with the app. |
|
| Parking monitoring not working. |
|
Specifications
| Feature | Detail |
|---|---|
| Brand | AZDOME |
| Model Name | GS63Pro |
| Video Resolution | Front: 4K (3840x2160P), Rear: 1080P |
| Internal Storage | 128GB eMMC |
| Connectivity | 5.8G WiFi, GPS |
| Special Features | HDR/WDR, App Control, Night Vision, G-Sensor, Parking Monitor (optional hardwire kit required) |
| Field of View | 150 degrees |
| Screen Size | 2.4 inches LCD |
| Aperture | F1.8 |
| Dimensions (D x W x H) | 4 x 8 x 7 cm |
| Weight | 150 grams |
Warranty and Support
The AZDOME GS63Pro Dash Cam comes with a 12-month manufacturer's warranty from the date of purchase. This warranty covers defects in materials and workmanship under normal use.
For technical support, troubleshooting assistance, or warranty claims, please contact AZDOME customer service through their official website or the retailer where you purchased the product. Please have your purchase receipt and product model number ready when contacting support.
For more information, visit the AZDOME Official Store.


