
1. Introduction
Thank you for choosing the CROSSIO 20-inch Crystal Chandelier Gold Ceiling Fan with Light. This manual provides essential information for the safe installation, operation, and maintenance of your new ceiling fan. Please read these instructions thoroughly before installation and retain them for future reference.
Important Safety Information
- Always disconnect power at the circuit breaker before installation or servicing.
- All electrical wiring must be in accordance with national and local electrical codes. If you are unfamiliar with wiring, consult a qualified electrician.
- Ensure the mounting structure can support the fan's weight (approximately 20 pounds).
- Do not bend the blade holders during installation or cleaning.
- Keep children away from the fan during operation.
2. Package Contents
Verify that all components are present and undamaged before beginning installation:
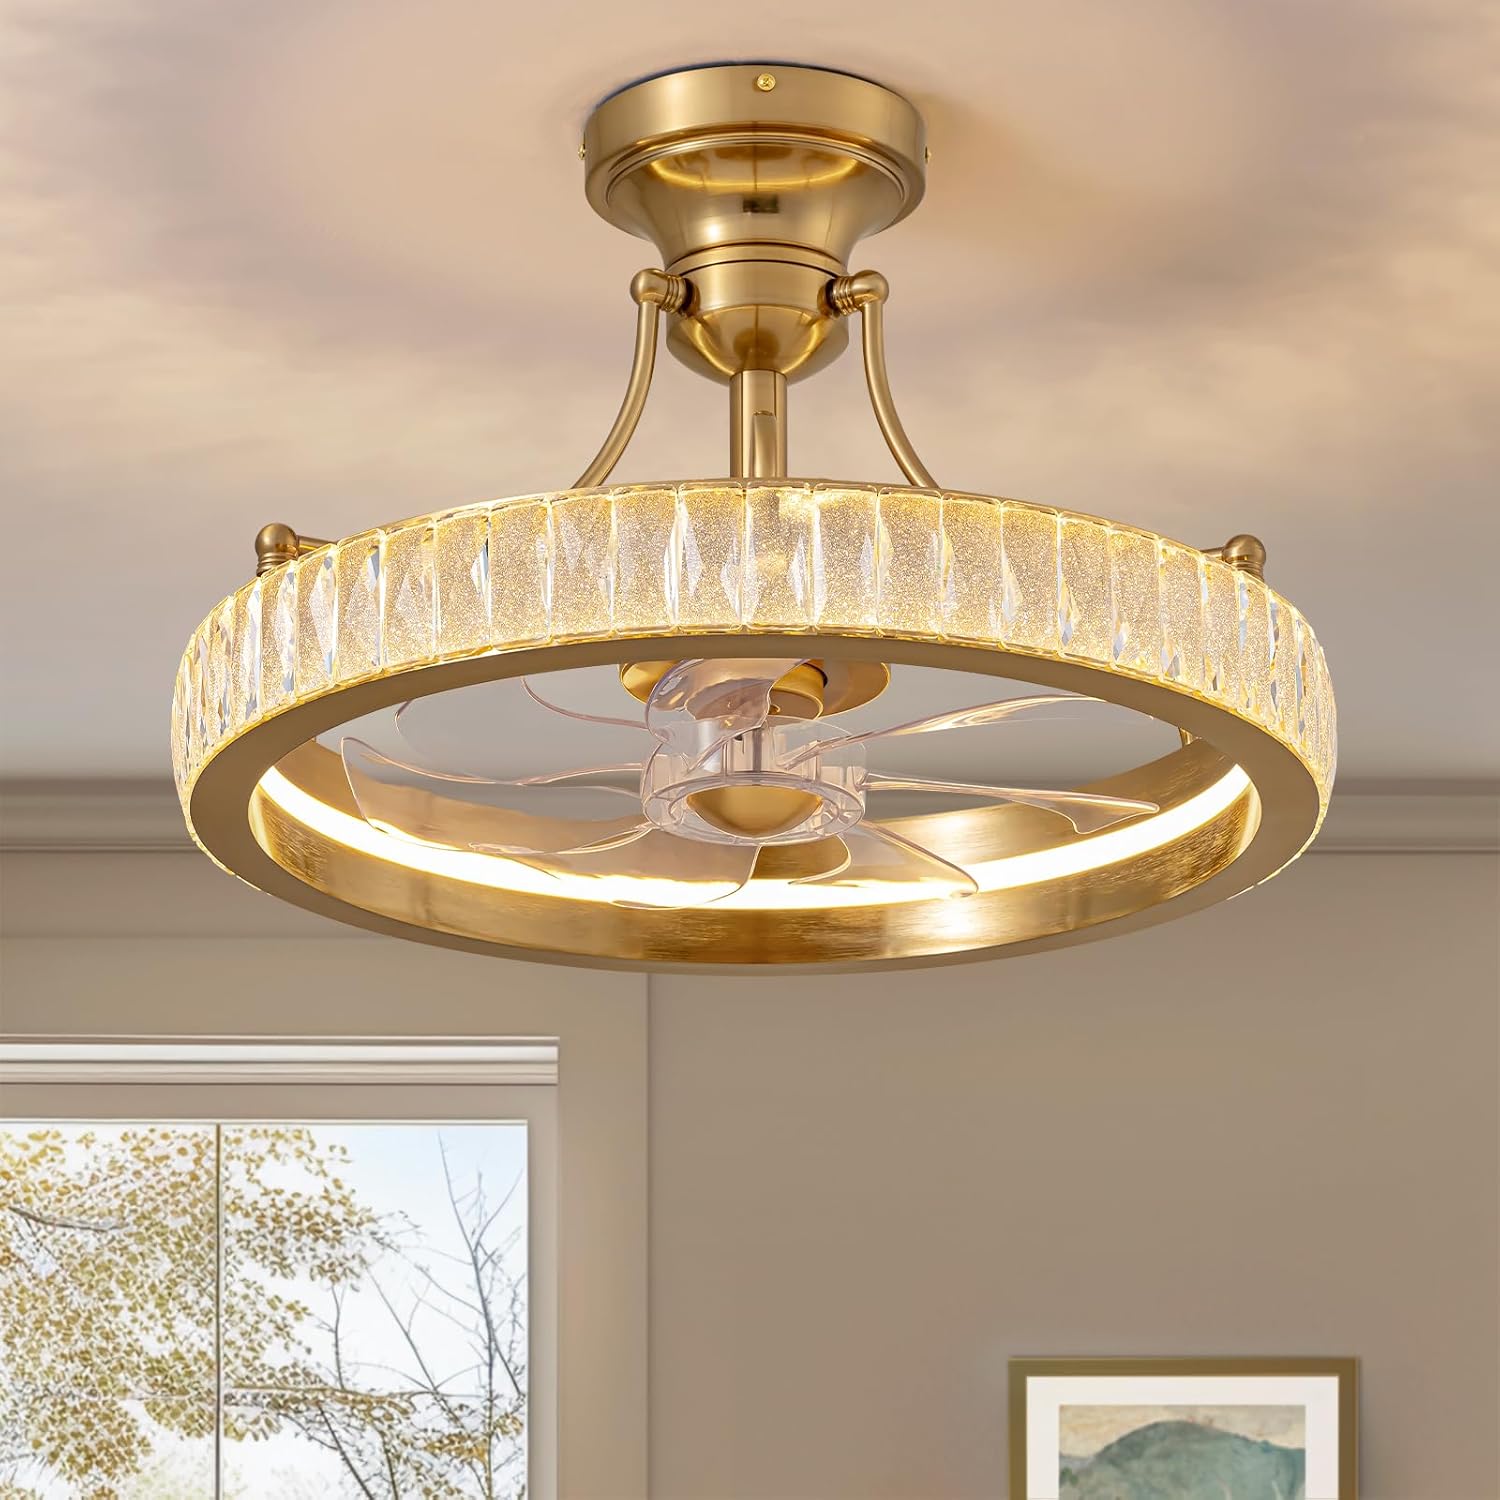
- Ceiling Fan Unit (with integrated light kit and crystal accents)
- Remote Control (batteries not included; requires 2 x AAA batteries)
- Installation Hardware (screws, wire nuts, mounting bracket)
- User Manual
3. Installation Instructions
Most functional components are pre-assembled for convenience. Professional installation is recommended if you are not experienced with electrical wiring.
Step-by-Step Installation
- Power Disconnection: Turn off power at the main circuit breaker to prevent electrical shock.
- Mounting Bracket Installation: Secure the mounting bracket to the ceiling junction box. Ensure the bracket is firmly attached and can support the fan's weight.
- Wiring Connections: Connect the fan's electrical wires to the household wiring according to local codes. Typically, this involves connecting live, neutral, and ground wires. Use appropriate wire nuts to secure connections.
- Fan Unit Attachment: Carefully lift the fan unit and attach it to the mounting bracket. Ensure all screws are tightened securely.
- Crystal Installation (if separate): If any crystal elements are packaged separately, attach them according to the specific instructions provided in the packaging.
- Power Restoration: Restore power at the circuit breaker and test the fan's operation.

4. Operating Instructions
Your CROSSIO ceiling fan can be controlled via the included remote control or a compatible smartphone application.
Remote Control Functions
Before use, insert 2 x AAA batteries into the remote control (not included).
- Power Button: Turns the fan and light on or off.
- Fan Speed Control: Adjusts the fan speed through 6 levels.
- Light On/Off: Controls the LED light independently.
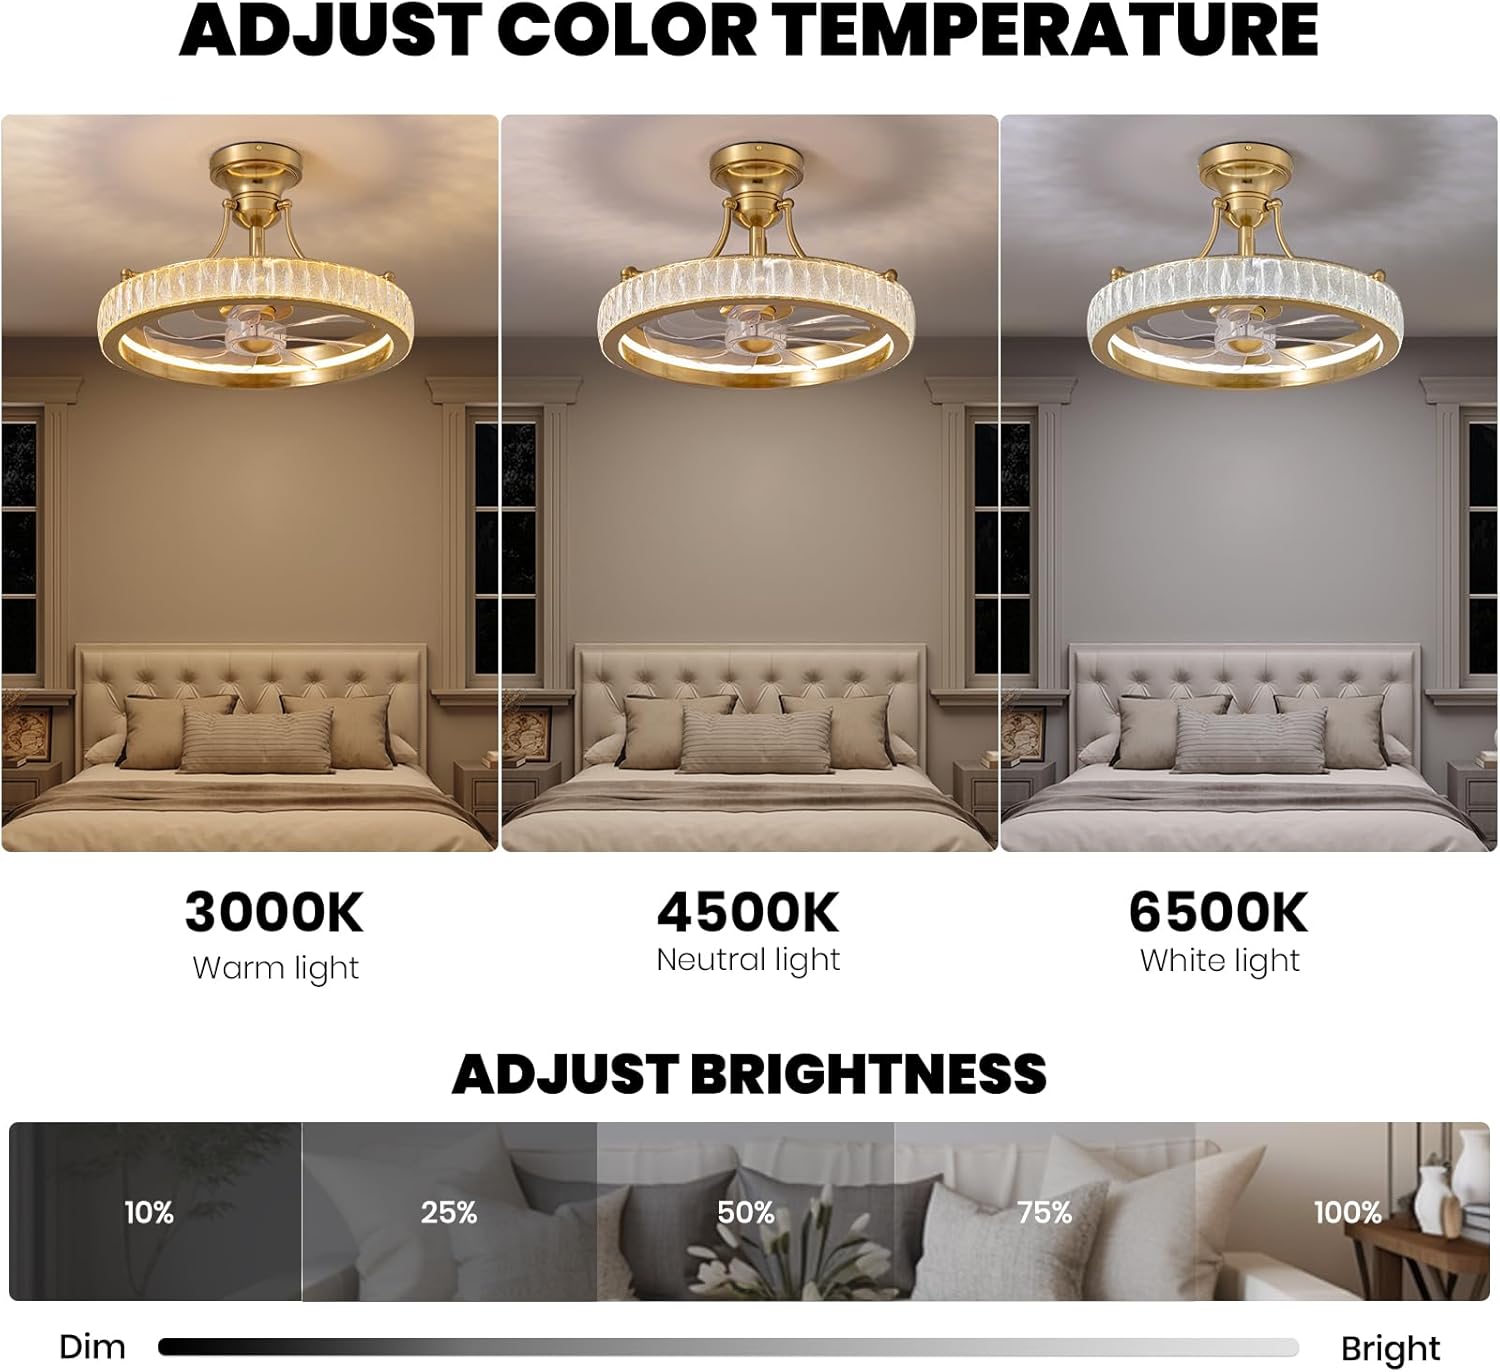
- Color Temperature Adjustment: Cycles through 3 color temperatures: 3000K (Warm Light), 4500K (Neutral Light), and 6500K (White Light).
- Brightness Adjustment: Dims or brightens the LED light from 10% to 100%.
- Reversible Motor Function: Changes the direction of blade rotation for seasonal use.
- Timer Setting: Sets the fan to turn off automatically after a specified duration.

Fan Modes
- Summer Mode (Downward Airflow): Blades rotate counter-clockwise, creating a downward breeze for cooling.
- Winter Mode (Upward Airflow): Blades rotate clockwise, circulating warm air near the ceiling downwards to enhance warmth.
Light Settings
The integrated LED light offers customizable illumination:
- Color Temperature: Choose between 3000K (warm), 4500K (neutral), and 6500K (white) to suit your preference or activity.
- Brightness: Adjust the light intensity from 10% (dim) to 100% (bright) using the remote control.

App Control
The fan also supports control via a smartphone application. Refer to the separate app instructions (if provided) for pairing and functionality. Generally, app control mirrors the remote control's features.
5. Maintenance
Regular maintenance ensures optimal performance and longevity of your ceiling fan.
Cleaning
- Power Disconnection: Always turn off power at the circuit breaker before cleaning.
- Fan Blades: Wipe the fan blades with a soft, damp cloth. Do not use abrasive cleaners that could scratch the finish.
- Crystal Accents: Gently wipe crystal elements with a soft, lint-free cloth. For stubborn spots, a mild glass cleaner can be applied to the cloth (not directly to the crystals).
- Motor Housing: Dust the motor housing with a soft brush or cloth.
General Care
- Periodically check all screw connections on the fan and mounting bracket to ensure they are secure.
- Do not attempt to lubricate the motor. It is permanently lubricated.
6. Troubleshooting
If you experience issues with your fan, consult the following troubleshooting guide:
| Problem | Possible Cause | Solution |
|---|---|---|
| Fan does not start | No power to the fan Remote control batteries are dead Incorrect wiring | Check circuit breaker and wall switch Replace remote control batteries Verify wiring connections (consult electrician if unsure) |
| Light does not work | No power to the light Incorrect wiring | Check circuit breaker and wall switch Verify wiring connections (consult electrician if unsure) |
| Fan wobbles | Loose mounting screws Unbalanced blades | Ensure all mounting screws are tight Check if blades are securely attached and balanced (balancing kit not included) |
| Excessive noise | Loose screws Motor issue | Check all screws for tightness If noise persists, contact customer support |
| Remote control not responding | Dead batteries Remote not paired (if applicable) | Replace batteries Refer to remote pairing instructions (if any) |
7. Specifications
- Brand: CROSSIO
- Model: 9002-01
- Dimensions: 19.7"L x 19.7"W x 12.6"H
- Material: Metal, Crystal, ABS Blades
- Color: Gold
- Light Source: Integrated LED
- Brightness: Up to 2598 Lumens
- Color Temperature: 3000K (Warm), 4500K (Neutral), 6500K (White)
- Fan Speeds: 6
- Motor: Reversible DC Motor
- Control: Remote Control, App Control
- Installation Type: Semi Flush Mount
- Recommended Room Size: Up to 12ft-16ft
- Noise Level: Approximately 30dB
- Power Source: DC
- Item Weight: 20 pounds
8. Warranty and Support
Warranty Information
Please refer to your purchase documentation or contact CROSSIO customer support for specific warranty details regarding your product.
Customer Support
CROSSIO is committed to providing excellent customer service. If you have any questions, require technical assistance, or encounter issues not covered in this manual, please contact our 24/7 customer support team. Contact information can typically be found on the product packaging or the official CROSSIO website.


