Introduction
This manual provides detailed instructions for the safe and effective use of your DEWINNER Adjustable Granite Seam Setter. This tool is designed for precise seam joining and leveling of various flat, non-porous materials such as granite, marble, stone, slabs, and glass during countertop or surface installation. Please read this manual thoroughly before operation and retain it for future reference.
Product Features
- Durable Design: Heavy-duty construction for long-lasting use, suitable for granite, marble, stone, slab, and glass installations.
- Strong Vacuum Suction: Equipped with powerful suction cups for secure attachment to flat surfaces, ensuring precision in seam joining.
- Adjustable Mechanism: Easy-to-use adjustments for precise alignment, accommodating various surface types and enhancing installation accuracy.
- Multi-Surface Compatibility: Works seamlessly with granite, marble, stone, slabs, and glass for both horizontal and vertical applications.
- Effortless Operation: Streamlined setup for quick and effective countertop seam leveling, minimizing installation time.
Package Contents
- 2 x DEWINNER Adjustable Seam Setter units
Specifications
| Manufacturer | DEWINNER |
| Part Number | DE-T345BKD |
| Item Weight | 5.04 pounds |
| Product Dimensions | 16.54 x 7.87 x 4.92 inches |
| Color | Black |
| Material | Plastic |
| Power Source | Hand-powered |
| Lifting Capacity (Approx.) | 187 lbs (Safety Load), 287 lbs (Vertical Load), 330 lbs (Horizontal Load) |
Setup and Operation
Follow these steps for proper setup and operation of the DEWINNER Adjustable Granite Seam Setter:
- Prepare Surfaces: Ensure the surfaces to be joined are clean, dry, and free of dust or debris. The seam setter works best on smooth, non-porous materials.
- Attach Suction Cups: Place each suction cup firmly onto the surface of the material, ensuring it is positioned close to the seam you intend to join. Press down on the suction cup and then press the locking lever down to create a strong vacuum seal. Repeat for all suction cups.
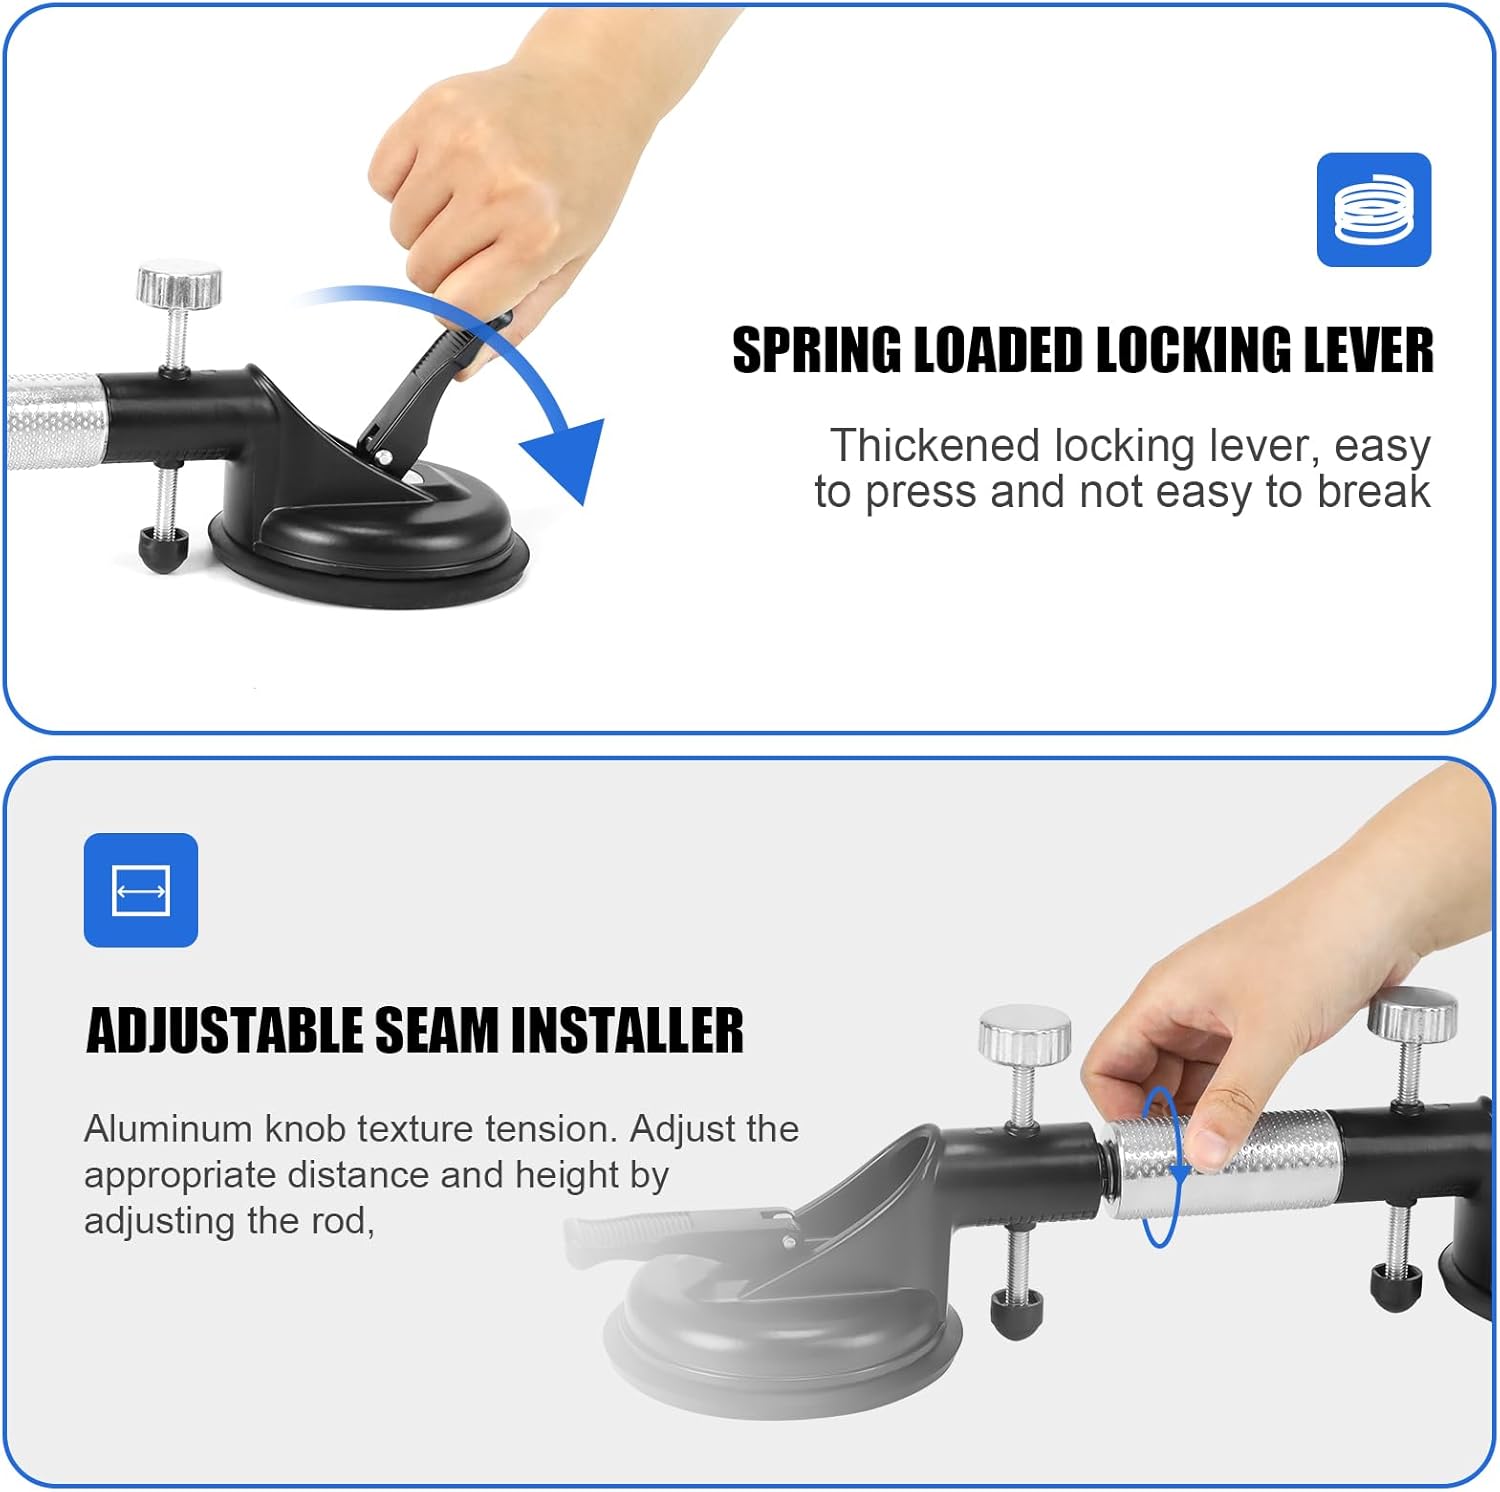
Figure 1: Engaging the spring-loaded locking lever to secure the suction cup.
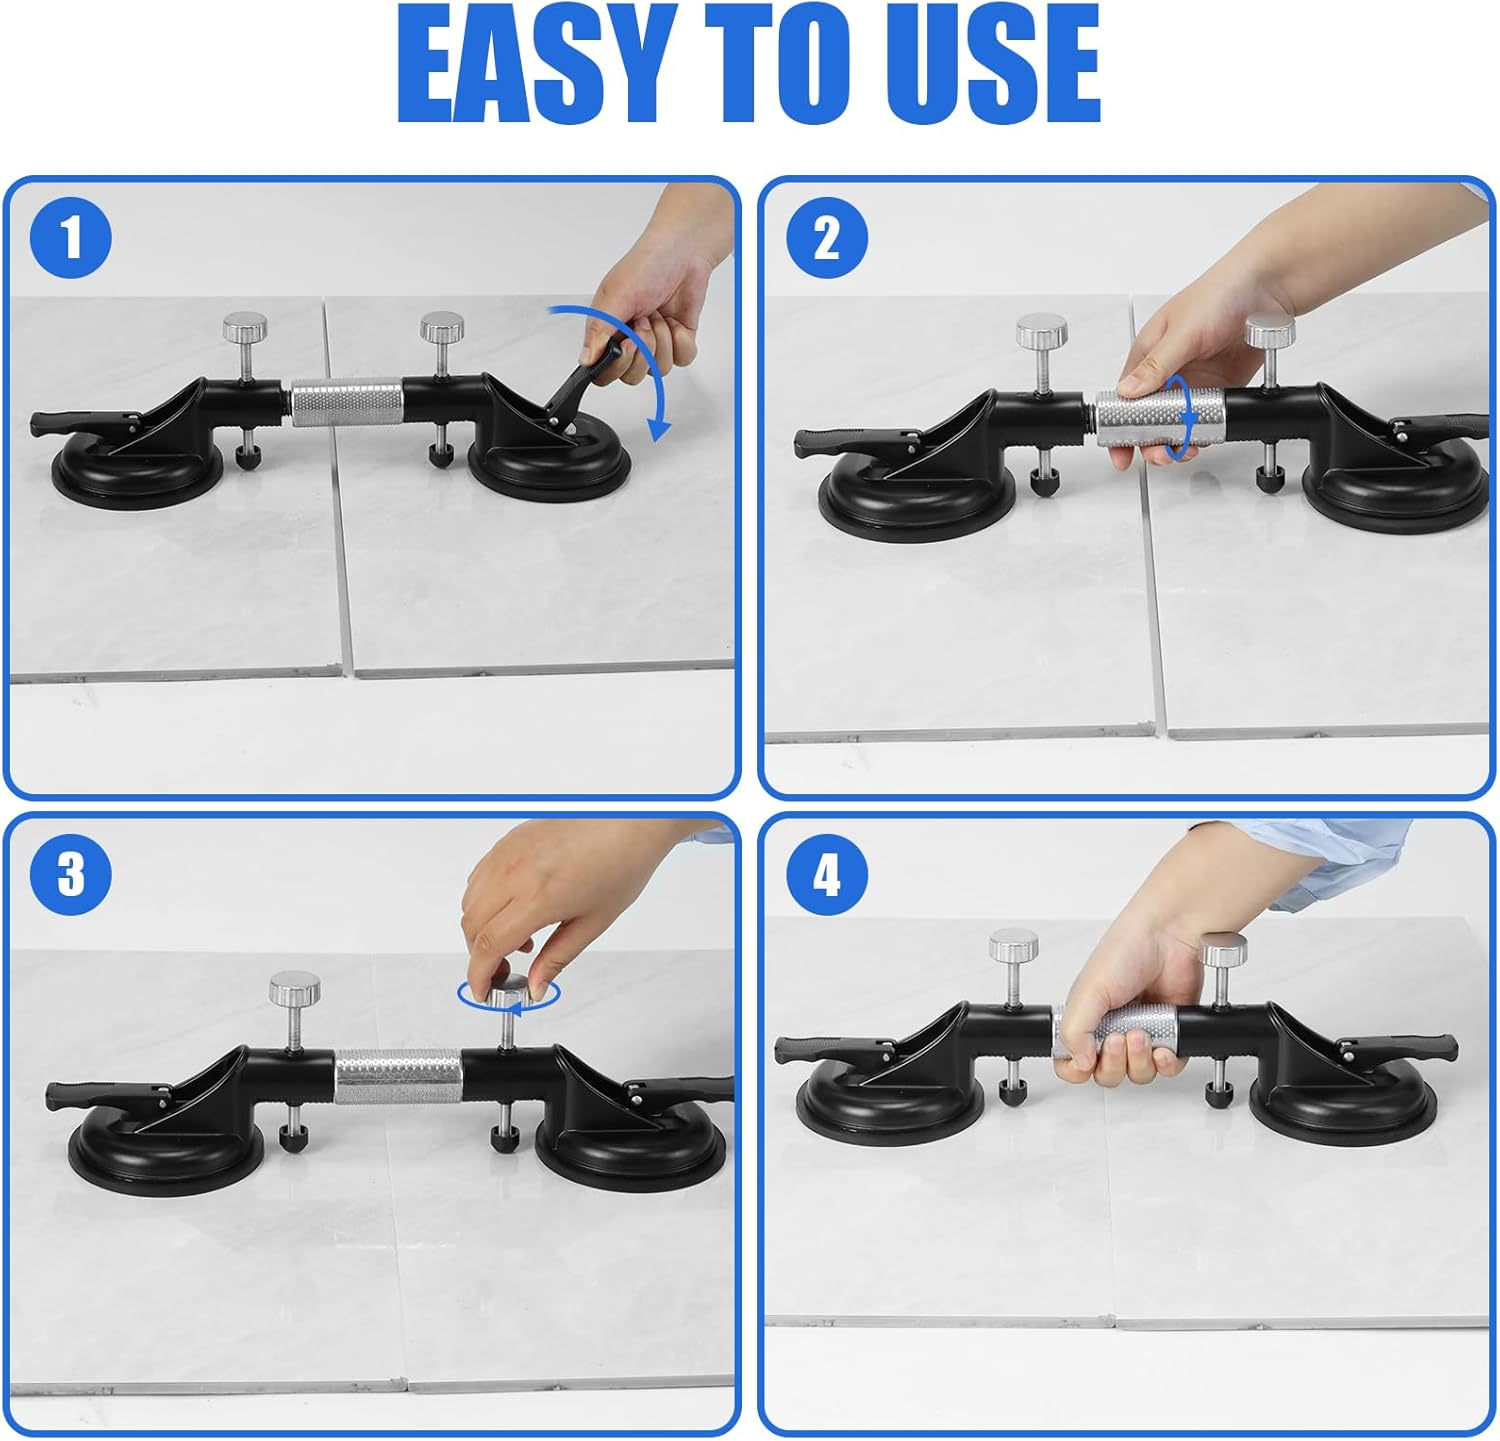
Figure 2: Step-by-step guide for attaching suction cups and making initial adjustments.
- Adjust Horizontal Alignment: Use the aluminum knob with textured tension to adjust the horizontal distance between the two pieces. Rotate the knob to bring the pieces closer together or move them apart, achieving a tight seam. The adjustable range is approximately 20mm.

Figure 3: Adjusting the horizontal seam installer knob.
- Adjust Vertical Leveling: Rotate the height adjustment knobs located on the top of the tool to level the surfaces. Use a spirit level to ensure both pieces are perfectly flush.
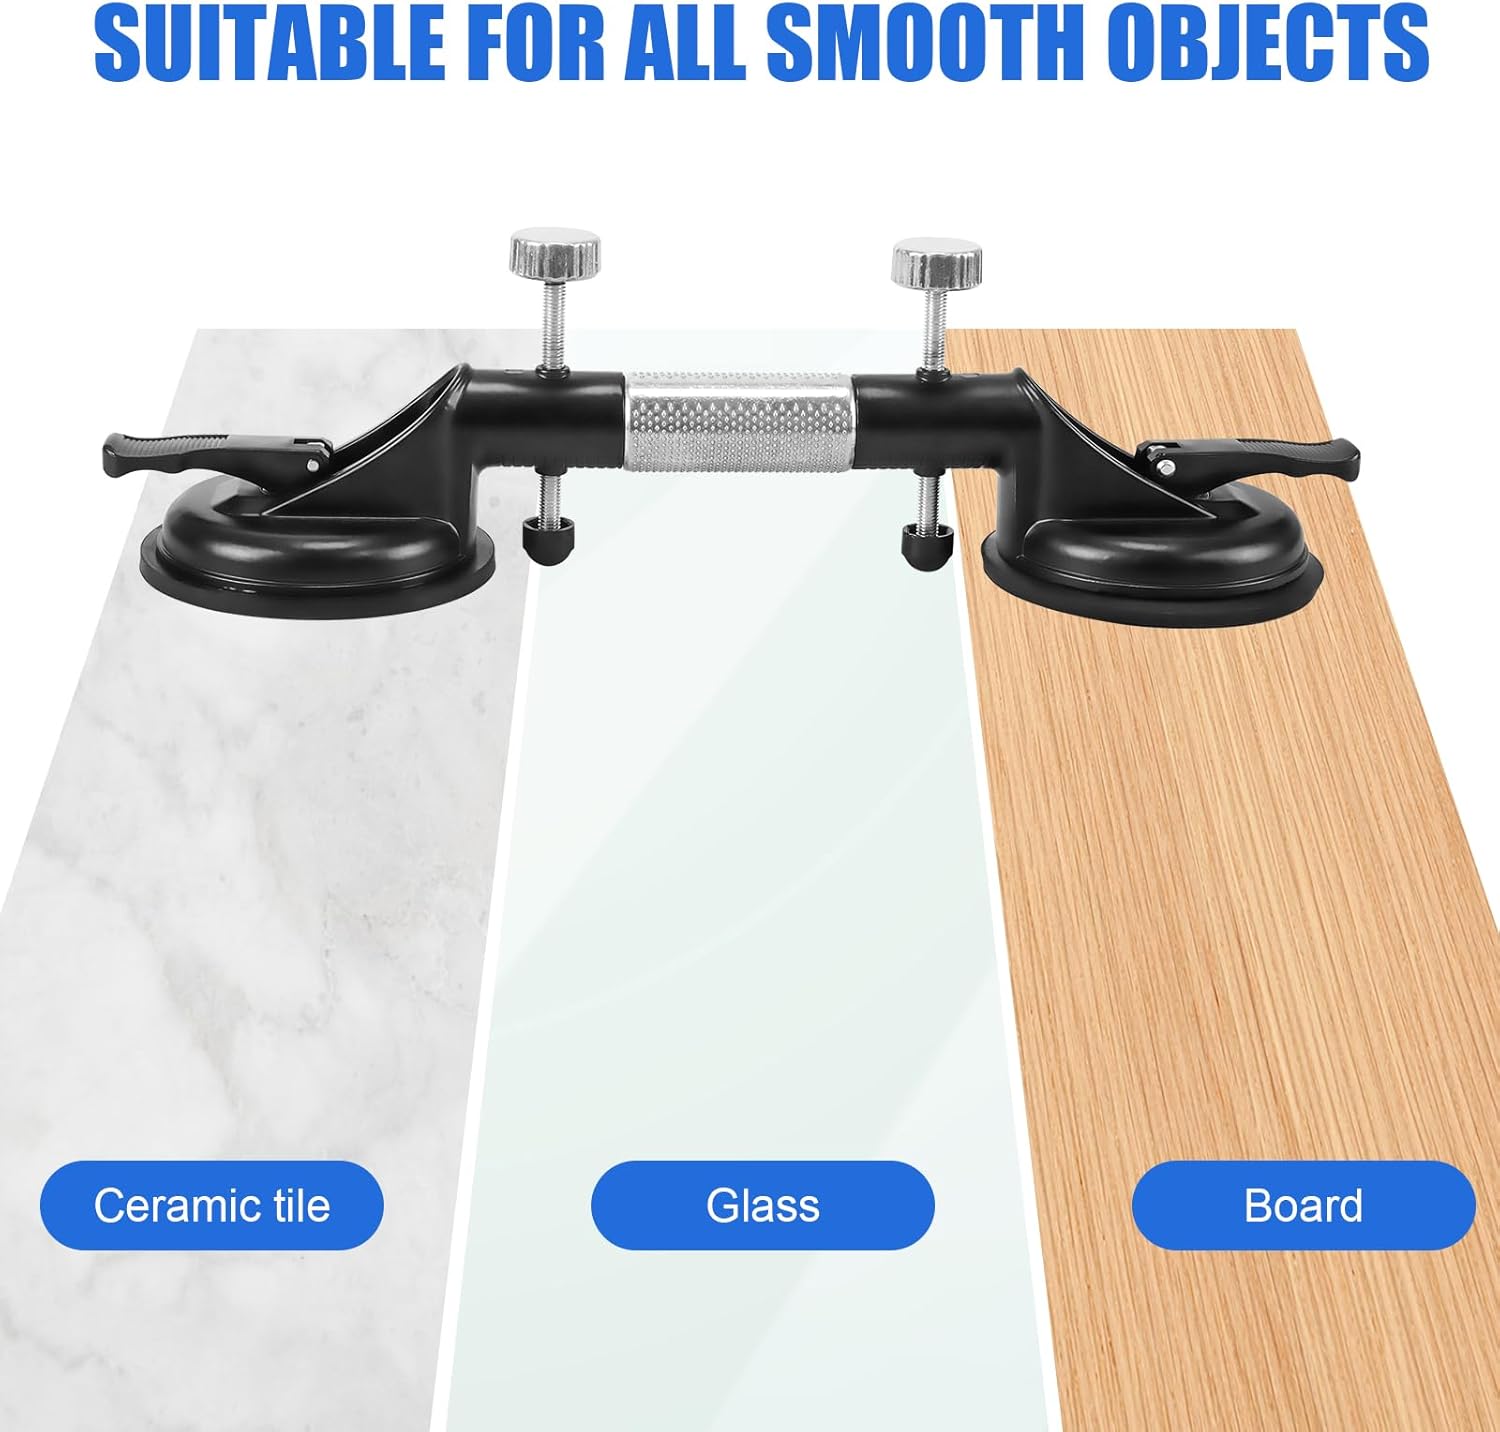
Figure 4: Fine-tuning vertical alignment using the height adjustment knobs.
- Verify Alignment: Visually inspect the seam and use a straight edge or level to confirm perfect alignment and leveling.
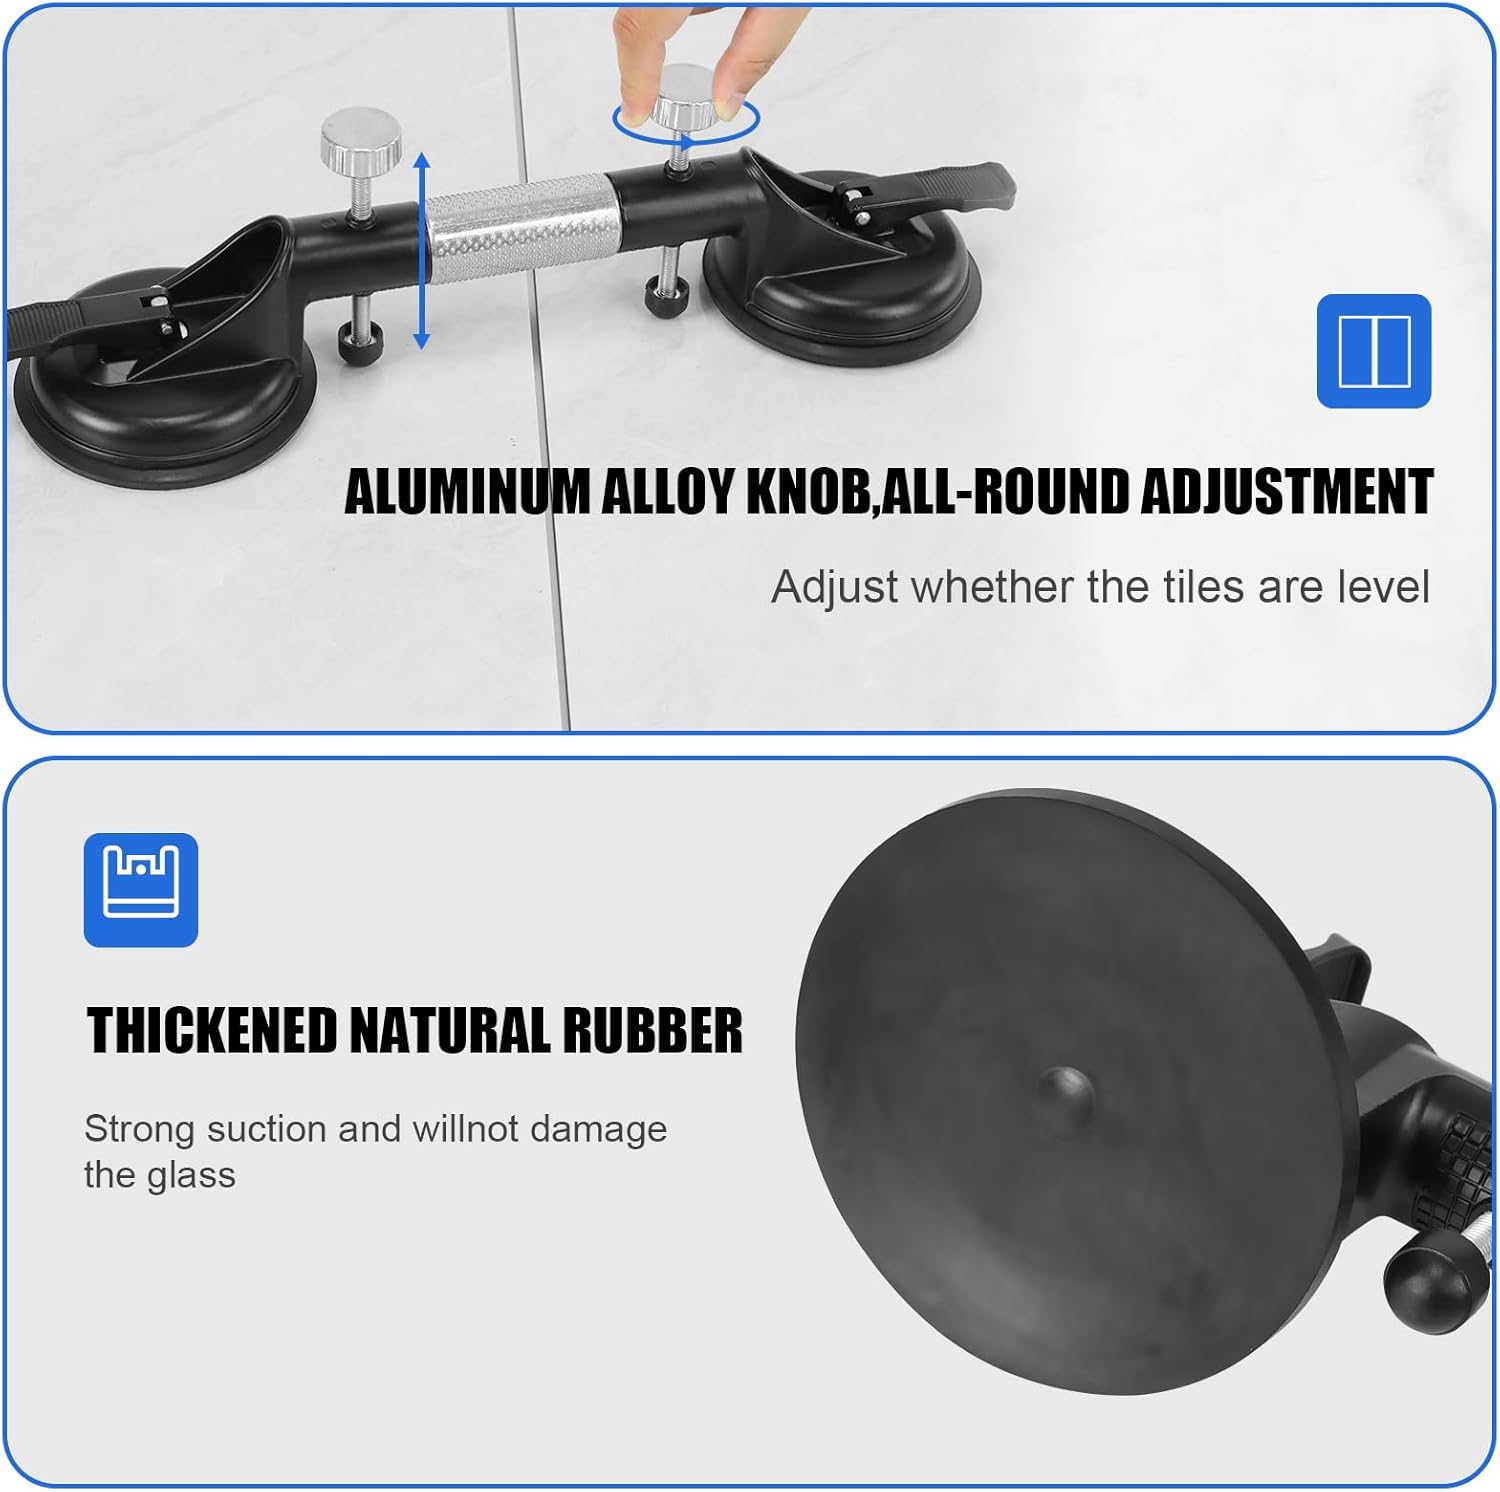
Figure 5: Visual comparison of surfaces before and after using the seam setter for alignment.
- Release Suction: Once the installation is complete and adhesives have cured (if applicable), release the suction by lifting the locking levers on each suction cup.
Usage Demonstration Video
Video 1: Tutorial demonstrating how to use the Adjustable Granite Seam Setter for joining and leveling surfaces.
Video 2: Detailed usage tutorial for the Granite Seam Setter, showing practical application.
Maintenance
- Cleaning: After each use, wipe down the suction cups and the main body with a clean, damp cloth to remove any dust, debris, or adhesive residue. Ensure the suction cups are completely dry before storage.
- Storage: Store the seam setter in a clean, dry place away from direct sunlight and extreme temperatures. Avoid storing with the suction cups pressed against uneven surfaces to prevent deformation.
- Inspection: Regularly inspect the suction cups for any signs of wear, cracks, or damage. Replace damaged components immediately to ensure optimal performance and safety.
Troubleshooting
Loss of Suction
- Check Surface Cleanliness: Ensure the surface is completely clean, dry, and free of dust, oil, or moisture. Even small particles can break the vacuum seal.
- Verify Surface Type: The tool is designed for smooth, non-porous surfaces. Rough, textured, or porous materials will not allow for a proper vacuum seal.
- Inspect Suction Cups: Check the rubber suction cups for any cuts, tears, or deformities. A damaged cup will not hold suction. Ensure the edges are clean and pliable.
- Re-engage Lever: If suction is lost during use, release the lever, reposition the cup, press down firmly, and re-engage the lever.
Difficulty Adjusting Seam
- Loosen Knobs: Ensure all adjustment knobs are sufficiently loosened before attempting to move the material.
- Even Pressure: Apply even pressure when making adjustments. If one side is tighter than the other, it may hinder smooth movement.
Warranty and Support
For warranty information or technical support, please refer to the product packaging or contact DEWINNER customer service directly. Contact details can typically be found on the manufacturer's official website or through your point of purchase.