
Introduction
This manual provides detailed instructions for the installation, operation, and maintenance of the GELUOXI Flexible Stainless Steel Braided Fuel Lines. These fuel lines are designed as a direct replacement for specific Chevrolet, GMC, and Rainier models. Please read this manual thoroughly before attempting any installation or maintenance procedures to ensure proper function and safety.
Safety Information
Working with fuel systems can be hazardous. Always prioritize safety by following these guidelines:
- Disconnect Battery: Always disconnect the vehicle's negative battery terminal before starting any work on the fuel system.
- Relieve Fuel Pressure: Ensure the fuel system pressure is relieved before disconnecting any fuel lines. Refer to your vehicle's service manual for the correct procedure.
- Wear Protective Gear: Always wear safety glasses and gloves to protect against fuel splashes and sharp edges.
- Work in a Well-Ventilated Area: Fuel fumes are flammable and toxic. Ensure adequate ventilation.
- No Open Flames: Keep all sources of ignition, such as open flames, sparks, and hot surfaces, away from the work area.
- Contain Fuel Spills: Have an appropriate container ready to catch any spilled fuel. Clean up spills immediately.
- Professional Installation Recommended: If you are not confident in your ability to perform this installation safely, seek assistance from a qualified automotive technician.
Package Contents
Verify that all components are present in your package:
- Flexible Stainless Steel Braided Fuel Lines (2 pieces)
- Mounting Clamp (1 piece)
- Mounting Bolt (1 piece)
- Washer (1 piece)
- Nut (1 piece)
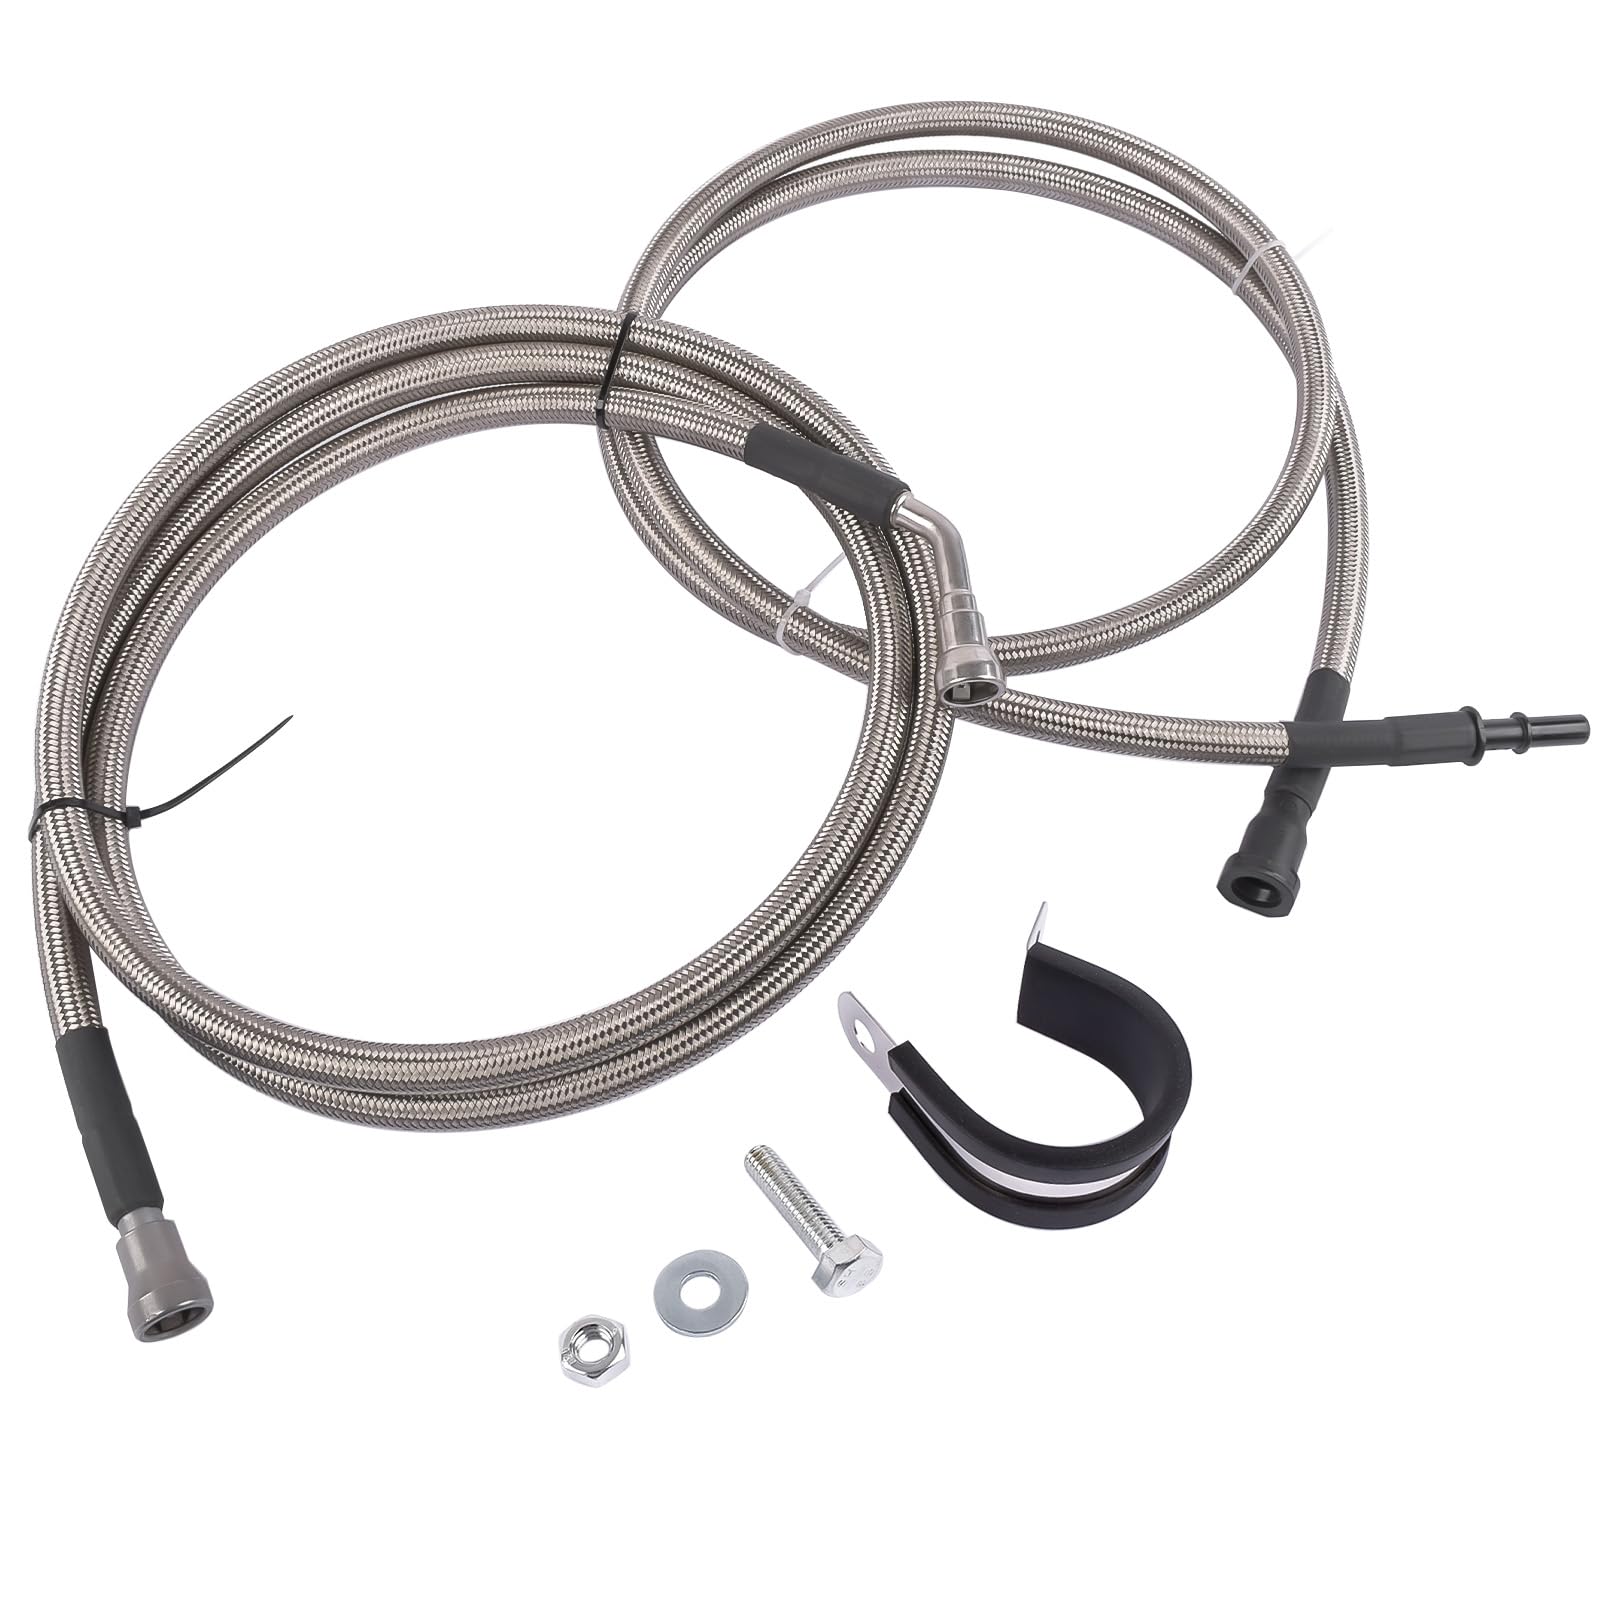
Figure 1: Overview of the GELUOXI Flexible Stainless Steel Braided Fuel Lines and included mounting hardware.
Vehicle Compatibility
These GELUOXI fuel lines are compatible with the following vehicle models and years, replacing OEM Part Numbers 819-814, 12658354, and 25829656:
- Chevy Trailblazer 4.2L (2005-2009)
- Chevy Trailblazer EXT 4.2L (2005-2006)
- GMC Envoy 4.2L (2005-2009)
- GMC Envoy XL 4.2L (2005-2006)
- GMC Envoy XUV 4.2L (2005)
- Rainier 4.2L (2005-2007)
Installation Instructions
Tools Required (Not Included)
- Wrench set (metric and/or standard, as required by vehicle)
- Fuel line disconnect tools (specific to vehicle make/model)
- Drain pan for fuel
- Safety glasses and gloves
- Torque wrench
- Shop rags
Preparation
- Park the vehicle on a level surface and engage the parking brake.
- Disconnect the negative battery terminal to prevent accidental electrical shorts.
- Relieve the fuel system pressure according to your vehicle's service manual. This typically involves removing the fuel pump fuse and running the engine until it stalls, or using a specialized fuel pressure relief tool.
- Place a drain pan beneath the fuel lines to catch any residual fuel during disconnection.
Removal of Old Fuel Lines
- Locate the existing fuel lines that need replacement. Note their routing and connection points.
- Using appropriate fuel line disconnect tools, carefully detach the old fuel lines from the fuel rail, fuel filter, and fuel tank/pump assembly. Expect some fuel to leak out.
- Remove any clamps or fasteners securing the old fuel lines to the vehicle chassis.
- Carefully remove the old fuel lines from the vehicle.
Installation of New Fuel Lines
- Compare the new GELUOXI fuel lines with the old ones to ensure they match in length, fitting types, and routing.
- Route the new fuel lines along the same path as the old ones, ensuring they are not kinked, pinched, or rubbing against any sharp edges or moving parts.
- Connect the new fuel lines to the fuel rail, fuel filter, and fuel tank/pump assembly. Ensure the quick-disconnect fittings click securely into place. Gently pull on the lines to confirm they are properly seated.
- Use the provided mounting clamp, bolt, washer, and nut to secure the fuel lines to the vehicle chassis at appropriate points, mimicking the original mounting. Ensure the lines are held firmly but not overly tight, allowing for vehicle movement.
- Double-check all connections for tightness and proper routing.

Figure 2: Close-up view of a quick disconnect fitting on the braided fuel line.

Figure 3: The two fuel lines with their distinct end fittings for proper connection.
Post-Installation
- Reconnect the negative battery terminal.
- Turn the ignition key to the 'ON' position (without starting the engine) for a few seconds, then turn it 'OFF'. Repeat this several times to allow the fuel pump to prime the system and build pressure.
- Inspect all new connections for any signs of fuel leaks. Use a flashlight if necessary. If leaks are detected, immediately turn off the ignition and re-tighten or re-seat the connections.
- Once no leaks are observed, start the engine and let it run for a few minutes. Re-inspect for leaks while the engine is running.
- Test drive the vehicle cautiously, paying attention to any unusual smells or performance issues.
Operation
Once properly installed, the GELUOXI Flexible Stainless Steel Braided Fuel Lines operate passively as an integral part of your vehicle's fuel delivery system. They are designed to transport fuel from the fuel tank to the engine, maintaining optimal fuel pressure and flow under various operating conditions. No user interaction is required for their operation beyond ensuring proper installation and adherence to regular maintenance checks.
Maintenance
Regular inspection of your fuel lines is crucial for vehicle safety and performance. Perform these checks periodically, or immediately if you suspect an issue:
- Visual Inspection: Regularly inspect the entire length of the fuel lines for any signs of wear, cracks, abrasions, or damage to the braided stainless steel outer layer.
- Leak Detection: Check all connection points for any signs of fuel leaks, such as wet spots, fuel odors, or drips.
- Corrosion Check: Examine the fittings and any exposed metal components for rust or corrosion.
- Routing and Security: Ensure the fuel lines remain properly routed and securely fastened by their clamps. They should not be sagging, touching hot engine components, or rubbing against other parts of the vehicle.
- Cleanliness: Keep the fuel lines free from excessive dirt, debris, or oil buildup, which can obscure damage or accelerate degradation.
Troubleshooting
If you experience issues related to fuel delivery after installation, consider the following:
- Fuel Leaks: If fuel leaks are detected, immediately shut off the engine. Re-inspect all connections to ensure they are fully seated and tightened. Check for any damage to the lines themselves.
- Engine Performance Issues (e.g., misfires, rough idle, loss of power): While less common with new lines, ensure the lines are not kinked or obstructed, which could restrict fuel flow. Verify that the correct lines were installed in the correct positions.
- Fuel Odor: A persistent fuel odor often indicates a leak. Follow the leak detection steps above.
- Difficulty Starting: If the engine cranks but does not start, or starts with difficulty, ensure the fuel system was properly primed after installation and that there are no leaks causing a loss of pressure.
If troubleshooting steps do not resolve the issue, it is recommended to consult a qualified automotive technician.
Specifications
| Feature | Specification |
|---|---|
| Brand | GELUOXI |
| OEM Part Numbers | 819-814, 12658354, 25829656 |
| Material | Stainless Steel |
| Color | Silver |
| Maximum Pressure Rating | 75 PSI |
| Item Length | 61 Millimeters |
| End 1 Fitting Type | Female Quick Disconnect |
| End 2 Fitting Type | Male Quick Disconnect |
| Item Weight | 2.2 pounds |
Warranty and Support
For warranty information or technical support regarding your GELUOXI Flexible Stainless Steel Braided Fuel Lines, please refer to your purchase documentation or contact GELUOXI customer service directly. Specific warranty terms and contact details are typically provided at the point of purchase or on the manufacturer's official website.