
1. Important Safety Information
Please read all safety instructions carefully before installing, operating, or performing maintenance on this appliance. Failure to follow these instructions may result in property damage, personal injury, or death. Keep this manual for future reference.
General Safety Precautions
- Electrical Safety: Always unplug the unit before cleaning, servicing, or moving. Ensure the unit is connected to a properly grounded electrical outlet with the correct voltage (115V/60Hz). Do not use extension cords.
- Flammable Refrigerant: This unit uses R600a refrigerant, which is flammable. Ensure proper ventilation and avoid open flames or ignition sources near the unit. Only qualified service personnel should handle refrigerant.
- Ventilation: Maintain adequate clearance around the unit for proper airflow to the condenser. Blocked airflow can lead to overheating and reduced efficiency.
- Weight and Movement: This appliance is heavy. Use appropriate lifting techniques and equipment when moving to prevent injury. Ensure the unit is stable and level after placement.
- Children: Do not allow children to play with or around the appliance. Ensure doors cannot be accidentally closed on children.
- Cleaning: Use only mild, non-abrasive cleaners. Avoid using harsh chemicals or abrasive pads that can damage surfaces.
2. Product Overview
The Empura 49" Horizontal Bottle Cooler (Model E-KBC-50) is designed for commercial use, providing efficient and reliable cooling for bottled beverages. It features a durable stainless steel top, black painted steel exterior, sliding lids, and an integrated bottle opener.
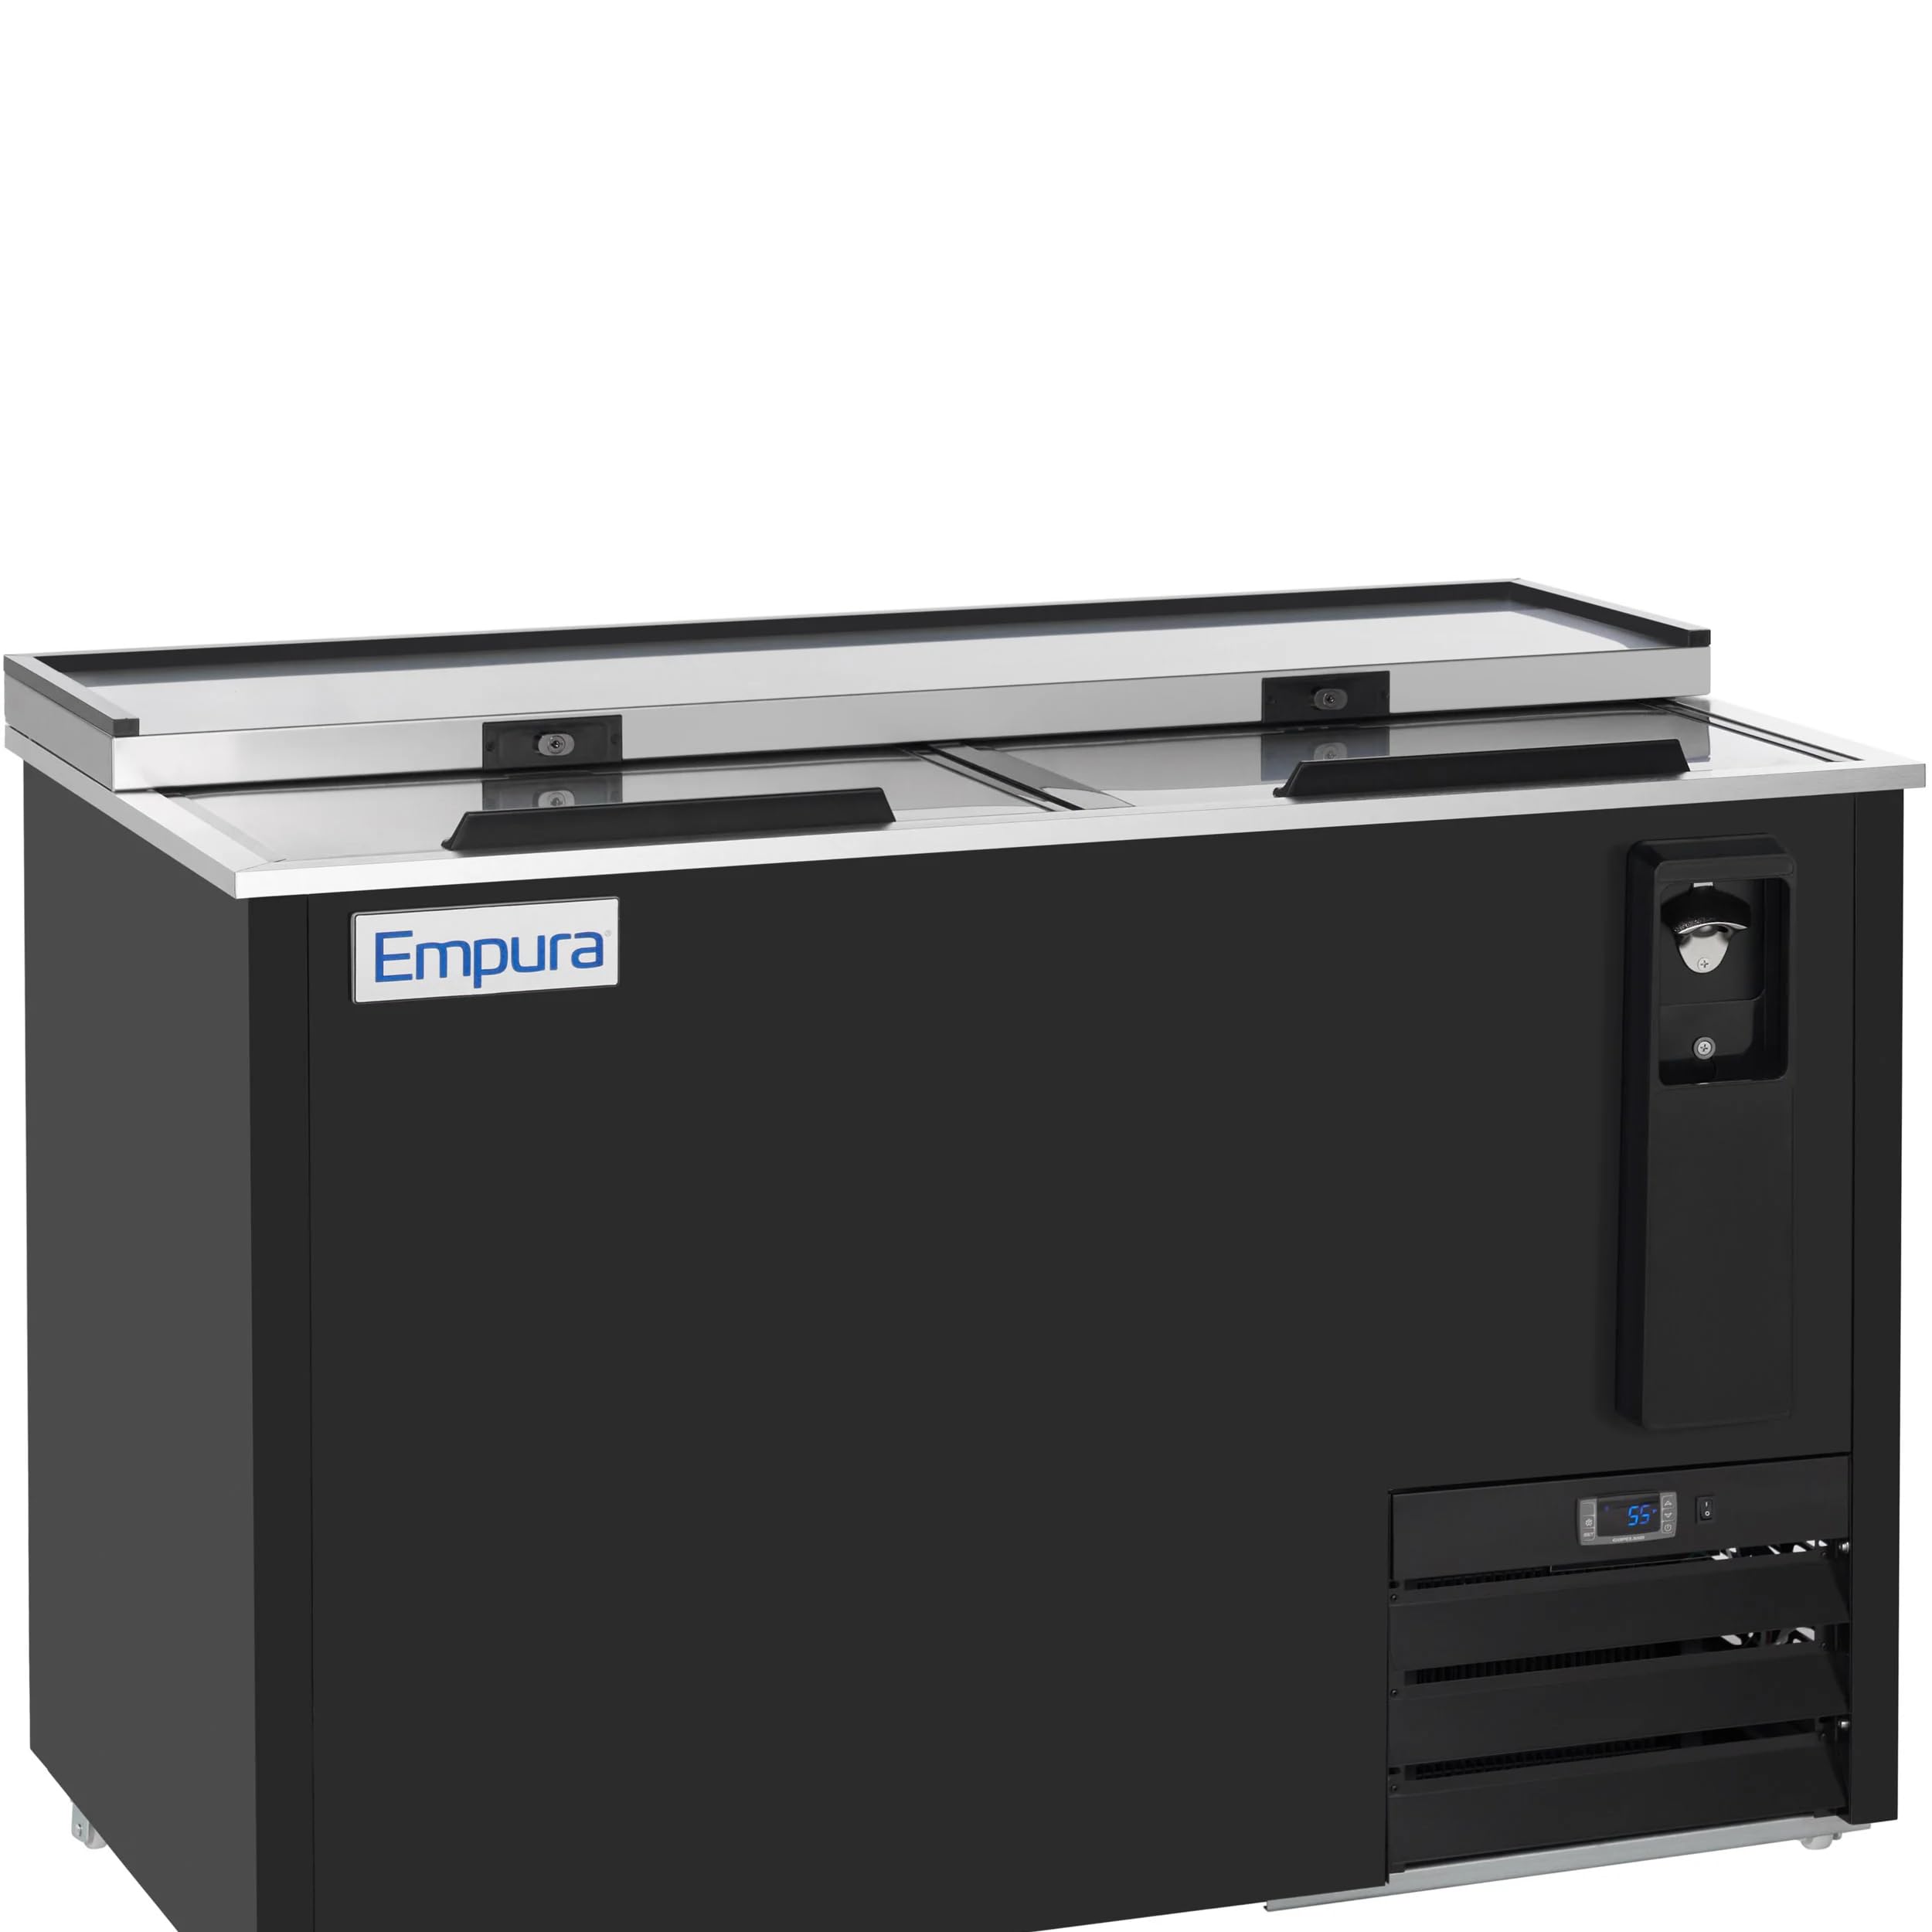
Figure 2.1: Front view of the Empura 49" Horizontal Bottle Cooler. This image displays the overall design of the cooler, featuring its black exterior, stainless steel flat top, and the integrated bottle opener on the right side.
Key Features
- 430 Stainless Steel Top and Framework
- Black Painted Steel Exterior
- Two Lockable Stainless Steel Sliding Lids
- Built-in Bottle Opener with Cap Catcher
- Digital LED Temperature Display
- Adjustable Dividers for Interior Organization
- Forced-Air Cooling System
- Automatic Self-Defrosting Evaporator
3. Unpacking and Installation
3.1 Unpacking
- Carefully remove all packaging materials, including tape and protective film.
- Inspect the unit for any shipping damage. Report any damage to the carrier and your dealer immediately.
- Remove all interior packing materials, including any accessories or documentation.
3.2 Placement
- Location: Place the cooler on a strong, level surface capable of supporting the unit's weight when fully loaded.
- Clearance: Ensure adequate air circulation. Maintain a minimum of 6 inches (15 cm) of clearance from walls or other obstructions on the sides and rear of the unit to allow for proper ventilation of the condenser.
- Environment: Avoid placing the unit in direct sunlight, near heat-producing equipment (ovens, heaters), or in areas with high humidity. Optimal ambient temperature for operation is between 60°F (16°C) and 80°F (27°C).
- Leveling: Use a level to ensure the unit is perfectly level. Adjust the leveling feet if necessary. Proper leveling is crucial for efficient operation and drainage.
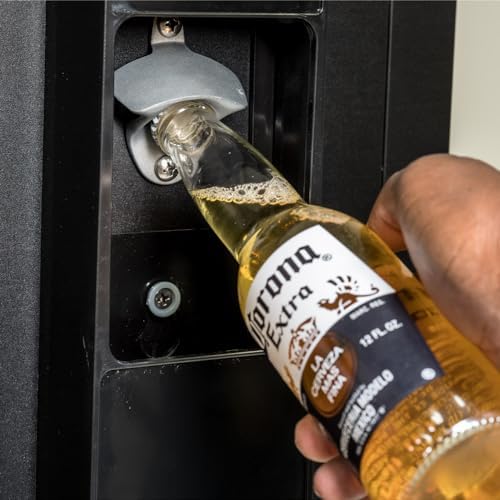
Figure 3.1: Dimensions of the Empura 49" Horizontal Bottle Cooler. The image shows the cooler with its width (49.4"), depth (27"), and height (35") clearly marked, aiding in proper placement and space planning.
3.3 Electrical Connection
- Before plugging in the unit, allow it to sit upright for at least 2 hours to allow compressor oils to settle.
- Ensure the power supply matches the requirements of the unit: 115 Volts, 60 Hz, Single Phase.
- Plug the unit directly into a dedicated, grounded electrical outlet. Do not use extension cords or adapter plugs.
3.4 Initial Startup
- After connecting to power, turn on the main power switch, usually located near the digital controller.
- Allow the unit to run empty for at least 2-4 hours to reach its set temperature before loading with products.
- Verify the temperature on the digital display.
4. Operation
4.1 Temperature Control
The unit is equipped with an electronic thermostat and a digital LED temperature display for precise temperature management.

Figure 4.1: Digital LED Temperature Display. This image shows the electronic control panel with its digital temperature readout and adjustment buttons, allowing users to monitor and set the desired cooling temperature.
- Viewing Temperature: The current internal temperature is continuously displayed.
- Adjusting Temperature: Refer to the specific instructions provided with the digital controller for detailed steps on how to set the desired temperature. Typically, this involves pressing a 'SET' button and using arrow keys to adjust the value.
- Recommended Range: The optimal operating temperature range for this cooler is typically 33°F to 41°F (0.5°C to 5°C).
4.2 Loading Guidelines
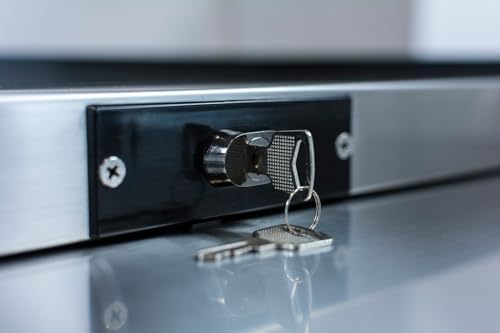
Figure 4.2: Interior of the bottle cooler with adjustable dividers. This view highlights the internal organization system, showing the metal dividers that can be repositioned to accommodate various bottle and can sizes, optimizing storage capacity.
- Do not overload the cooler. Allow space between bottles for proper air circulation.
- Use the provided adjustable dividers to organize beverages and maximize storage efficiency.
- Avoid blocking the internal fan or air vents to ensure uniform cooling.
- Ensure lids are closed properly after accessing beverages to maintain temperature.
4.3 Sliding Lids and Security
- The unit features two stainless steel sliding lids for easy access to beverages.
- Each lid is lockable for security. Use the provided keys to lock and unlock the lids as needed.
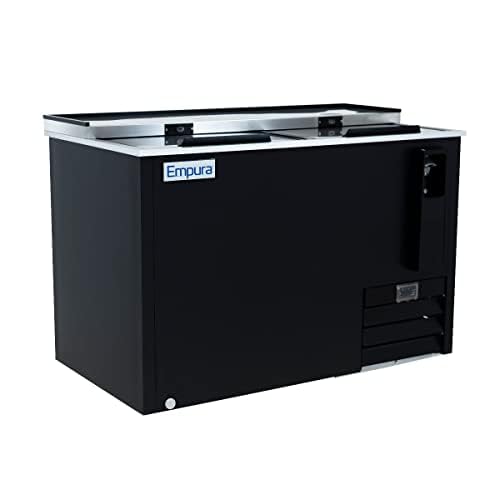
Figure 4.3: Close-up of the lid lock mechanism. This image details the integrated lock on the cooler's lid, with a key inserted, emphasizing the security feature for stored beverages.
4.4 Built-in Bottle Opener
A convenient bottle opener with a cap catcher is integrated into the side of the unit for ease of use.

Figure 4.4: Using the built-in bottle opener. This image shows a hand opening a bottle of beer using the cooler's integrated bottle opener, highlighting its practical design and convenience.
5. Maintenance
Regular maintenance ensures optimal performance and extends the lifespan of your bottle cooler. Always unplug the unit before performing any cleaning or maintenance.
5.1 Cleaning the Interior
- Remove all beverages and dividers.
- Wipe down interior surfaces with a soft cloth dampened with a mild soap and water solution.
- Rinse with a clean, damp cloth and dry thoroughly to prevent water spots and mildew.
- Clean dividers with soap and water, rinse, and dry before returning them to the unit.
5.2 Cleaning the Exterior
- Wipe the stainless steel top and black exterior with a soft cloth and a mild cleaner.
- For stainless steel, wipe in the direction of the grain to avoid scratching.
- Clean the cap catcher regularly.
5.3 Condenser Coil Cleaning
The condenser coil should be cleaned every 30 days or as needed, depending on the operating environment. A dirty condenser coil reduces cooling efficiency and increases energy consumption.
- Unplug the unit from the power supply.
- Locate the condenser coil, typically behind the front grille or side panel.
- Use a stiff brush or vacuum cleaner with a brush attachment to remove dust and debris from the coil fins. Be careful not to bend the fins.
- Ensure all debris is removed for optimal airflow.
5.4 Automatic Defrost
This unit features an automatic self-defrosting evaporator. Ice buildup on the evaporator coil will be periodically melted and drained. Ensure the drain line is clear and unobstructed.

Figure 5.1: Interior view showing the cooling fan. This image provides a close-up of the internal fan, which is part of the forced-air cooling system, ensuring even temperature distribution throughout the cooler.
5.5 Gasket Maintenance
Inspect the lid gaskets regularly for cracks or tears. Clean gaskets with mild soap and water. Damaged gaskets can lead to air leaks, reducing efficiency and causing excessive ice buildup.
6. Troubleshooting
Before contacting service, please check the following common issues and solutions.
| Problem | Possible Cause | Solution |
|---|---|---|
| Unit does not run | No power; Power switch off; Circuit breaker tripped | Check power cord connection; Turn power switch on; Reset circuit breaker |
| Unit not cooling properly | Dirty condenser coil; Blocked airflow; Lids not closing properly; Temperature set too high; Ambient temperature too high | Clean condenser coil; Ensure proper clearance; Check lid gaskets; Adjust thermostat; Relocate unit if necessary |
| Excessive noise | Unit not level; Loose parts; Fan motor issue | Level the unit; Check for loose components; Contact service if fan motor is faulty |
| Water on floor (leakage) | Clogged drain line; Unit not level | Clear drain line; Level the unit |
| Interior light not working | Light switch off; Bulb faulty | Turn light switch on; Replace bulb (if applicable, consult service manual) |
If the problem persists after attempting these solutions, please contact qualified service personnel.
7. Specifications
Technical specifications for the Empura 49" Horizontal Bottle Cooler, Model E-KBC-50.
| Feature | Specification |
|---|---|
| Model Number | E-KBC-50 |
| Product Dimensions (D x W x H) | 27"D x 49.4"W x 35"H |
| Capacity | 13.7 cubic feet |
| Voltage | 115V / 60Hz |
| Refrigerant | R-600A |
| Defrost System | Automatic |
| Number of Doors | 2 (Sliding Lids) |
| Installation Type | Freestanding |
| Material | Stainless Steel Top, Black Painted Steel Exterior |
| UPC | 810136060300 |
8. Warranty and Support
8.1 Warranty Information
Warranty details for your Empura Horizontal Bottle Cooler are typically provided with your purchase documentation or can be found on the official Empura website. Please retain your proof of purchase for warranty claims. The warranty generally covers defects in materials and workmanship under normal use and service.
8.2 Customer Support
For technical assistance, parts, or service inquiries, please contact your dealer or the manufacturer directly. When contacting support, please have your model number (E-KBC-50) and serial number (if applicable) ready.
Empura Contact Information: Please refer to the contact details provided at the time of purchase or visit the official Empura website for the most current support information.


