
1. Product Overview
The ASUS Prime B860-PLUS WiFi motherboard is designed to provide a robust foundation for your PC build, supporting Intel Core Ultra Processors (Series 2) with the LGA 1851 socket. It features advanced connectivity and power delivery for optimal performance and stability. This motherboard is equipped with DDR5 memory support, PCIe 5.0 for graphics cards, and multiple M.2 slots for high-speed storage. Integrated Wi-Fi 6E and 2.5Gb Ethernet ensure fast and reliable network connections. Its design focuses on maximizing performance, stability, and compatibility for an enhanced DIY experience.

Image 1.1: Top-down view of the ASUS Prime B860-PLUS WiFi Motherboard, showcasing its layout and components.
2. Key Features
- Advanced AI PC Readiness: Designed to support future AI computing demands, offering necessary power and connectivity.
- Intel LGA 1851 Socket: Compatible with Intel Core Ultra Processors (Series 2).
- Robust Power Solution: Features 8+1+1+1 80A DrMOS power stages, an 8-pin ProCool power connector, alloy chokes, and durable capacitors for stable power delivery.
- Latest M.2 Support: Includes one PCIe 5.0 M.2 slot with a heatsink and one PCIe 4.0 M.2 slot for high-speed storage.
- Ultrafast Connectivity: Equipped with Wi-Fi 6E, a PCIe 5.0 x16 slot, Realtek 2.5Gb Ethernet, a rear USB 20Gbps Type-C port, and a front USB 5Gbps Type-C connector.
- Optimized Thermal Design: Features enlarged VRM heatsinks, an M.2 heatsink, PCH heatsink, hybrid fan headers, and Fan Xpert 2+ for efficient cooling.
- DIY Friendly Design: Includes Q-Dashboard, Q-DIMM, Q-LED, Q-slot, and a pre-mounted I/O shield for easier assembly.
- Unmatched Personalization: Three Addressable Gen 2 headers, configurable with ASUS-exclusive Aura Sync RGB lighting.

Image 2.1: Illustration of the motherboard's premium power stages and enhanced DDR5 performance features.

Image 2.2: Visual representation of the motherboard's fast connectivity options, including Wi-Fi 6E, USB 20Gbps Type-C, PCIe 5.0, and 2.5Gb Ethernet.
3. What's in the Box
Upon opening the product packaging, you should find the following items:
- ASUS Prime B860-PLUS WiFi Motherboard
- Wi-Fi Antenna
- SATA Cables (2x)
- M.2 Screw Package
- M.2 Rubber
- User Manual / Quick Start Guide
- Support DVD (may vary by region)
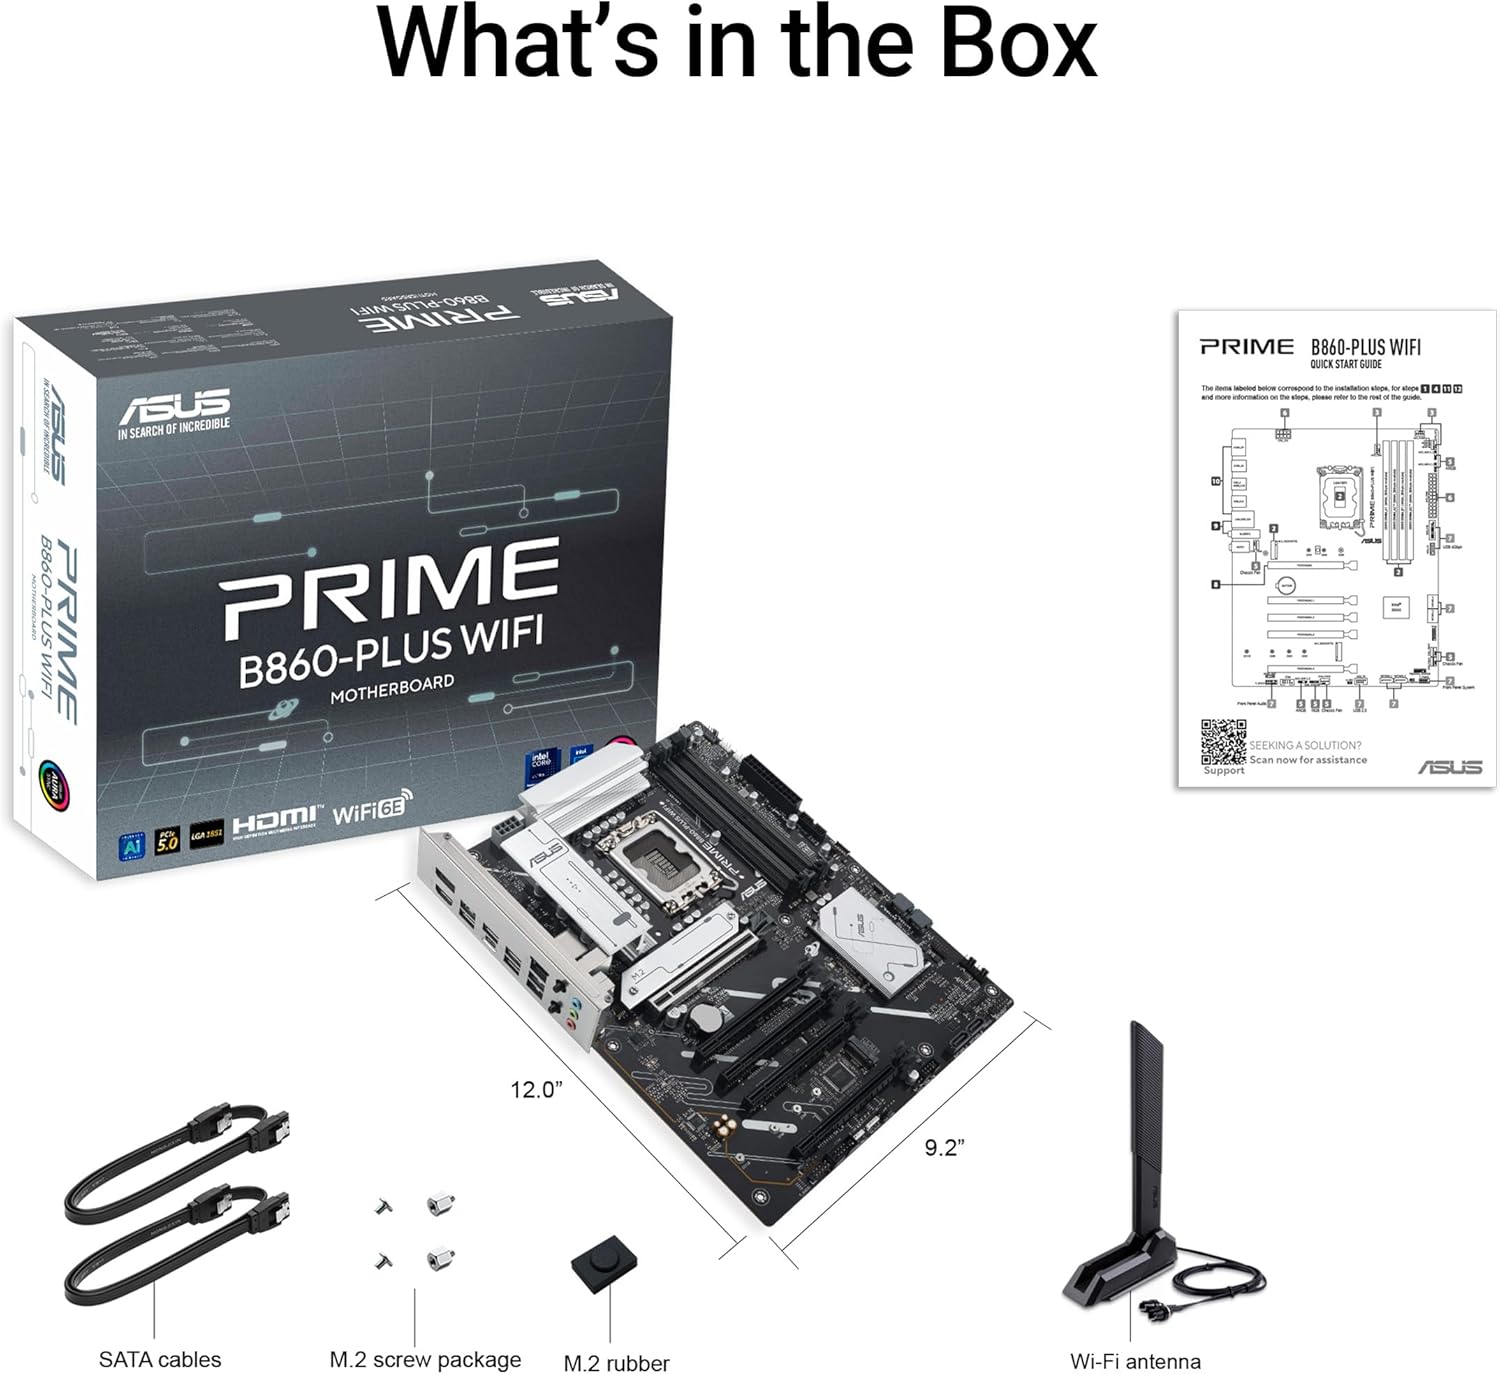
Image 3.1: Contents of the ASUS Prime B860-PLUS WiFi motherboard box, including the motherboard, Wi-Fi antenna, SATA cables, and M.2 accessories.
4. Setup Guide
Follow these steps for a successful installation of your ASUS Prime B860-PLUS WiFi motherboard:
- Prepare Your Workspace: Ensure a clean, well-lit, and static-free environment. Use an anti-static wrist strap.
- Install the CPU: Carefully open the CPU socket lever, align the CPU with the triangular mark on the socket, and gently place it. Close the lever to secure the CPU.
- Install the CPU Cooler: Attach your chosen CPU cooler according to its manufacturer's instructions. Ensure proper thermal paste application.
- Install DDR5 Memory: Open the clips on the DIMM slots. Align the memory modules with the slots, ensuring the notch on the module matches the notch in the slot. Press firmly until the clips snap into place. Refer to the motherboard manual for recommended slot population.
- Install M.2 SSDs: Locate the M.2 slots. Remove the heatsink (if present), insert the M.2 SSD at an angle, and secure it with the provided M.2 screw or rubber stand-off. Reattach the heatsink if applicable.
- Mount the Motherboard: Install the I/O shield into your PC case. Align the motherboard with the standoffs in the case and secure it with screws.
- Install the Graphics Card (GPU): Open the PCIe 5.0 x16 slot latch. Insert the graphics card firmly until it clicks into place. Secure it to the case with screws.
- Connect Power Cables: Connect the 24-pin ATX power connector and the 8-pin (or 4+4-pin) CPU power connector from your power supply to the motherboard. Connect power to the graphics card if required.
- Connect Storage Drives: Connect SATA data cables from your SATA SSDs/HDDs to the SATA ports on the motherboard. Connect power cables from the power supply to these drives.
- Connect Front Panel Cables: Connect the front panel headers (power button, reset button, USB ports, audio jacks) to the corresponding pins on the motherboard. Refer to the motherboard manual for pin layout.
- Connect Peripherals: Connect your monitor, keyboard, mouse, and other peripherals to the rear I/O ports.
- Initial Boot: Power on your system. Access the BIOS/UEFI setup to configure settings, install your operating system, and install necessary drivers.

Image 4.1: Highlights of the motherboard's DIY-friendly innovations, including the Q-Antenna for Wi-Fi setup and the pre-mounted I/O shield.
5. Operating Instructions
Once your system is assembled, follow these guidelines for operation:
5.1 BIOS/UEFI Setup
To access the BIOS/UEFI setup utility, press the Delete key or F2 key during the Power-On Self-Test (POST) process. The BIOS/UEFI allows you to configure system settings, boot order, overclocking parameters, and monitor hardware status. Save changes before exiting.
5.2 Driver Installation
After installing your operating system, install the latest drivers for your motherboard components (chipset, audio, LAN, Wi-Fi, etc.) from the ASUS support website. This ensures optimal performance and stability. The included support DVD may contain drivers, but online downloads are usually more up-to-date.
5.3 ASUS Software Utilities
ASUS provides several software utilities to enhance your experience, including:
- Armoury Crate: Centralized software for system monitoring, RGB lighting control (Aura Sync), and driver updates.
- Fan Xpert 2+: Advanced fan control for optimized cooling and noise levels.
- AI Suite 3: A comprehensive suite for system tuning and monitoring.
6. Maintenance
Regular maintenance helps ensure the longevity and optimal performance of your motherboard:
- Keep it Clean: Periodically clean dust from the motherboard and components using compressed air. Ensure the system is powered off and unplugged before cleaning.
- BIOS/UEFI Updates: Check the ASUS support website for the latest BIOS/UEFI versions. Updates can improve compatibility, stability, and performance. Follow the update instructions carefully to avoid system damage.
- Driver Updates: Keep your drivers updated to ensure compatibility with new software and hardware, and to benefit from performance improvements and bug fixes.
- Monitor Temperatures: Use monitoring software to keep an eye on CPU, chipset, and VRM temperatures, especially during heavy loads, to prevent overheating.
7. Troubleshooting
If you encounter issues, consider the following troubleshooting steps:
- No Power/No Boot:
- Check all power connections (24-pin ATX, 8-pin CPU, GPU).
- Ensure the power supply is switched on.
- Verify front panel power button connection.
- Test with minimal components (CPU, one RAM stick, GPU) to isolate the issue.
- No Display:
- Ensure the monitor is connected to the graphics card (or motherboard if using integrated graphics).
- Reseat the graphics card and memory modules.
- Check monitor input selection.
- System Instability/Crashes:
- Update BIOS/UEFI and all drivers to the latest versions.
- Check CPU and GPU temperatures.
- Run memory diagnostic tools to check for faulty RAM.
- Ensure adequate power supply for all components.
- Network Connectivity Issues:
- Ensure Wi-Fi antenna is securely connected.
- Check Ethernet cable connection.
- Update Wi-Fi and LAN drivers.
- Verify network settings in your operating system.
For more detailed troubleshooting, consult the comprehensive user manual available on the ASUS support website or contact ASUS customer support.
8. Specifications
| Feature | Specification |
|---|---|
| Brand | ASUS |
| Model Name | PRIME B860-PLUS WIFI |
| CPU Socket | LGA 1851 |
| Compatible Processors | Intel Core Ultra Series 2 |
| Chipset Type | INTEL B860 |
| RAM Memory Technology | DDR5 |
| Memory Speed | 6 GHz (up to 8600MHz+ OC) |
| Graphics Card Interface | PCIe 5.0 x16 |
| Storage Interfaces | 1x PCIe 5.0 M.2, 1x PCIe 4.0 M.2, 4x SATA 6Gb/s |
| Wireless Type | Wi-Fi 6E, Bluetooth |
| LAN | Realtek 2.5Gb Ethernet |
| USB Ports (Rear) | USB 20Gbps Type-C, various USB 5Gbps/10Gbps Type-A |
| Video Output | HDMI, DisplayPort |
| Form Factor | ATX |
| Dimensions (LxWxH) | 13.98 x 0.78 x 9.7 inches |

Image 8.1: Detailed view of the rear I/O panel of the ASUS Prime B860-PLUS WiFi Motherboard, showing various connectivity ports.
9. Product Video
Video 9.1: An unboxing and overview of an ASUS B860-PLUS WiFi motherboard. Please note this video features the TUF Gaming variant, but provides a general understanding of the B860-PLUS WiFi series features and components.
10. Warranty and Support
Your ASUS Prime B860-PLUS WiFi motherboard comes with a manufacturer's warranty. For specific warranty terms, duration, and registration details, please refer to the warranty card included in your product packaging or visit the official ASUS support website. ASUS provides comprehensive customer support, including FAQs, driver downloads, and technical assistance. For any issues not covered in this manual, please contact ASUS customer service directly.
For the latest drivers, BIOS updates, and support information, please visit: www.asus.com/support