Introduction
This manual provides detailed instructions for the assembly, operation, and maintenance of your TecTake® 2-Person Reclining Sun Lounger with Sunshade. Please read this manual thoroughly before assembly and use to ensure safe and optimal performance of your product. Keep this manual for future reference.
Safety Information
WARNING: Failure to follow these safety instructions may result in injury or damage to the product.
- Do not use if the total weight of users exceeds 250 kg (approximately 551 lbs).
- Use caution when reclining to avoid injury.
- Pay attention to stability when moving the sun lounger. Ensure the wheels are properly engaged and the lounger is balanced.
- Always assemble the product on a flat, stable surface.
- Keep children and pets away during assembly.
- Regularly inspect all bolts and connections to ensure they are tight.
- Do not use the product in strong winds or extreme weather conditions.
Package Contents
Before beginning assembly, ensure all parts listed below are present and undamaged. If any parts are missing or damaged, do not proceed with assembly and contact customer support.
- 1x Frame (steel coated)
- 1x Sleeping Surface (100% Polyester fabric)
- 2x Cushions (approx. 40 x 23 x 4 cm)
- 1x Sunshade Canopy
- 1x Assembly Guide
- Necessary assembly hardware (screws, bolts, etc.)

Image: Main components of the TecTake Sun Lounger.
Specifications
| Feature | Detail |
|---|---|
| Model Number | 404865 |
| Brand | TecTake |
| Overall Dimensions (L x W x H) | Approx. 200 x 175 x 154 cm (78.7 x 68.9 x 60.6 inches) |
| Sleeping Surface (L x W) | Approx. 190 x 134 cm (74.8 x 52.8 inches) |
| Sunshade Dimensions (L x W) | Approx. 121 x 185 cm (47.6 x 72.8 inches) |
| Height from Ground | Approx. 45-52 cm (17.7-20.5 inches) |
| Weight | Approx. 18 kg (39.7 lbs) |
| Maximum Load Capacity | 250 kg (551 lbs) |
| Frame Material | Coated Steel (diameter 4 cm) |
| Fabric Material | 100% Polyester with water-repellent coating |
| Features | Reclinable, Sunshade, 2 Wheels for movement, 2 Cushions included |

Image: Detailed product dimensions and technical specifications.
Setup and Assembly
The TecTake Sun Lounger is supplied disassembled and requires assembly. A detailed assembly guide is included in your package. Please follow the steps precisely to ensure correct and safe assembly.
- Unpack Components: Carefully remove all parts from the packaging. Lay them out on a clean, flat, and soft surface to prevent scratches.
- Identify Parts: Refer to the included assembly guide to identify each component and hardware.
- Assemble Frame: Begin by assembling the main steel frame components. Ensure all connections are secure but do not fully tighten bolts until the entire frame is assembled.
- Attach Sleeping Surface: Carefully attach the polyester sleeping surface to the frame. This step may require some tensioning to fit correctly.
- Install Sunshade: Mount the sunshade canopy to the designated points on the frame.
- Attach Wheels and Feet: Securely attach the two wheels and the anti-slip feet to the frame.
- Final Tightening: Once all components are in place, systematically tighten all bolts and screws. Do not overtighten.
- Attach Cushions: Place the two cushions on the sleeping surface. They are removable for easy cleaning or storage.
Note: Some users have reported that attaching the sleeping surface can be challenging due to fabric tension. It may be helpful to have a second person assist with this step. Ensure the fabric is evenly stretched.
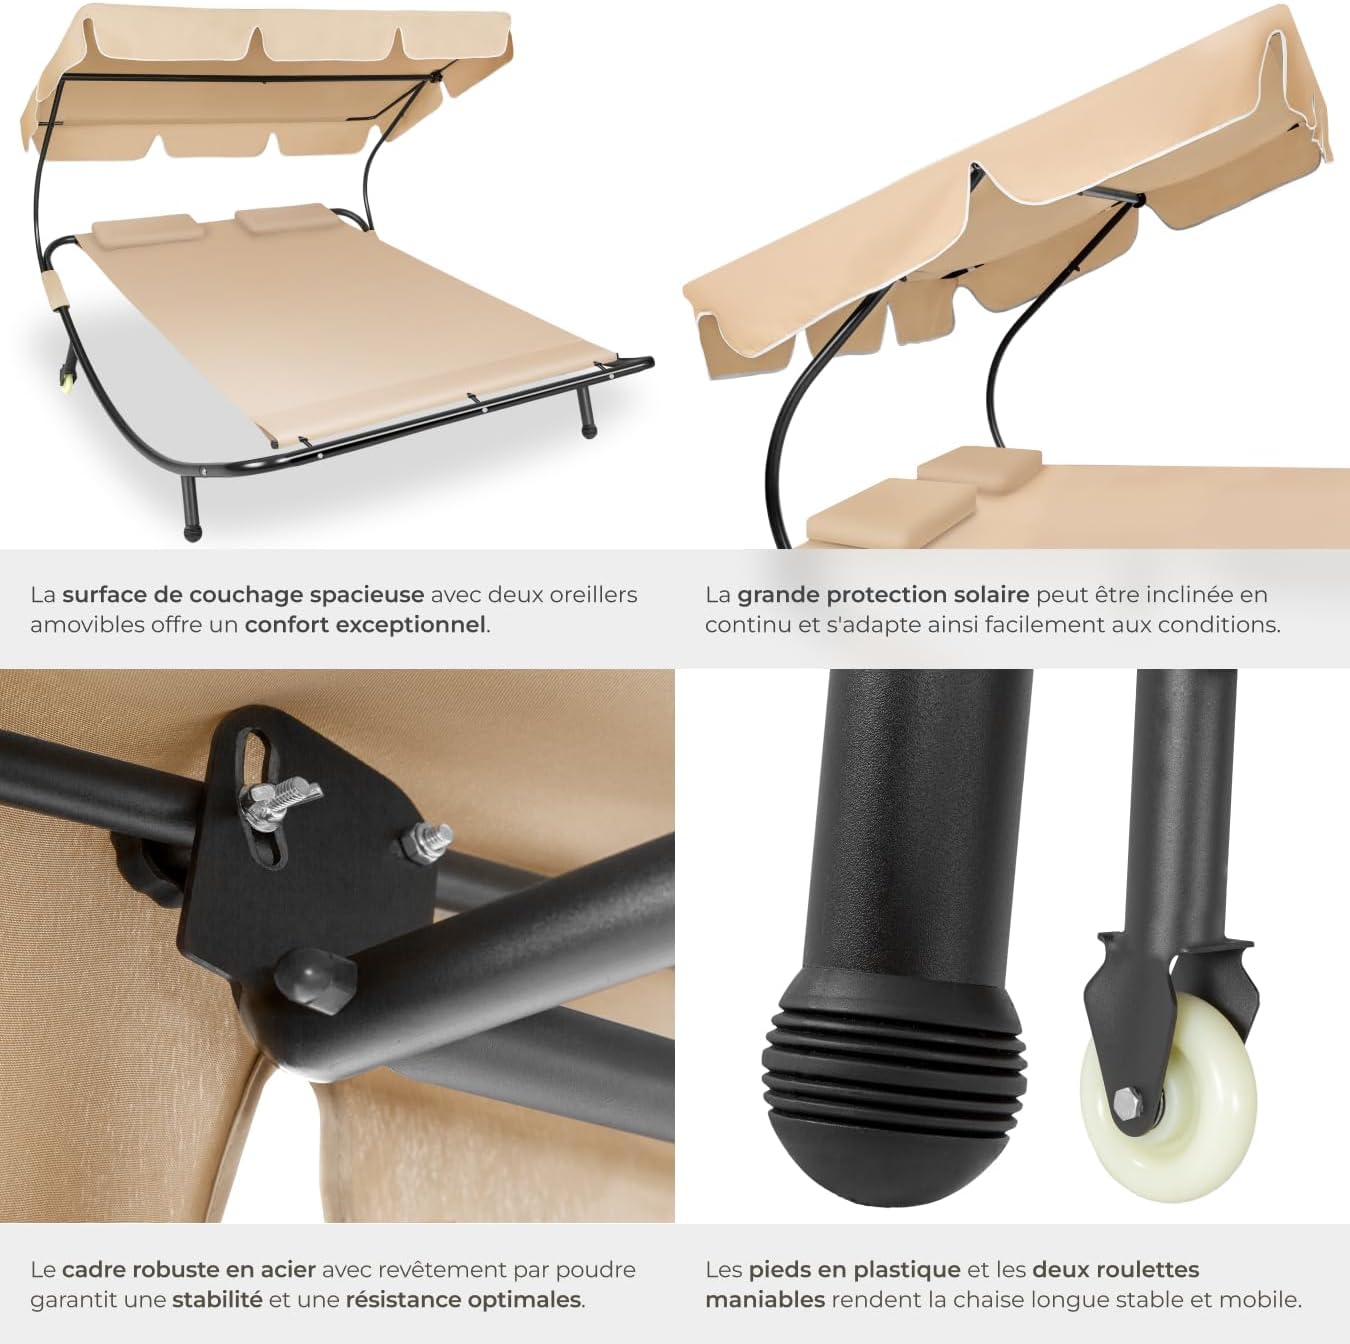
Image: Detail of the robust steel frame and mobility wheels.
Operating Instructions
- Using the Reclining Function: The sun lounger features an inclinable design. To adjust the recline, carefully lift or lower the backrest to your desired position. Ensure it locks securely into place before use.
- Adjusting the Sunshade: The sunshade canopy is continuously adjustable. Position it to provide optimal shade based on the sun's angle.
- Moving the Lounger: The two integrated wheels allow for easy movement. To move, slightly lift the end without wheels and roll the lounger to your desired location. Ensure the path is clear and even.
- Comfort: The two included cushions can be positioned for head or lumbar support as desired. They are removable.

Image: Demonstrating the variable inclination and comfortable cushions.
Maintenance
Proper maintenance will extend the life and appearance of your sun lounger.
- Cleaning Fabric: The textile covers are easy to clean due to their water-repellent coating. Wipe with a damp cloth and mild soap if necessary. Do not use harsh chemicals or abrasive cleaners. Allow to air dry completely before storage.
- Frame Care: The steel frame is coated to resist corrosion. Clean with a damp cloth. Avoid prolonged exposure to moisture to prevent rust.
- Protection: For prolonged outdoor use, especially during adverse weather conditions (rain, strong sun, frost), it is highly recommended to use a protective cover to shield the product from wear and material discoloration.
- Storage: When not in use for extended periods, store the sun lounger in a dry, sheltered area to protect it from the elements.
- Regular Inspection: Periodically check all screws, bolts, and connections to ensure they remain tight. Tighten if necessary.
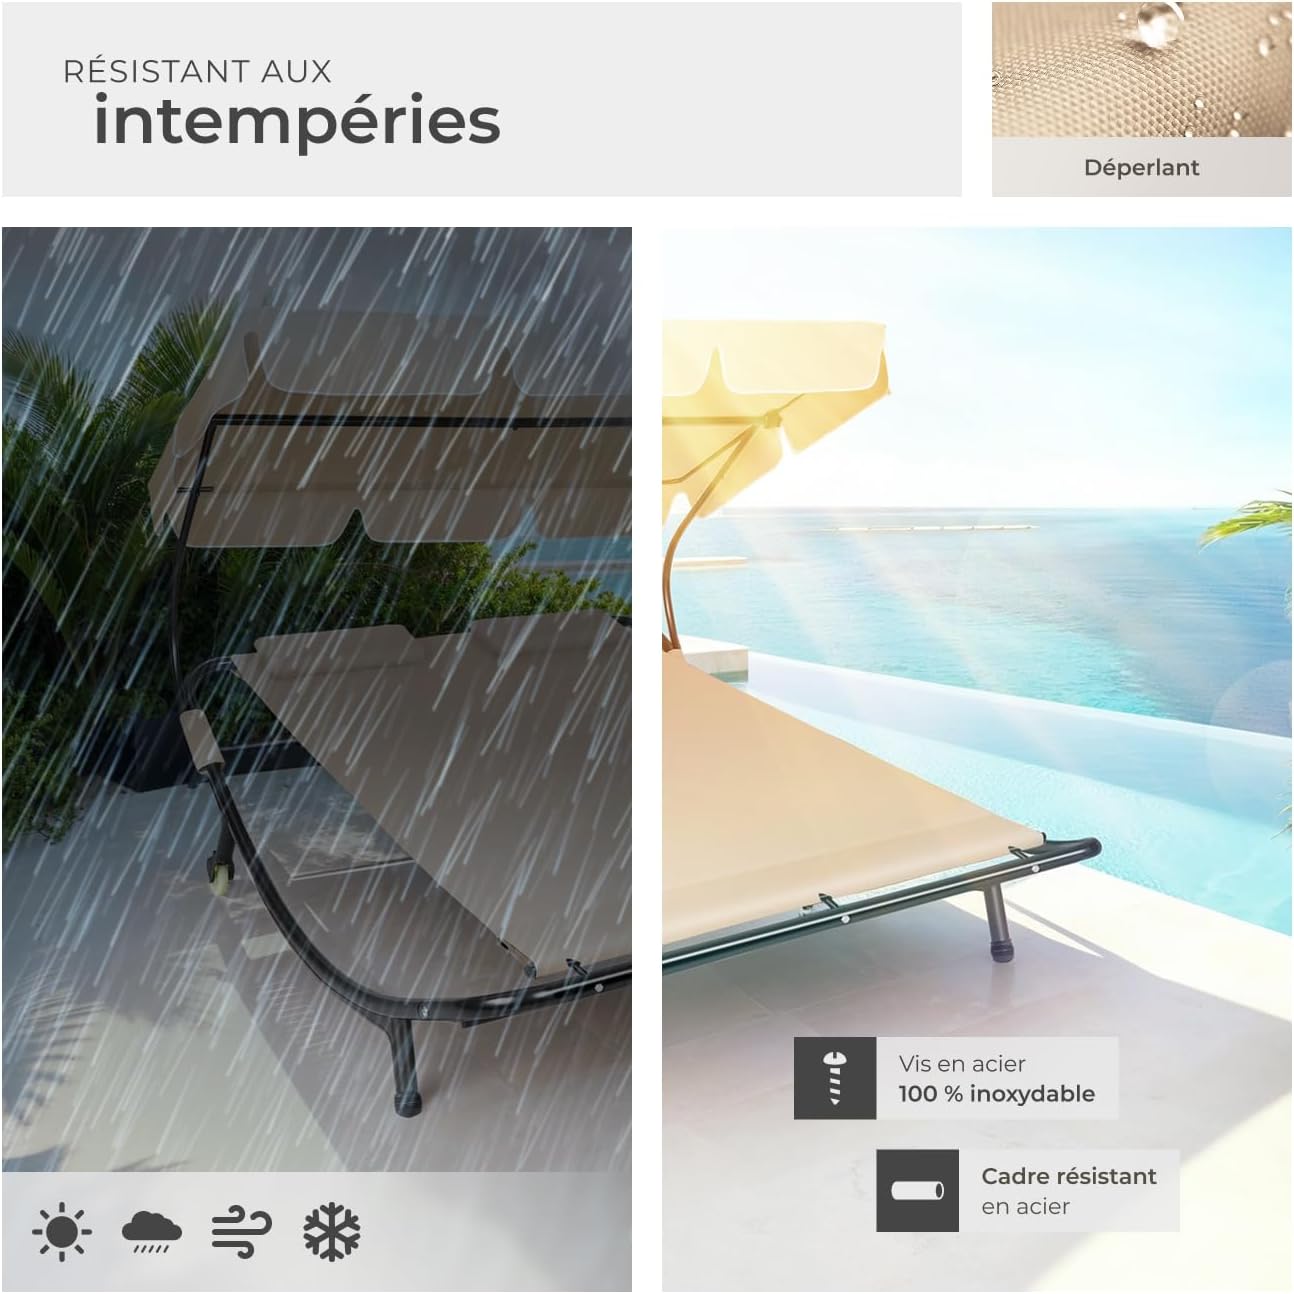
Image: Demonstrating the weather-resistant features of the fabric.
Troubleshooting
| Problem | Possible Cause | Solution |
|---|---|---|
| Difficulty during assembly, especially with the sleeping surface. | Fabric is very taut; misalignment of parts. | Ensure all parts are correctly oriented as per the assembly guide. Apply firm, even pressure. It may be easier with two people. Ensure the fabric is stretched evenly. |
| Product feels unstable or wobbly. | Loose connections; uneven ground. | Check and tighten all bolts and screws. Ensure the lounger is placed on a flat, level surface. |
| Fabric tearing or showing signs of wear prematurely. | Excessive weight; prolonged exposure to harsh elements without protection. | Ensure total user weight does not exceed 250 kg. Use a protective cover when not in use, especially in direct sunlight or rain. |
| Rust appearing on the frame. | Prolonged exposure to moisture. | Clean and dry the frame immediately after rain. Consider using a rust-inhibiting spray or a protective cover. |
Warranty and Support
TecTake products are designed for quality and durability. While specific warranty details are typically provided with your purchase documentation, standard return policies usually allow for returns within 30 days of purchase if the product is defective or not as described.
For any questions, missing parts, or issues not covered in this manual, please contact TecTake customer support. Refer to your purchase receipt or the seller's information for contact details.
You can often find support information on the official TecTake website or through the retailer where you purchased the product.


