
1. Introduction
This manual provides detailed instructions for the installation, operation, and maintenance of your Briidea Cool/Heat RV LCD Screen Digital Thermostat, Model MK-176. This digital thermostat is designed to replace the Dometic 3106995.032 model and offers precise temperature control for your RV environment. It is important to note that this thermostat is not applicable for Coleman Air Conditioners or Dometic 3-wire systems.
Key features include:
- Wide Temperature Range: Supports a temperature span from 0–30°C or 40–90°F, with a convenient ℃/℉ toggle switch.
- Accurate Digital Control: Engineered with electronic sensing technology for enhanced temperature precision.
- Clear Dual Temperature Display: Shows both the current ambient temperature and your selected setting simultaneously.
- Simple and Guided Installation: Comes with a comprehensive wiring guide and six color-coded wires for straightforward setup.
2. Safety Information
Please read all safety instructions before installing or operating this device. Failure to follow these instructions may result in property damage, injury, or death.
- Electrical Hazard: Disconnect all power to the RV's climate control system before installation to prevent electrical shock.
- Compatibility: This thermostat is designed for 12V DC systems and is compatible with Dometic 3106995.032 replacement. It is not compatible with Coleman Air Conditioners or Dometic 3-wire systems. Verify your system's compatibility before proceeding.
- Professional Installation: If you are unsure about any part of the installation process, consult a qualified RV technician.
- Operating Environment: Do not expose the thermostat to extreme moisture or direct water spray.
3. Product Overview
The Briidea RV Thermostat features a clear LCD screen and intuitive push-button controls for easy temperature management.

Figure 3.1: Front view of the Briidea RV Thermostat. The display shows 'FAN AUTO', 'FAN LO', '85°F', and 'OFF'. Buttons include 'ON AUTO FAN', 'SYSTEM', 'HI LO FAN', and up/down arrows.
The thermostat's compact design allows for easy integration into your RV's interior.

Figure 3.2: Physical dimensions of the thermostat, measuring approximately 4 inches in width, 2.6 inches in height, and 0.9 inches in depth.
The thermostat is designed to withstand a wide range of temperatures, ensuring reliable operation in various RV environments.

Figure 3.3: The thermostat is built to operate effectively across a broad temperature spectrum, from -31°F (-35°C) to 150°F (66°C).
4. Setup & Installation
Follow these steps for proper installation of your Briidea RV Thermostat. Ensure all power is disconnected before beginning.
4.1. Pre-Installation Checks
- Confirm your RV's climate control system is a 12V DC system.
- Verify that your existing thermostat is a Dometic 3106995.032 or a compatible model. This thermostat is not suitable for Coleman Air Conditioners or Dometic 3-wire systems.
- Gather necessary tools: screwdriver, wire strippers, electrical tape (optional).
4.2. Wiring Instructions
The thermostat comes with a comprehensive wiring guide and six color-coded wires for straightforward identification and connection.
- Disconnect Power: Turn off all power to your RV's climate control system at the circuit breaker.
- Remove Old Thermostat: Carefully remove your old thermostat from the wall. Take a photo of the existing wiring connections for reference before disconnecting any wires.
- Identify Wires: Match the color-coded wires from your RV system to the corresponding terminals on the Briidea thermostat. Refer to the wiring diagram below.
- Connect Wires: Connect the wires according to the diagram. Ensure secure connections.
- Mount Thermostat: Secure the new thermostat to the wall using the provided mounting hardware.
- Restore Power: Once installation is complete and all connections are secure, restore power to the RV's climate control system.

Figure 4.1: RV Thermostat Wiring Diagram. This diagram illustrates the connections for the system switch, fan mode, and fan speed, with color-coded wires for easy identification.
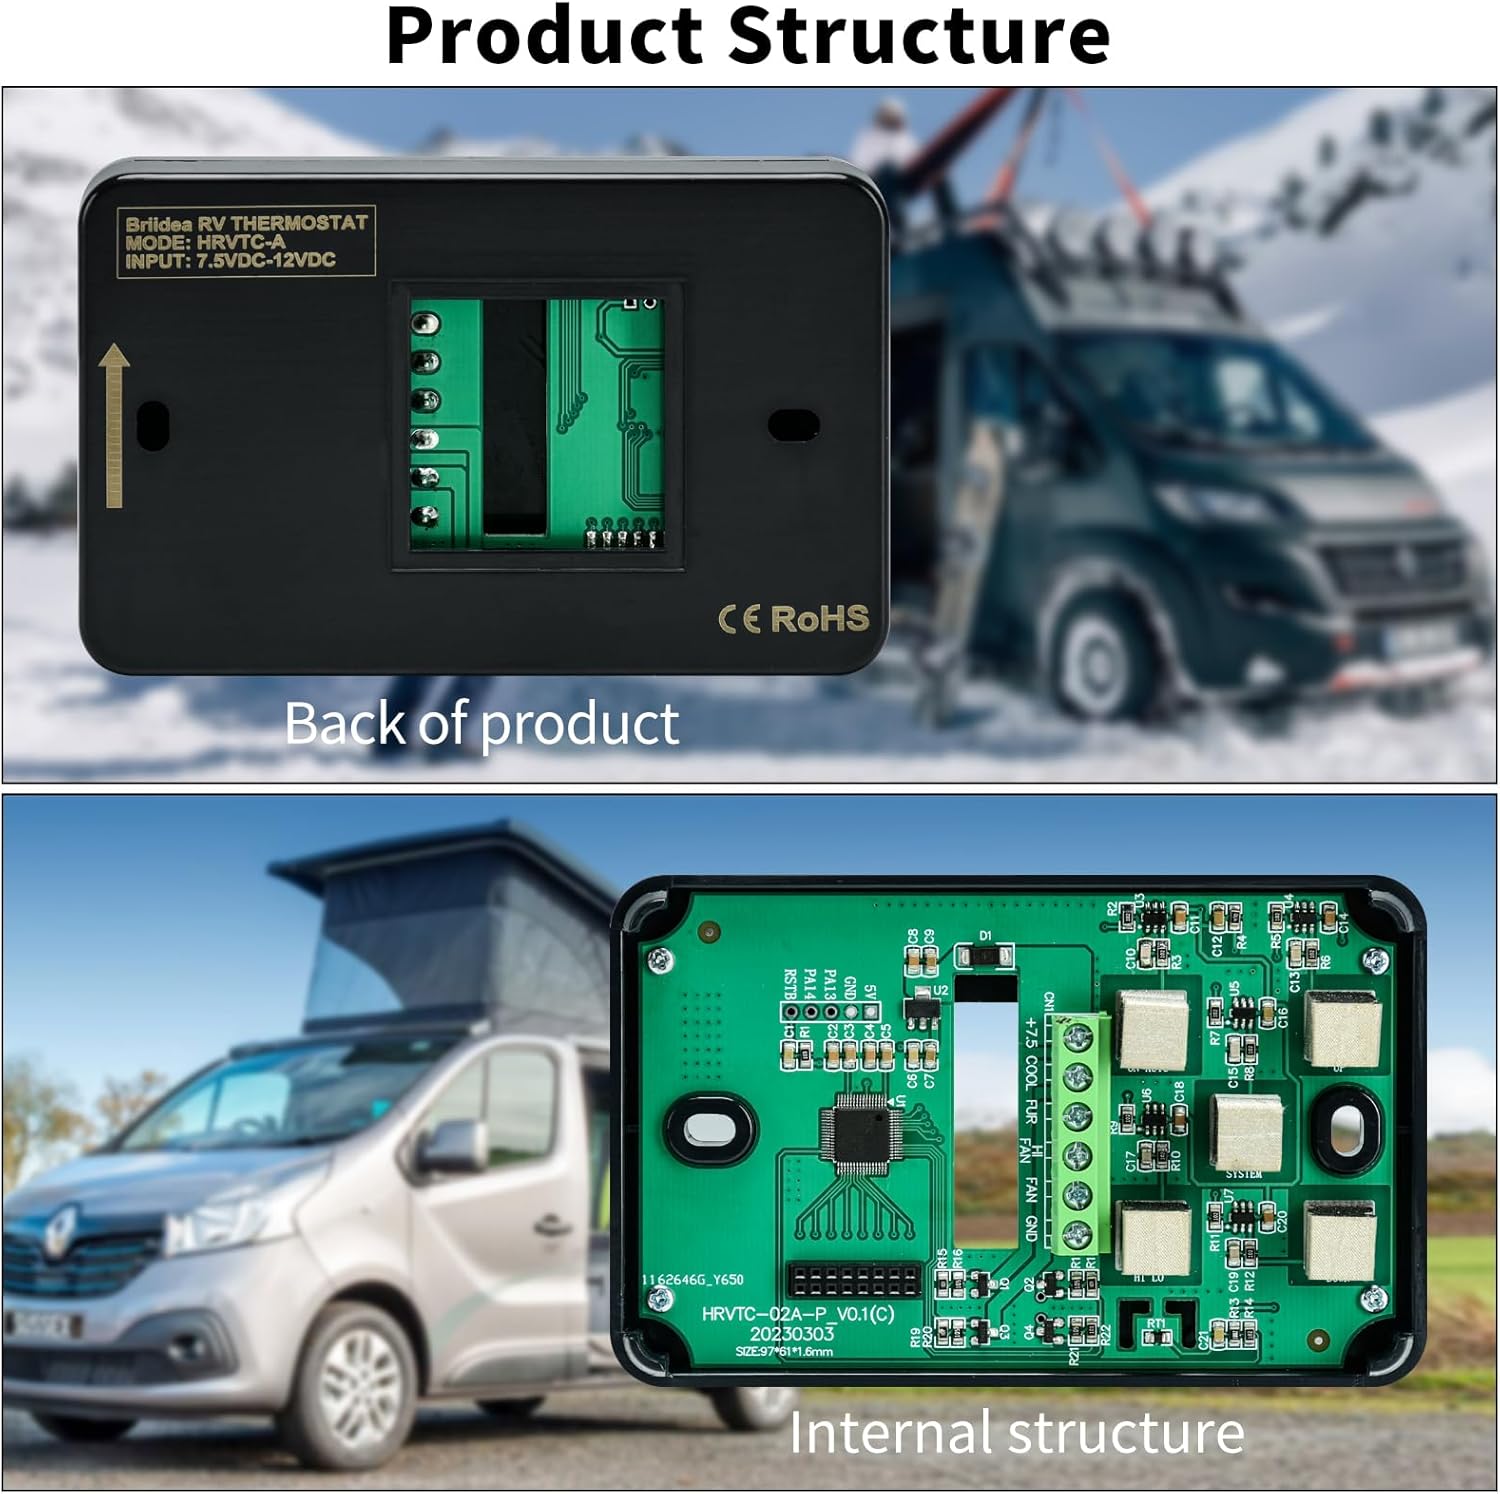
Figure 4.2: Back of the product, indicating the model HRVT-C and input voltage range of 7.5VDC-12VDC.

Figure 4.3: Internal structure of the thermostat, revealing the circuit board and connection points for the wiring.
5. Operation
The Briidea RV Thermostat is designed for intuitive operation. The LCD screen displays both the current ambient temperature and your set temperature.
5.1. Power On/Off
Press the SYSTEM button to cycle through system modes (OFF, HEAT, COOL, FAN). Selecting HEAT or COOL will turn the system on. Selecting OFF will power down the climate control functions.
5.2. Setting Temperature
Use the Up (▲) and Down (▼) arrow buttons to adjust your desired temperature setting. The set temperature will be displayed on the LCD screen.
5.3. System Modes
Press the SYSTEM button to select one of the following modes:
- OFF: Turns off the heating and cooling system.
- HEAT: Activates the heating system to reach the set temperature.
- COOL: Activates the cooling system to reach the set temperature.
- FAN: Operates the fan independently without heating or cooling.
5.4. Fan Control
Use the ON AUTO FAN and HI LO FAN buttons to control the fan operation:
- ON AUTO FAN: Toggles between Fan ON (continuous operation) and Fan AUTO (fan runs only when heating or cooling is active).
- HI LO FAN: Toggles between High (HI) and Low (LO) fan speeds when the fan is operating.
5.5. Celsius/Fahrenheit Toggle
The thermostat supports both Celsius (°C) and Fahrenheit (°F) temperature displays. Refer to the specific instructions provided with your unit for how to toggle between these units, typically involving a combination of button presses or a switch on the back of the unit.

Figure 5.1: The thermostat supports both Celsius and Fahrenheit temperature display options.
6. Maintenance
The Briidea RV Thermostat requires minimal maintenance to ensure optimal performance.
- Cleaning: Gently wipe the thermostat's screen and casing with a soft, dry cloth. Do not use abrasive cleaners, solvents, or spray cleaners directly onto the unit.
- Avoid Obstructions: Ensure that the thermostat's vents (if any) are not blocked by furniture or other objects, as this can affect temperature sensing accuracy.
- Battery Replacement: This thermostat is powered by the RV's 12V DC system and does not require battery replacement.
7. Troubleshooting
If you encounter issues with your Briidea RV Thermostat, refer to the following common problems and solutions:
| Problem | Possible Cause | Solution |
|---|---|---|
| Thermostat display is blank. | No power to the unit. | Check RV's circuit breaker. Ensure wiring connections are secure. |
| System not heating/cooling. | Incorrect mode selected, set temperature not reached, or wiring issue. | Verify SYSTEM mode (HEAT/COOL). Adjust set temperature. Check wiring connections as per Section 4.2. |
| Fan not operating. | Fan mode not selected, or fan speed set to OFF/AUTO when not heating/cooling. | Ensure FAN mode is selected. If in AUTO, the fan will only run with HEAT/COOL. Select ON for continuous fan operation. Check fan wiring. |
| Inaccurate temperature reading. | Thermostat location, blocked vents, or external heat sources. | Ensure thermostat is not in direct sunlight or near heat/cold sources. Clear any obstructions around the unit. |
| Thermostat not responding to button presses. | Temporary software glitch or power issue. | Try cycling power to the RV's climate control system (turn off at breaker, wait 30 seconds, turn back on). |
If the problem persists after attempting these solutions, please contact customer support.
8. Specifications
The following are the technical specifications for the Briidea RV Thermostat (Model MK-176):
| Feature | Detail |
|---|---|
| Brand | briidea |
| Model Name | MK-176 |
| Controller Type | Push Button |
| Special Feature | Accurate Digital Control, Dual Temperature Display, Easy Installation |
| Color | Black |
| Temperature Control Type | Manual, Digital |
| Power Source | 12V DC |
| Item Weight | 0.11 Kilograms (3.84 ounces) |
| Voltage | 12 Volts (DC) |
| Display Type | LCD |
| Control Method | Touch |
| Mounting Type | Surface Mount |
| Package Dimensions | 4.45 x 3.7 x 1.38 inches |
| Compatibility | Replaces Dometic 3106995.032. NOT APPLICABLE FOR COLEMAN AIR CONDITIONERS & DOMETIC 3 WIRES SYSTEM. |
9. Warranty & Support
For warranty information, please refer to the documentation included with your purchase or visit the official briidea website. Briidea stands behind the quality of its products.
If you require technical assistance, have questions about installation, or need to troubleshoot an issue not covered in this manual, please contact briidea customer support through their official channels. Contact information can typically be found on the product packaging or the briidea brand website.


