1. Product Overview
The GSEICE 12 Gallon Commercial Slushy Machine is designed for preparing a variety of frozen beverages, including slushies, frozen margaritas, and cold drinks. This machine features three 4-gallon (15L) tanks, intuitive controls, and a durable construction suitable for both commercial and home use.
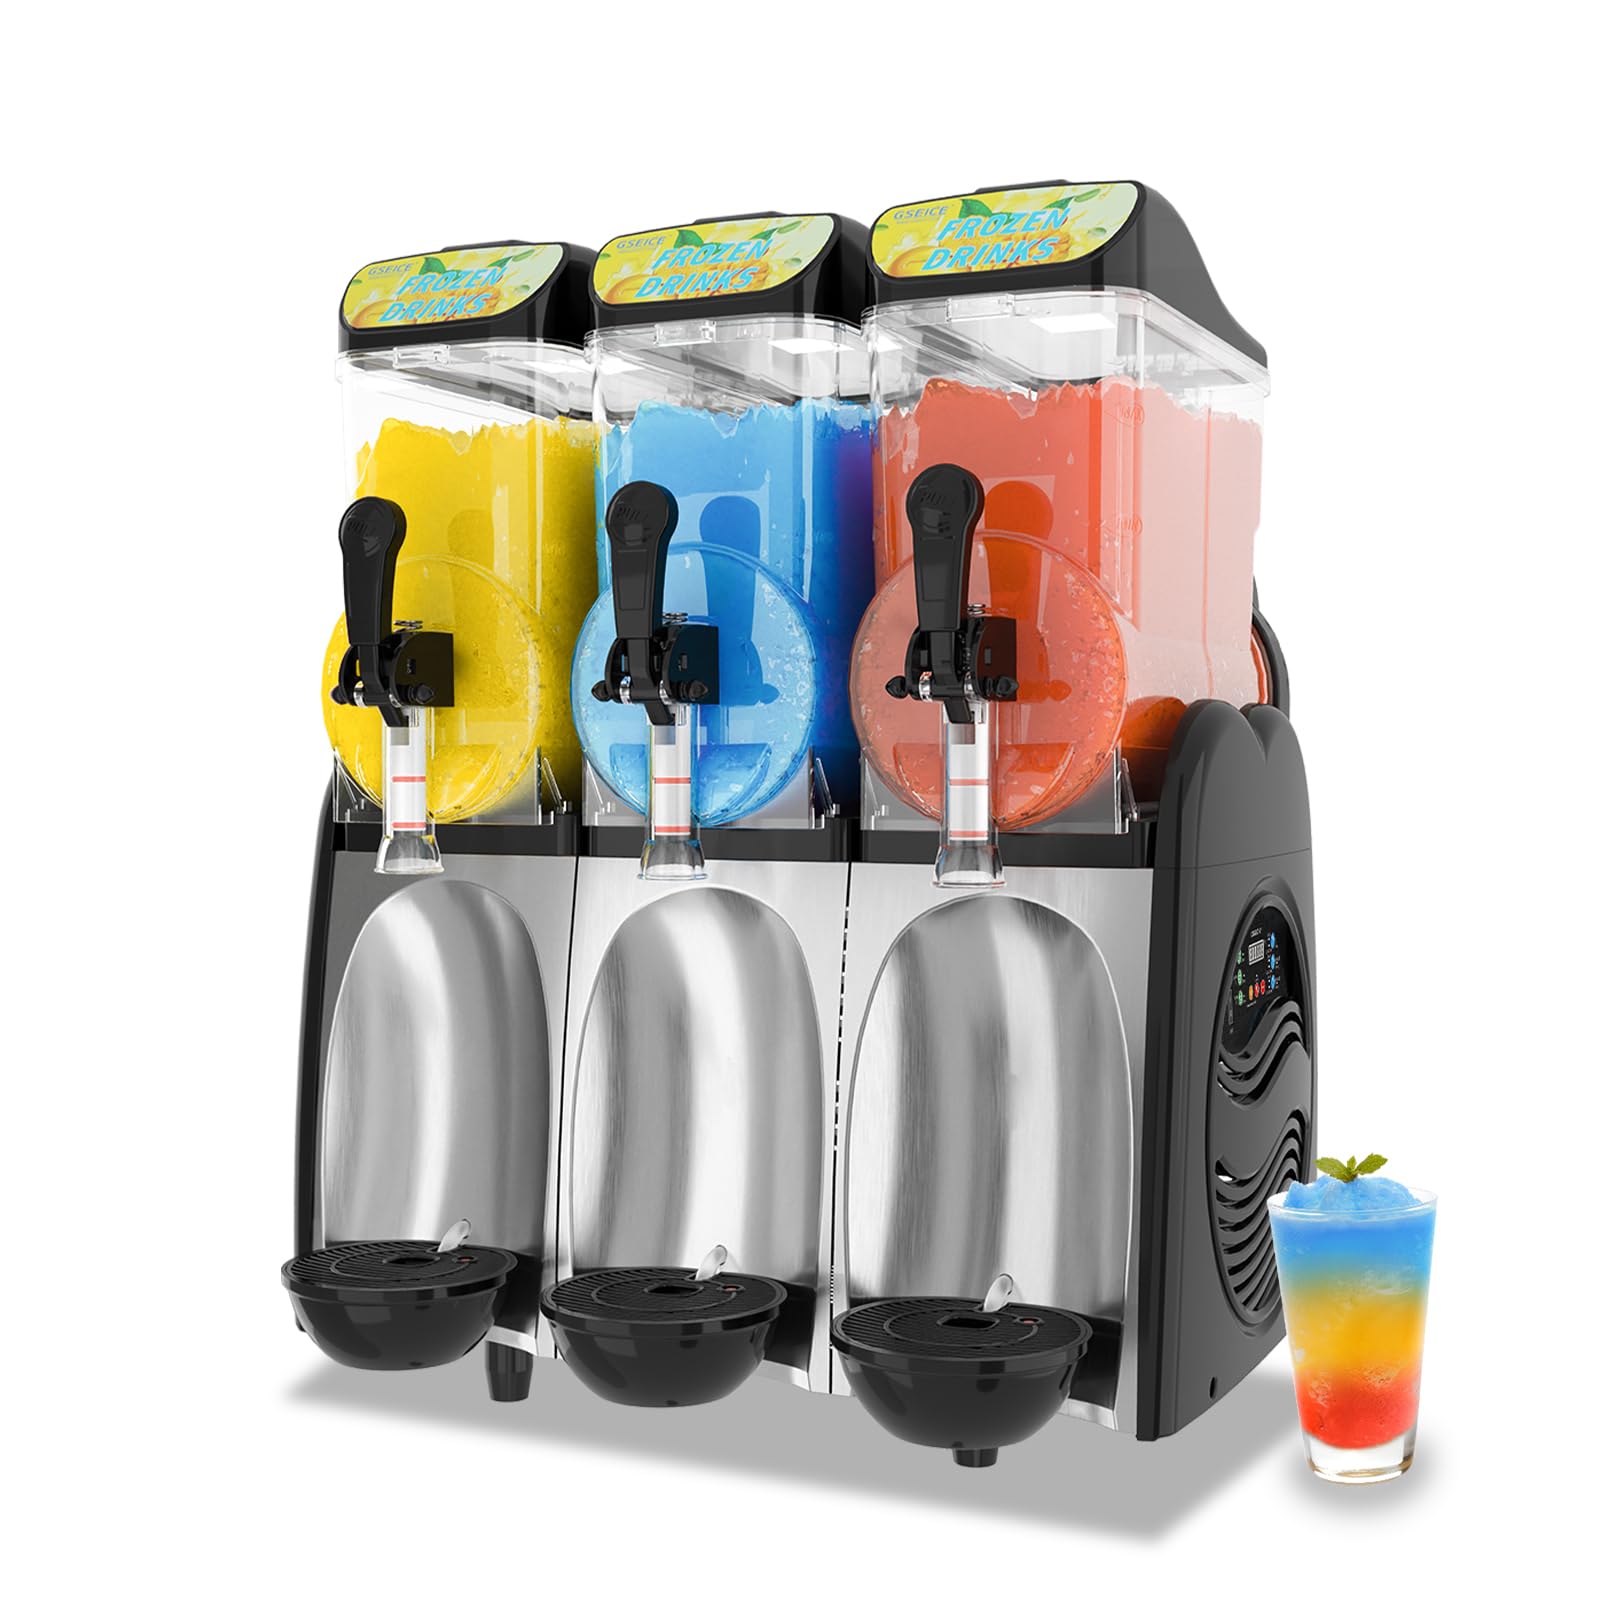
Image: The GSEICE 12 Gallon Commercial Slushy Machine, showcasing its three transparent tanks filled with colorful frozen beverages.
Key Features:
- Three 15L (4-Gallon) Tanks: Allows for simultaneous preparation of multiple flavors or drink types.
- User-Friendly Controls: Intuitive interface for easy operation.
- Easy to Clean: Features a removable drip tray and simplified maintenance design.
- Durable Construction: Built with high-quality stainless steel and sturdy plastic for long-lasting use.
- Sleek Design: Illuminated tanks enhance visual appeal.
2. Setup Instructions
2.1 Unpacking and Inspection
- Carefully remove the slushy machine from its packaging.
- Inspect the machine for any signs of damage during transit. Contact customer support immediately if any damage is found.
- Verify all accessories are included: measuring cup, whisk, flapper seals (3 pcs), valve stem O-rings (6 pcs), and drum rear seals (3 pcs).

Image: Included accessories for the slushy machine, essential for setup and maintenance.
2.2 Initial Cleaning
Before first use, it is crucial to clean all parts that will come into contact with beverages.
- Remove the tank lids and any removable components from the tanks.
- Wash the tanks, lids, and dispensing mechanisms with warm, soapy water. Rinse thoroughly.
- Fill each tank with clean water (room temperature or cold).
- Turn on the machine and press the 'Clean' button for each bowl to run a cleaning cycle for approximately 5 minutes.
- Drain the water from each tank using the dispensing handles. Repeat this process if necessary.
2.3 Component Assembly
Ensure all components are properly installed before filling with beverage mix.
- Attach the drip trays below each dispensing nozzle.
- Ensure the mixing augers are correctly seated within each tank.
- Properly position the groove of the material container into the protruding part of the machine for secure installation.

Image: Proper installation of the material container, ensuring the groove is aligned with the machine's base.
2.4 Power Connection
Connect the machine to a standard 110V/60Hz power outlet. Ensure the power switch is in the 'OFF' position before plugging in.
3. Operating Instructions
3.1 Preparing the Beverage Mix
Mix your desired beverage concentrate with water according to the manufacturer's instructions for the concentrate. For slushies, maintain a sugar content of at least 13% to achieve the correct consistency and prevent freezing solid. Do not use just water and alcohol.
3.2 Filling the Tanks
- Lift the tank lids.
- Pour the prepared beverage mix into each tank, ensuring not to exceed the 'MAX' fill line.
- Securely replace the tank lids.
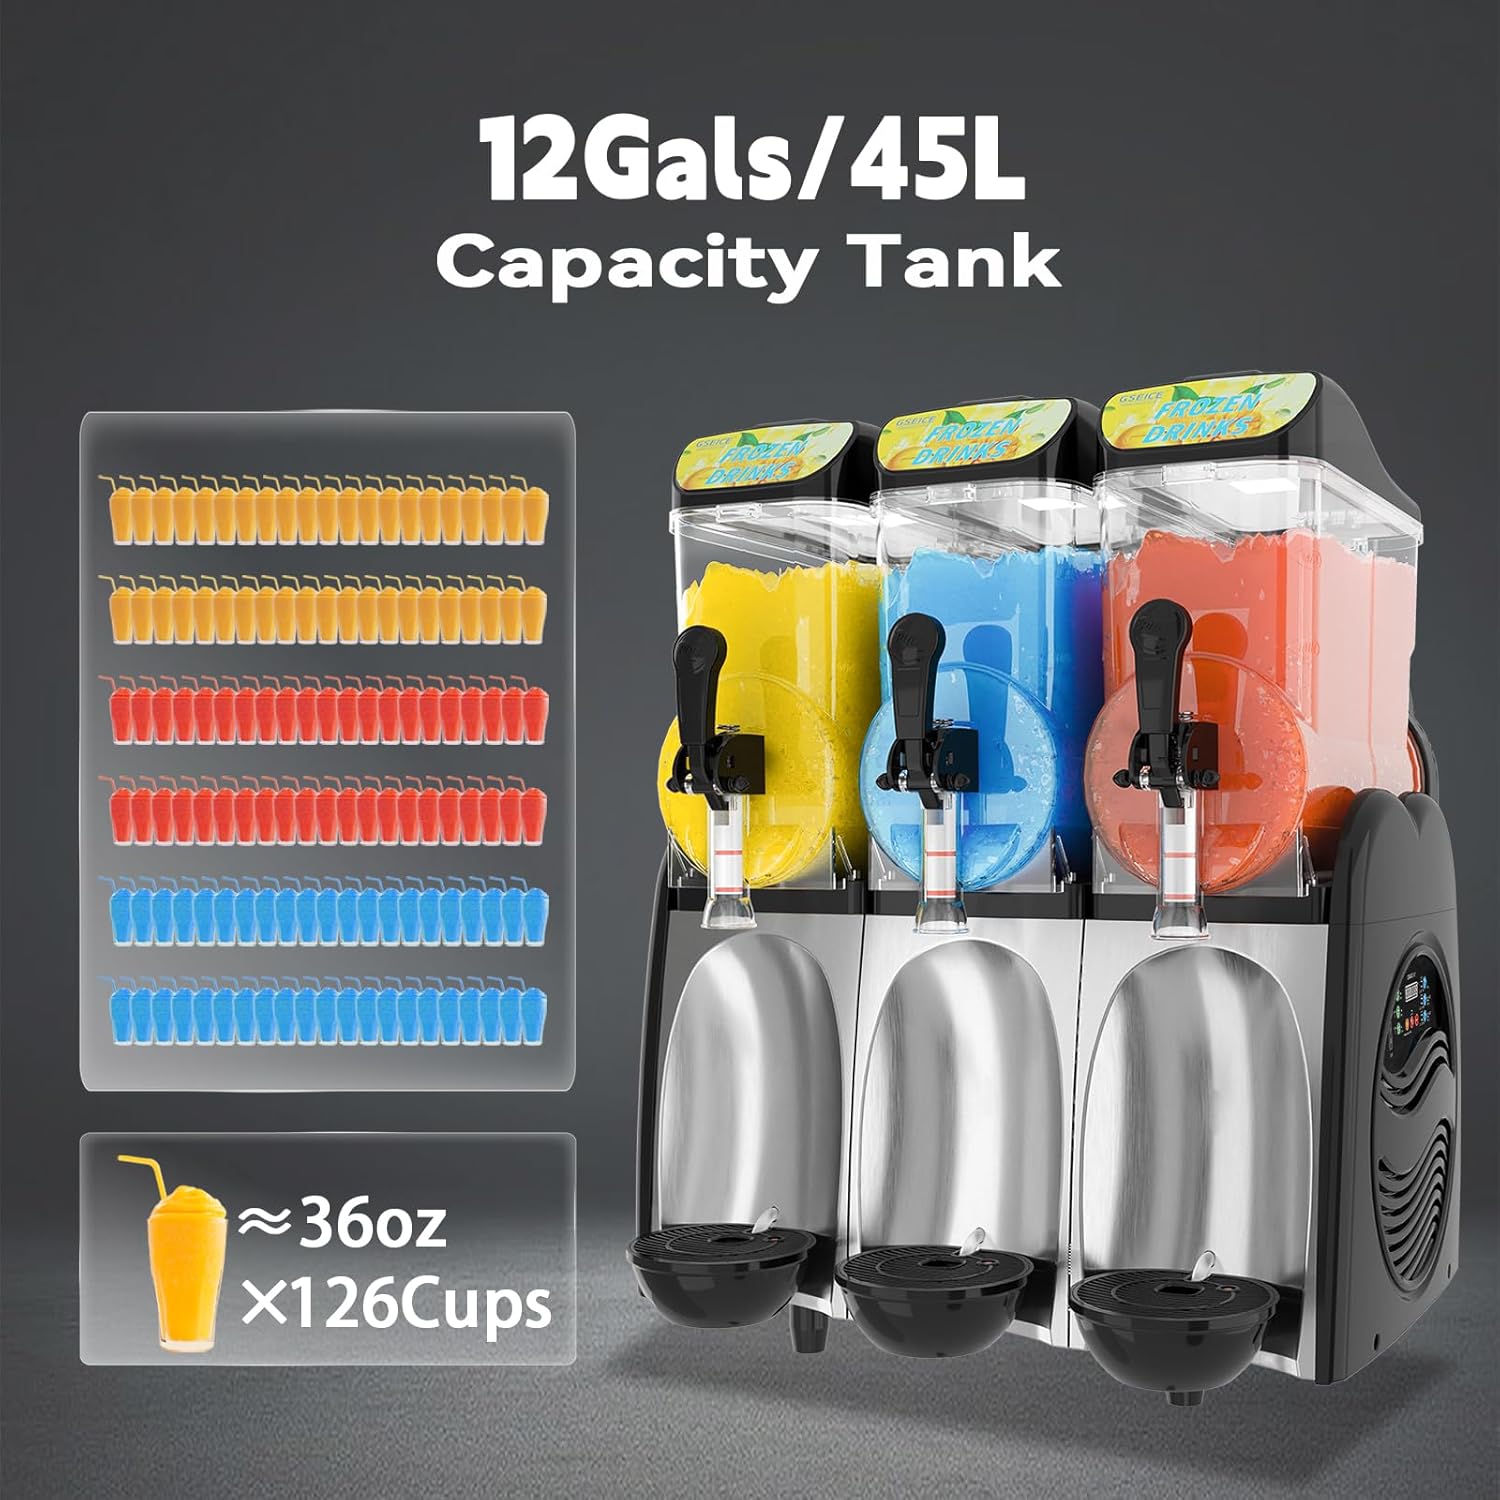
Image: The machine's 12-gallon capacity across three tanks, capable of producing approximately 126 cups of 36oz frozen drinks.
3.3 Selecting Operating Mode
The control panel allows you to select different modes for each bowl.
- Turn the main power switch to 'ON'.
- On the control panel, select the desired mode for each bowl (Bowl I, Bowl II, Bowl III) by pressing the corresponding button:
- Slush: For standard slushy consistency (-2°C/28.4°F).
- Cold Drink: For chilled liquid beverages (5°C/41°F).
- Margarita: For thicker, frozen margarita consistency (-5°C/23°F).
- The temperature display will show the current temperature. You can adjust the temperature by pressing the 'SET' button and then the '+' or '-' buttons.

Image: The control panel with options for Frozen Drink, Slush, and Margarita modes, along with temperature settings.

Image: A visual guide demonstrating the six steps for operating the slushy machine, from mixing to serving.
3.4 Dispensing
Once the desired consistency is reached, place a cup under the dispensing nozzle and pull the handle down to dispense the frozen beverage.
Video: A short demonstration of the commercial slushy machine in operation, showing the mixing and dispensing process.
4. Maintenance
4.1 Daily Cleaning
- Empty any remaining beverage mix from the tanks.
- Perform a cleaning cycle as described in Section 2.2.
- Remove and clean the drip trays. The removable drip tray can collect up to 0.2 gallons of water, and a red warning button pops up when full, indicating it needs to be emptied.
- Wipe down the exterior of the machine with a damp cloth.
4.2 Regular Maintenance
Periodically inspect and maintain the seals and moving parts to ensure proper function and prevent leaks.
- Before installation or reassembly, apply petroleum jelly to all seals (flapper seals, valve stem O-rings, drum rear seals) to ensure a tight fit and prevent wear.
- Replace worn or damaged seals as needed using the provided spare parts.

Image: Guide for accessory maintenance, emphasizing the lubrication of seals with petroleum jelly before installation.
5. Troubleshooting
Common Issues and Solutions:
- Watery Slushy Consistency: Ensure the sugar content of your beverage mix is at least 13%. Lower sugar content can result in a watery texture. Adjust the temperature setting to a colder mode (e.g., Margarita mode) if a thicker consistency is desired.
- Motor Stops Spinning / Slushy Too Thick: If the slushy becomes too thick or the temperature is set too low, the motor may struggle or stop. Adjust the temperature setting to a warmer mode (e.g., Slush or Cold Drink mode) or increase the liquid content in the mix.
- Leaks from Tanks: Check the seal rings in the tanks and ensure they are properly seated and not damaged. Apply petroleum jelly to seals during reassembly.
- Machine Not Freezing: Verify the power connection and ensure the correct operating mode is selected. Check the temperature display to confirm the machine is attempting to cool.
For persistent issues, refer to the detailed troubleshooting section in the included manual or contact customer support.
6. Specifications
- Model: B0DNHSY3T4
- Brand: GSEICE
- Tank Capacity: Three 15L (4 Gallons) tanks, total 12 Gallons
- Power: 110V/60Hz
- Product Dimensions: 26.6 x 20.87 x 32.48 inches
- Item Weight: 119.7 pounds
- First Available: November 19, 2024
7. Warranty and Support
This product is backed by GSEICE's commitment to quality. While specific warranty details are provided in the product packaging, customer support is available to assist with any questions or issues you may encounter. Many users have reported positive experiences with responsive customer service.
For assistance, please refer to the contact information provided in your product manual or visit the official GSEICE website.

