
1. Introduction
This manual provides detailed instructions for the COOSPO BC200 Wireless GPS Cycling Computer. It covers everything from initial setup and installation to advanced operation, maintenance, and troubleshooting. Please read this manual thoroughly to ensure proper use and to maximize the performance of your device.

Figure 1: COOSPO BC200 Bike Computer with Out-Front Mount. The display shows various cycling data fields including speed, distance, and time.
2. Package Contents
Before proceeding, please verify that all items listed below are included in your package:
- COOSPO BC200 GPS Cycling Computer
- CooSpo Out-Front Mount (MT5)
- USB Charging Cable
- User Manual (this document)

Figure 2: CooSpo MT5 Out-Front Mount, including the mount itself, handlebar spacers, and a hex key for installation.
3. Setup
3.1 Mounting the Device
The COOSPO BC200 comes with an out-front mount (MT5) designed for secure attachment to your bicycle handlebars. The mount is constructed from durable glass fiber and synthetic plastic, offering a shockproof and vibration-resistant design.
- Position the mount on your handlebar, ensuring it is centered and does not obstruct other controls.
- Use the provided hex key to tighten the mount securely. Use appropriate spacers if needed for a snug fit.
- Align the BC200 computer with the mount's interface.
- Gently push and twist the BC200 clockwise until it locks firmly into place.

Figure 3: Step-by-step guide for installing the CooSpo BC200 bike computer and its out-front mount onto a bicycle handlebar.
3.2 Initial Power On and GPS Positioning
To power on the BC200, press and hold the power button located on the side of the device. For the first use, the device will initiate GPS positioning. This process may take 3-5 minutes to acquire a stable signal. Ensure you are in an open outdoor area for optimal signal acquisition. The BC200 supports GPS, BEIDOU, and GLONASS for accurate positioning.
3.3 Sensor Pairing
The BC200 supports ANT+ and BLE (Bluetooth Low Energy) sensors for expanded data collection, including heart rate monitors, cadence sensors, speed sensors, and power meters. To pair a sensor:
- Navigate to the 'Sensor' menu on the BC200.
- Ensure your sensor is active and within range.
- Select 'Add Sensor' and choose the type of sensor you wish to pair.
- The BC200 will scan for available sensors. Select your sensor from the list to complete pairing.

Figure 4: The BC200 is compatible with various external sensors, including Heart Rate Monitors, Cadence Sensors, Speed Sensors, and Power Meters.
4. Operating the Device
4.1 Display Overview
The BC200 features a clear LCD display that shows various cycling metrics. The main screen typically displays:
- Speed (current, average, max)
- Distance (trip, total)
- Time (ride time, total time)
- Heart Rate (current, average, max - requires HR sensor)
- Cadence (current, average, max - requires cadence sensor)
- Power (current, average, max - requires power meter)
- Altitude (current)
- Temperature
- Calories Burned
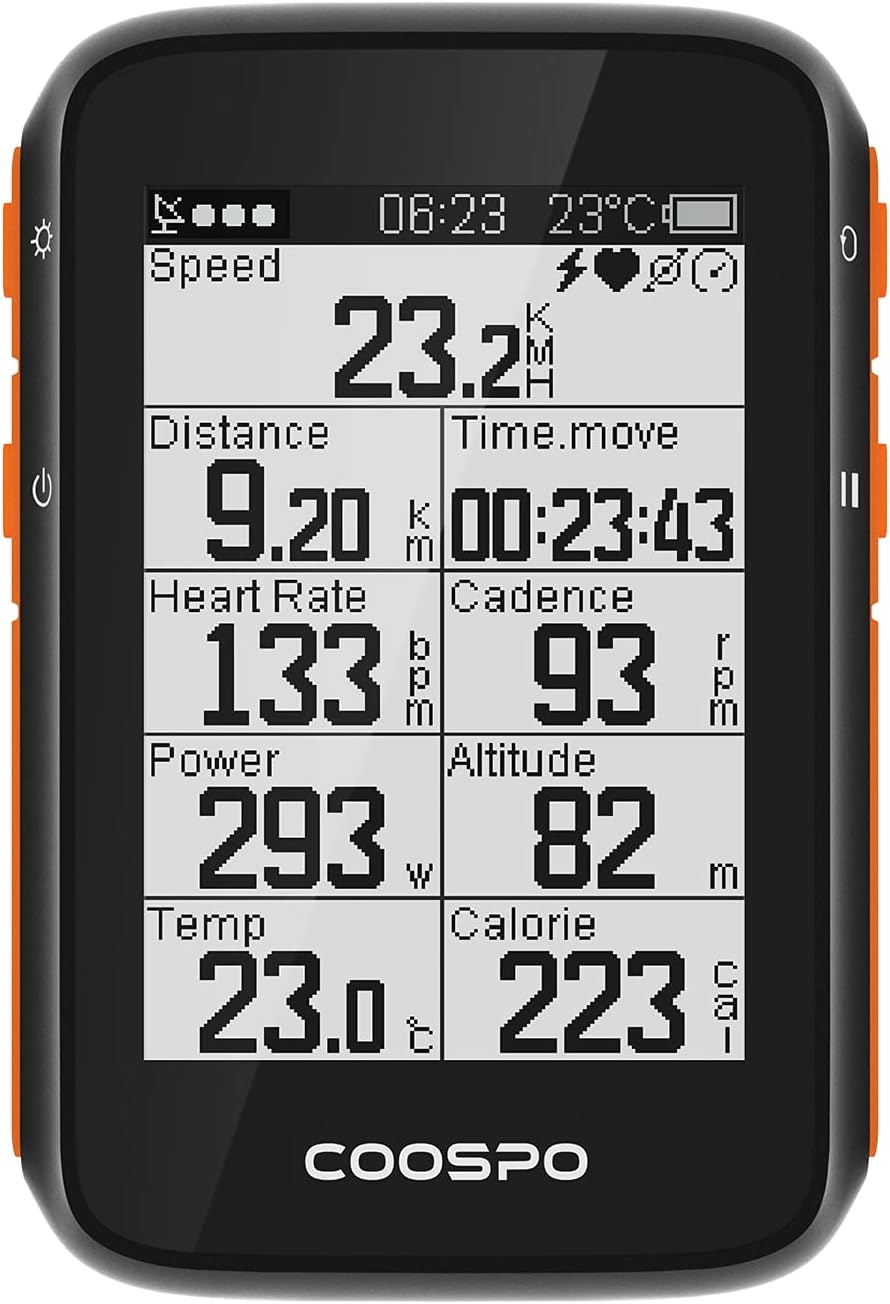
Figure 5: Close-up view of the CooSpo BC200 display, showing various real-time cycling data fields.
4.2 Navigation and Modes
The BC200 is operated using its side buttons. Key functions and modes include:
- Cycling: Main riding mode for data recording.
- Dial: Customizable data display pages.
- Bike: Bike profile settings.
- User: User profile settings.
- Sensor: Manage paired sensors.
- History: View past ride data.
- Sync: Synchronize data with the CooSpo app via Bluetooth 5.0.
- GPS: GPS status and settings.
- Setting: General device settings.

Figure 6: Overview of the BC200's main features and menu icons, including GPS, IP67 rating, large screen, auto backlight, 36-hour runtime, barometer, and sensor support.
4.3 Language Settings
The BC200 supports multiple languages. To change the display language:
- Go to the 'Setting' menu.
- Select 'Language'.
- Choose your preferred language from the list (e.g., English, Español, Deutsch, Français, Português, Русский, Türkçe).

Figure 7: The BC200's language selection menu, demonstrating its multi-language capabilities.
5. Maintenance
5.1 Battery Information
The BC200 is powered by a Lithium Ion battery, offering up to 36 hours of runtime on a full charge. To charge the device, connect the provided USB cable to the charging port on the BC200 and a standard USB power source. A full charge typically takes a few hours. Avoid extreme temperatures during charging and operation to prolong battery life.
5.2 Cleaning and Storage
To maintain your BC200, wipe the device with a soft, damp cloth. Do not use abrasive cleaners or solvents. Ensure the charging port cover is securely closed to maintain its IPX4 water resistance rating. Store the device in a cool, dry place away from direct sunlight when not in use.
6. Troubleshooting
If you encounter issues with your COOSPO BC200, refer to the table below for common problems and their solutions.
| Problem | Possible Cause | Solution |
|---|---|---|
| Device does not power on. | Low battery. | Charge the device fully. |
| No GPS signal. | Indoors or obstructed view of sky. | Move to an open outdoor area. Allow 3-5 minutes for initial acquisition. |
| Sensor not pairing. | Sensor off, out of range, or battery low. | Ensure sensor is active and close to the BC200. Check sensor battery. Try re-pairing. |
| Inaccurate data readings. | Improper sensor calibration or interference. | Check sensor installation and calibration settings. Avoid strong electromagnetic fields. |
7. Specifications
Key technical specifications for the COOSPO BC200 GPS Cycling Computer:
| Feature | Detail |
|---|---|
| Brand | CooSpo |
| Model | BC200 |
| Display Type | LCD |
| Connectivity Technology | ANT+, Bluetooth 5.0 |
| GPS Positioning | GPS, BEIDOU, GLONASS |
| Battery Type | Lithium Ion |
| Battery Runtime | Up to 36 hours |
| International Protection Rating | IPX4 (Water Resistant) |
| Mounting Type | Out-Front Mount (MT5) |
| Human Interface Input | Buttons |
| Included Components | BC200 Computer, MT5 Mount, USB Cable, Manual |
8. Warranty and Support
For warranty information and technical support, please refer to the official CooSpo website or contact CooSpo customer service directly. Keep your purchase receipt as proof of purchase for any warranty claims.
Official CooSpo Website: www.coospo.com