
1. Introduction
This manual provides detailed instructions for the assembly, operation, and maintenance of your Merax 51.2-inch Kitchen Island with Drop Leaf and Wheels. Please read this manual thoroughly before assembly and use to ensure safe and efficient operation. Keep this manual for future reference.

Image: The Merax Kitchen Island, showcasing its design and functionality with the drop leaf extended.
2. Safety Information
- Read all instructions carefully before assembly and use.
- Keep all packaging materials away from children.
- Ensure all parts are securely fastened before use. Periodically check and tighten fasteners.
- Do not exceed the maximum weight capacity of 400 lbs for the top surface, 33 lbs for the drop leaf, and 75 lbs for each shelf.
- Use on a flat, stable surface. If using wheels, ensure two are locked when stationary.
- Avoid placing hot items directly on the surface without protection.
- Keep hands clear of moving parts, especially when folding or unfolding the drop leaf.
3. Package Contents
Verify that all components are present before beginning assembly. If any parts are missing or damaged, contact customer support.
| Part | Description | Quantity |
|---|---|---|
| A | Main Cabinet Body | 1 |
| B | Drop Leaf Countertop | 1 |
| C | Adjustable Shelves | (Quantity Varies) |
| D | Internal Storage Racks | (Quantity Varies) |
| E | Towel Rack | 1 |
| F | Lockable Wheels | 4 |
| G | Solid Wood Feet | 4 |
| H | Hardware Pack | 1 |
4. Setup & Assembly
Follow these steps for proper assembly. It is recommended to have two people for assembly.
4.1. Choose Installation Method: Wheels or Fixed Feet
The kitchen island offers two installation options for mobility: lockable wheels or solid wood feet. Decide which method suits your needs before proceeding.
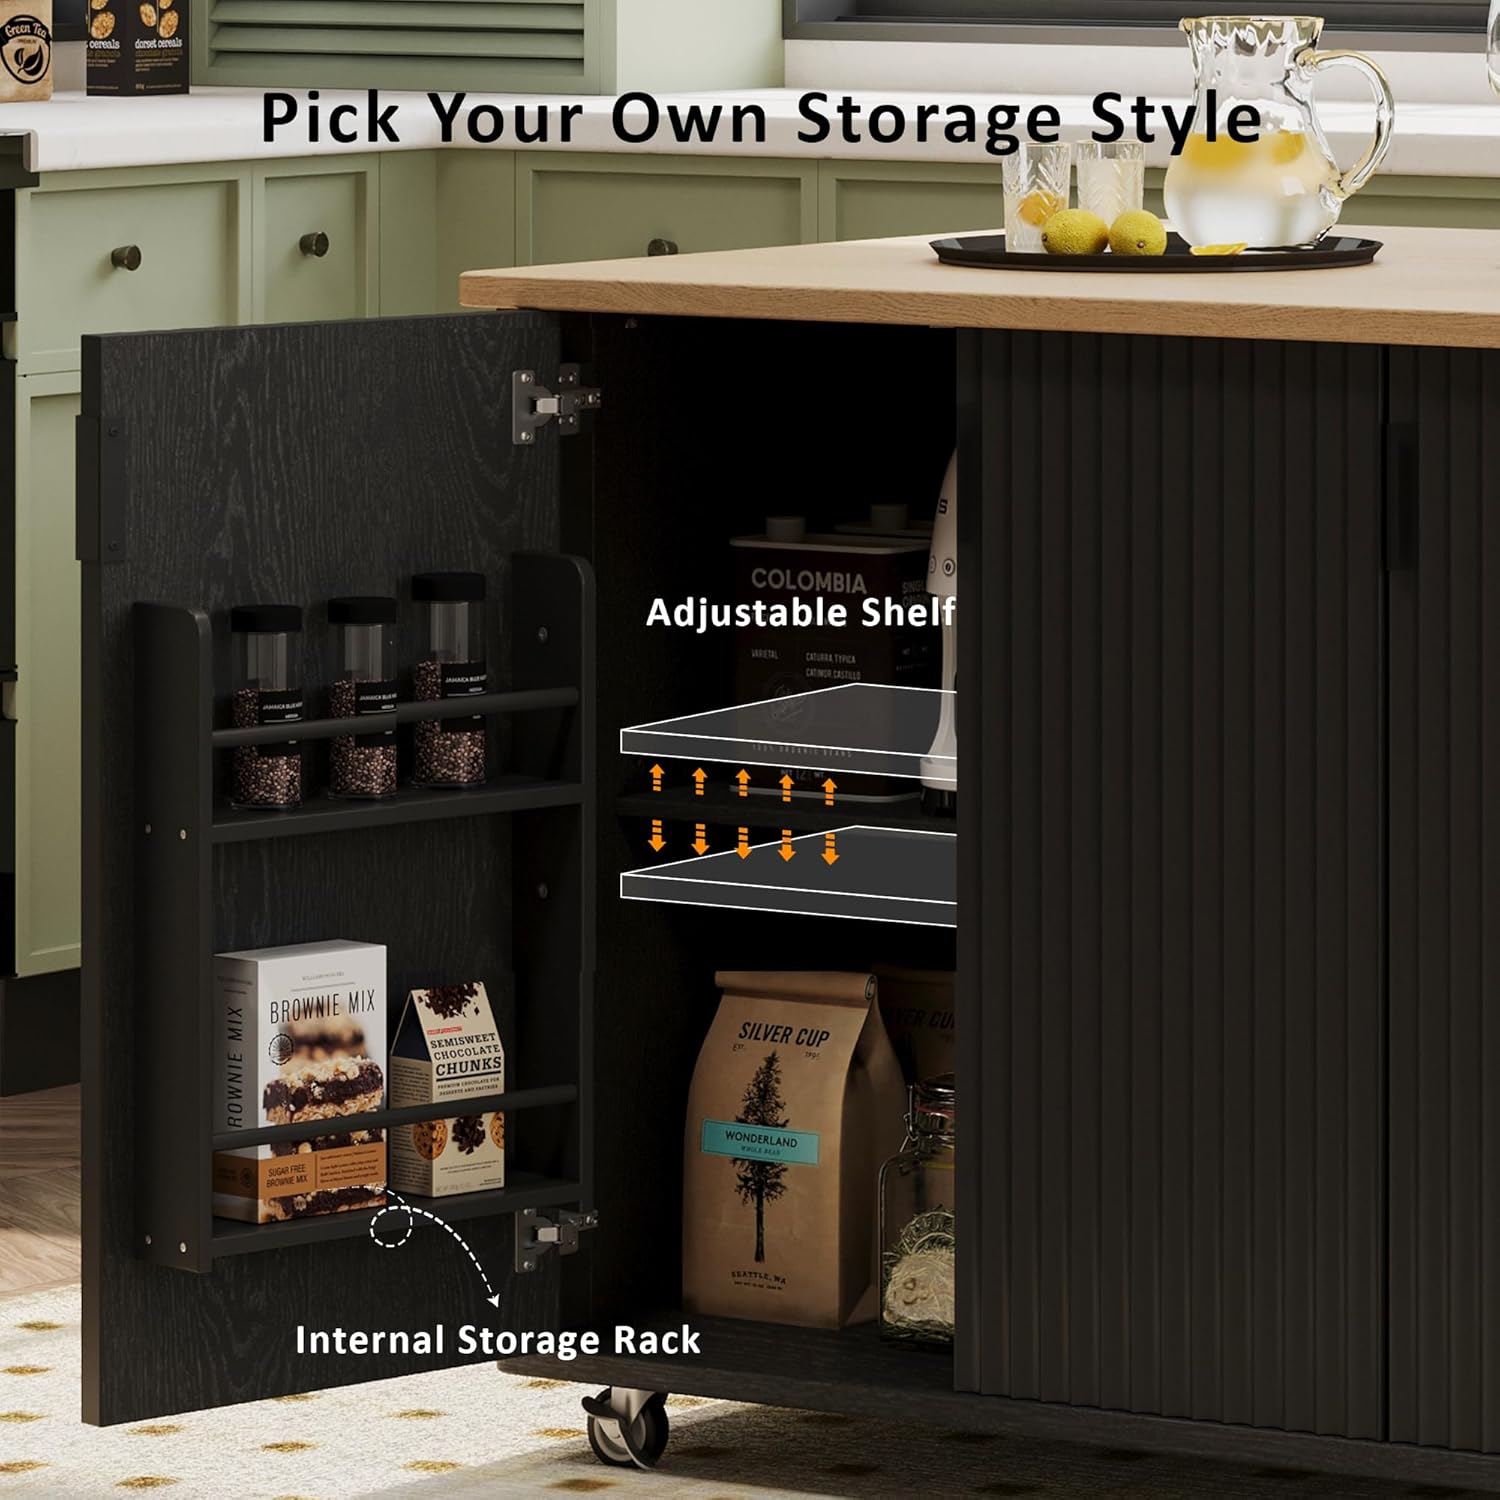
Image: Comparison of lockable wheels for mobility and solid wood feet for stationary use.
4.2. Base Assembly (Wheels or Feet)
- Carefully unpack all components and lay them out on a clean, soft surface to prevent scratches.
- Attach the chosen base components (wheels or solid wood feet) to the bottom of the main cabinet body (Part A) using the provided hardware from Pack H. Ensure all screws are tightened securely.
- If installing wheels, ensure the two lockable wheels are positioned on the same side for easier locking.
4.3. Cabinet and Shelf Installation
- Assemble the main cabinet structure according to the diagrams in the separate assembly guide (if provided).
- Install the adjustable shelves (Part C) into the cabinet compartments at your desired height. Shelf pins are typically used for this purpose.
- Attach the internal storage racks (Part D) to the inside of the cabinet doors using the designated hardware.
- Mount the towel rack (Part E) to the side of the island as shown in the product images.

Image: Detailed view of the adjustable shelf and internal storage rack for customized storage.
4.4. Drop Leaf Countertop Attachment
- Attach the drop leaf countertop (Part B) to the main countertop using the hinges and support mechanisms provided in the hardware pack.
- Ensure the drop leaf mechanism operates smoothly and locks securely in both the extended and folded positions.

Image: Illustration of the drop leaf mechanism, highlighting its space-saving functionality.
5. Operating Instructions
5.1. Using the Drop Leaf
- To Extend: Gently lift the drop leaf until it is level with the main countertop. Engage the support latch underneath to secure it in place.
- To Fold: Disengage the support latch and carefully lower the drop leaf until it hangs vertically alongside the island.
5.2. Moving the Kitchen Island (with Wheels)
- To Move: Unlock the two lockable wheels by flipping their levers. Gently push the island to its desired location.
- To Secure: Once in position, lock the two lockable wheels by flipping their levers back. This prevents unintended movement.
5.3. Adjusting Shelves
The internal shelves are adjustable. To change shelf height, remove all items from the shelf, lift the shelf, reposition the shelf pins to the desired slots, and then place the shelf back onto the pins.
6. Maintenance
- Cleaning: Wipe surfaces with a soft, damp cloth. Avoid abrasive cleaners or harsh chemicals that may damage the finish.
- Spills: Clean up spills immediately to prevent staining or damage to the engineered wood.
- Hardware: Periodically check all screws and fasteners to ensure they remain tight. Retighten as necessary to maintain stability.
- Wheels: If using wheels, keep them free of debris to ensure smooth movement.
7. Troubleshooting
| Problem | Possible Cause | Solution |
|---|---|---|
| Island is wobbly. | Loose fasteners or uneven floor. | Check and tighten all screws. Ensure the island is on a level surface. If using feet, adjust as needed. |
| Drop leaf does not stay extended. | Support latch not engaged or damaged. | Ensure the support latch is fully engaged. Inspect the latch for damage; contact support if broken. |
| Wheels do not roll smoothly. | Debris in wheels or wheels locked. | Check if wheels are locked and unlock them. Remove any debris (hair, lint) from the wheel casters. |
| Cabinet doors do not close properly. | Misaligned hinges or obstruction. | Check hinge alignment and adjust if necessary. Ensure nothing inside the cabinet is blocking the door. |
8. Specifications
| Feature | Detail |
|---|---|
| Product Dimensions (D x W x H) | 51.2"D x 29.5"W x 36.2"H |
| Material | Engineered Wood |
| Color | Black |
| Style Name | Vertical Striped Black with Drop Leaf |
| Maximum Load Capacity (Top) | 400 lbs |
| Maximum Load Capacity (Drop Leaf) | 33 lbs |
| Maximum Load Capacity (Each Shelf) | 75 lbs |
| Included Components | Adjustable Shelves, Internal Storage Rack, Towel Rack, Wheels, With Drop Leaf |
| Model Number | N707P221446B-DHMY |
| GTIN | 00197793952682 |

Image: Diagram illustrating the product dimensions and maximum load capacities for various sections.
9. Warranty & Support
Merax products are designed for quality and durability. For warranty information, missing parts, or technical assistance, please contact Merax customer support. Keep your purchase receipt for warranty claims.
Contact information can typically be found on the product packaging or the official Merax website.
