1. Introduction
This manual provides detailed instructions for the assembly, operation, and maintenance of your Tribesigns 85.8" L-Shaped Executive Desk. Please read all instructions carefully before beginning assembly and retain this manual for future reference. This desk is designed to provide a spacious and organized workspace for home or business office environments.
2. Safety Information
WARNING: Failure to follow these safety instructions may result in injury or damage to the product.
- Always assemble the desk with the recommended number of people (2) to prevent injury and ensure proper alignment.
- Ensure the desk is properly anchored to the wall or floor to prevent tipping, especially if heavy items are placed on shelves or in drawers.
- Do not overload the desk with items heavier than it can safely support. Refer to the 'Specifications' section for weight limits.
- Keep all small parts and packaging materials away from children and pets to avoid choking hazards.
- Use only the provided hardware and tools, or equivalent, as specified in the assembly steps.
- Avoid using power tools with excessive torque, as this may strip screws or damage components.
- Place the desk on a level surface to ensure stability and prevent wobbling.
3. Package Contents
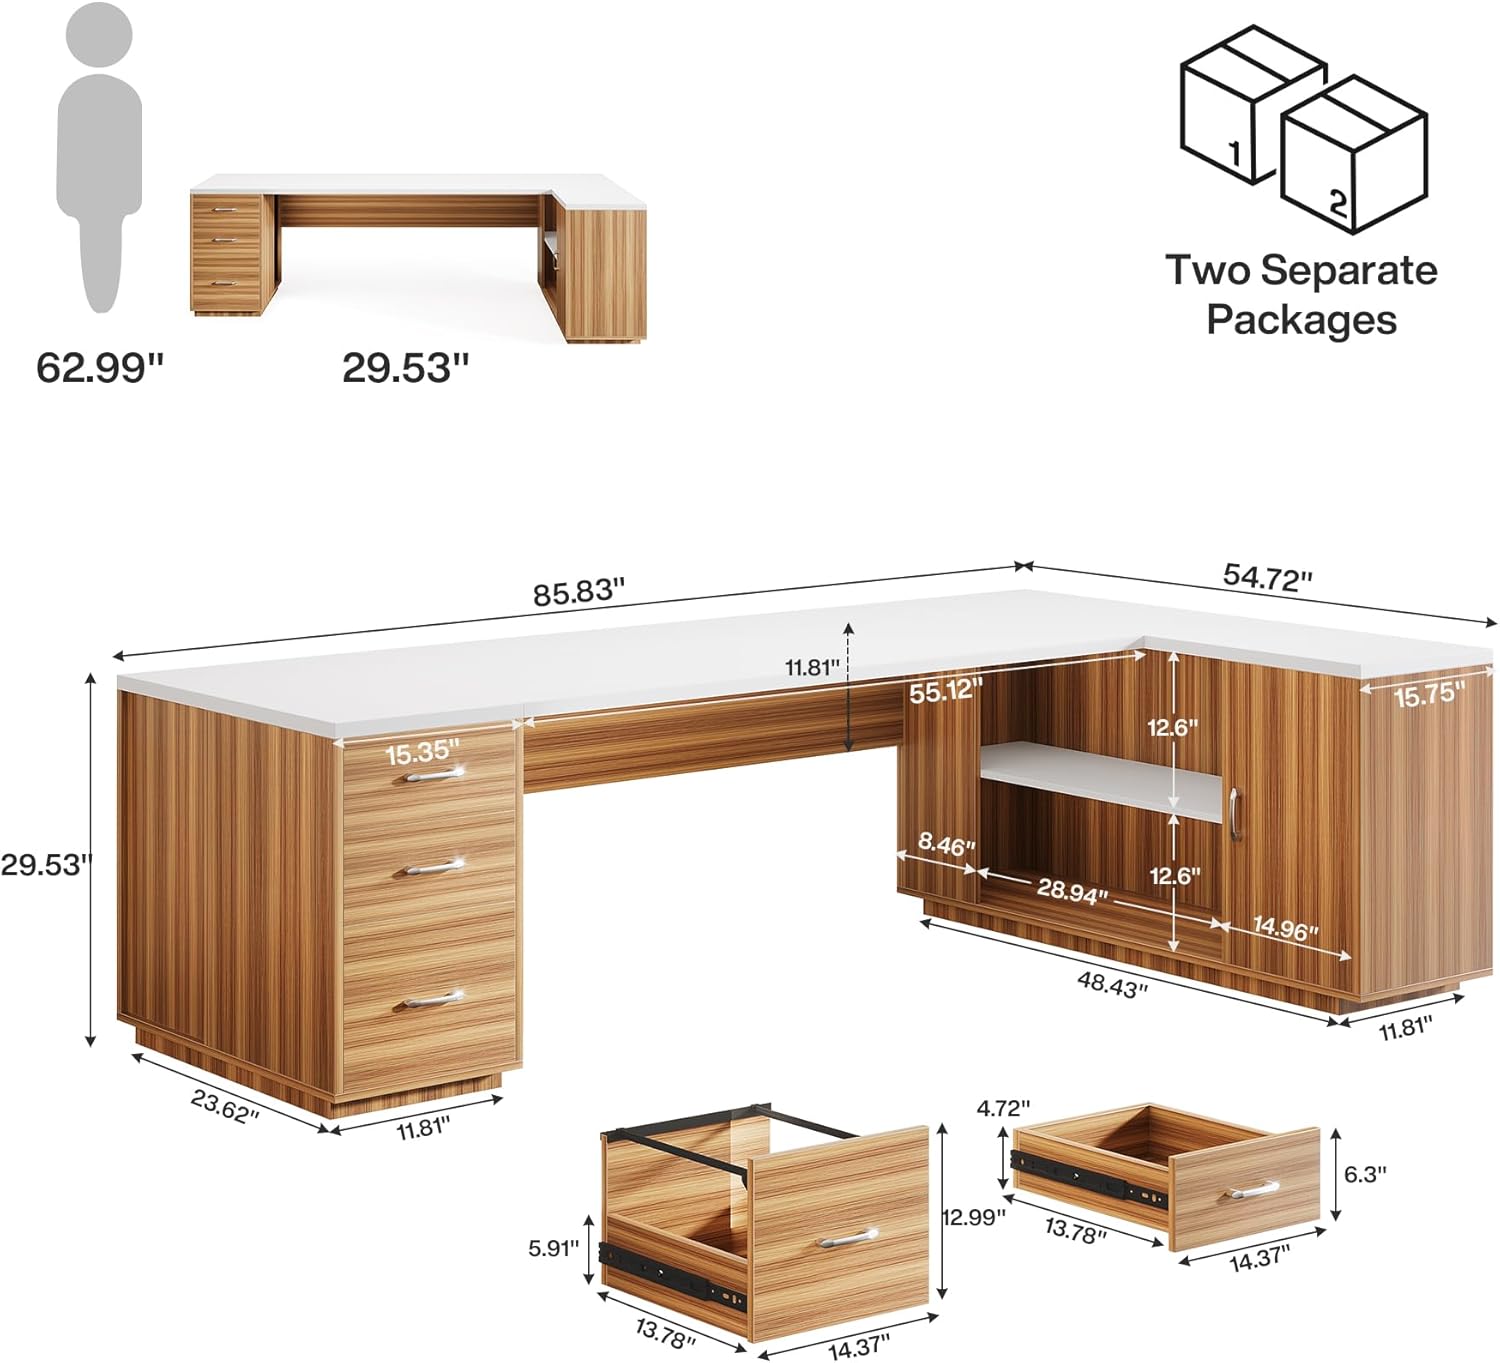
Your Tribesigns L-Shaped Executive Desk is shipped in two separate packages. Please verify that all components and hardware are present before beginning assembly. Refer to the parts list provided in your physical manual for exact quantities.
The following video demonstrates the unboxing process for the desk components:
4. Assembly Instructions
Assembly requires two people. Follow the steps below in sequence. A power drill with appropriate bits is recommended to expedite the process, but avoid overtightening screws.
For a visual guide, please refer to the comprehensive installation video:
Step-by-Step Assembly Overview:
- Prepare Components: Lay out all wooden panels and hardware on a clean, soft surface to prevent scratches. Identify each part using the labels (e.g., 1, 2, 3, A, B).
- Assemble Drawer Frames: Attach the side panels of the drawers to the front and back panels using the specified screws and dowels. Ensure all connections are secure.
- Install Drawer Slides: Secure the drawer slides to the inner sides of the desk's drawer compartments and to the outer sides of the assembled drawer frames using the provided screws. Ensure smooth operation.
- Construct Desk Base Units: Assemble the base units for both the main desk and the L-extension, following the numerical sequence in the diagram. Use cam locks and dowels for strong connections.
- Attach Desk Tops: Carefully place the main desk top and the L-extension top onto their respective base units. Secure them using the designated hardware.
- Install Cabinet Doors: Attach hinges to the cabinet doors and then mount the doors to the cabinet section of the L-extension. Adjust hinges for proper alignment and smooth closing.
- Insert Shelves: Place the adjustable shelves into the cabinet and open storage sections. Use shelf pins to secure them at the desired height.
- Final Checks: Verify that all screws are tightened, and the desk is stable. Adjust any leveling feet if necessary.
5. Operating Instructions
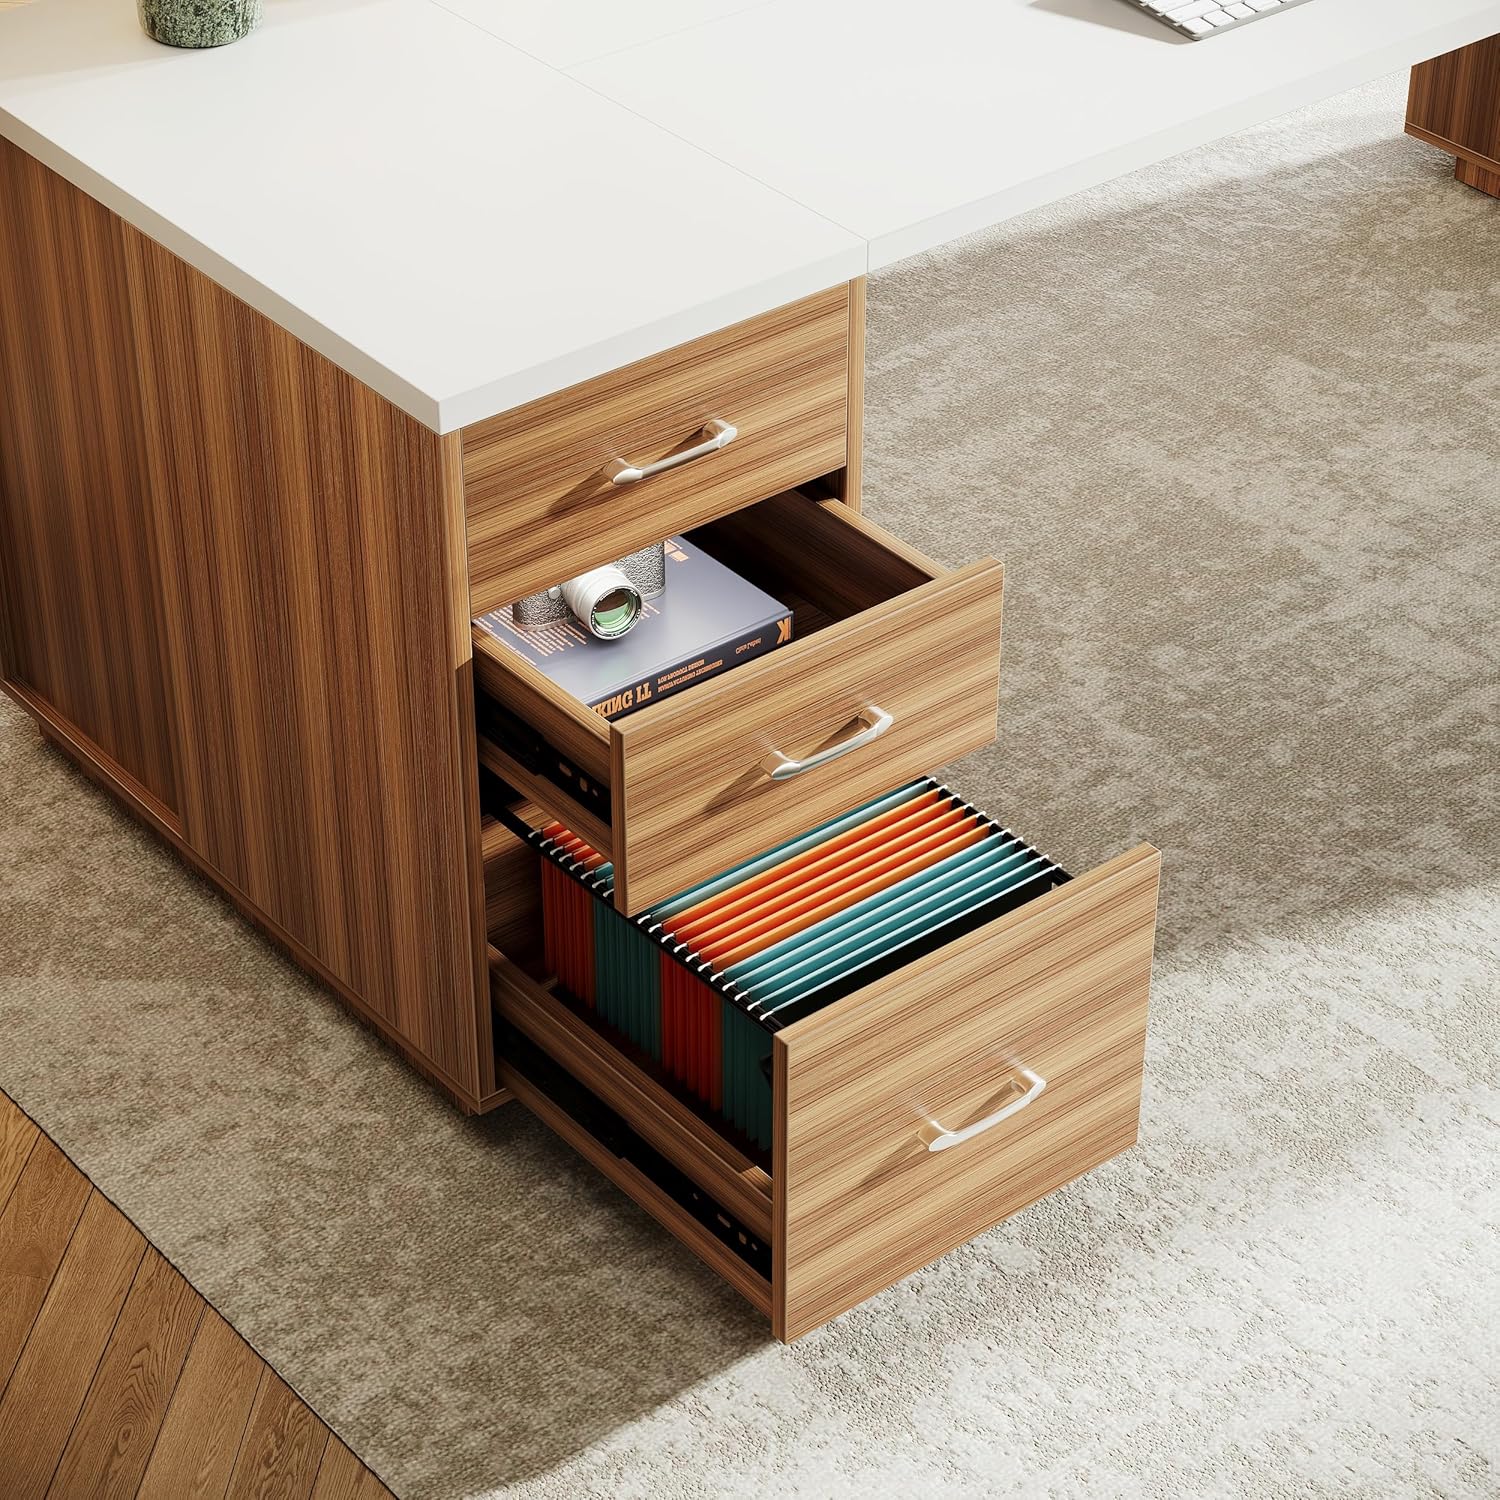
Drawers:
The desk features one file drawer and two storage drawers. To open, gently pull the handle. To close, push firmly until the drawer is fully seated. The file drawer is designed to accommodate A4/Letter size files.
Cabinet and Shelves:
The desk includes a cabinet with a door and an open storage shelf. The cabinet features an adjustable shelf to accommodate items of various sizes. To adjust the shelf, remove the shelf pins, reposition the shelf to the desired height, and reinsert the pins.

6. Maintenance
- Cleaning: Wipe surfaces with a soft, damp cloth. Avoid harsh chemicals or abrasive cleaners that may damage the finish.
- Spills: Clean up spills immediately to prevent staining or damage to the engineered wood.
- Hardware: Periodically check all screws and connections to ensure they remain tight. Retighten as necessary.
- Sunlight Exposure: Avoid prolonged exposure to direct sunlight to prevent fading or discoloration of the wood grain finish.
- Heat and Moisture: Protect the desk from excessive heat and moisture. Use coasters for drinks and heat pads for hot items.
7. Troubleshooting
- Wobbly Desk: Ensure the desk is on a level surface. Check and tighten all assembly screws. Adjust the leveling feet if present.
- Drawers Not Sliding Smoothly: Verify that the drawer slides are correctly installed and aligned. Ensure no debris is obstructing the tracks. Lubricate slides with a silicone-based spray if needed.
- Cabinet Door Misalignment: Adjust the hinges on the cabinet door. Most hinges allow for minor adjustments to align the door properly.
- Missing Parts: If any parts are missing or damaged upon arrival, please contact Tribesigns customer service immediately for assistance.
8. Specifications
| Feature | Detail |
|---|---|
| Brand | Tribesigns |
| Model Number | QQY12NP7PV |
| Shape | L-Shape |
| Desk Design | Executive Desk |
| Product Dimensions (D x W x H) | 54.72"D x 85.83"W x 29.53"H |
| Color | White Brown |
| Style | Modern |
| Base Material | Engineered Wood |
| Top Material Type | Engineered Wood |
| Finish Type | Wood Grain (Walnut) |
| Number of Drawers | 3 (1 file drawer, 2 storage drawers) |
| Number of Shelves | 2 (1 open, 1 in-cabinet) |
| Required Assembly | Yes |
| Recommended Number of People for Assembly | 2 |
9. Warranty & Support
Tribesigns provides a limited warranty for this product. For specific warranty details, please refer to the documentation included with your purchase or contact Tribesigns customer service. If you encounter any issues or require assistance, please reach out to our support team via the contact information provided on our official website or through your retailer.


