
1. Introduction
Thank you for choosing the Gevi VelPro 400 Single Dose Espresso Grinder. This manual provides essential information for the safe and efficient operation, maintenance, and troubleshooting of your new coffee grinder. Please read it thoroughly before first use and retain it for future reference.

Image 1.1: The Gevi VelPro 400 Single Dose Espresso Grinder, showcasing its sleek silver design, the dosing cup, and the 64mm flat burrs.
2. Safety Information
Please observe the following safety precautions to prevent injury or damage to the appliance:
- Always unplug the grinder from the power outlet before cleaning or when not in use.
- Do not immerse the motor base in water or other liquids.
- Keep hands and utensils away from the grinding burrs during operation.
- Ensure the grinder is placed on a stable, flat, and dry surface.
- This appliance is for household use only. Do not use outdoors.
- Do not operate the grinder with a damaged cord or plug.
3. Package Contents
Carefully unpack your Gevi VelPro 400 grinder and check that all items are present and in good condition. The package should include:

Image 3.1: An illustration showing the contents of the Gevi VelPro 400 package, including the grinder unit, dosing cup with digital scale, power cord, USB-C cable, cleaning brush, and instruction manual.
- Gevi VelPro 400 Grinder Unit
- Dosing Cup with Digital Scale
- Power Cord
- USB-C Cable (for dosing cup charging)
- Cleaning Brush
- Instruction Manual
4. Setup
- Unpacking: Remove all packaging materials and ensure no parts are missing or damaged.
- Placement: Place the grinder on a stable, level, and dry countertop. Ensure there is adequate space around the unit for ventilation and operation.
- Power Connection: Connect the detachable power cord to the grinder's power inlet and then to a standard 120V AC power outlet.

Image 4.1: A close-up view of the detachable power cord being connected to the back of the Gevi VelPro 400 grinder, highlighting its ease of connection and storage.
- Dosing Cup Charging: The digital scale in the dosing cup requires power. Use the provided USB-C cable to charge it if necessary.
5. Operating Instructions
5.1 Grind Adjustment
The Gevi VelPro 400 features stepless grind adjustment, allowing for precise control over particle size. The large dial has a thread pitch of 5mm, enabling fine adjustments down to 5µm per turn.

Image 5.1: A hand adjusting the stepless grind dial on the Gevi VelPro 400, illustrating the ultra-wide adjustment range for various coffee brewing methods.
Rotate the grind adjustment dial to select your desired coarseness. Finer settings are suitable for espresso, while coarser settings are for French press or cold brew.

Image 5.2: A visual guide showing recommended grind sizes from fine (flour) to coarse, with corresponding brewing methods like Turkish Coffee, Espresso, Moka pot, Drip coffee, Pour over, Syphon, and French Press.
5.2 RPM Adjustment
The grinder features an adjustable speed range of 500-1500 RPM. Lower speeds result in more uniform grinding and reduced heat, preserving coffee aroma. Higher speeds can produce finer powder.

Image 5.3: A close-up of the grinder showing the RPM adjustment dial and the visual digital display, indicating how to change the motor speed.
Turn the RPM adjustment knob to select your desired grinding speed. The digital display will show the current RPM setting.
5.3 Dosing and Grinding Process
- Prepare Beans: Ensure the bean hopper is clean. The grinder has a 40g bean capacity, suitable for single-dose grinding.

Image 5.4: Coffee beans being poured into the grinder's hopper, illustrating its 40g single-dose capacity.
- Weigh Beans: Place the magnetic dosing cup on the integrated digital scale to weigh your coffee beans accurately before grinding. The dosing cup is designed to fit 51/54/58 mm portafilters.

Image 5.5: The dosing cup shown fitting perfectly onto a portafilter, demonstrating its compatibility for espresso preparation.

Image 5.6: A detailed view of the magnetic dosing cup with its integrated digital scale, showing the magnetic link and its suitability for espresso.
- Add Beans to Hopper: Pour the weighed coffee beans into the grinder's hopper. The integrated anti-popcorn disc helps prevent beans from skipping during grinding.

Image 5.7: A close-up of coffee beans being poured into the grinder's hopper, highlighting the integrated anti-popcorn disc for consistent single-dose grinding.
The pre-breaker design enhances flavor extraction by cracking beans before the main grinding process.

Image 5.8: An internal view of the grinder illustrating the pre-breaker design, which cracks beans before grinding to enhance flavor extraction.
- Start Grinding: Press the power button to begin grinding. The 400W brushless DC motor ensures smooth and quiet operation.

Image 5.9: An X-ray view of the grinder's internal components, highlighting the 400W BLDC motor and its smooth, quiet operation.
- Collect Grounds: The built-in static eliminators (plasma generator) reduce flying powder, keeping your workspace tidy.

Image 5.10: A comparison image showing the Gevi VelPro 400 with minimal static and flying grounds, next to another grinder with noticeable static, demonstrating the effectiveness of its built-in static eliminators.

Image 5.11: A close-up view of the grinder's output chute, showing coffee grounds falling cleanly into the dosing cup, illustrating the function of the built-in plasma generator to reduce static and mess.
6. Maintenance
6.1 Cleaning the Grinder
Regular cleaning ensures optimal performance and extends the life of your grinder.
- Unplug: Always unplug the grinder before cleaning.
- Disassemble: The grinder is designed for easy disassembly. Rotate the grind adjustment dial counter-clockwise to remove the upper burr assembly.

Image 6.1: A three-step visual guide demonstrating how to disassemble the grinder for cleaning: 1) Rotate the dial counter-clockwise, 2) Remove the burr assembly, 3) Brush away coffee grounds.
- Brush Clean: Use the provided cleaning brush to remove any residual coffee grounds from the burrs and the grinding chamber. Do not use water or abrasive cleaners on the burrs.
- Wipe Exterior: Wipe the exterior of the grinder with a damp cloth.
- Reassemble: Reassemble the burr assembly by aligning it and rotating the dial clockwise until secure.
6.2 Burr Care
The Gevi VelPro 400 is equipped with professional 64mm titanium-coated flat burrs, designed for durability and uniform grinding.
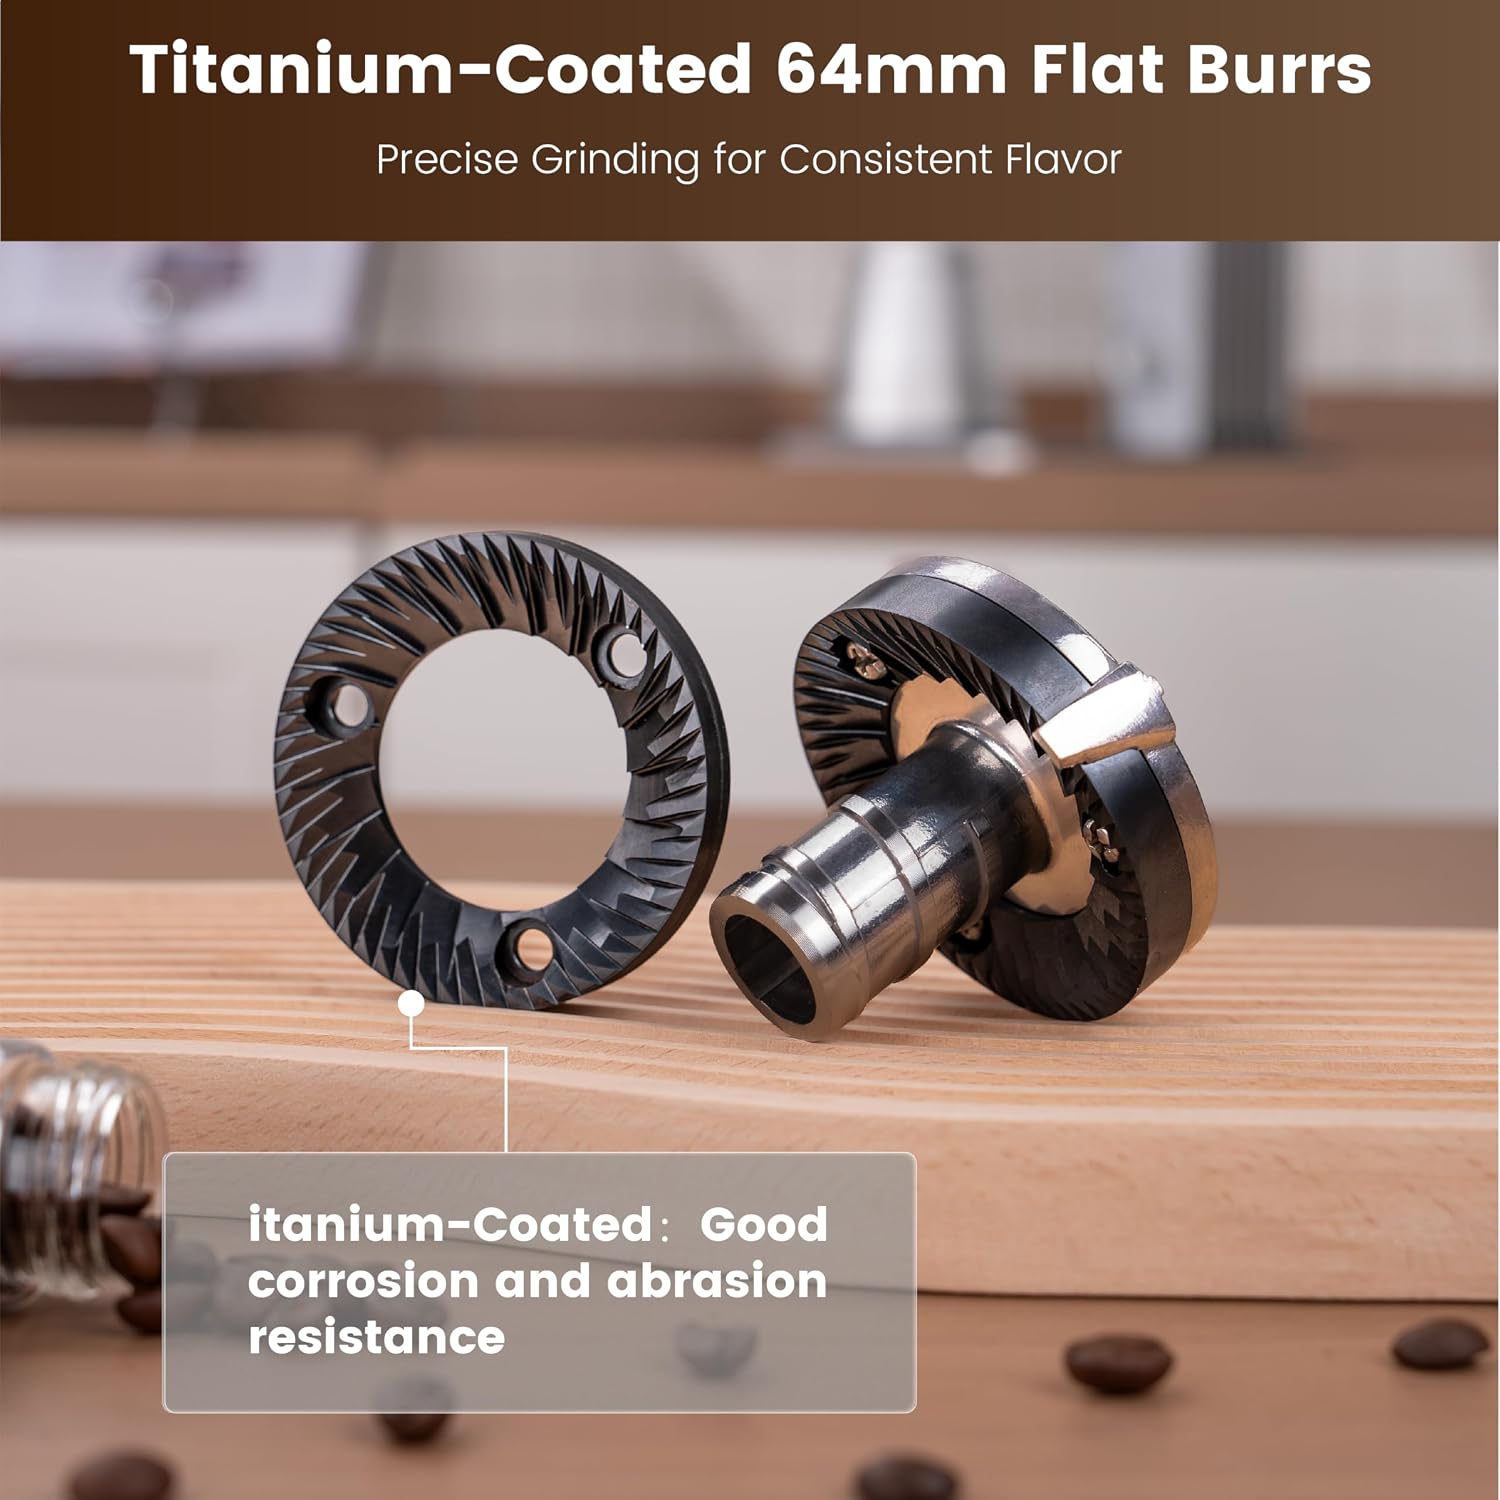
Image 6.2: A close-up view of the titanium-coated 64mm flat burrs, highlighting their robust construction and corrosion resistance.
- Avoid grinding flavored coffee beans, as oils can clog the burrs.
- Do not grind anything other than roasted coffee beans.
- Inspect burrs periodically for wear. Replacement burrs can be obtained from Gevi customer support.
7. Troubleshooting
If you encounter issues with your grinder, refer to the following common problems and solutions:
- Grinder not turning on:
- Ensure the power cord is securely plugged into both the grinder and a working electrical outlet.
- Check if the power button has been pressed.
- Beans not grinding or grinding slowly:
- Check for blockages in the burrs or chute. Disassemble and clean the burrs as described in the Maintenance section.
- Ensure the grind setting is not too fine for the type of beans being used, which can cause clogging.
- Verify that the bean hopper is not empty.
- Inconsistent grind:
- Ensure the burrs are clean and free of old coffee residue.
- Check that the burr assembly is properly seated and tightened.
- Excessive static:
- The grinder has built-in static eliminators. If static is still an issue, ensure the grinder is clean and dry. Humidity levels can also affect static.
For further assistance, please contact Gevi customer support.
8. Specifications
| Feature | Specification |
|---|---|
| Brand | Gevi |
| Model Number | CGB0-SV0A1 |
| Color | Silver |
| Style | Flat Burr Coffee Grinder |
| Product Dimensions | 11.9"L x 7.3"W x 11.9"H |
| Item Weight | 14.6 pounds |
| Voltage | 120 Volts |
| Motor | 400W Brushless DC Motor |
| RPM Range | 500-1500 RPM (Variable Speed) |
| Burr Type | 64mm Titanium-Coated Flat Burr |
| Grind Adjustment | Stepless, 5µm adjustment per 5mm dial turn |
| Bean Capacity | 40g (Single Dose) |
| Dosing Cup Compatibility | 51/54/58 mm Portafilters |

Image 8.1: A diagram illustrating the key dimensions of the Gevi VelPro 400 grinder, including length, width, and height.
9. Warranty and Support
The Gevi VelPro 400 Single Dose Espresso Grinder comes with a 12-month warranty from the date of purchase. This warranty covers manufacturing defects under normal household use.
For warranty claims, technical support, or any questions regarding your product, please contact Gevi customer service through the official Gevi website or your retailer.
Please have your model number (CGB0-SV0A1) and proof of purchase ready when contacting support.