
1. Introduction
Thank you for choosing the SMETA Compact Front Load Washer, Model TWF-120DX. This appliance is designed to provide efficient and convenient laundry care in a space-saving form factor. This manual contains important information regarding the safe and proper operation, maintenance, and troubleshooting of your new washing machine. Please read it thoroughly before use and keep it for future reference.

Image 1: SMETA Compact Front Load Washer, Model TWF-120DX. This image displays the front view of the white washing machine with a dark circular door and a digital control panel.
2. Safety Information
Always follow basic safety precautions when using any electrical appliance to reduce the risk of fire, electric shock, or injury to persons.
- Read all instructions before using the appliance.
- Do not wash articles that have been previously cleaned in, washed in, soaked in, or spotted with gasoline, dry-cleaning solvents, or other flammable or explosive substances as they emit vapors that could ignite or explode.
- Do not allow children to play on or in the appliance. Close supervision of children is necessary when the appliance is used near children.
- Do not reach into the appliance if the tub or agitator is moving.
- Do not install or store this appliance where it will be exposed to the weather.
- Do not tamper with controls.
- Do not repair or replace any part of the appliance or attempt any servicing unless specifically recommended in the user-maintenance instructions or in published user-repair instructions that you understand and have the skills to carry out.
3. Setup and Installation
Proper installation is crucial for the optimal performance and longevity of your washing machine. Ensure the appliance is placed on a firm, level surface.
3.1 Unpacking and Removing Shipping Bolts
Before using the washing machine, it is essential to remove all shipping bolts from the back of the unit. Failure to do so can cause severe unbalance and damage during operation.
- Locate the four bolts on the back of the washer.
- Using a spanner, loosen and remove all four bolts.
- Remove the four plastic spacers (including rubber grommets) and four power cord retainers.
- Store these components in a safe place for future transport if needed.

Image 2: Diagram illustrating the location and removal of shipping bolts, plastic spacers, and power cord retainers from the rear of the washing machine.
3.2 Placement and Leveling
This compact washer is designed to fit into various spaces, including RVs, apartments, and laundry rooms. Ensure adequate clearance around the unit for proper ventilation and operation.

Image 3: The washing machine with dimensions indicated: 24 inches (width), 25 inches (depth), and 34 inches (height). A laundry basket is shown next to it for scale.
Use the adjustable feet at the bottom of the washer to ensure it is perfectly level. A level machine reduces vibration and noise during cycles.

Image 4: Washing machine placed in an RV setting.

Image 5: Washing machine placed in an apartment setting.
4. Operating Instructions
4.1 Control Panel Overview
The washing machine features a touch control console with a central dial for cycle selection and a digital display for time and settings. All controls for both washing and drying functions are integrated into this single panel.
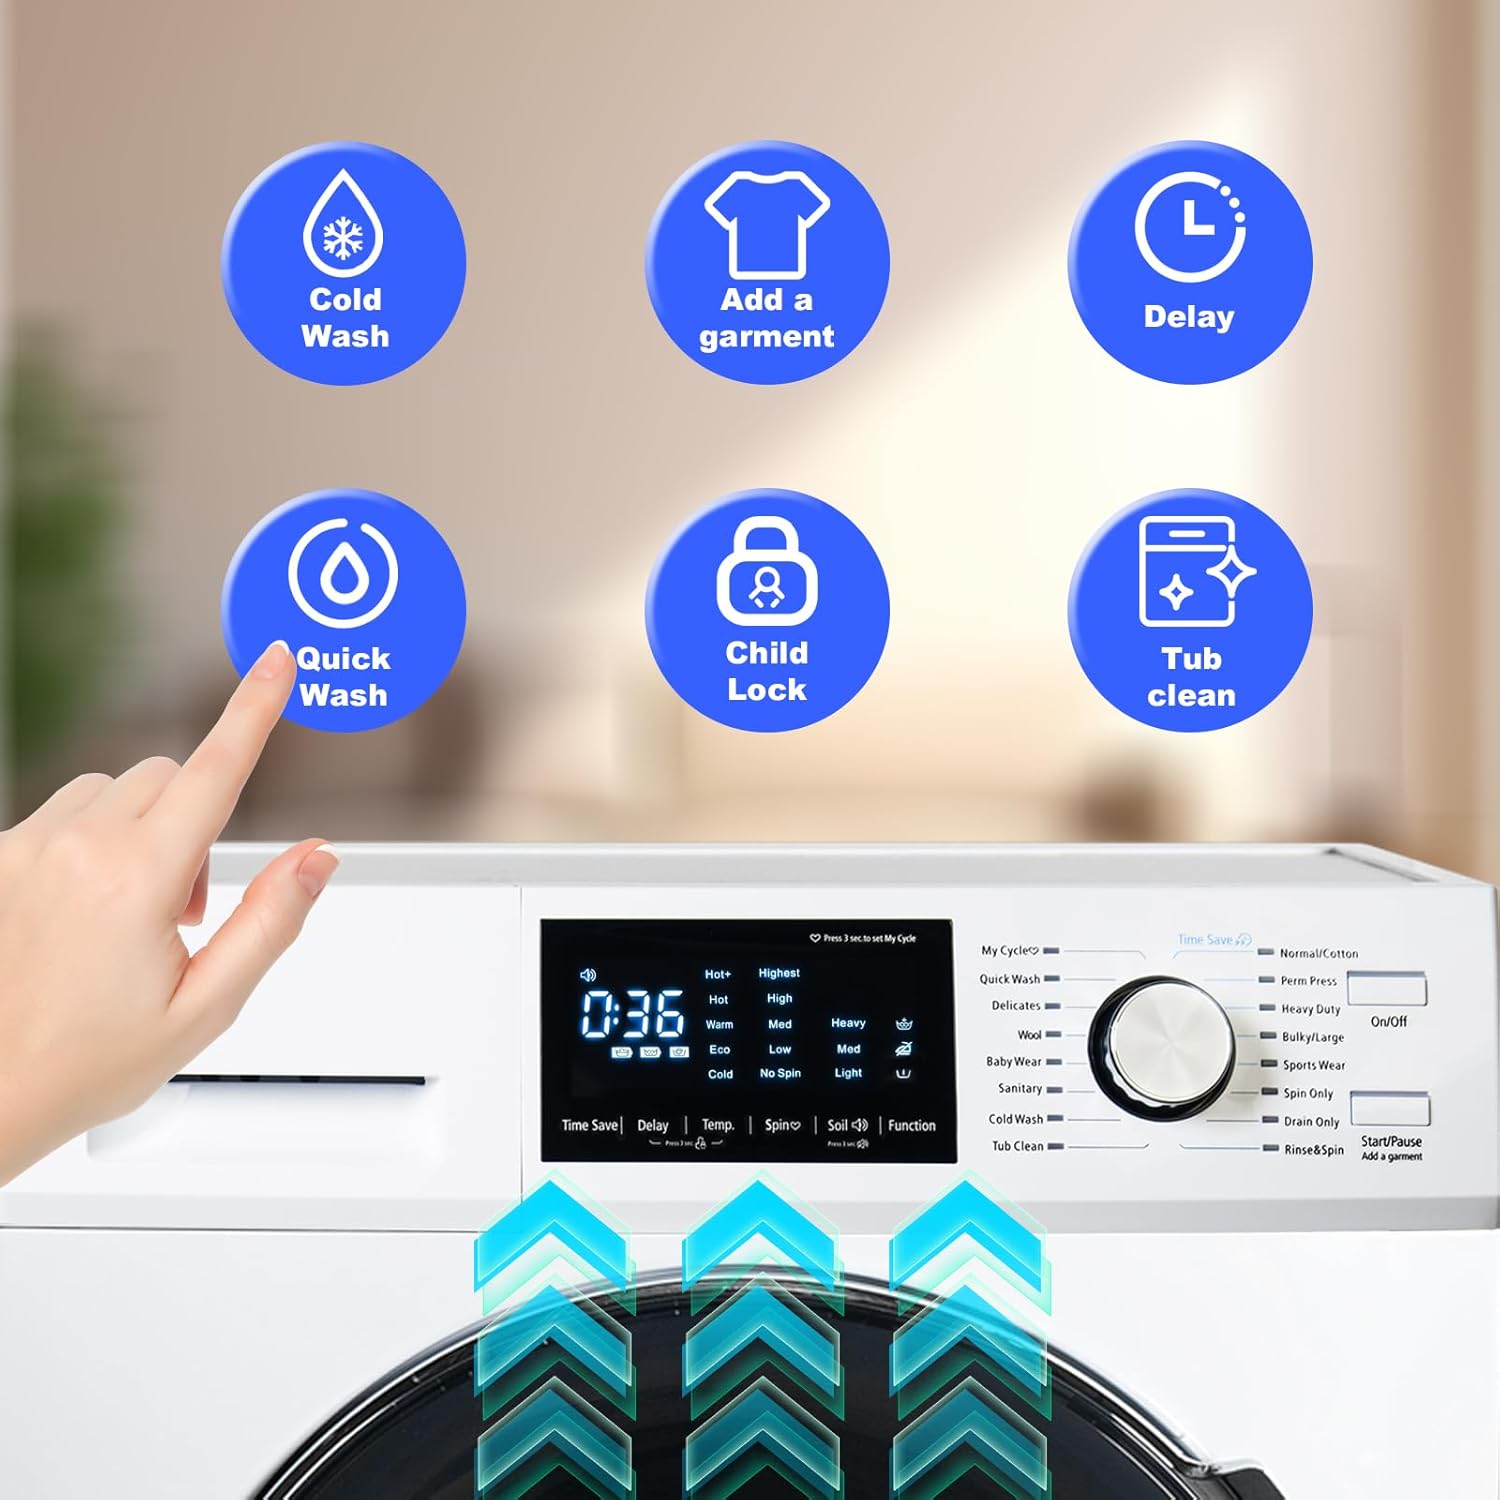
Image 6: The control panel highlighting key functions such as Quick Wash, Child Lock, Tub Clean, Cold Wash, Add a Garment, and Delay Start.
4.2 Loading Laundry
Open the front-loading door and place your laundry inside the drum. For optimal washing results, it is recommended to fill the drum about halfway. Avoid overfilling to ensure clothes can move freely and be cleaned effectively.

Image 7: The washing machine drum with clothes, illustrating the recommended 'About Half Way Full' loading level.
4.3 Adding Detergent
The washing machine features an integrated dispenser for detergents and other additives. Pull out the dispenser drawer located on the top left of the control panel and add your preferred laundry products.
4.4 Selecting a Wash Cycle
Turn the central dial to select one of the 16 available washing cycles. The digital display will show the estimated time for the selected cycle. Available cycles include:
- My Cycle (customizable)
- Quick Wash
- Wool
- Baby Wear
- Sanitary
- Cold Wash
- Tub Clean
- Normal/Cotton
- Permanent Press
- Heavy Duty
- Bulky/Large
- Sports Wear
- Spin Only
- Drain Only
- Rinse & Spin

Image 8: The control panel displaying specific programs for different clothes types, such as Sanitary, Baby Wear, Delicates, and Perm Press.
4.5 Customizing Cycles and Special Functions
You can adjust various settings for each cycle, including wash time, rinse number, spin speed, and water temperature. The 'My Cycle' feature allows you to save your preferred customized settings for future use.
- Child Lock: Activate this feature to prevent accidental changes to settings or opening of the door during operation.
- Delay Start: Set a delayed start time for your wash cycle to suit your schedule.
- Add a Garment: Pause the cycle to add forgotten items.

Image 9: Visual representation of key features such as Child Lock, low noise operation, and the ability to add garments mid-cycle.
4.6 Quiet Operation
The inverter motor ensures quiet operation, with noise levels not exceeding 72dB, allowing for use in various living environments without significant disturbance.

Image 10: The washing machine operating quietly, emphasizing its low noise level and minimal vibration.
4.7 Video Demonstration
Watch this video for a general overview of front-load washer operation, including cycle selection and detergent loading.
Video 1: A demonstration of a front-load washing machine's control panel, showing how to select cycles and load detergent. This video provides a general guide to operating similar appliances.
5. Maintenance
5.1 Tub Clean Function
The 'Tub Clean' cycle uses high temperatures to clean the drum and internal components, ensuring a hygienic washing environment and extending the appliance's lifespan. It is recommended to run this cycle periodically.
5.2 General Cleaning
Regularly wipe down the exterior of the machine with a soft, damp cloth. Clean the detergent dispenser drawer to prevent residue buildup. Inspect the door seal for any debris and wipe it clean to prevent mold or odors.

Image 11: Detailed view of the durable stainless steel inner tub and the 'Water Cube Drum' design, which promotes efficient water drainage and circulation.
6. Troubleshooting
If you encounter any issues with your SMETA Compact Front Load Washer, please refer to the following common troubleshooting tips before contacting customer support.
- Machine not starting: Ensure the power cord is securely plugged in and the door is fully closed. Check if the 'Child Lock' is activated.
- Excessive vibration/noise: Verify that all shipping bolts have been removed and the machine is properly leveled. Ensure the load is balanced inside the drum.
- Water leakage: Check hose connections for tightness and ensure the detergent dispenser is not overfilled or clogged.
- Clothes not clean: Ensure proper detergent dosage and cycle selection for the load type and soil level. Avoid overfilling the drum.
For more detailed troubleshooting, please consult the full product manual or contact SMETA customer support.
7. Specifications
| Feature | Specification |
|---|---|
| Brand | SMETA |
| Model Info | TWF-120DX |
| Item Weight | 187 pounds |
| Product Dimensions | 25 x 24 x 34 inches |
| Capacity | 2.8 Cubic Feet |
| Special Features | Child Lock |
| Control Console | Touch |
| Access Location | Front Load |
| Washer Dispenser Options | Integrated Dispenser |
| Manufacturer | Simate |
8. Warranty and Support
The SMETA Compact Front Load Washer, Model TWF-120DX, comes with a 12 Months Limited Warranty. This warranty covers defects in materials and workmanship under normal use. Please retain your proof of purchase for warranty claims.
For technical assistance, warranty service, or to purchase replacement parts, please contact SMETA customer support through the official brand website or your retailer.